NOTE: This article describes steps required for SAML SSO configuration in v7.
- For instructions on configuring SAML SSO in MI v6, see SAML Single Sign-On (SSO) (for MI v6.x).
Metric Insights supports Single Sign-On (SSO) authentication, with Users being able to log into Metric Insights via a central Location (Identity Provider - IdP).
- Metric Insights uses SAML (Security Assertion Markup Language) for authentication,
- Some common SAML implementations that can be used are by Okta, Microsoft (ADFS), Oracle.
This article describes how to configure Metric Insights to work with a SAML-based IdP using Okta as an example. This process comprises the following steps:
If you're getting the "<Attribute Name> attribute is missing in the assertion or not mapped properly." error, see Getting "attribute is missing in the assertion or not mapped properly." Error.
1. Generate Metadata XML from Metric Insights
1.1. Access the Installation Page for SimpleSAML in Metric Insights
Append /simplesaml/module.php/admin/ to your Metric Insights URL, i.e. https://<Metric Insights Server>/simplesaml/module.php/admin/.
NOTE: The SAML Admin password can be found in the web container under /opt/mi/external_config/saml.php, its value is stored in the SAML_ADMIN_PASSWORD variable. Its value must be changed from the default one in order to be able to log in.
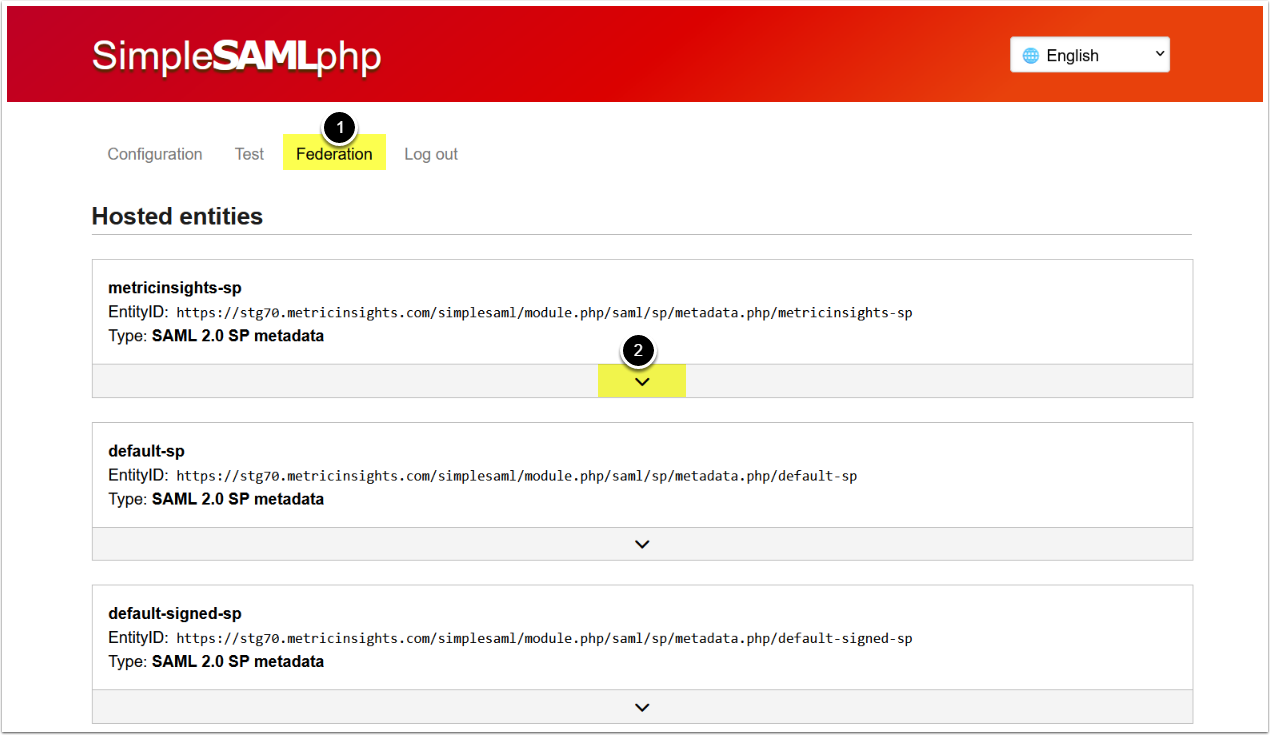
- Open the Federation tab
- Click on the arrow icon
NOTE: Entity ID we are choosing on this step is using metricinsights-sp authentication source. The same source is to be set in the SAML config in further steps.
1.2. Copy Metadata
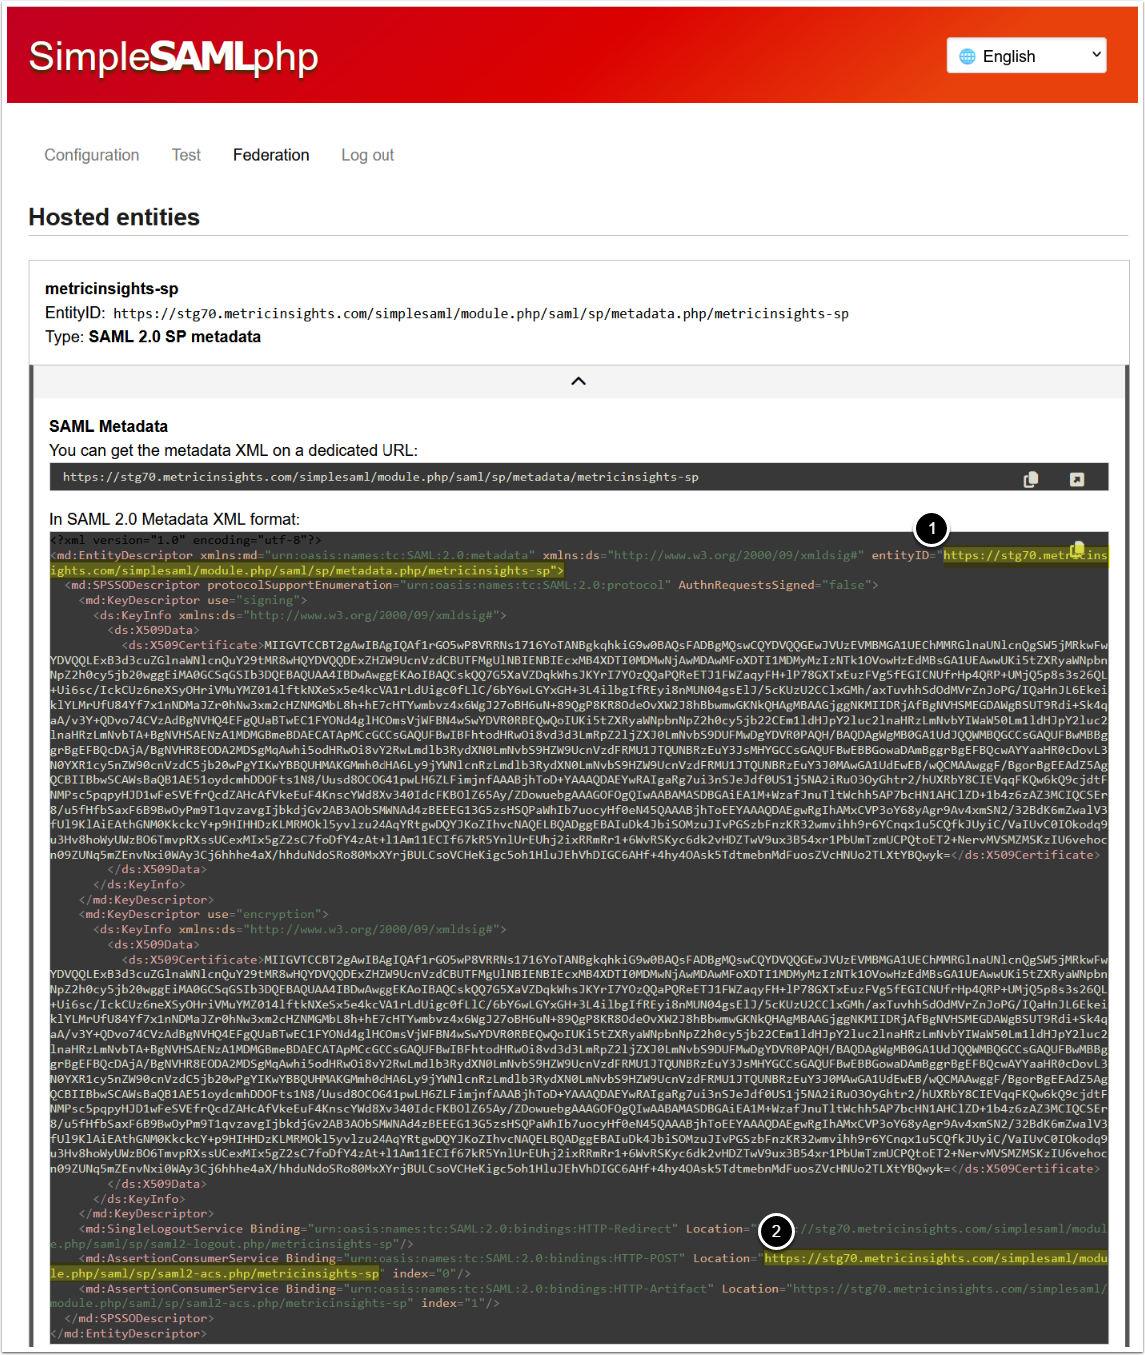
Copy the parameters' values to generate an IdP XML from Okta:
- Single sign-on URL: The value of the entityID parameter,
-
SP Entity ID: The value of the Location parameter of the md: AssertionConsumerService element with Binding parameter's value ending with
HTTP-POST.
2. Obtain Metadata XML from IdP
NOTE: This example demonstrates how to obtain metadata XML from Okta as an IdP for SAML SSO configuration. However, SAML authentication is a standard and is not specific to Okta. The steps may vary depending on your chosen Identity Provider.
2.1. Create New Application in Okta
Access Okta Admin menu
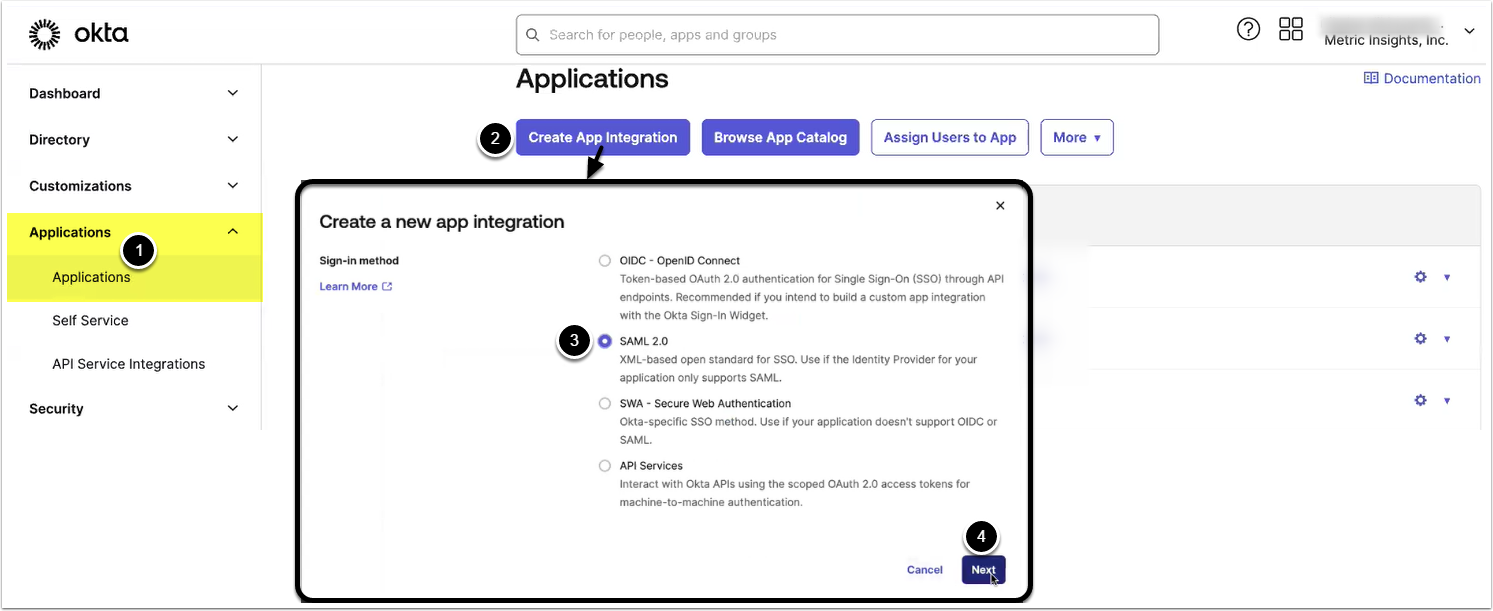
- Access Applications
- [Create App Integration]
- Select SAML 2.0
- [Next]
2.2. Configure Application
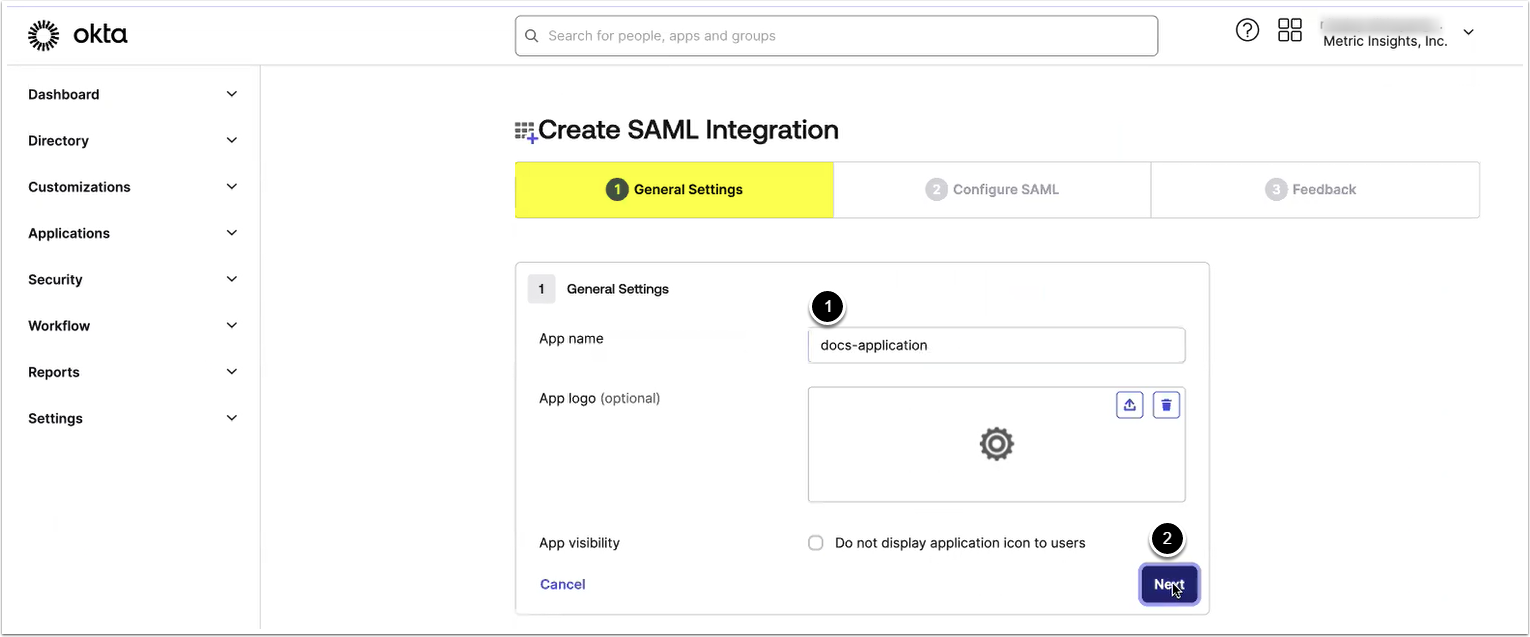
- Provide a descriptive App name
- [Next]
2.3. Provide General Settings
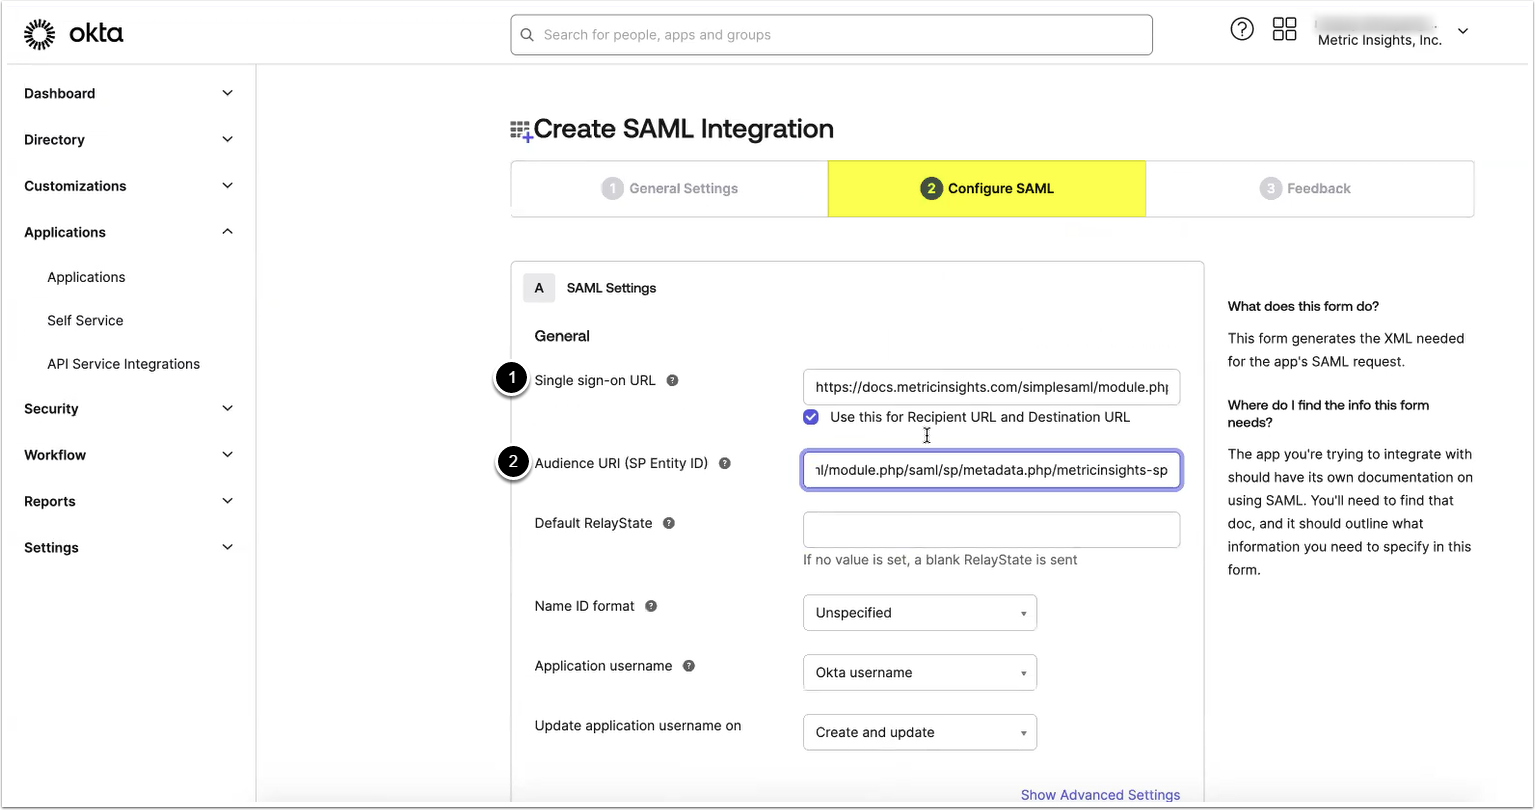
Provide values for the following two parameters:
- Single sign-on URL
- Audience URI (SP Entity ID)
See Copy Metadata for information on where to find the needed values.
Optionally, the value for Default RelayState can be provided and assigned to the MI instance hostname.
2.4. Provide Attribute Statements

Add the following Attribute Statements:
- Name: uid, Value: user.login
- Name: email, Value: user.email
- [Next]
2.5. Finish Creating Application
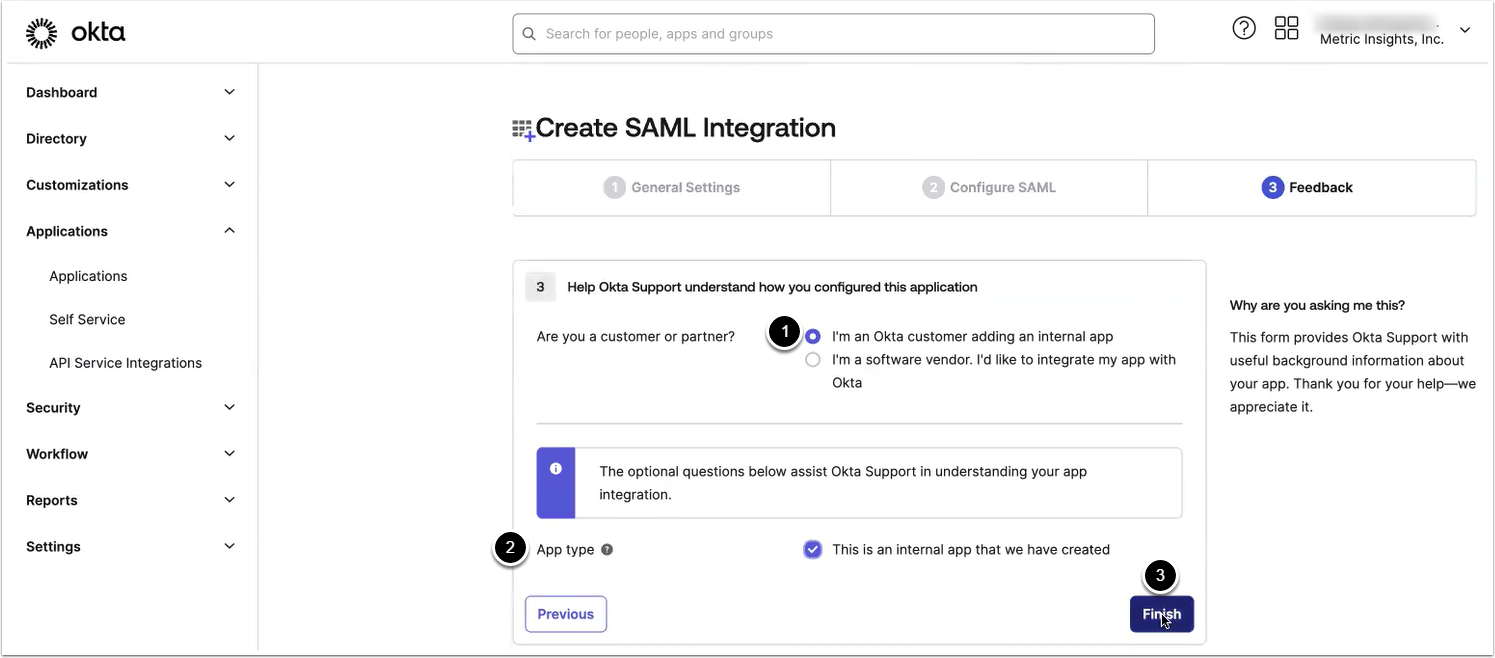
- Select "I'm an Okta customer adding an internal app"
- Select "This is an internal app that we have created"
- [Finish]
2.6. View IdP Metadata
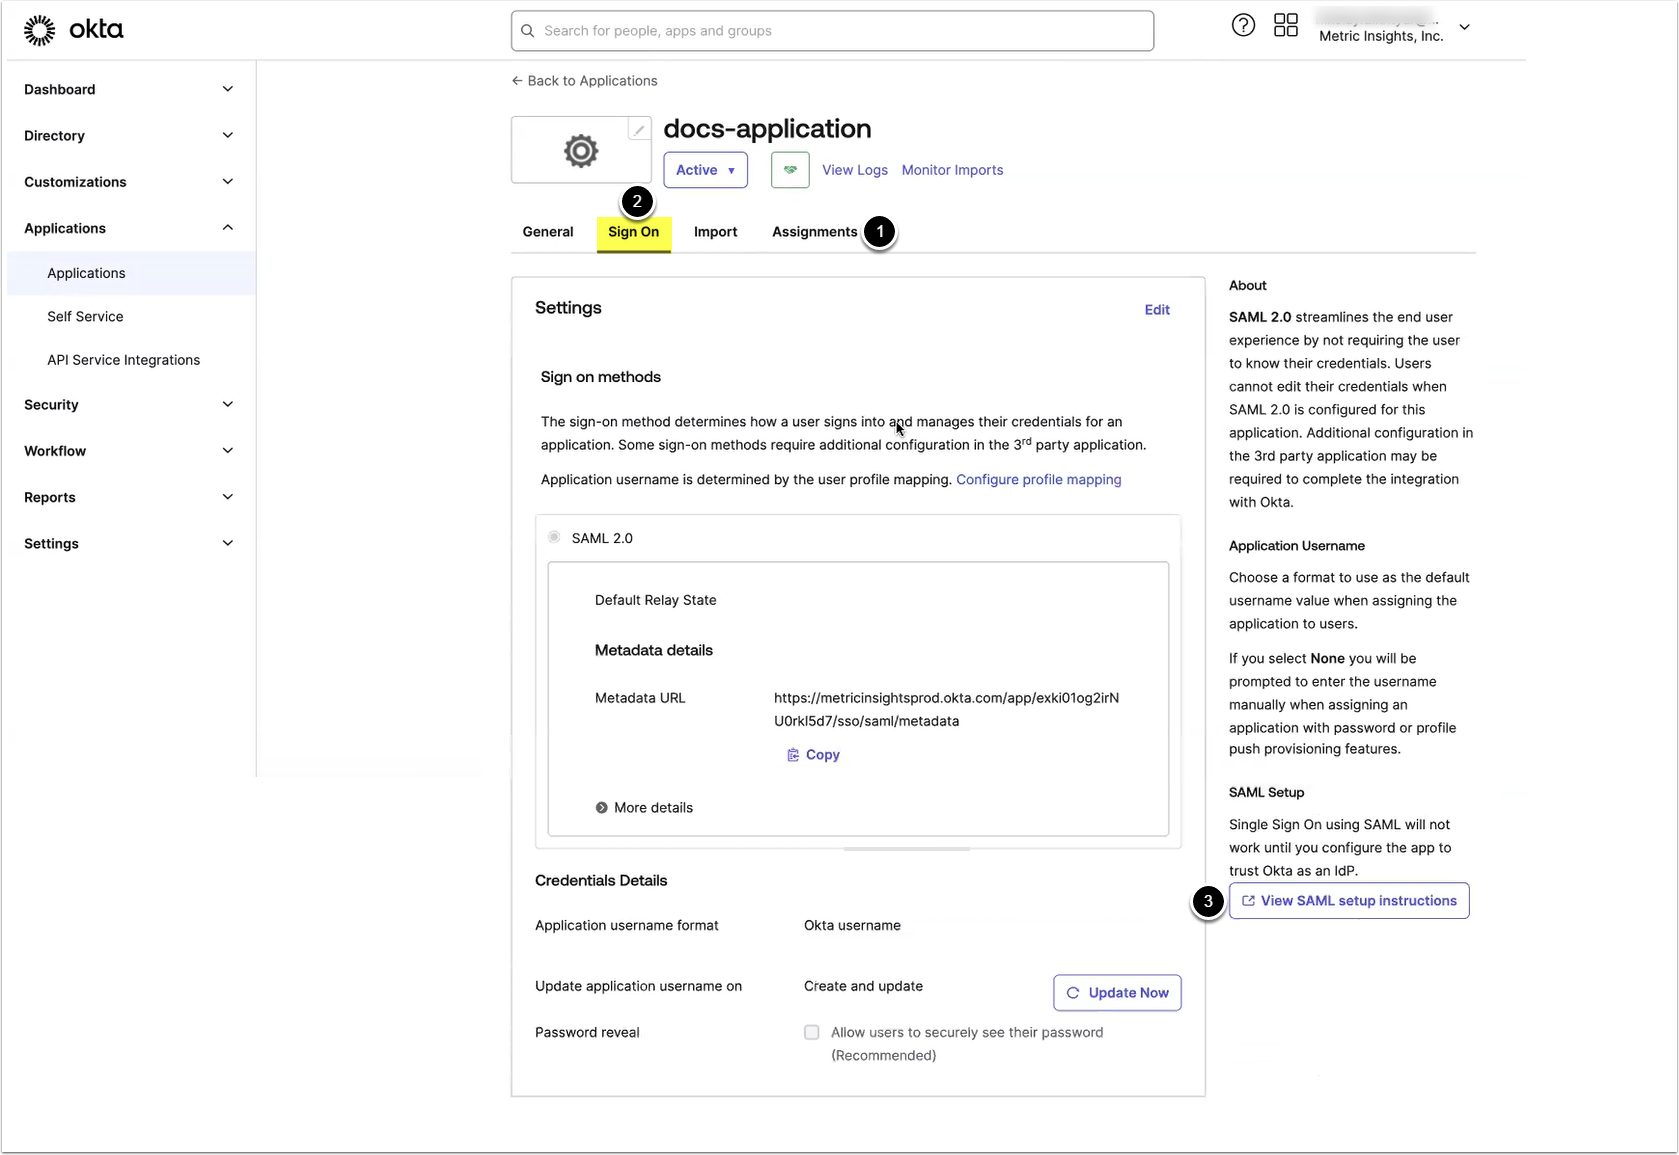
- Access the Assignments tab to assign the application to the users
- Access the Sign On tab
- [View SAML setup instructions]
2.7. Copy IdP Metadata
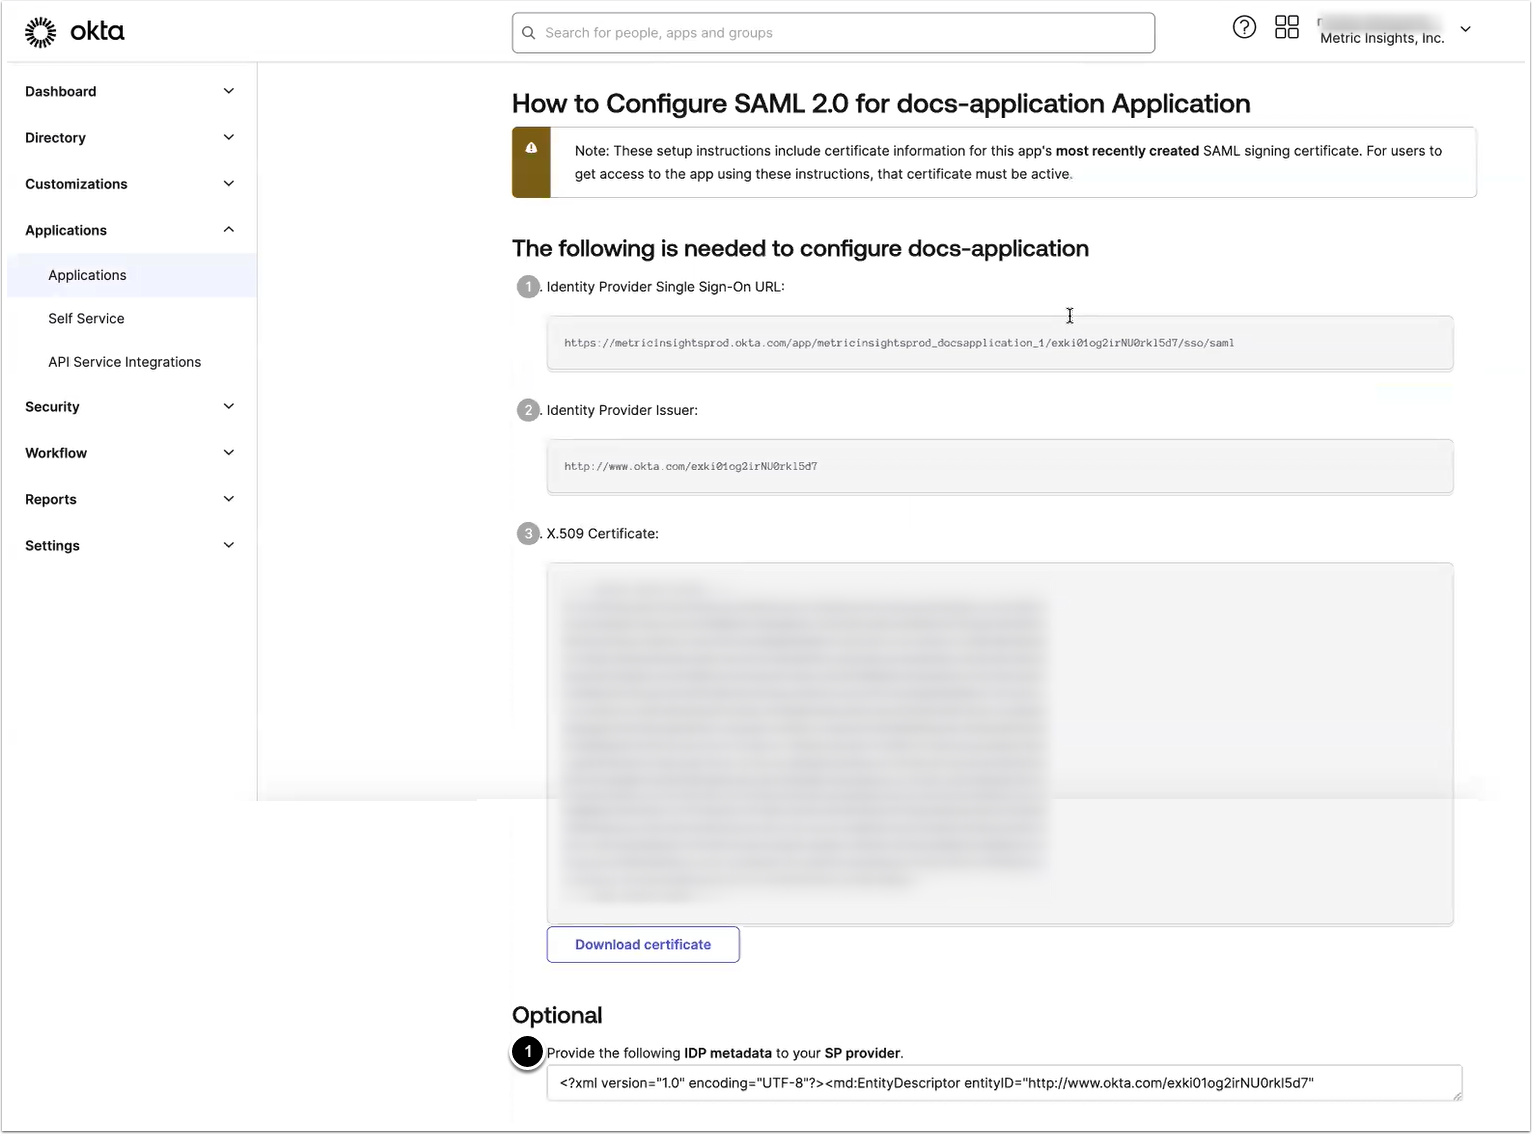
- Copy metadata
- Save it in an XML file for SAML SSO configuration via MI Console or keep it in clipboard for manual configuration
3. Finish SAML Configuration
The recommended way of finishing the SAML configuration is via MI Console. Alternatively, you can finish SAML configuration manually.
Finish SAML Configuration in MI Console
NOTE: Only users that are System Admins can access the MI Console.
3.1. Enable SAML
Access MI Console > Configuration > SAML
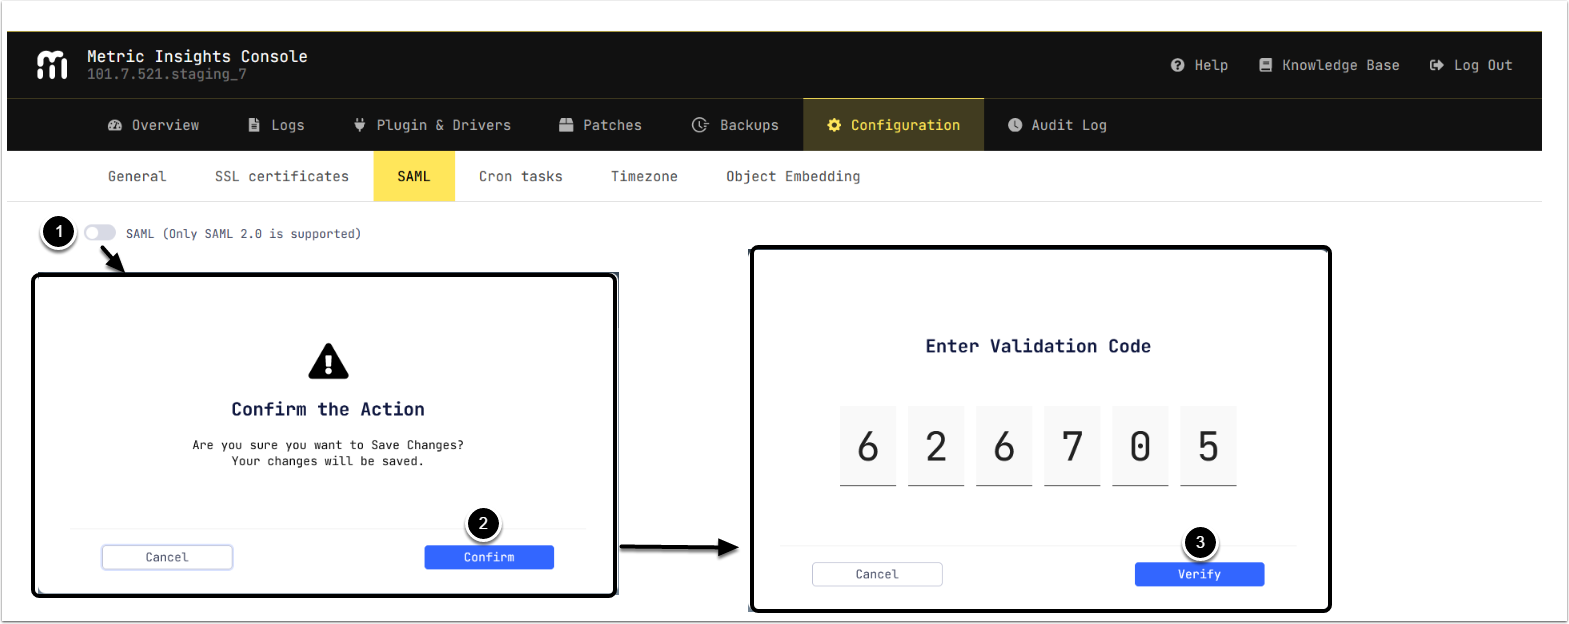
- Enable SAML
- [Confirm]
- Enter Validation Code from the selected authentication app and [Verify]
3.2. Upload IdP Metadata
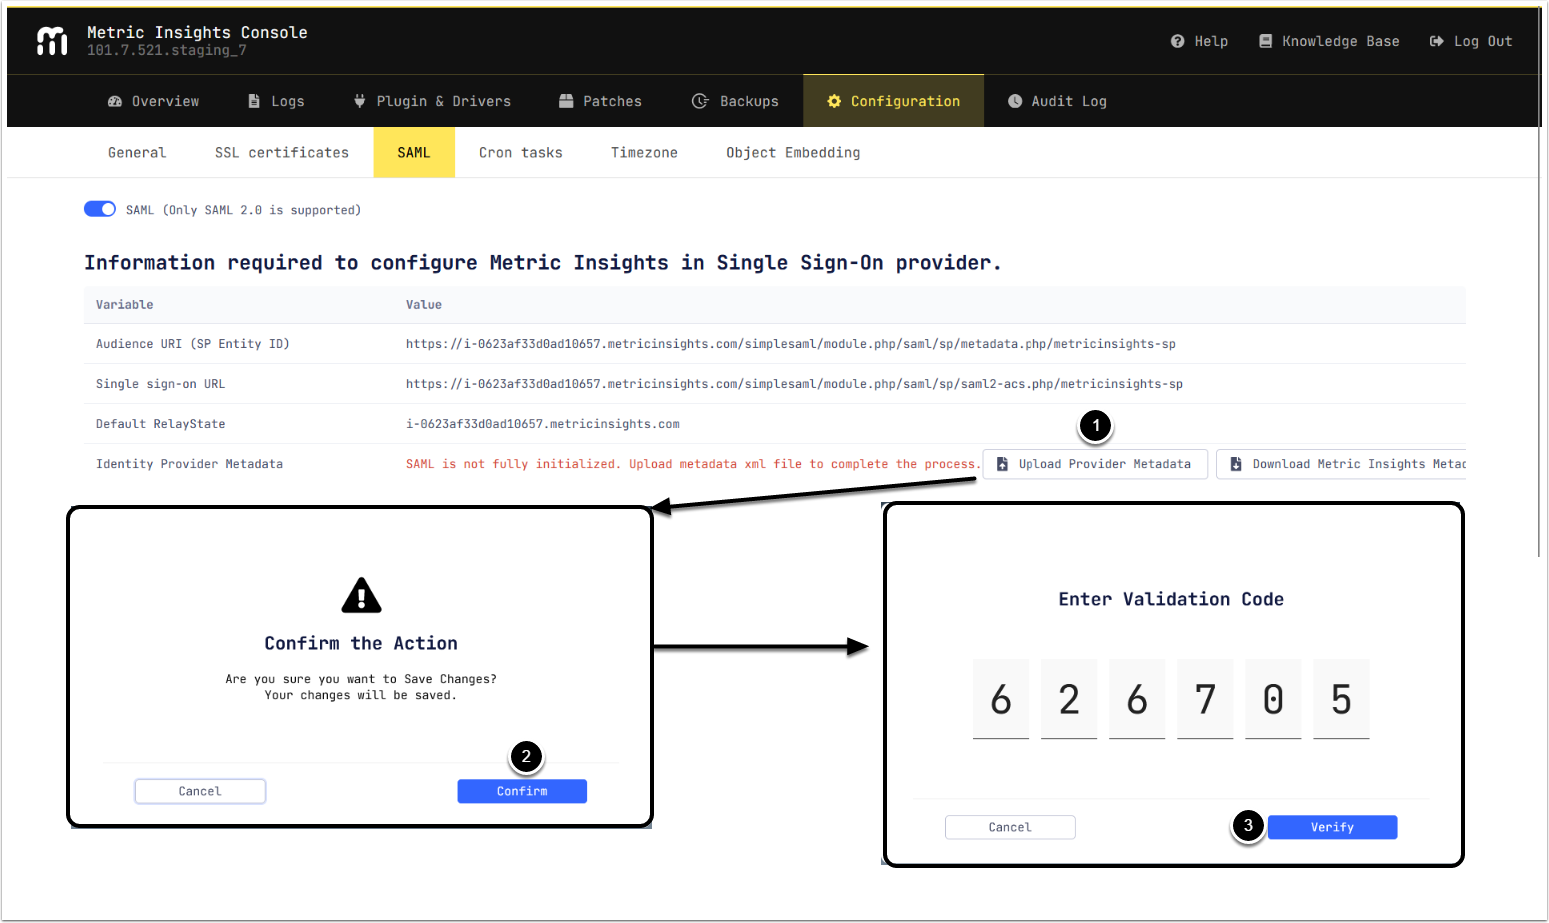
- [Upload Provider Metadata] selecting the XML metadata from IdP.
- [Confirm]
- Enter Validation Code from the selected authentication app and [Verify]
3.3. Check MI Console
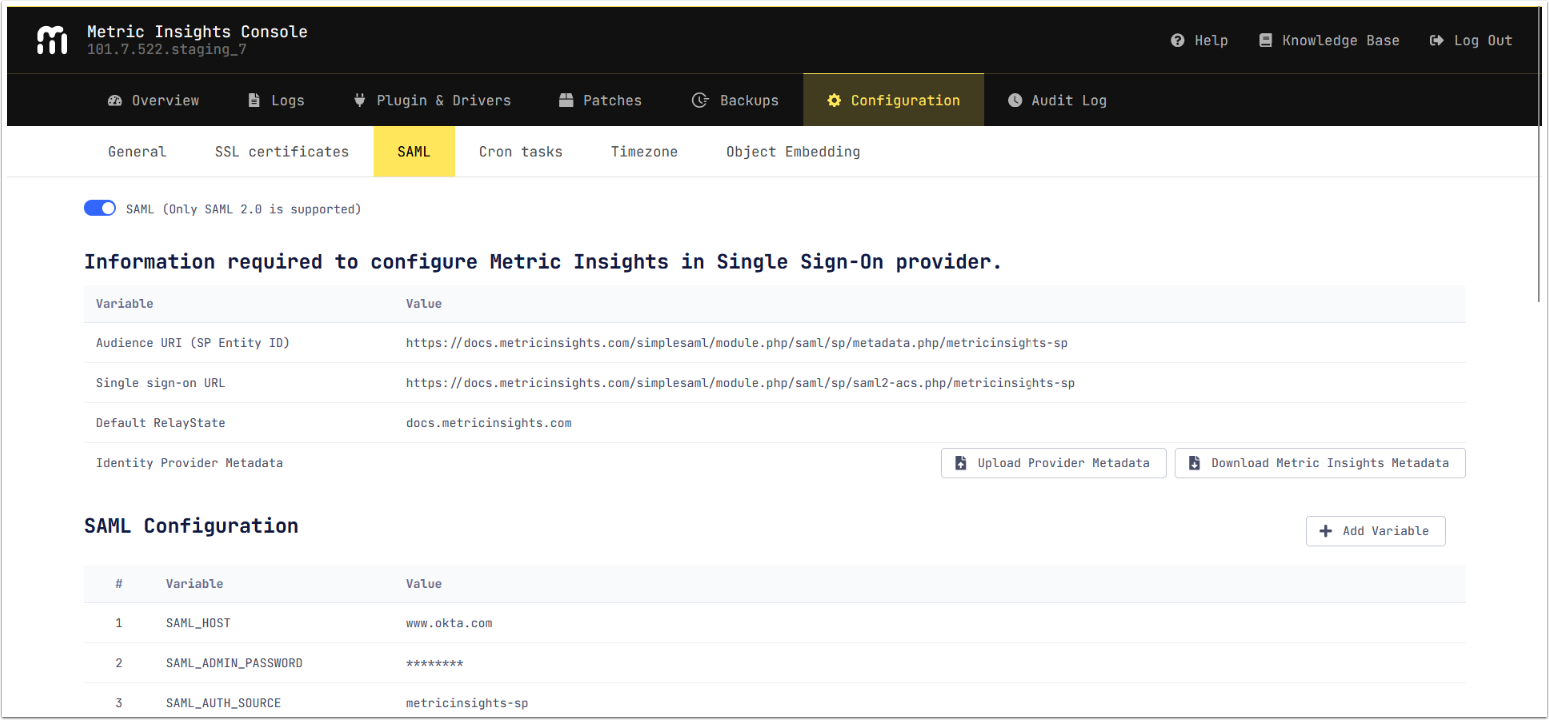
The message in Identity Provider Metadata field is no longer displayed and all mandatory Variables in SAML Configuration section are assigned values.
3.1. Access Web Container
sudo mi-web
3.2. Paste IdP Metadata Into New File And Update SAML Configuration Files
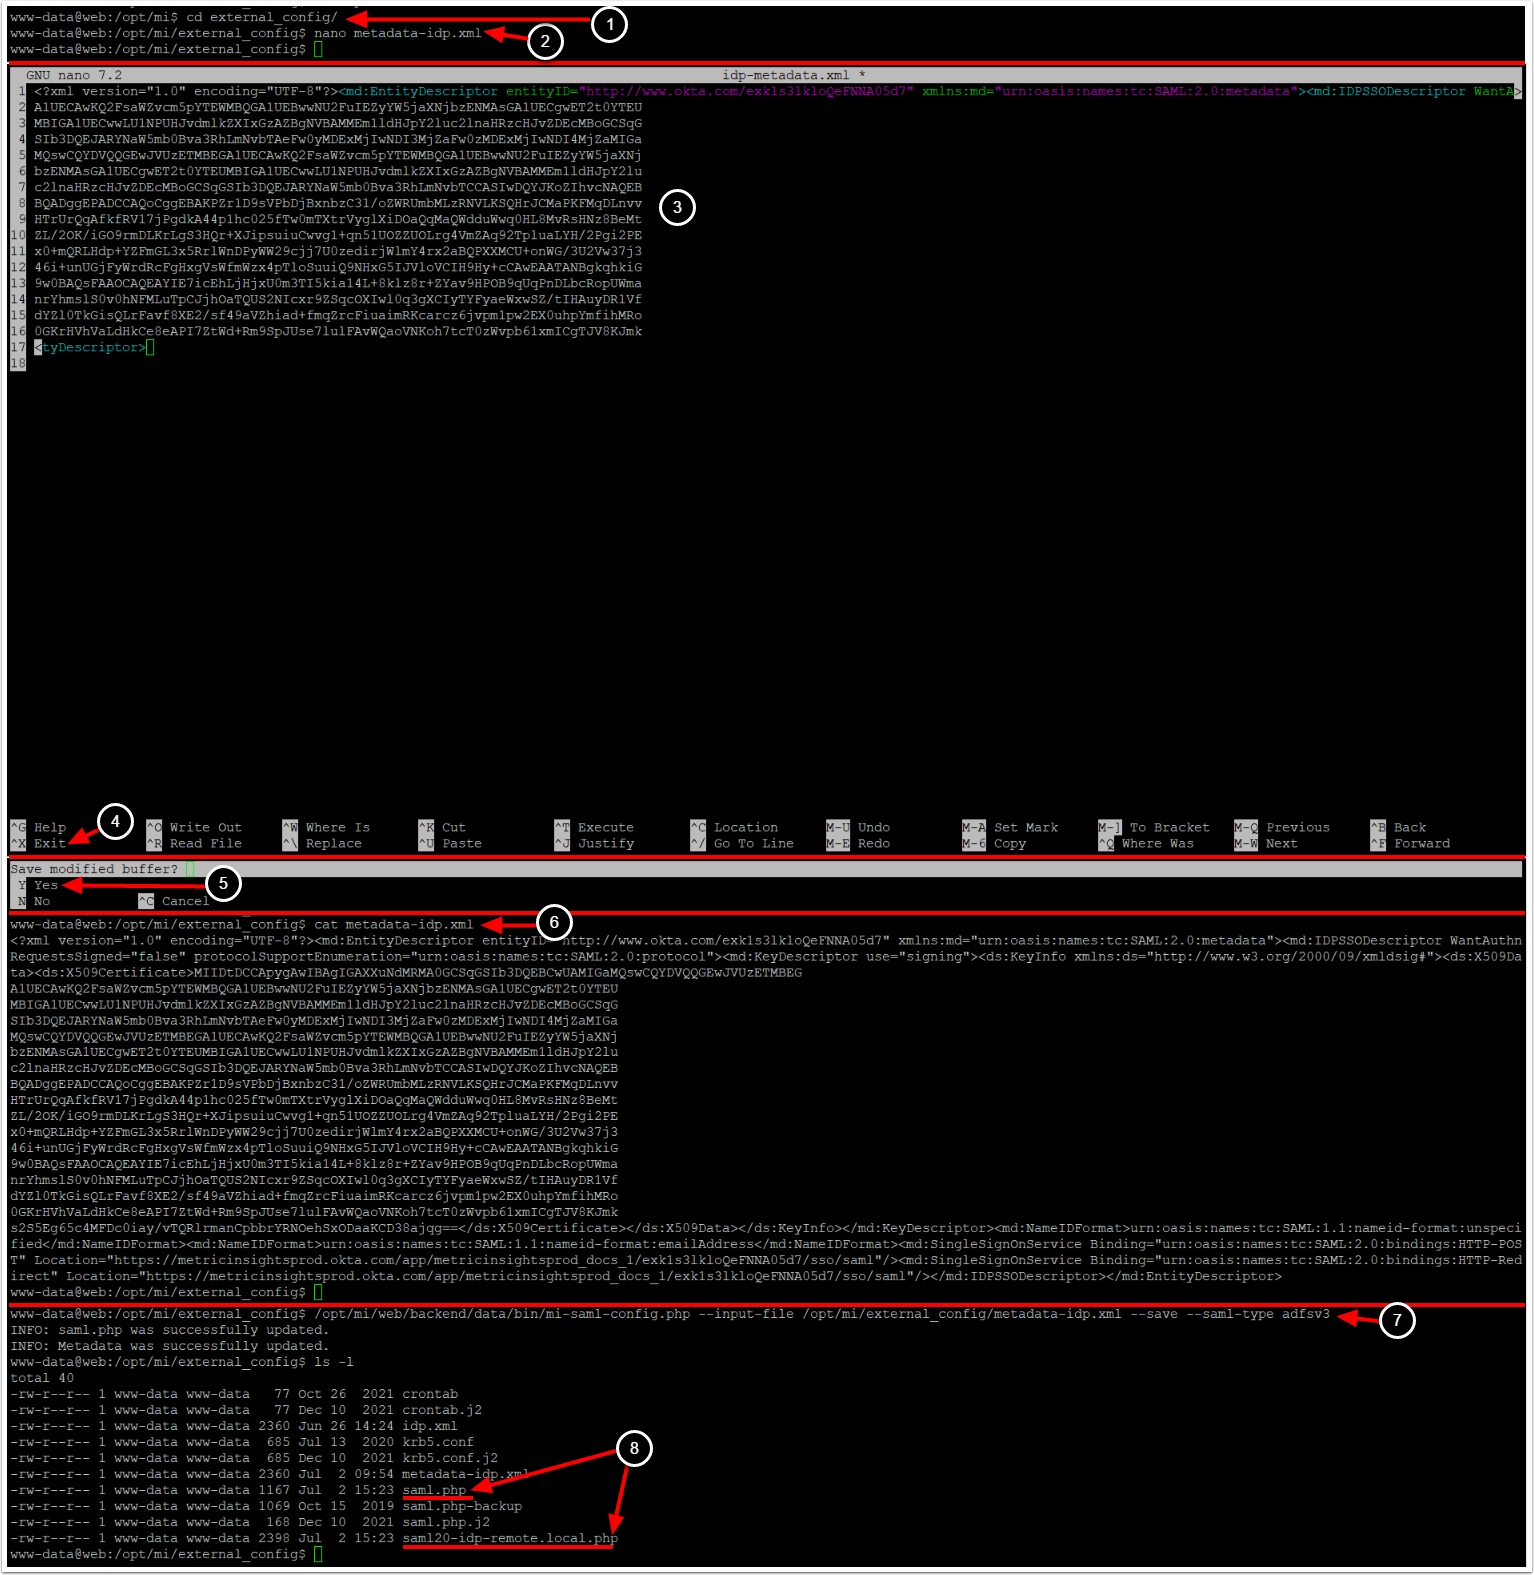
- Access
external_configdirectory:cd /opt/mi/external_config - Create new file which will contain metadata from IdP:
nano <Metadata file name> - Paste the previously copied IdP XML into the created file
- Ctrl + X to close the file
- Y to save
- View and verify the created file:
cat <Metadata file name> - Run the following command to save SAML configuration:
/opt/mi/web/backend/data/bin/mi-saml-config.php --input-file <Full path to XML metadata> --save --saml-type adfsv3 - Two files are updated by the
mi-saml-config.phpscript:-
saml.php: Stores SAML configuration information, -
saml20-idp-remote.local.php: Stores the certificate required to check signature.
-
Once SAML configuration is saved, proceed to check the result in MI console.
3.3. Check saml.php File Permissions and Owner

We recommend to set:
- The file access level for 644 (
-rw-r--r--), - the owner of the file for
www-data:www-data(www-datauser inwww-datauser group).
You can change the files access using chmod linux command, to change the owner use chown.
3.4. Enable SAML in Metric Insights
Access Admin > System > System Variables
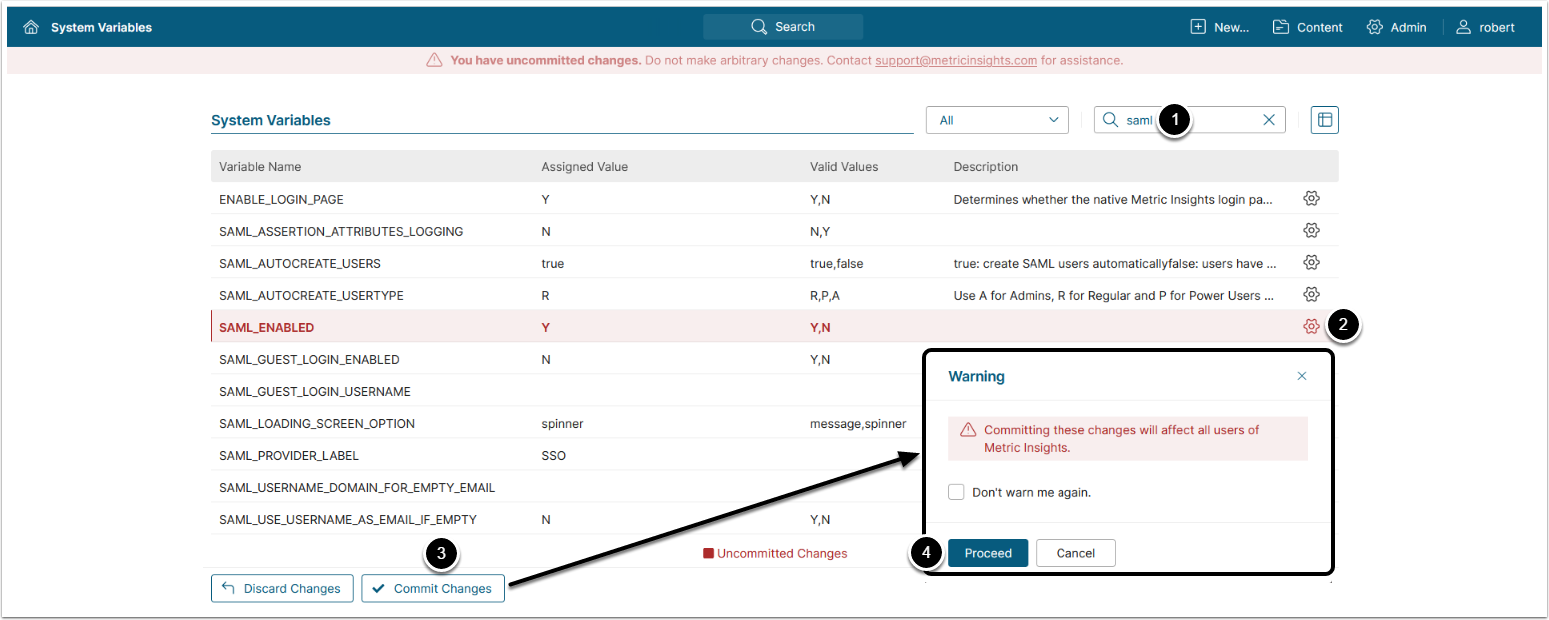
- Enter "SAML" in search field
- Set the SAML_ENABLED field to 'Y' using the gear icon on the right
- [Commit Changes]
- [Proceed]
3.5. Test SAML Configuration
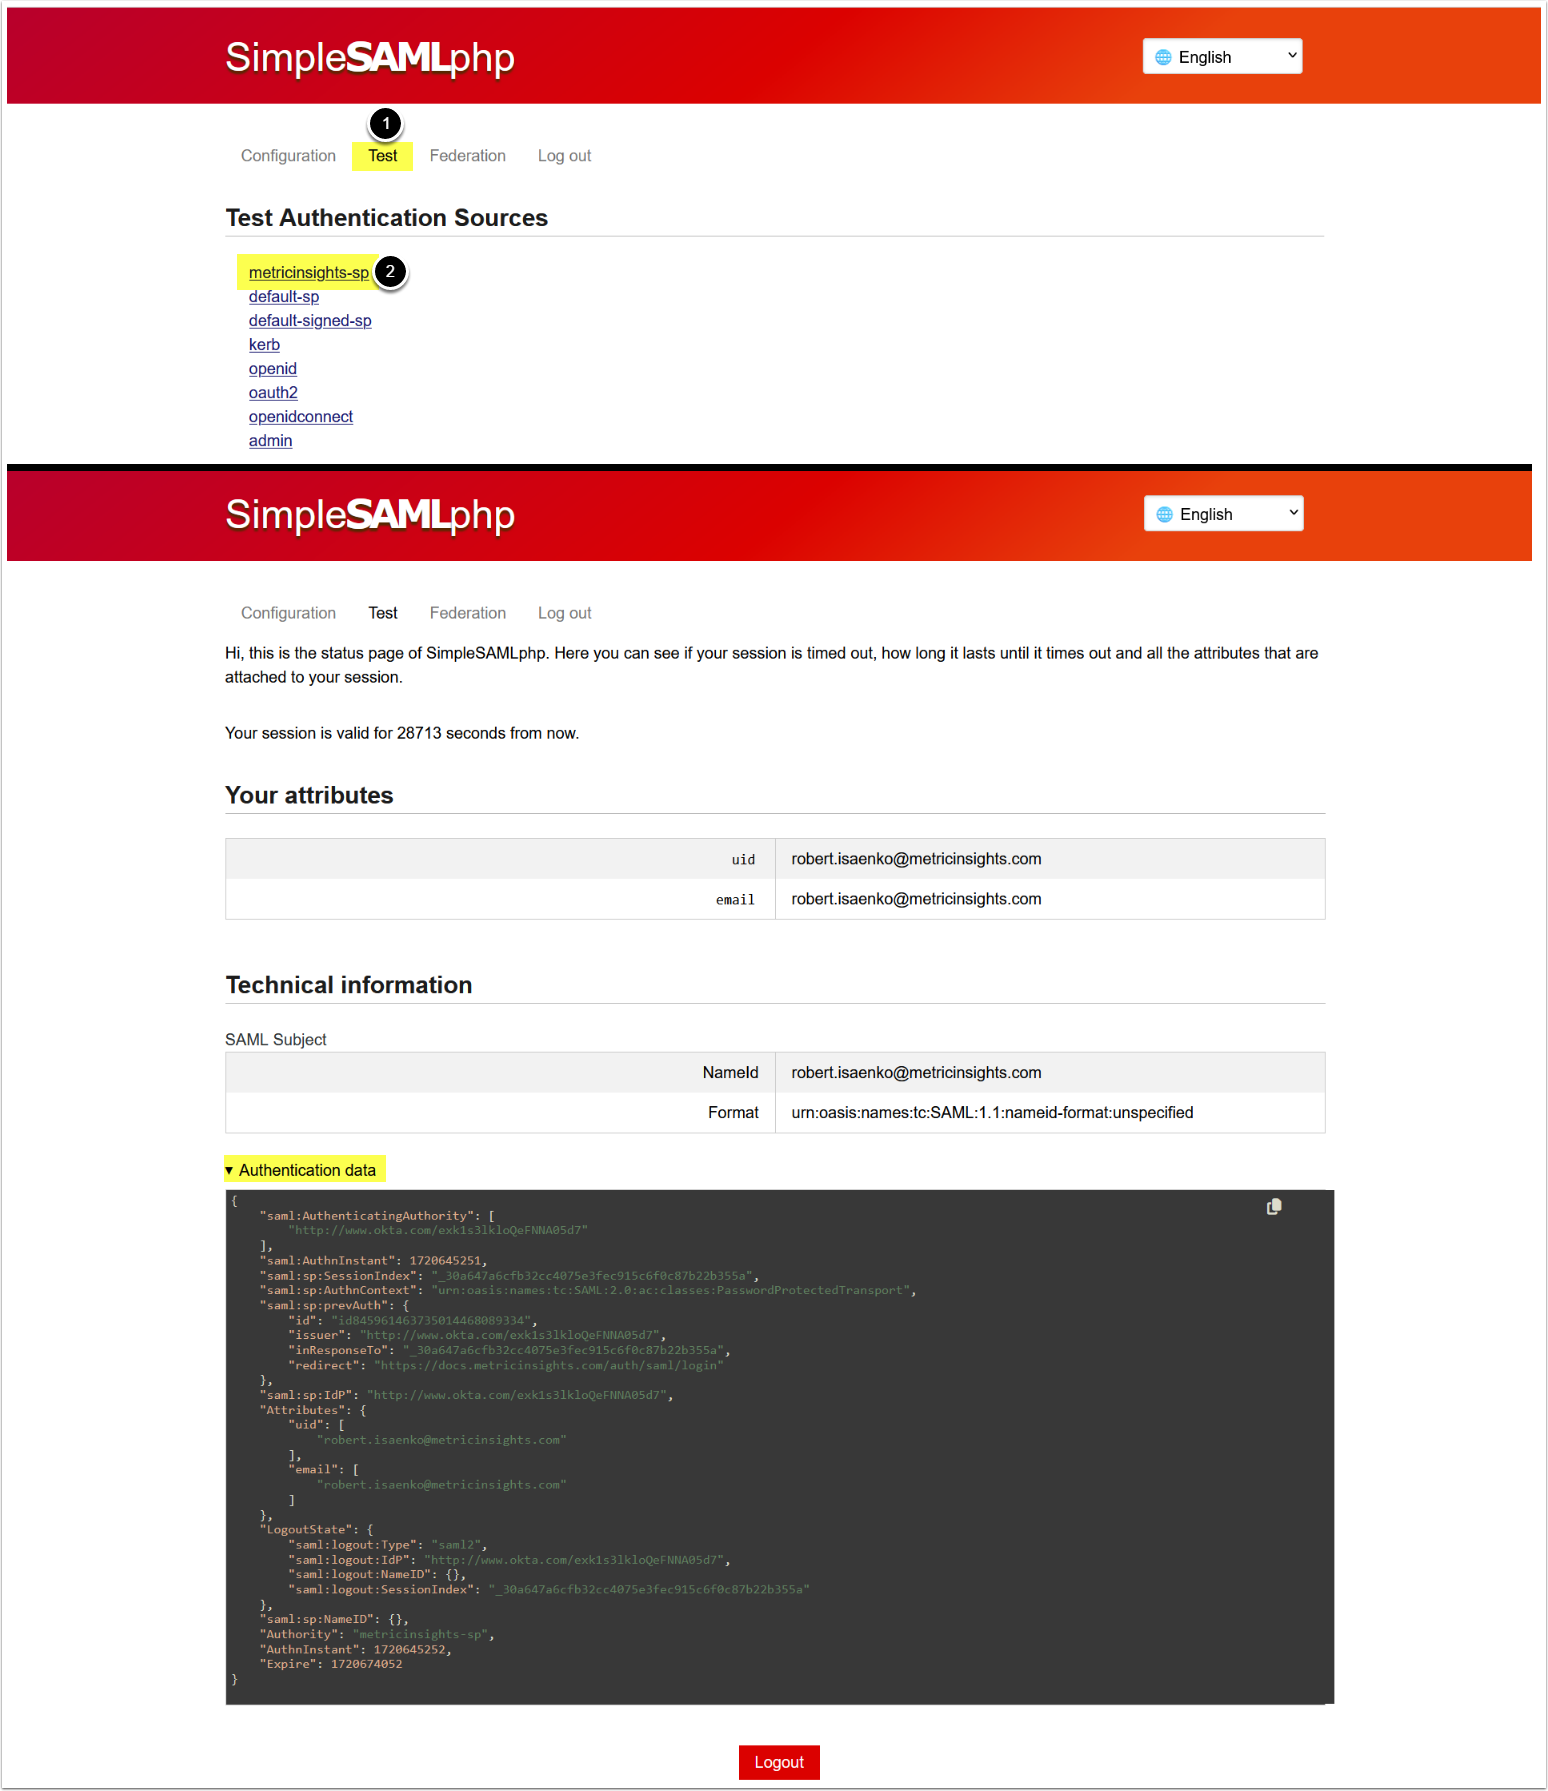
- Access the Test tab
- Access metricinsights-sp,
- If setup correctly, then you will be redirected to your IdP to sign in. Upon successful login you will be redirected back to Metric Insights and the screen will show you the values of SAML fields, so you can check your mapping in
saml.php.
- If setup correctly, then you will be redirected to your IdP to sign in. Upon successful login you will be redirected back to Metric Insights and the screen will show you the values of SAML fields, so you can check your mapping in
4. Configure MI Loading Screen Behavior
Optionally, you can change the loading screen behavior from the default message to spinner.
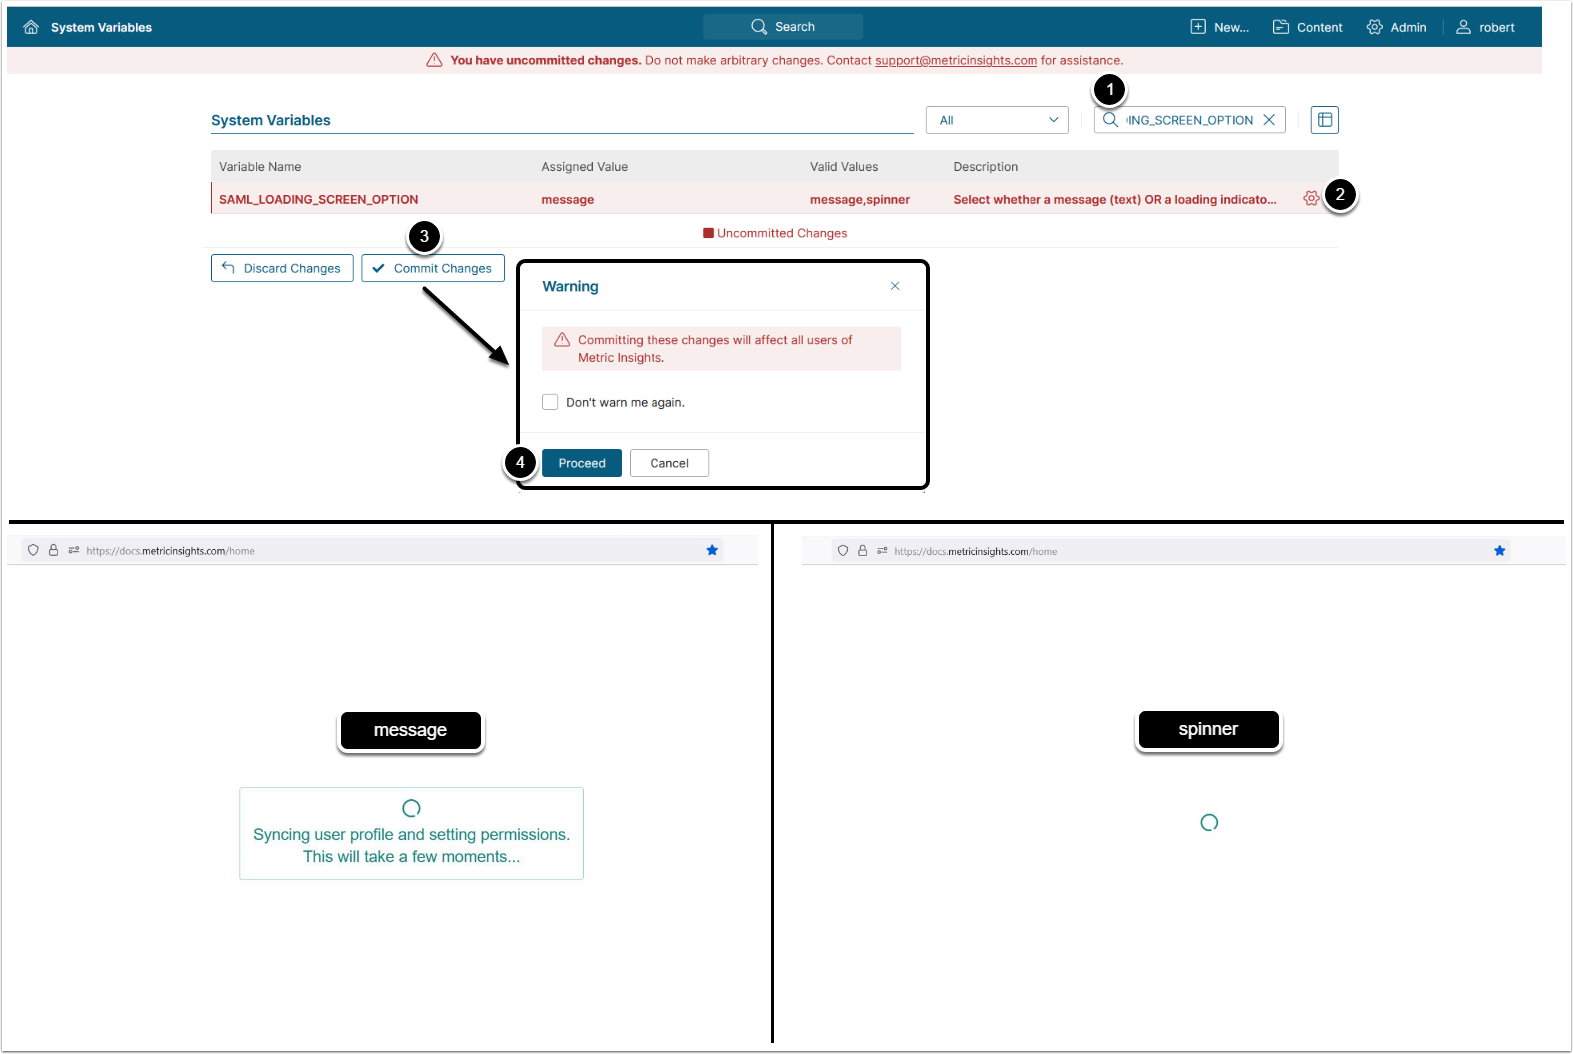
- Enter "SAML_LOADING_SCREEN_OPTION" in search field
- Click on the gear icon
- Configure SAML_LOADING_SCREEN_OPTION:
- "message": Display text message
- "spinner": Display loading indicator
- [Save]
- [Commit changes]