This article describes how to connect to Qlik Sense Cloud in order to load data into Datasets and map Qlik Sense Cloud objects to External Reports in Metric Insights.
PREREQUISITES:
1. Create New Data Source
Access Admin > Collection & Storage > Data Sources
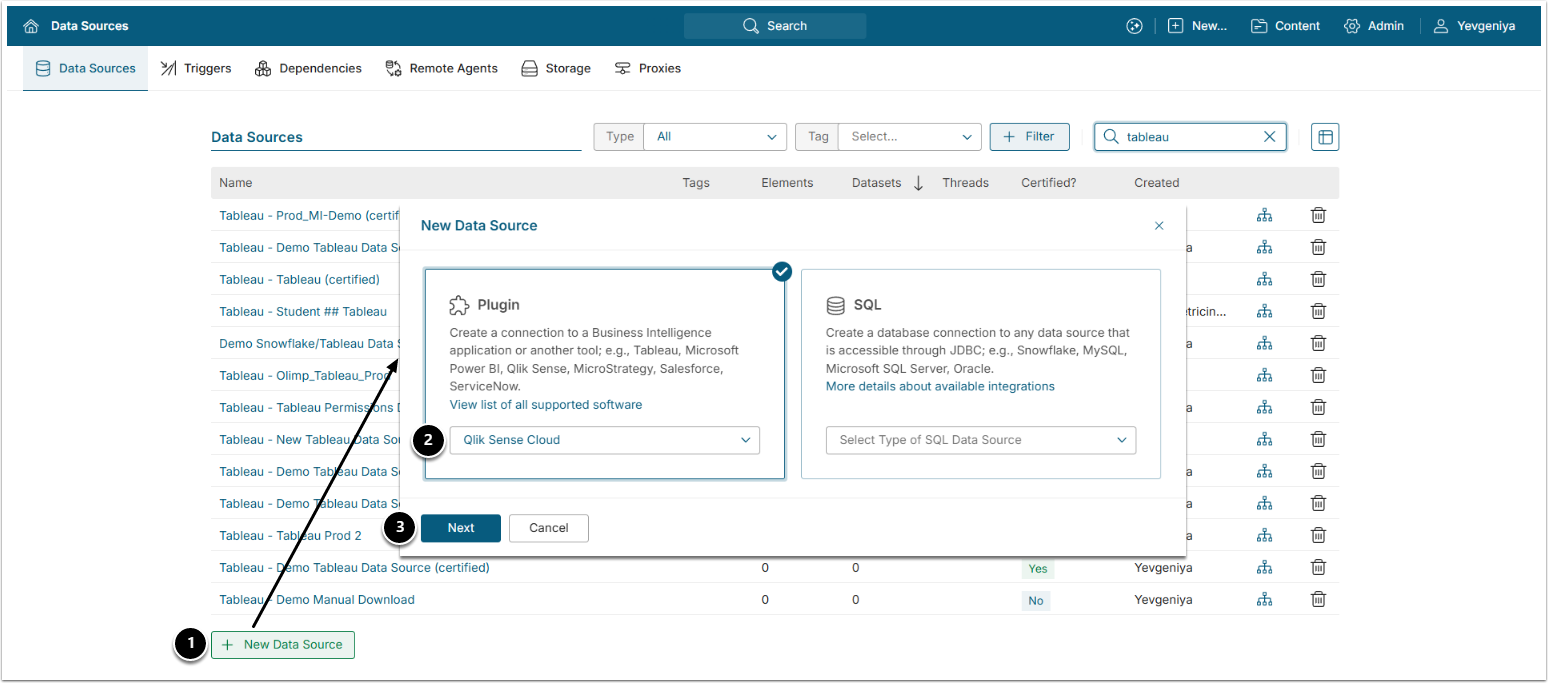
- [+ New Data Source]
- Plugin: choose "Qlik Sense Cloud" from the drop-down list.
- [Next]
2. Provide Required Qlik Sense Cloud Parameters
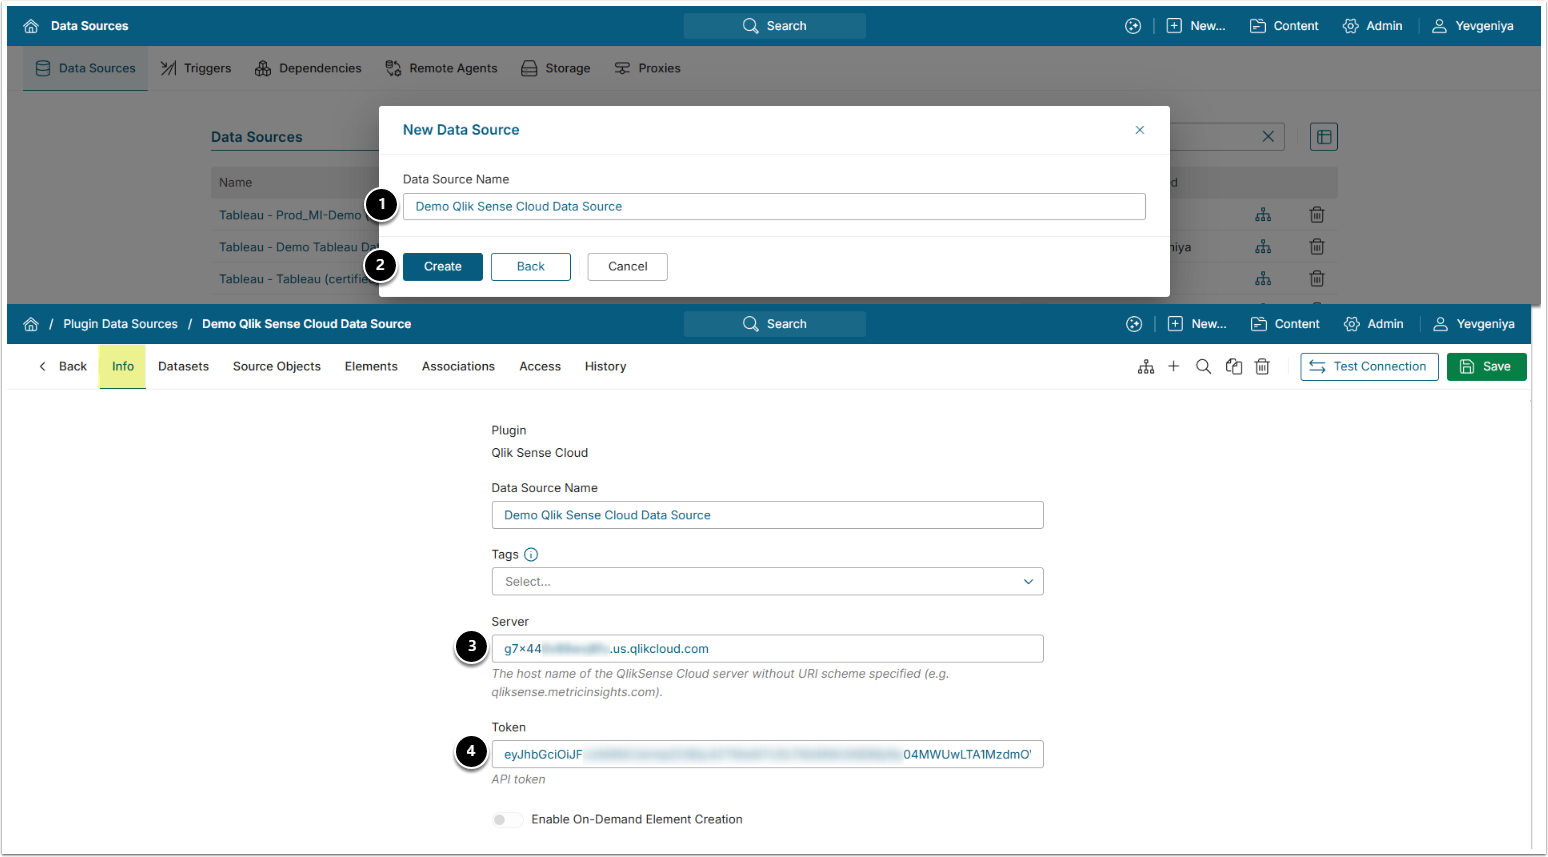
- Data Source Name: provide a descriptive phrase.
- [Create]
- Server: provide the host name of the Qlik Sense Cloud server (without URI scheme).
-
Token: provide the Qlik Sense Cloud API token.
- Refer to Prerequisites for Connecting to Qlik Sense Cloud for the instructions.
Optionally, toggle on Enable On-Demand Element Creation.
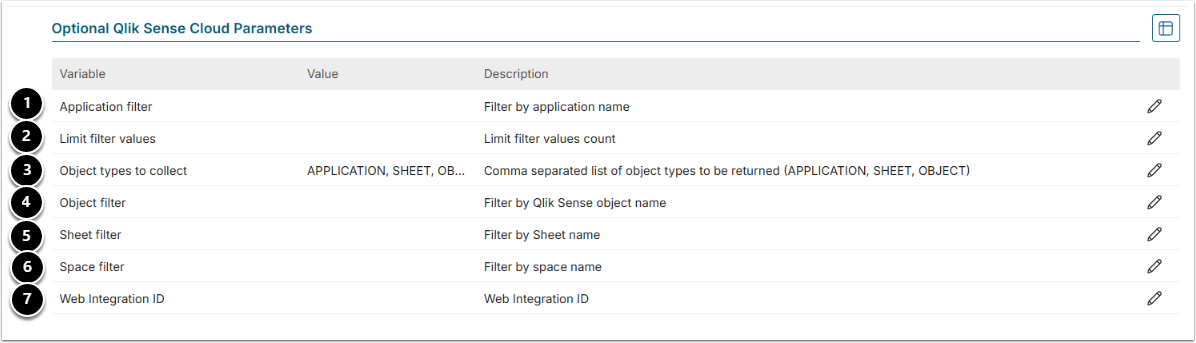
3. Configure Optional Parameters
| Parameter | Description | |
|---|---|---|
| 1 | Application filter | Provide a comma-separated list of Qlik Sense Cloud applications to be returned. Leave blank to return all applications.
|
| 2 | Limit filter values | Specify the limit for the number of filter values to be applied to all filters. |
| 3 | Object types to collect | Provide a comma-separated list of object types to be returned (APPLICATION, SHEET, OBJECT). Leave blank to return all types of objects. |
| 4 | Object filter | Provide a comma-separated list of object names to be returned. Leave blank to return all objects.
|
| 5 | Sheet filter | Provide a comma-separated list of sheet titles to return. Leave blank to return all sheets.
|
| 6 | Space filter | Provide a comma-separated list of space names from which to return objects. Leave blank to return all objects.
|
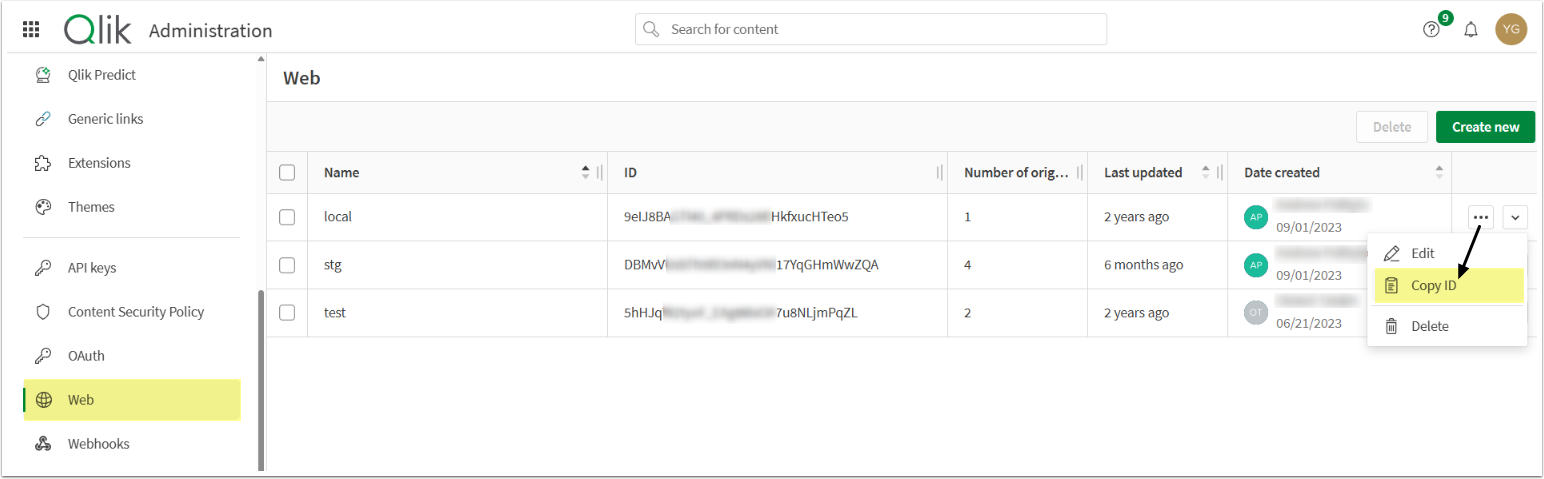
| 7 | Web integration ID | Specify the Web ID from the Management Console. Used for the Intermediate Page only. See the screen below to locate it. |
4. Proceed with Advanced Configuration
Advanced Configuration settings can be set to default values unless Data Source requires more precise tuning. For more details on how to proceed, refer to Advanced Data Source Configuration.
Click [Test Connection] in the upper right corner to validate setup.