This article details how to establish connectivity to Samba Filesystem to use it as Data Source for creating Elements in Metric Insights.
PREREQUISITE:
- Make sure all the Prerequisites for Connecting to Samba Filesystem have been met
TABLE OF CONTENTS:
1. Add New Data Source
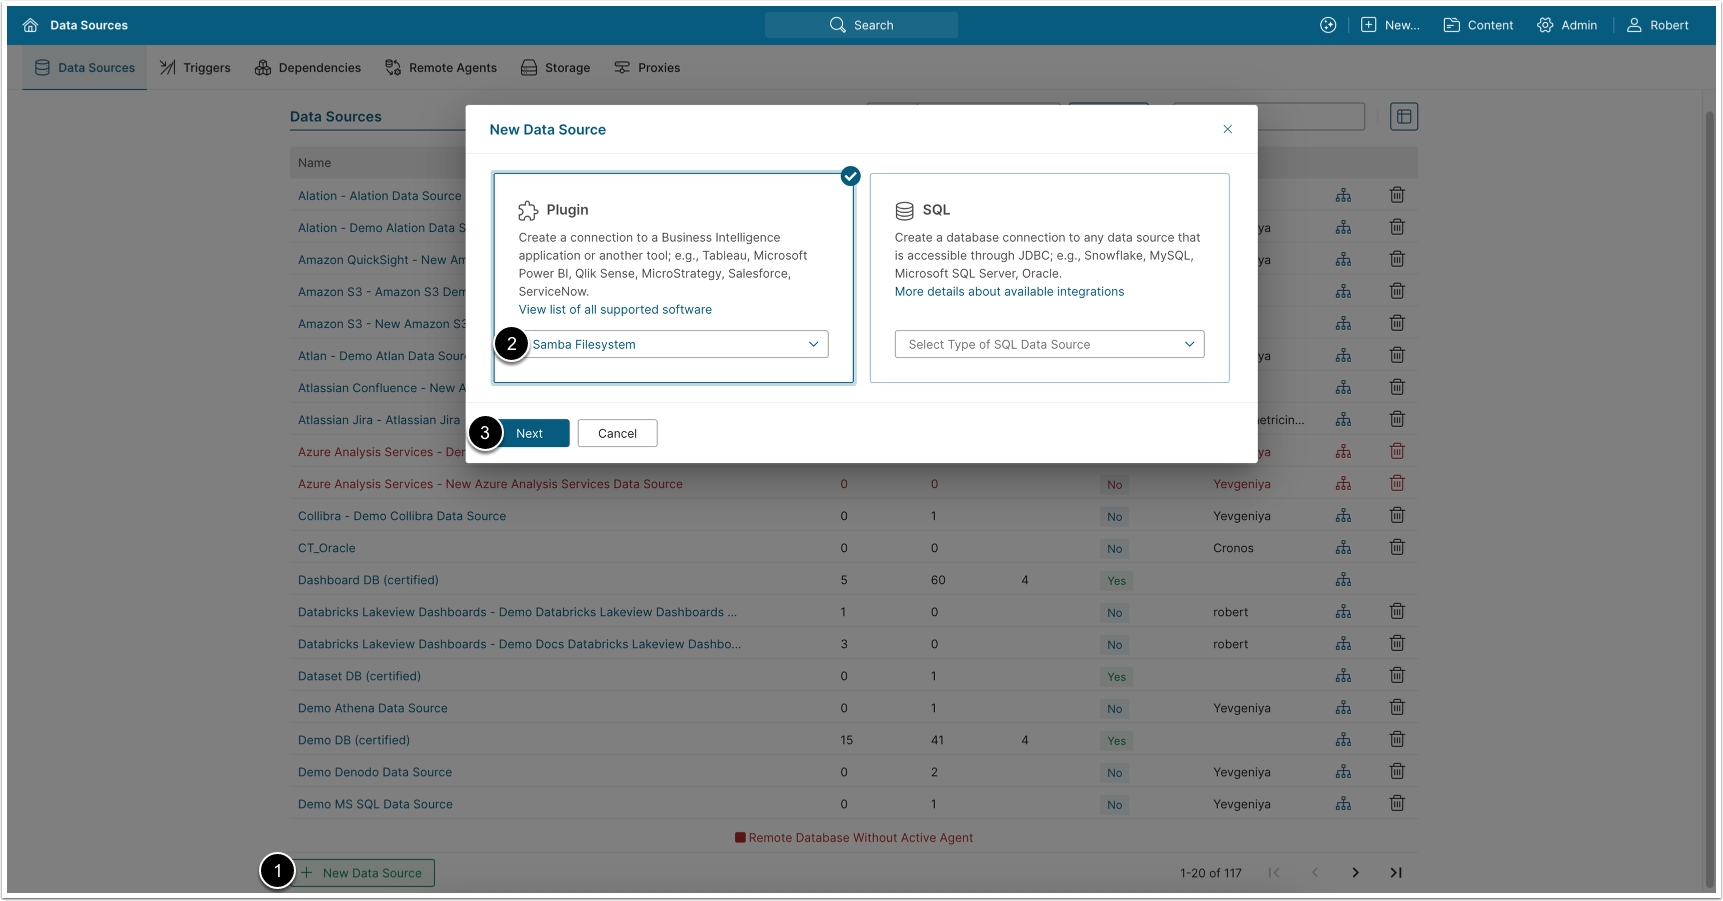
Access Admin > Collection & Storage > Data Sources
- [+New Data Source]
- Choose "Samba Filesystem" from Plugin drop-down list
- [Next]
2. Provide Required Parameters
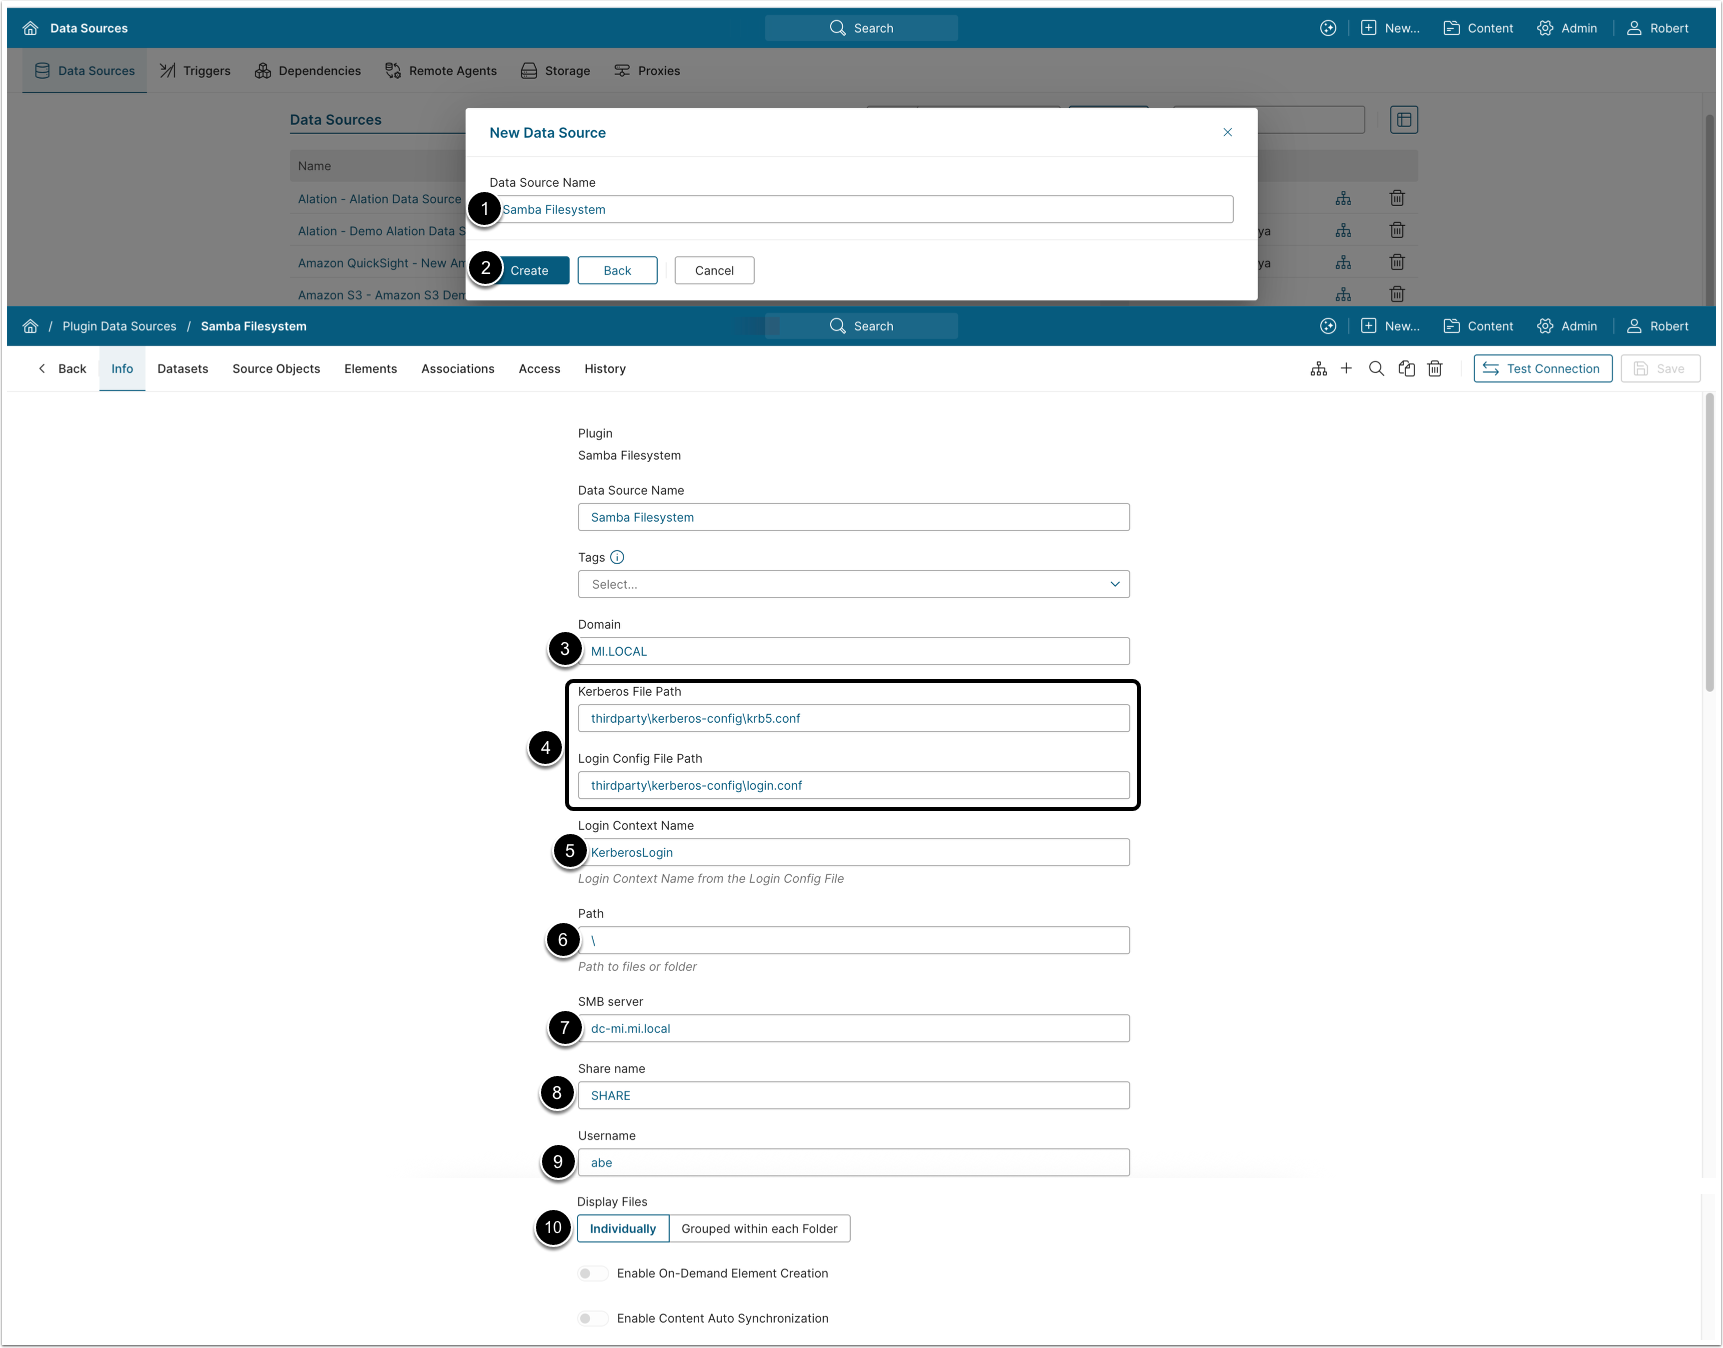
- Enter a descriptive Data Source Name
- [Create]
- Domain: Your organization's Kerberos realm
- Kerberos File Path and Login Config File Path: Paths to the previously created
.conffiles- NOTE: The paths are relative to the
Remote Agentfolder
- NOTE: The paths are relative to the
- Login Context Name: Enter the value from the login.conf file
- Example:
KerberosLogin
- Example:
- Path: Enter a path to files or a folder within the shared folder specified in the Share name
- SMB server: Domain name of the SMB server
- Share name: Name of the shared folder
- Username: The user who generated the Kerberos ticket
- Display Files: Select how files will be displayed in the External Content Viewer and Editor
- Individually: Each file is displayed individually
- Grouped within Each Folder: Files are grouped by their containing folder. In the External Content Viewer, the most recent file is displayed by default, with a drop-down menu allowing to select other files from the folder
Optionally, toggle on Enable On-Demand Element Creation and Enable Content Auto Synchronization.
3. Configure Optional Parameters
| Parameter | Description | |
|---|---|---|
| 1 | CSV Delimiter | Choose the delimiter character used in your CSV files
|
| 2 | Extension filter | Provide a comma-separated list of file extensions to fetch only files with the specified file extensions. |
| 3 | Files filter | Collect only files that match the defined filters.
|
| 4 | Includes headers | Choose whether the first row of the CSV file should be treated as column headers ('true') or as a regular data row ('false‘).
|
| 5 | Include Excel sheets | Choose whether to extract and return metadata for each worksheet within Excel files ('true') or treat each file as a single document ('false‘).
|
| 6 | Retrieve empty folders | Choose whether to fetch empty folders.
|
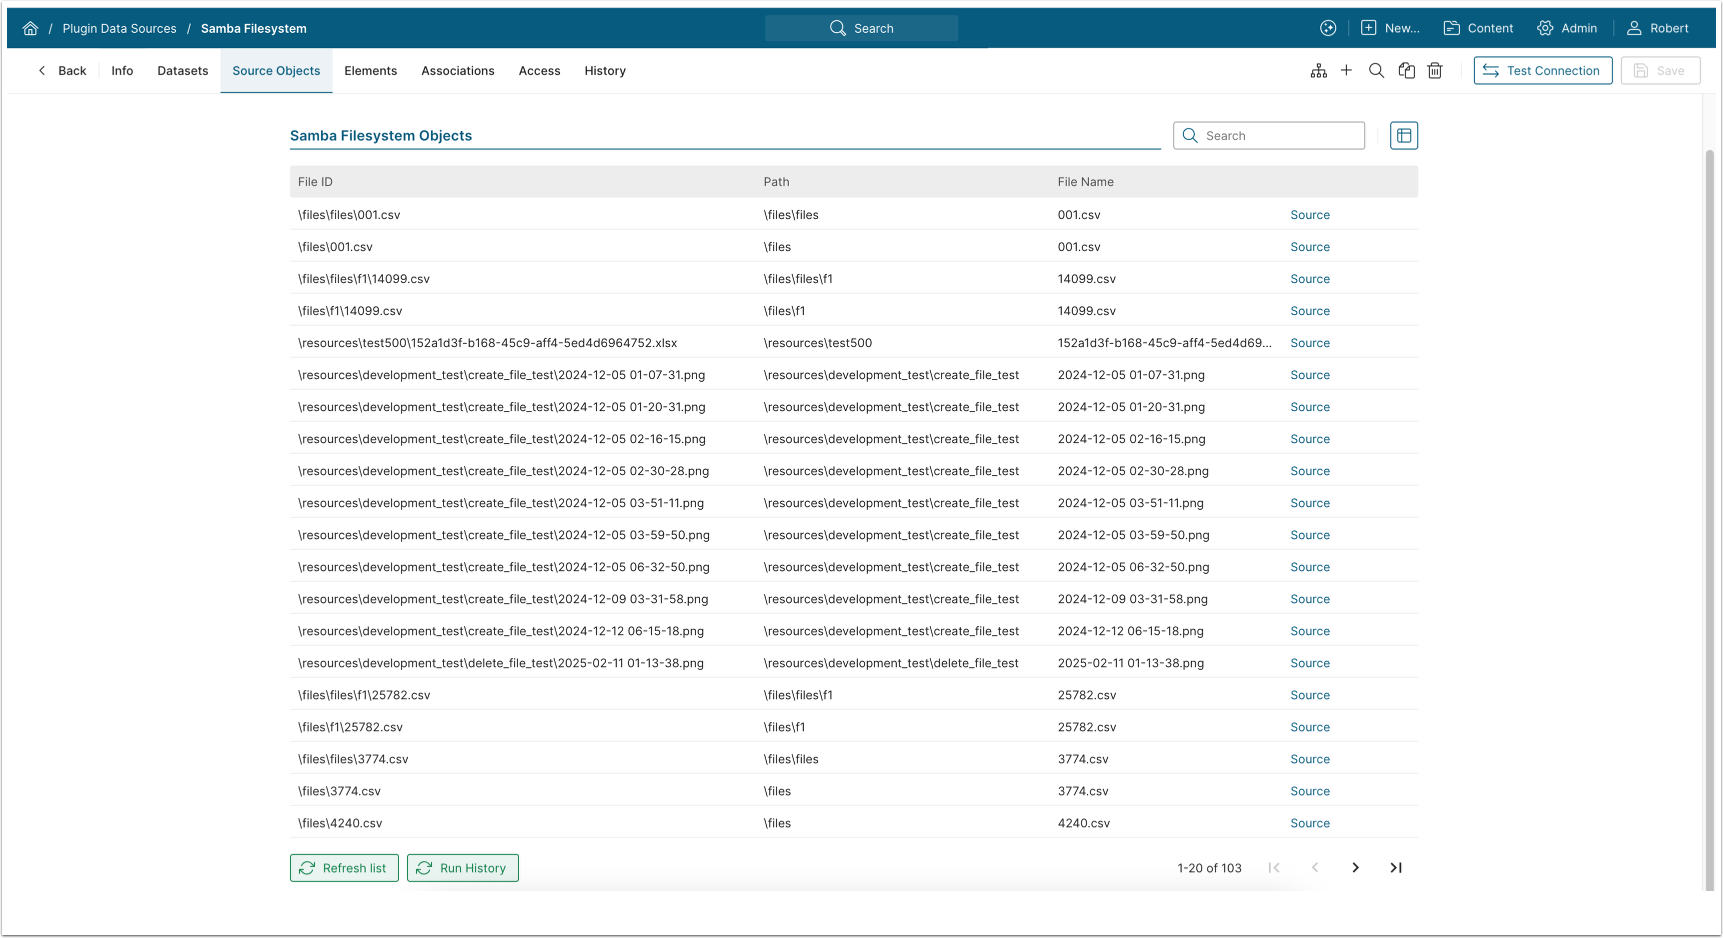
| 7 | Use absolute path as report Id | Select whether the Report ID displayed on the Source Objects tab should include the path from the Path parameter.
|
4. Advanced Configuration
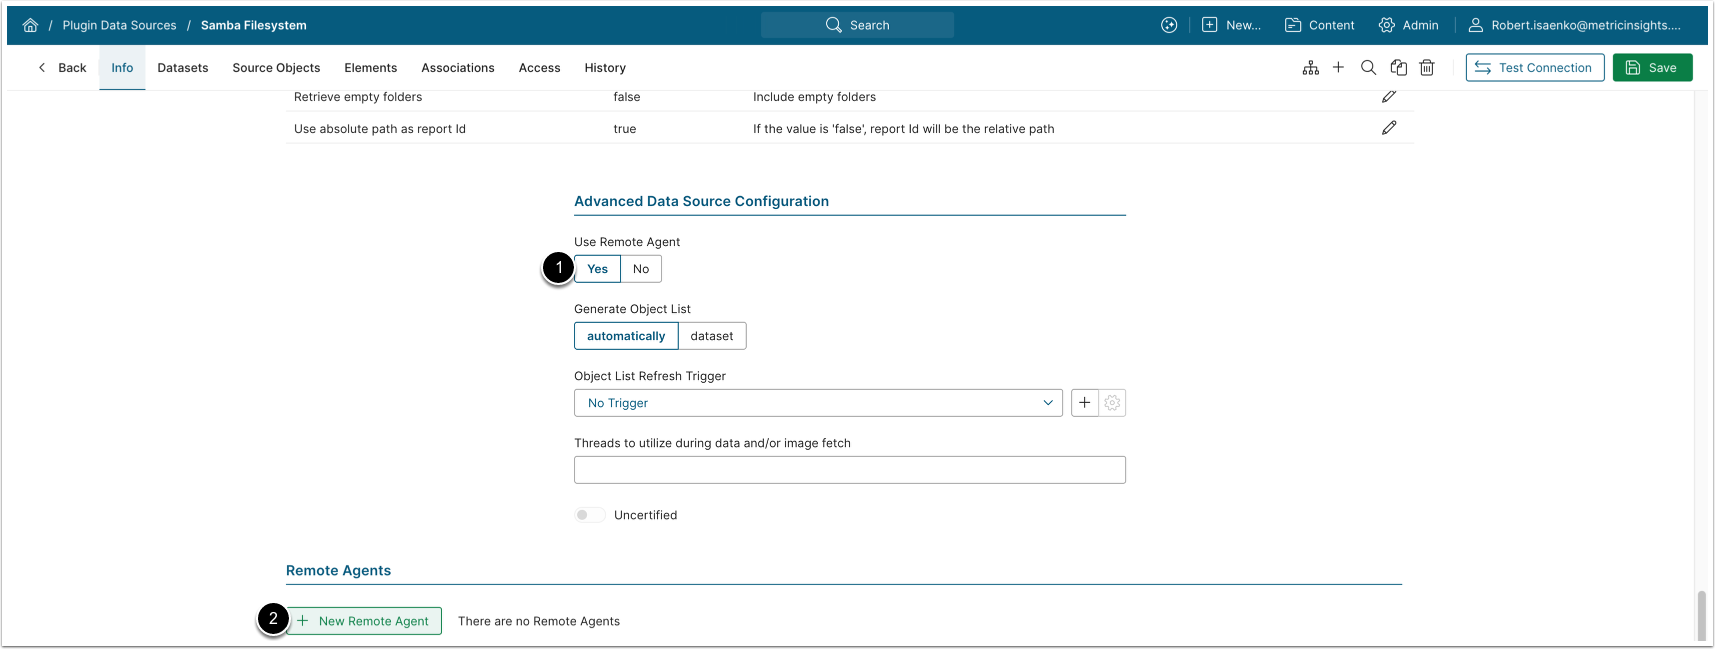
- Use Remote Agent: Yes
- [+New Remote Agent], select the previously configured Remote Agent
Other Advanced Configuration settings can be set to default values unless Data Source requires more precise tuning. For more details on how to proceed, refer to Advanced Data Source Configuration.


