In Metric insights, Datasets which are set to keep their history are called Snapshot Datasets. They allow to track changes within a Dataset by comparing paired Datasets instances. This article describes how to enable snapshot functionality, as well as features that Snapshot Dataset offers.
This article includes:
- Enabling Snapshot Functionality
- Reviewing a Single Instance
- Tracking Changed, New and Removed Rows
- Applying Filters to Changed, New and/or Removed Rows
- Using Derived Fields When Comparing Instances
PREREQUISITES:
1. Enabling Snapshot Functionality
Access Dataset Editor and open the Data tab.
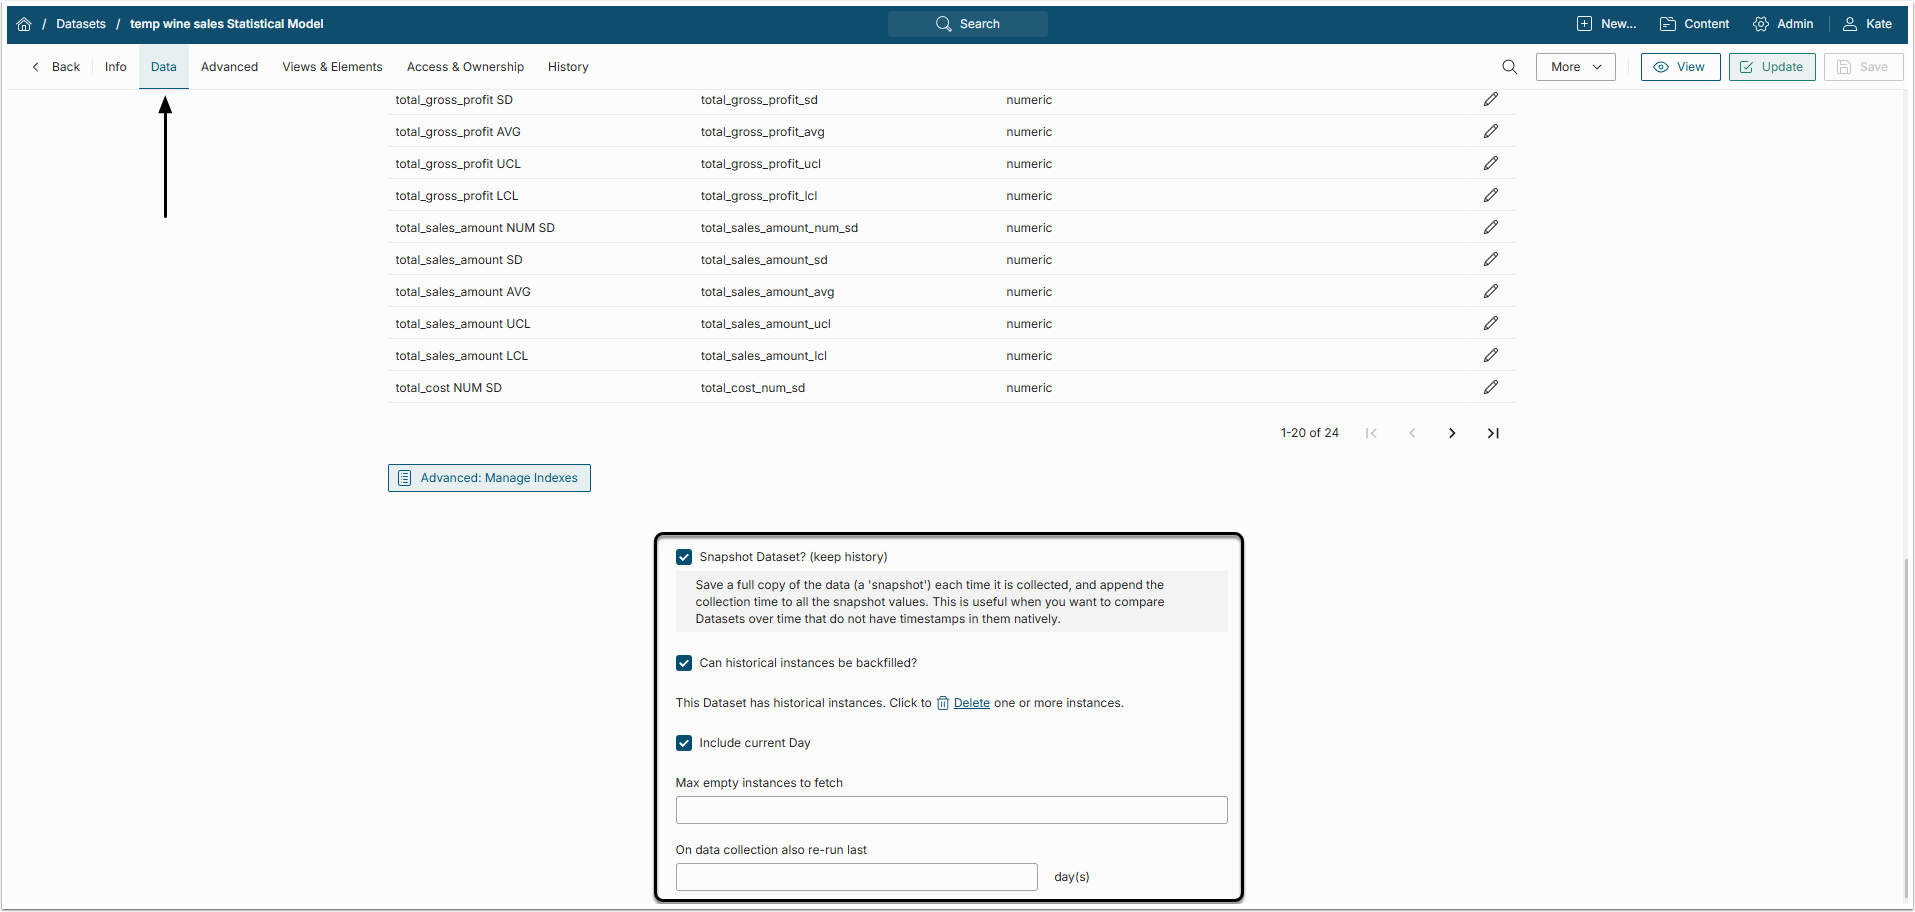
Scroll the page down, find the Snapshot Dataset? field and activate the checkbox.
The following options will become available in the Dataset Viewer:
- Reviewing a Single Instance of this Dataset
- Tracking changes in the Last Two Instances of this Dataset (e.g., yesterday's data compared to what occurred the day before yesterday)
NOTE: You can compare any instance saved during previous data collections to its instance collected the day before.
2. Reviewing a Single Instance
Click [View] in the upper right corner of the Dataset Editor to open the Dataset Viewer.
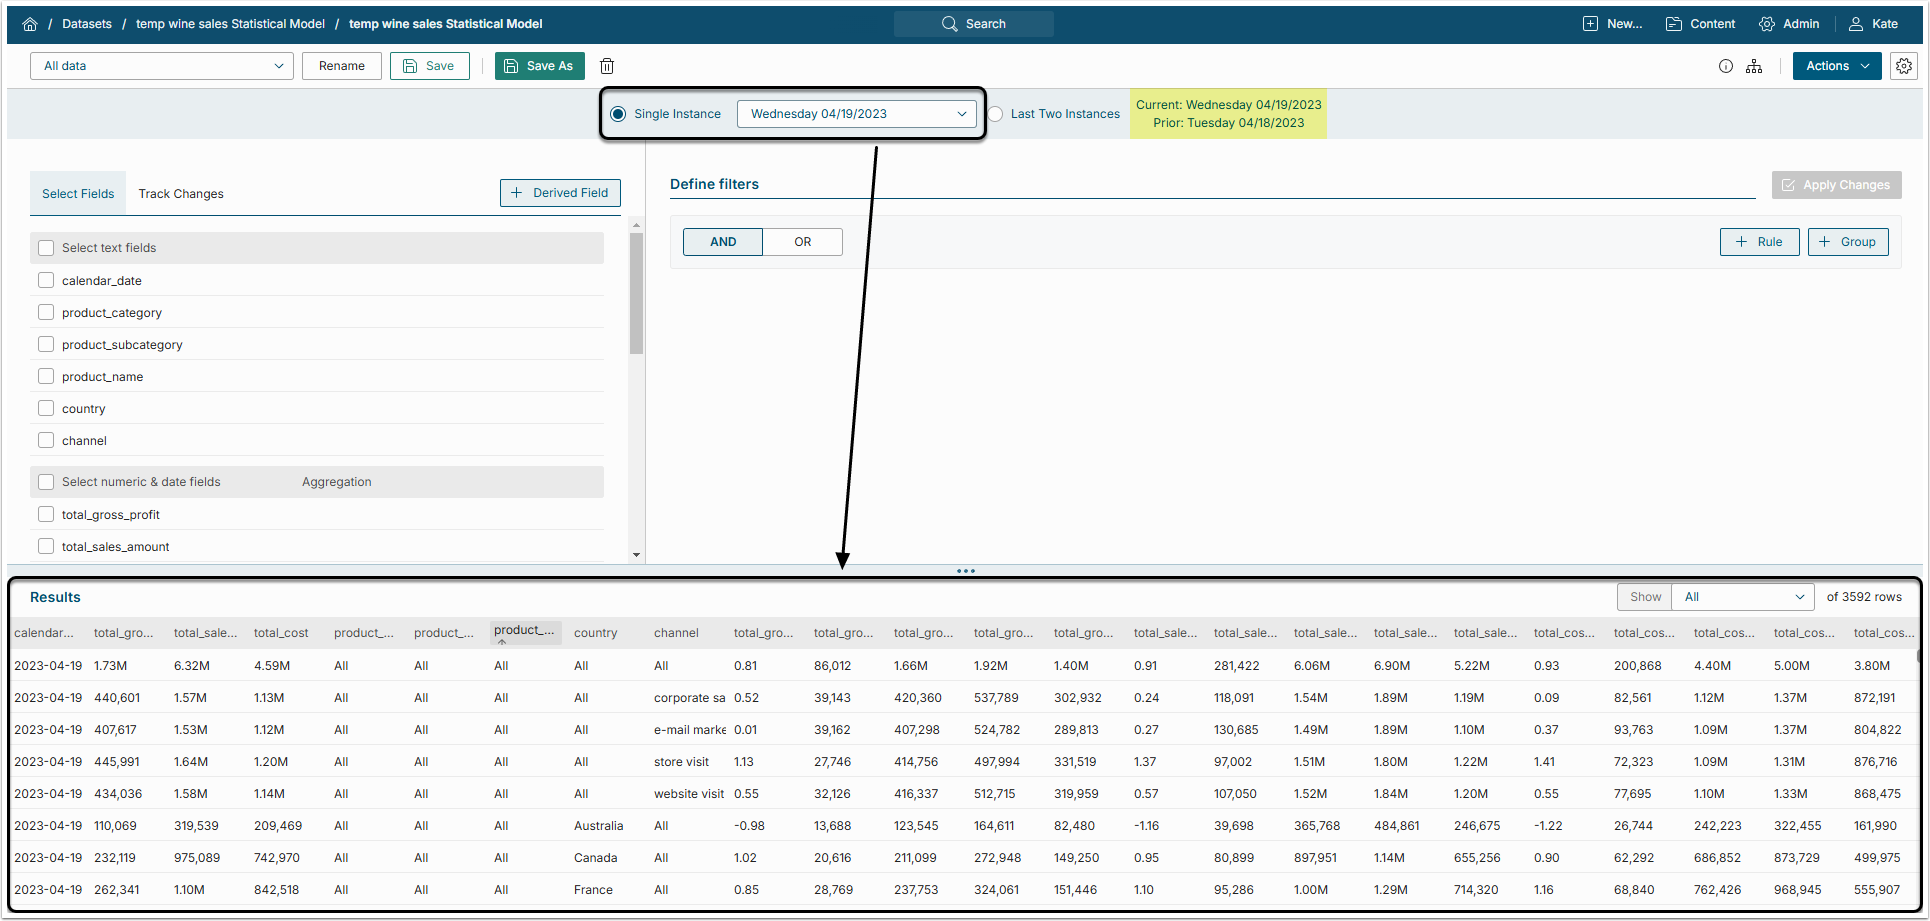
Select Single Instance and choose the date in the drop-down menu. Results will be shown in the grid below. The date of the instance you are currently watching is shown to the right with the date of a previous instance.
3. Tracking Changed, New and Removed Rows
The Track Changes function allows fetching a selection of New and/or Removed and/or Changed rows. Whenever you choose to include more than one Type of rows' alteration; e.g., Changed+New, Changed+New+Removed, then each row in the Results set is assigned a corresponding label in the Change Type column.
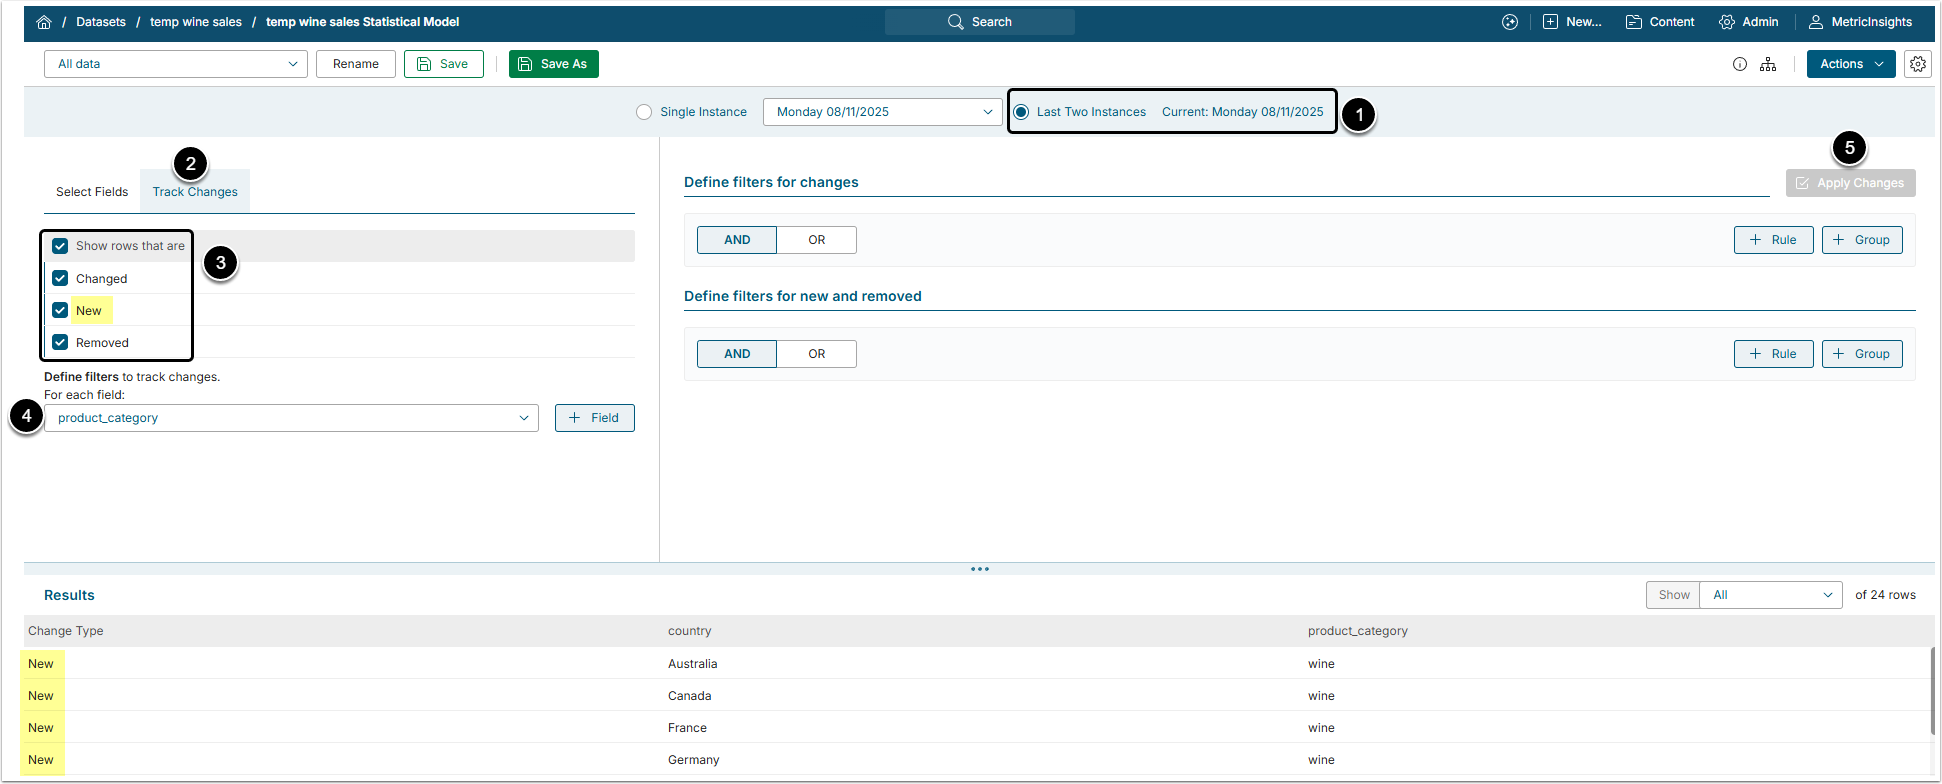
To compare values and track changes/updates in Last Two instances:
- Switch to the Last Two Instances mode.
- The Track Changes option is now available for use.
- Define whether you want to see which rows have been changed, new or removed since the previous date by selecting the appropriate check boxes.
- For each field: Specify the field (parameter) by which the comparison is going to be performed.
- Click [Apply Changes] to update the Results set.
Results: Only those rows where the values defined during Step 4 have been changed / new / removed since collecting the prior instance are shown.
4. Applying Filters to Changed, New and/or Removed Rows
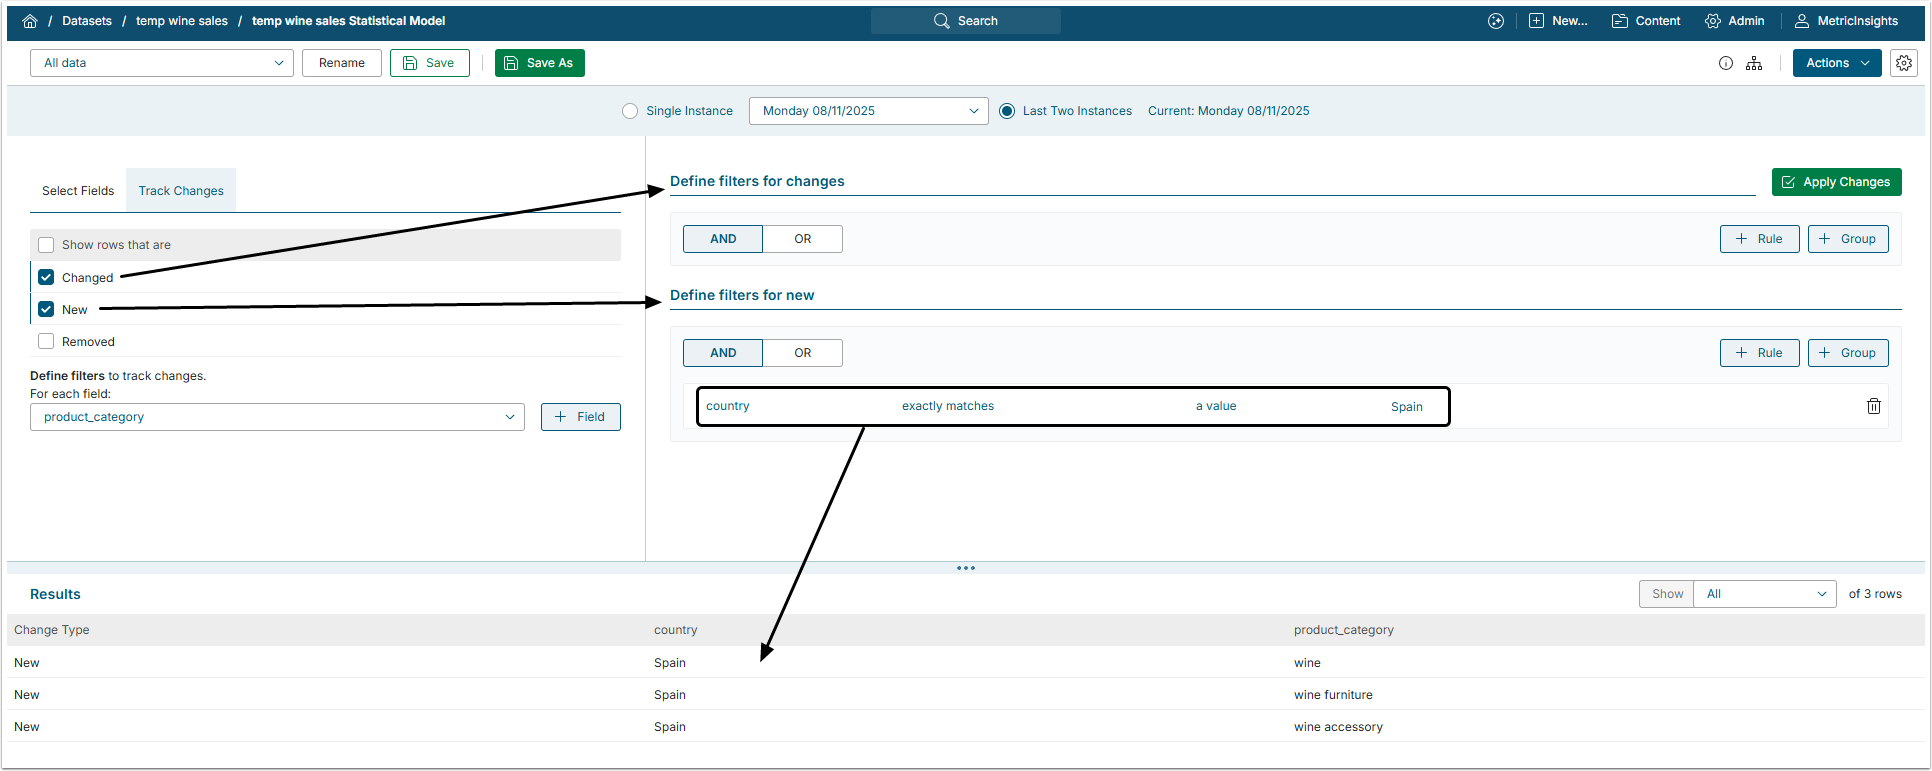
You can apply different set of filters to the rows that are Changed and to those which are New or Removed.
5. Using Derived Fields When Comparing Instances
Derived Fileds include values that do not exist in a Data Source itself but are calculated from one or more existing numeric fields via basic arithmetic expressions and non-aggregate numeric functions.
For detailed information on derived fields, refer to the Understanding Derived Fields article.
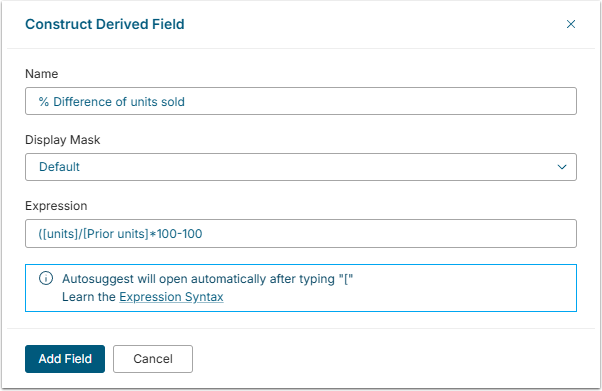
5.1. [Option 1] Constructing Complex Formulas
When constructing a formula for a Derived field in the Last Two Instances mode, you can include the same field, but from current and prior instances.
NOTE: Derived fields with formulas including current and prior values become UNAVAILABLE when switching to a Single Instance mode.
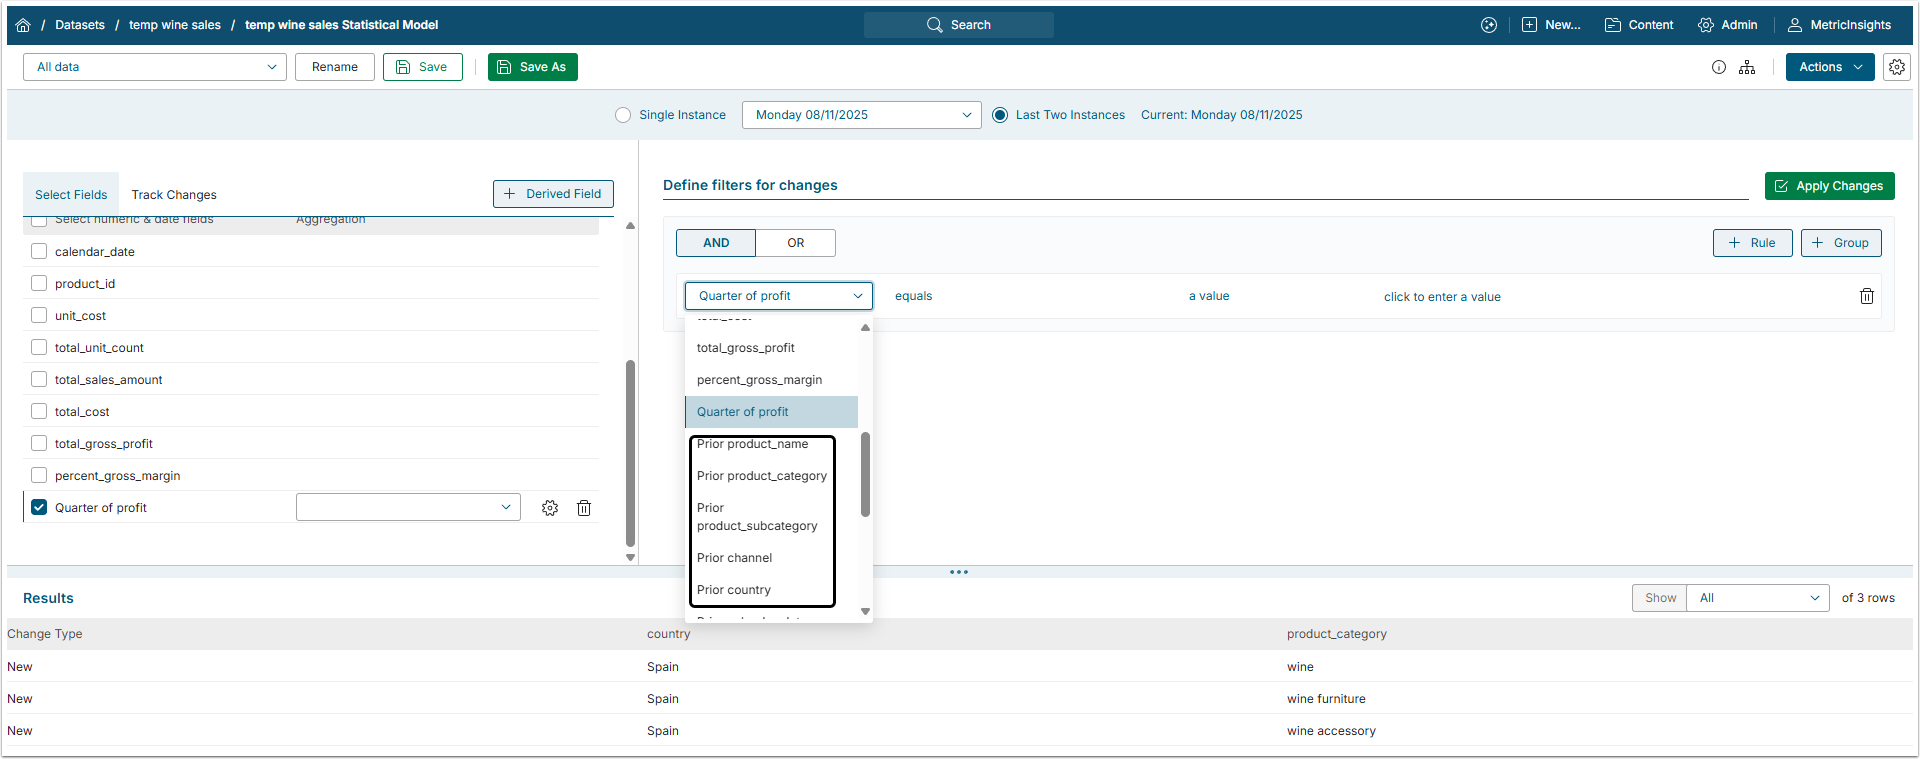
5.2. [Option 2] Using Derived Fields When Constructing Filters
Derived fields can also be used to construct filters. In this case they are treated the same way as regular fields if the formula contains only current values. The drop-down lists in filters section will include current and prior value options. See the image below.
Alternatively, if the complex formula of a Derived Field includes both current and prior values which are required for calculation (as shown above), the drop-down lists in filters section will include only current value option.