The Theme Editor is intended for quick color, font, and style changes. This functionality allows for maximized flexibility in UI customization. This article briefly outlines the key functionality.
1. Add New Theme
Access Admin > System > Themes
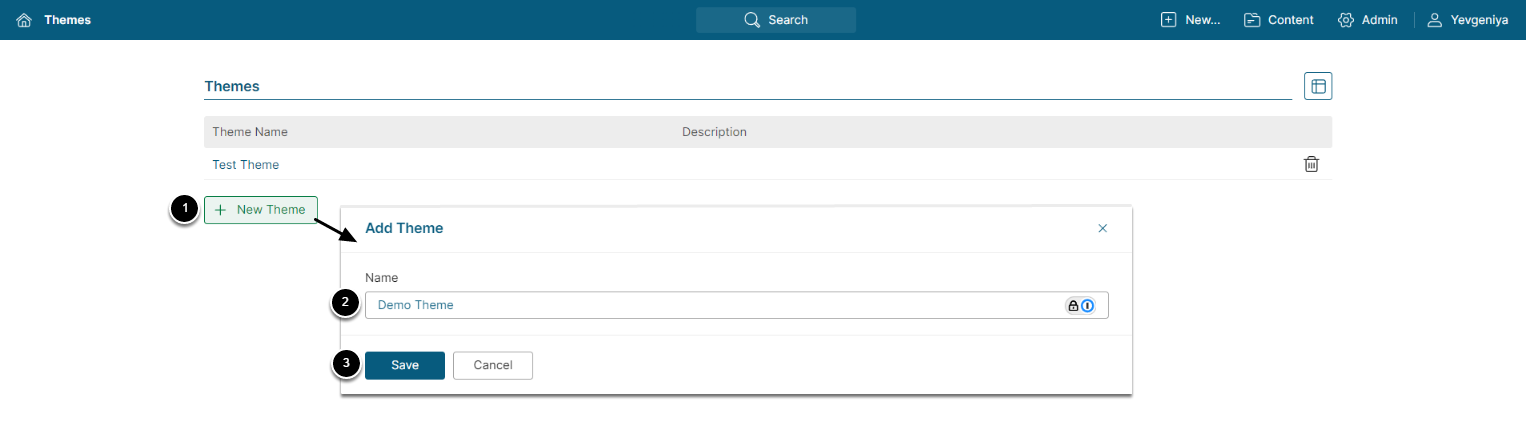
- [+New Theme]
- Provide a descriptive Name.
- [Save]
Once saved, a full Themes Editor will be available.
2. Change Name and Add Description

Under the Info Tab, you can change the Name and add Description.
3. Adjust UI Element Colors and Buttons
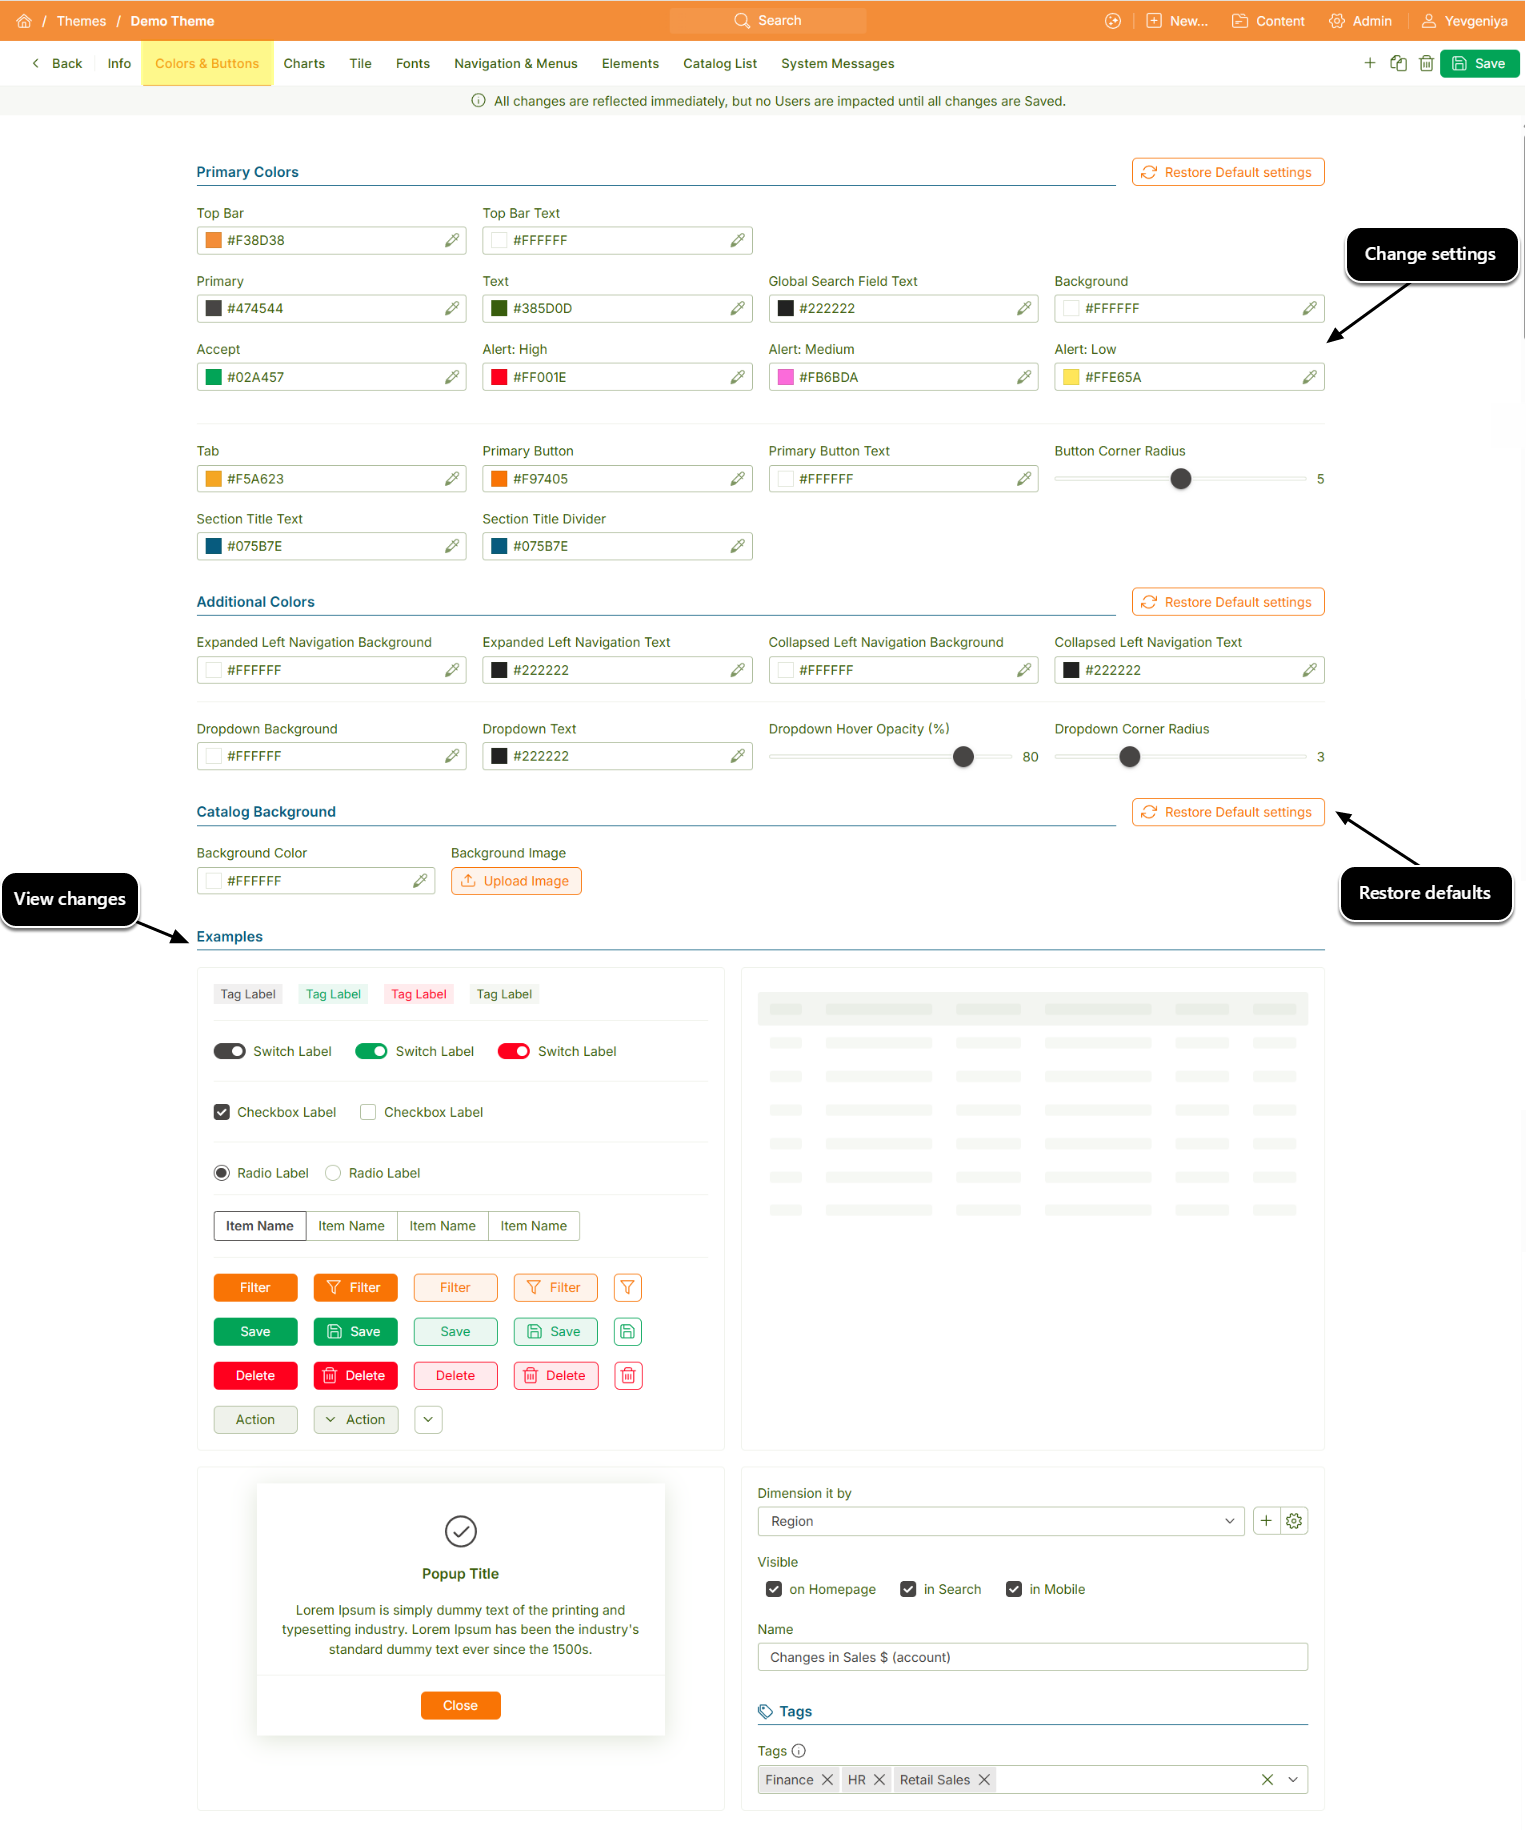
The Colors Tab allows you to:
- Adjust colors of major UI elements, backgrounds, text;
- Change button/drop-down corner radius;
- Adjust drop-down hover opacity;
- See your changes in real-time under Examples before saving.
4. Adjust Charts' Look and Feel
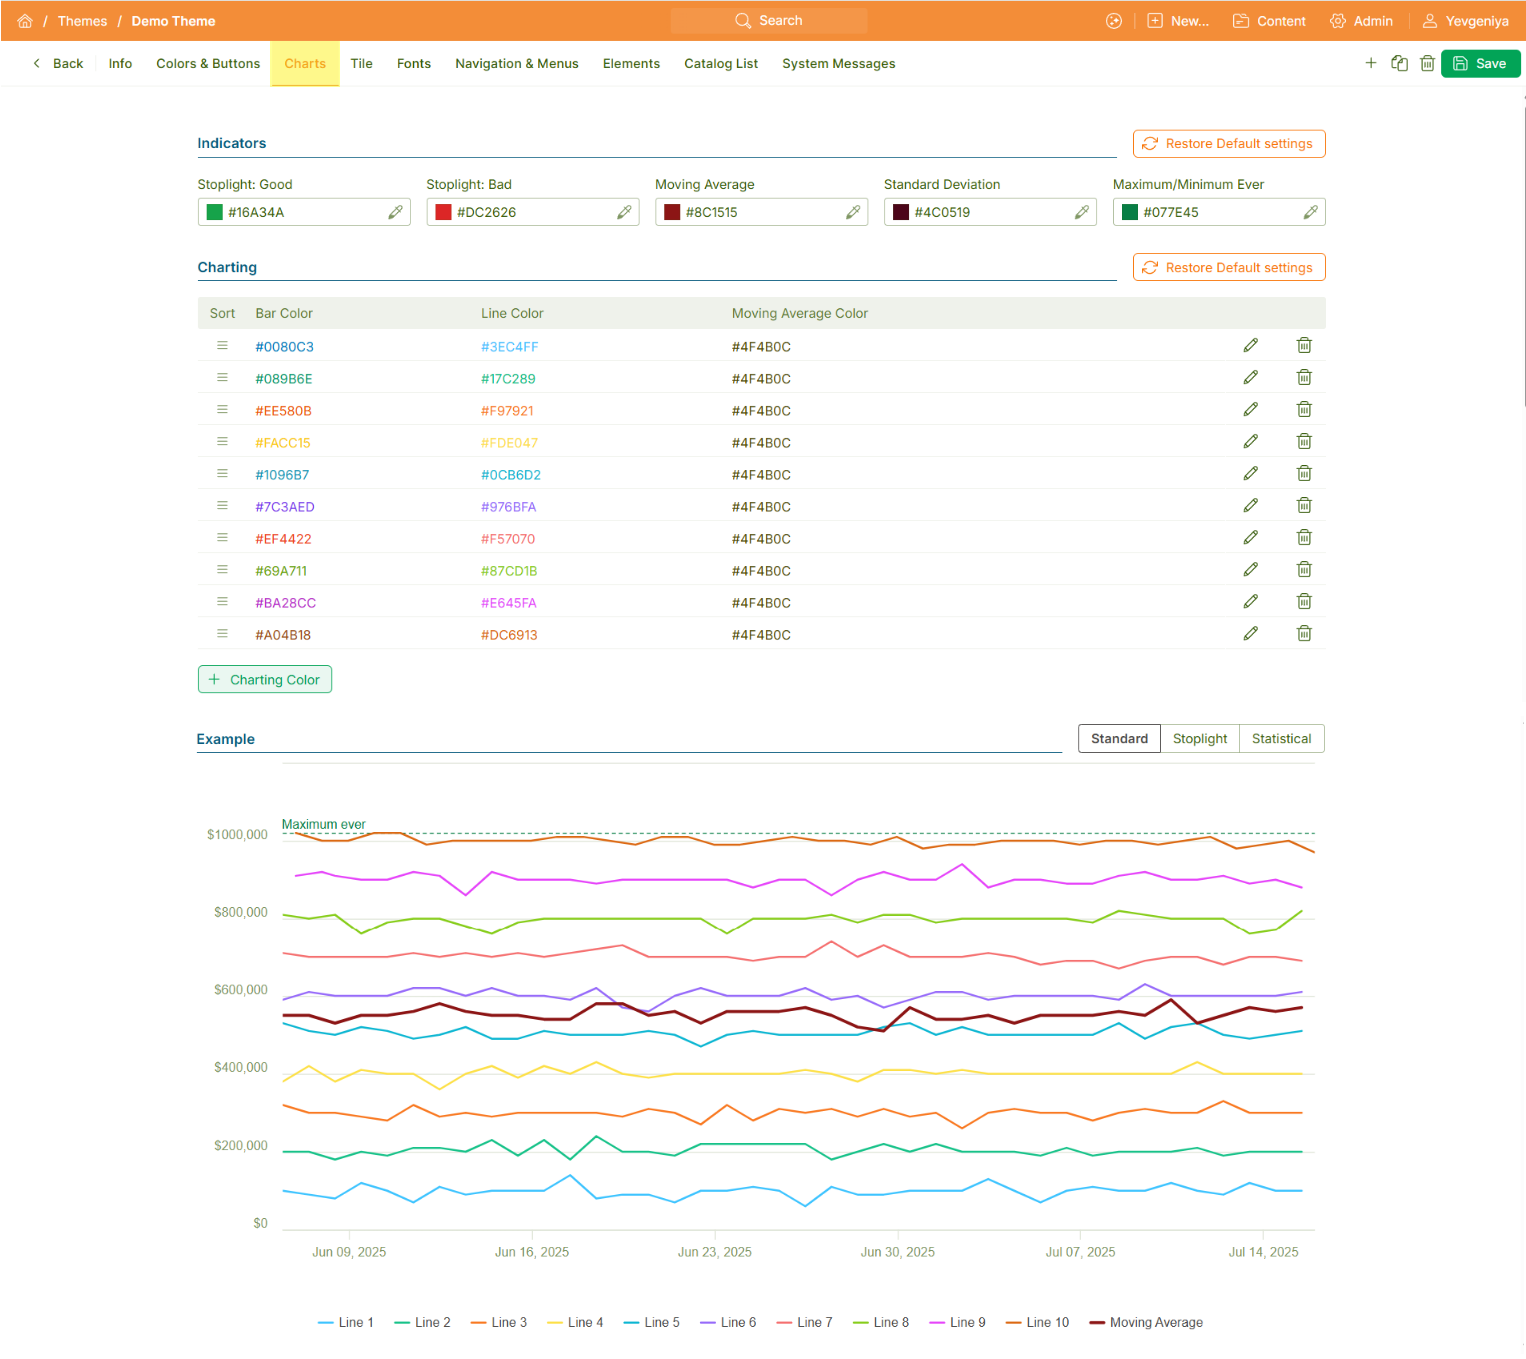
Here you can change colors of key indicators and charts. View changes in real-time in tree views:
- Standard;
- Stoplight;
- Statistical.
5. Modify Tile Shape and Colors
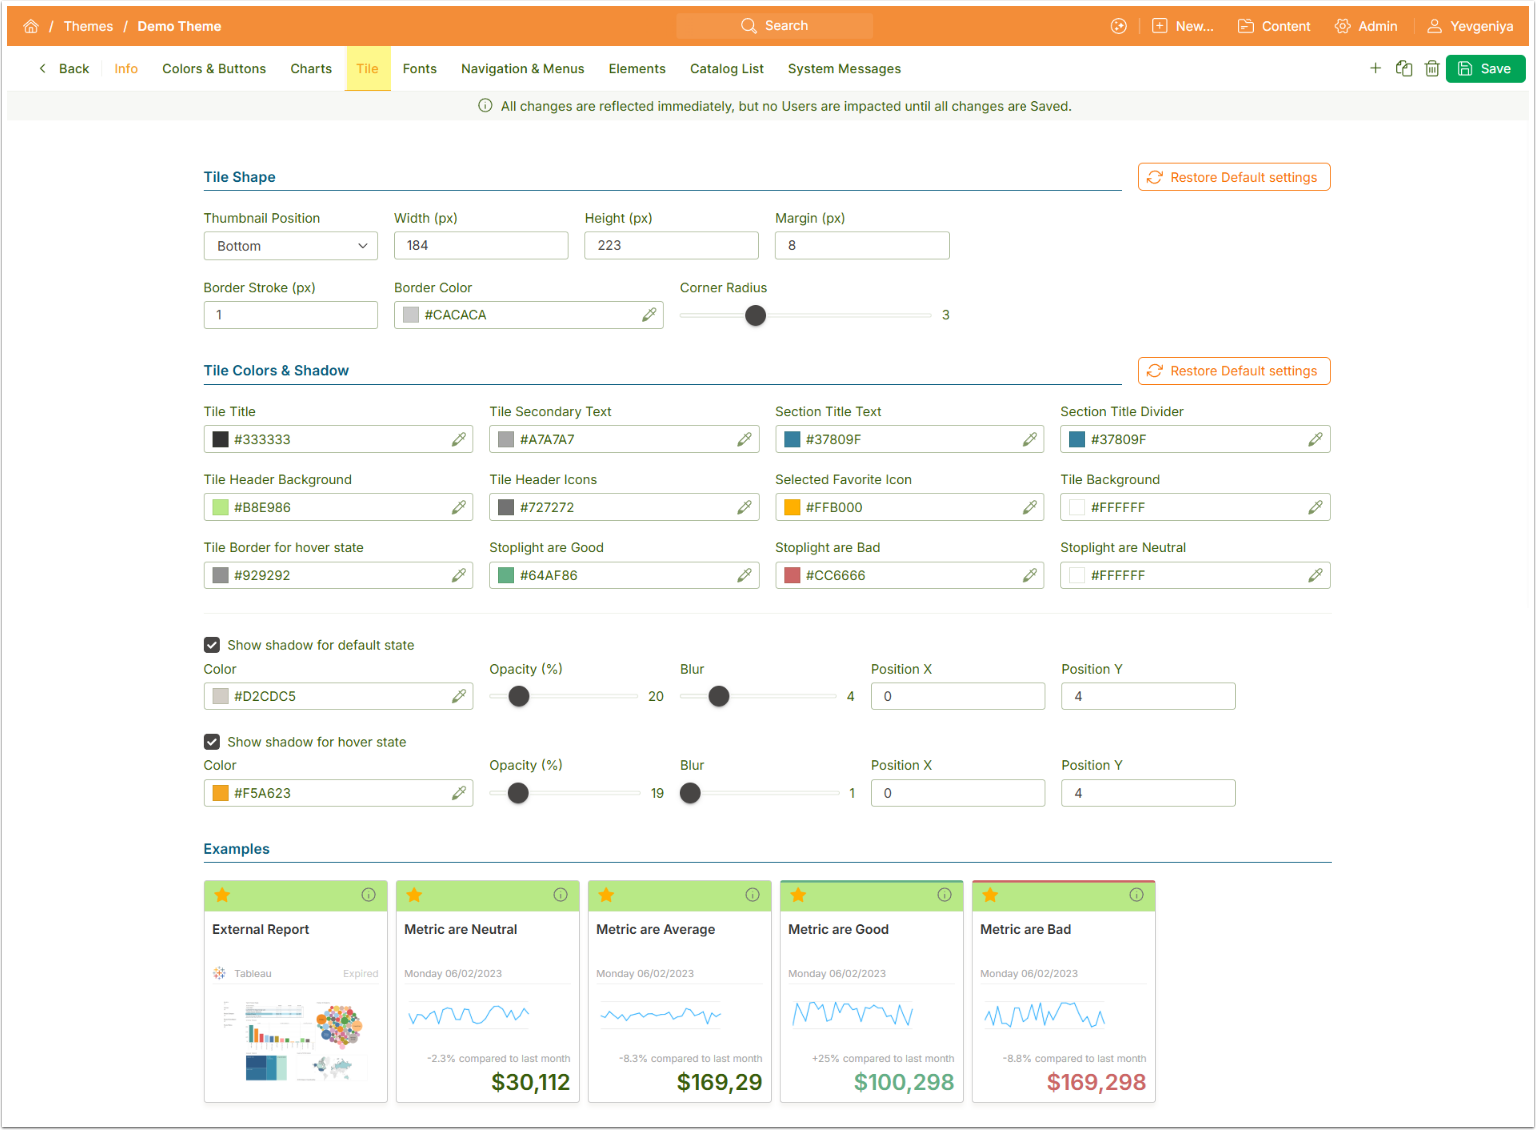
Under the Tile Tab, you can adjust the look of Homepage Tiles.
6. Apply Fonts
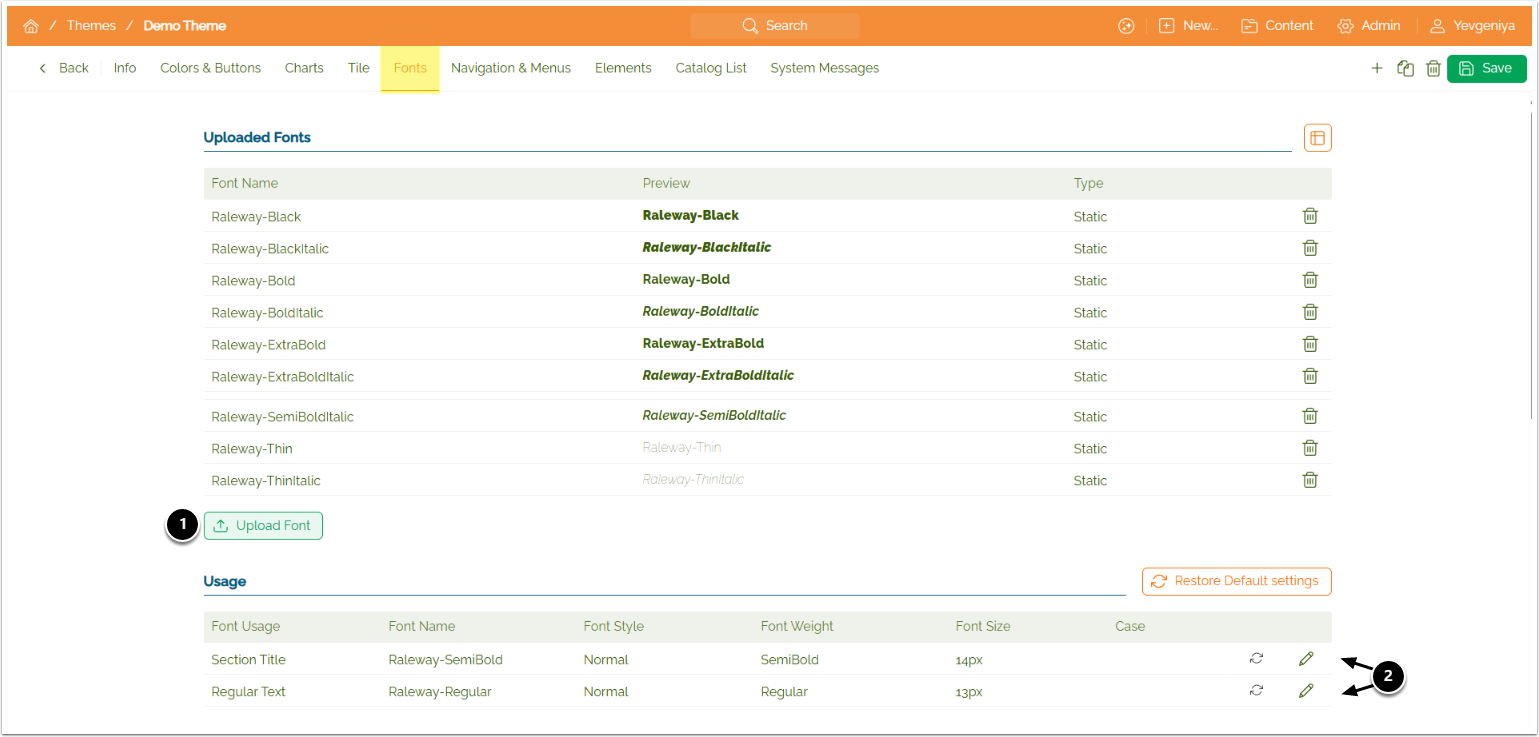
To apply custom system fonts on the Fonts Tab:
- [Upload Font] to upload the custom font file.
- Apply fonts.
7. Manage Navigation and Menus Display
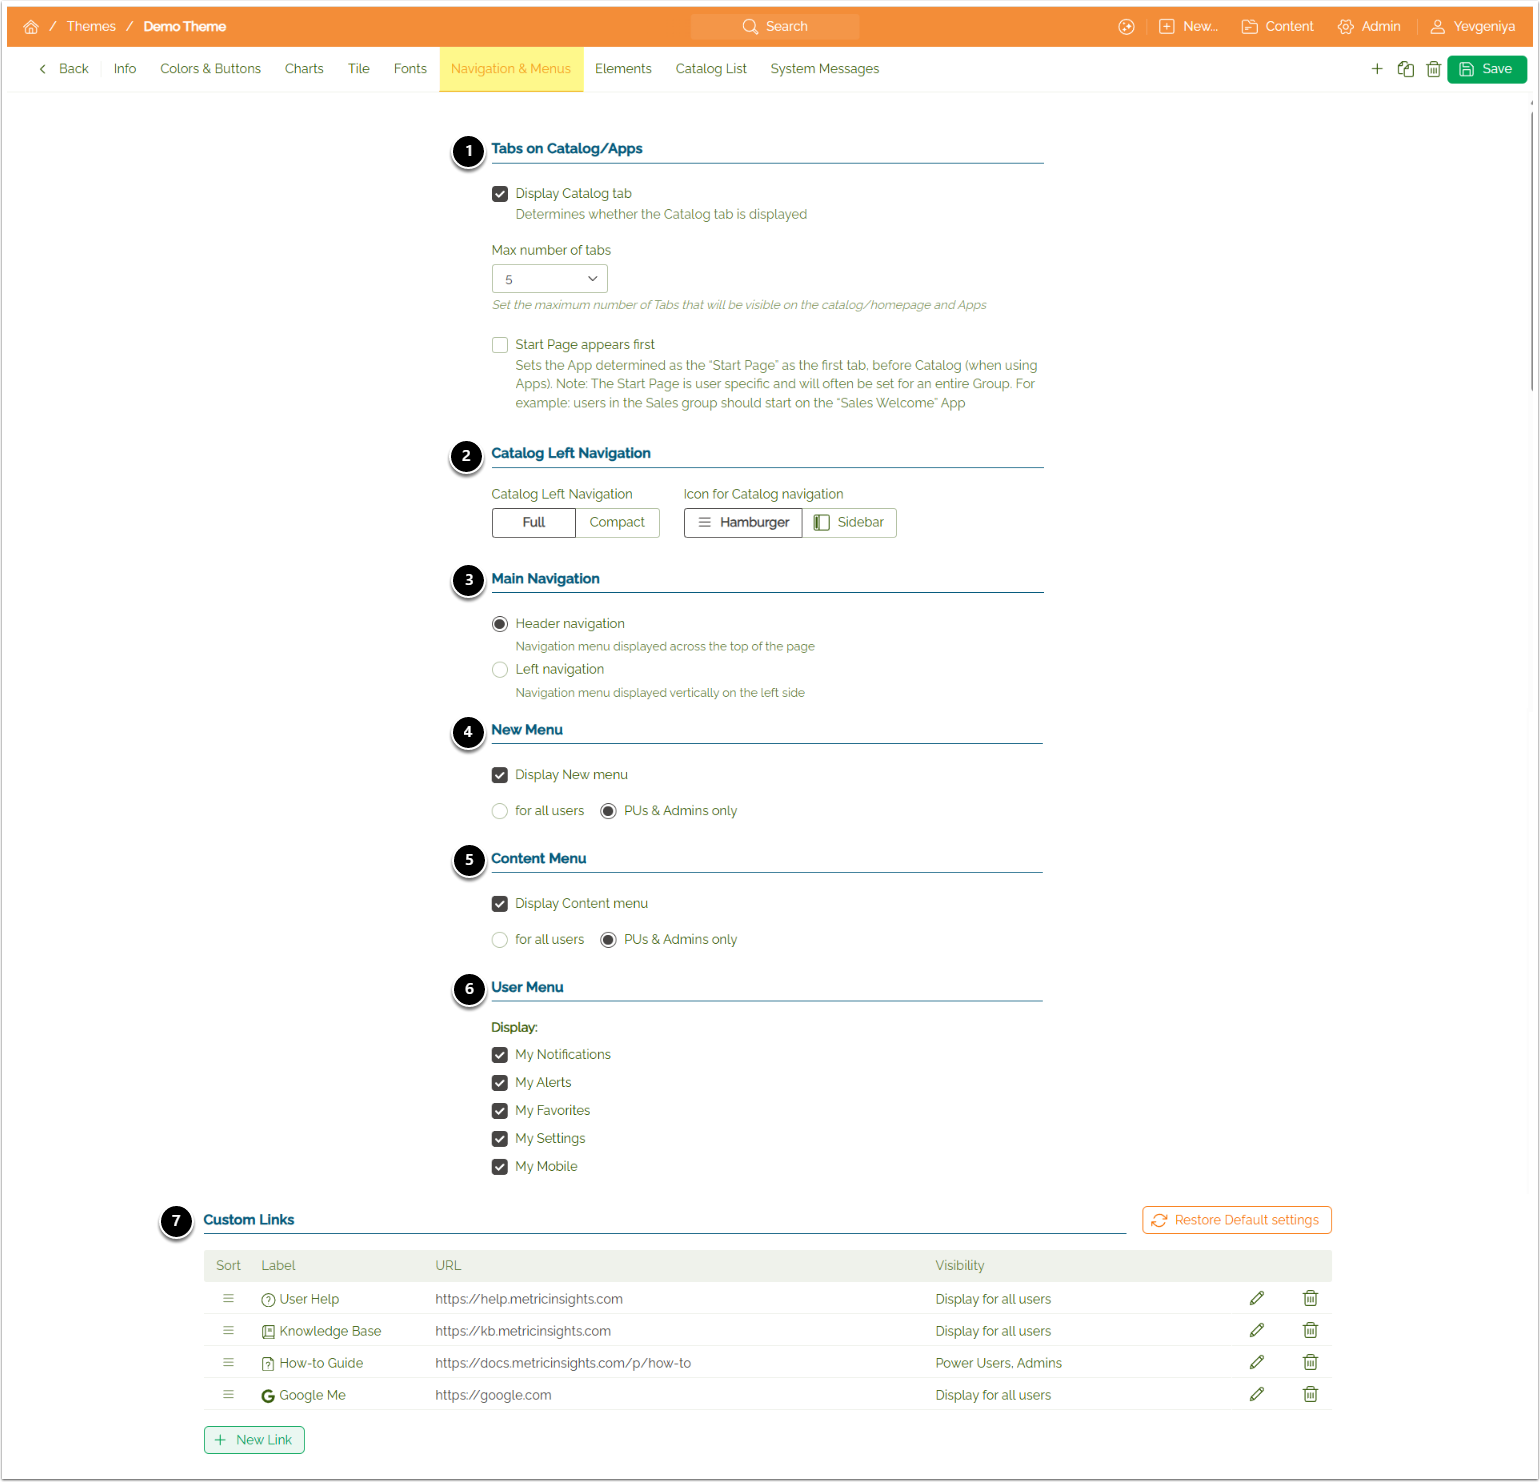
The Tab allows you to configure the display of Catalog, Navigation, and menus.
You can control:
- Tabs on Homepage, including the start page;
- Catalog left navigation look;
- Main navigation style;
- The New menu display and behavior;
- NOTE: This setting is not based on our security model. Only the UI is affected.
- The Content menu display and behavior;
- NOTE: This setting is not based on our security model. Only the UI is affected.
- The user menu items;
- Links to resources that appear on the user menu.
8. Manage Elements Display in Viewers
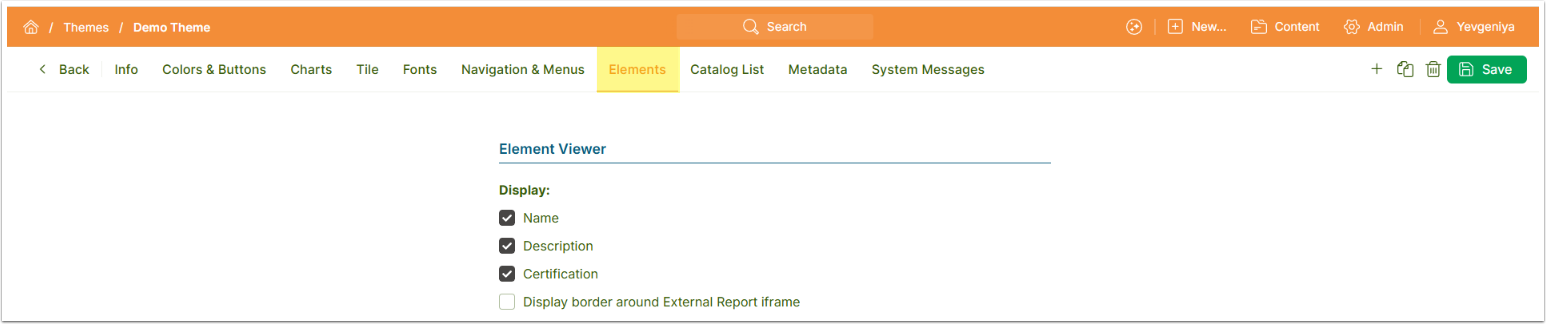
The Elements Tab is intended for controlling the display of External Reports in Viewer, which is helpful for embedding.
You can choose to disable the display of:
- Name;
- Description;
- Certification;
- External Report border in iframe.
9. Change Catalog View
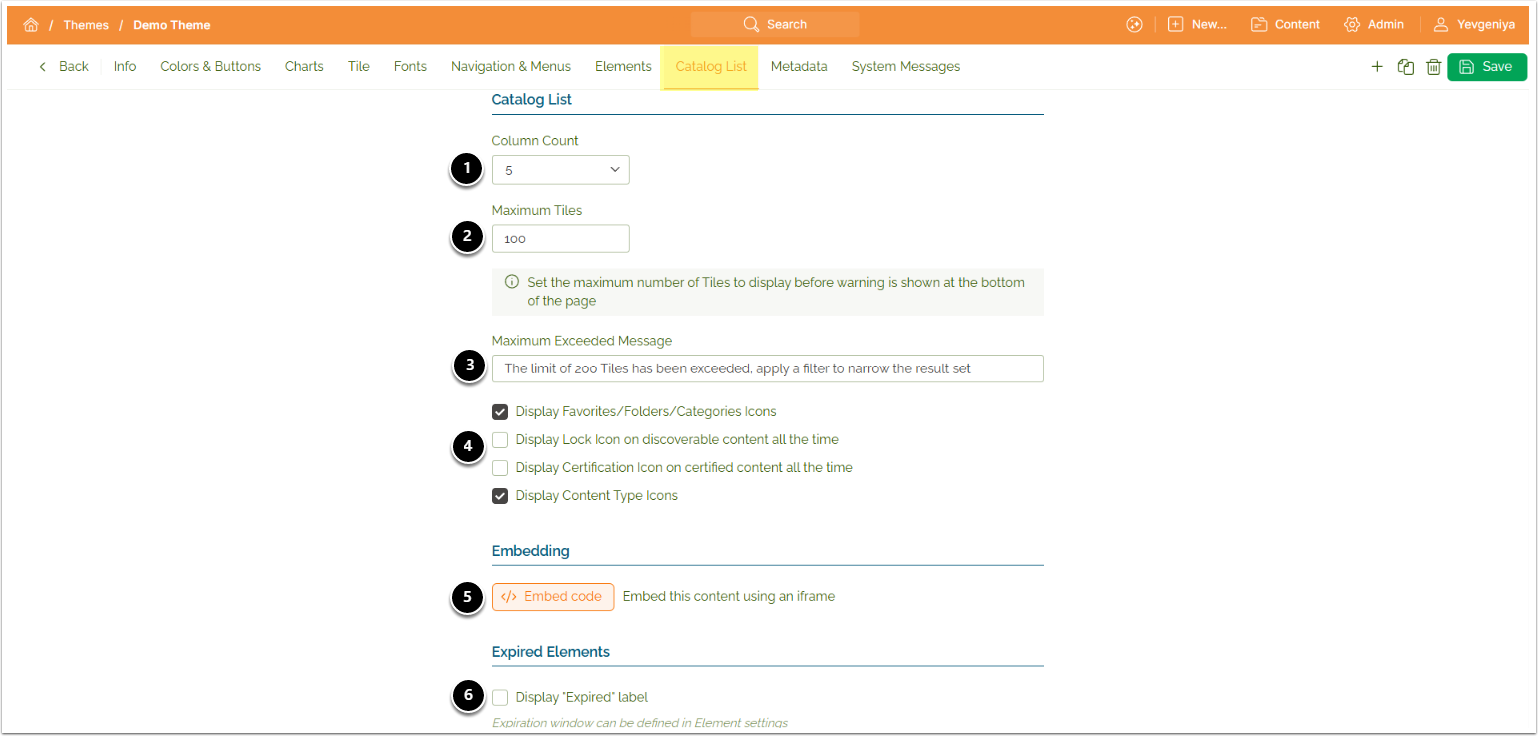
This tab controls the look of Homepage in List View 🈪:
- Set the number of list columns on Homepage;
- Set the max number of Tiles to display;
- Customize the warning message to display when the max number of Tiles exceeds the value;
- Customize the display of Homepage icons;
- Get Embed codes to embed List view. Additional parameters are:
- hide_filter_panel
- hide_hierarchy
- hide_announcements
- Hide/Show the "Expired" label.
10. [7.2.0] Customize Tile Metadata Display
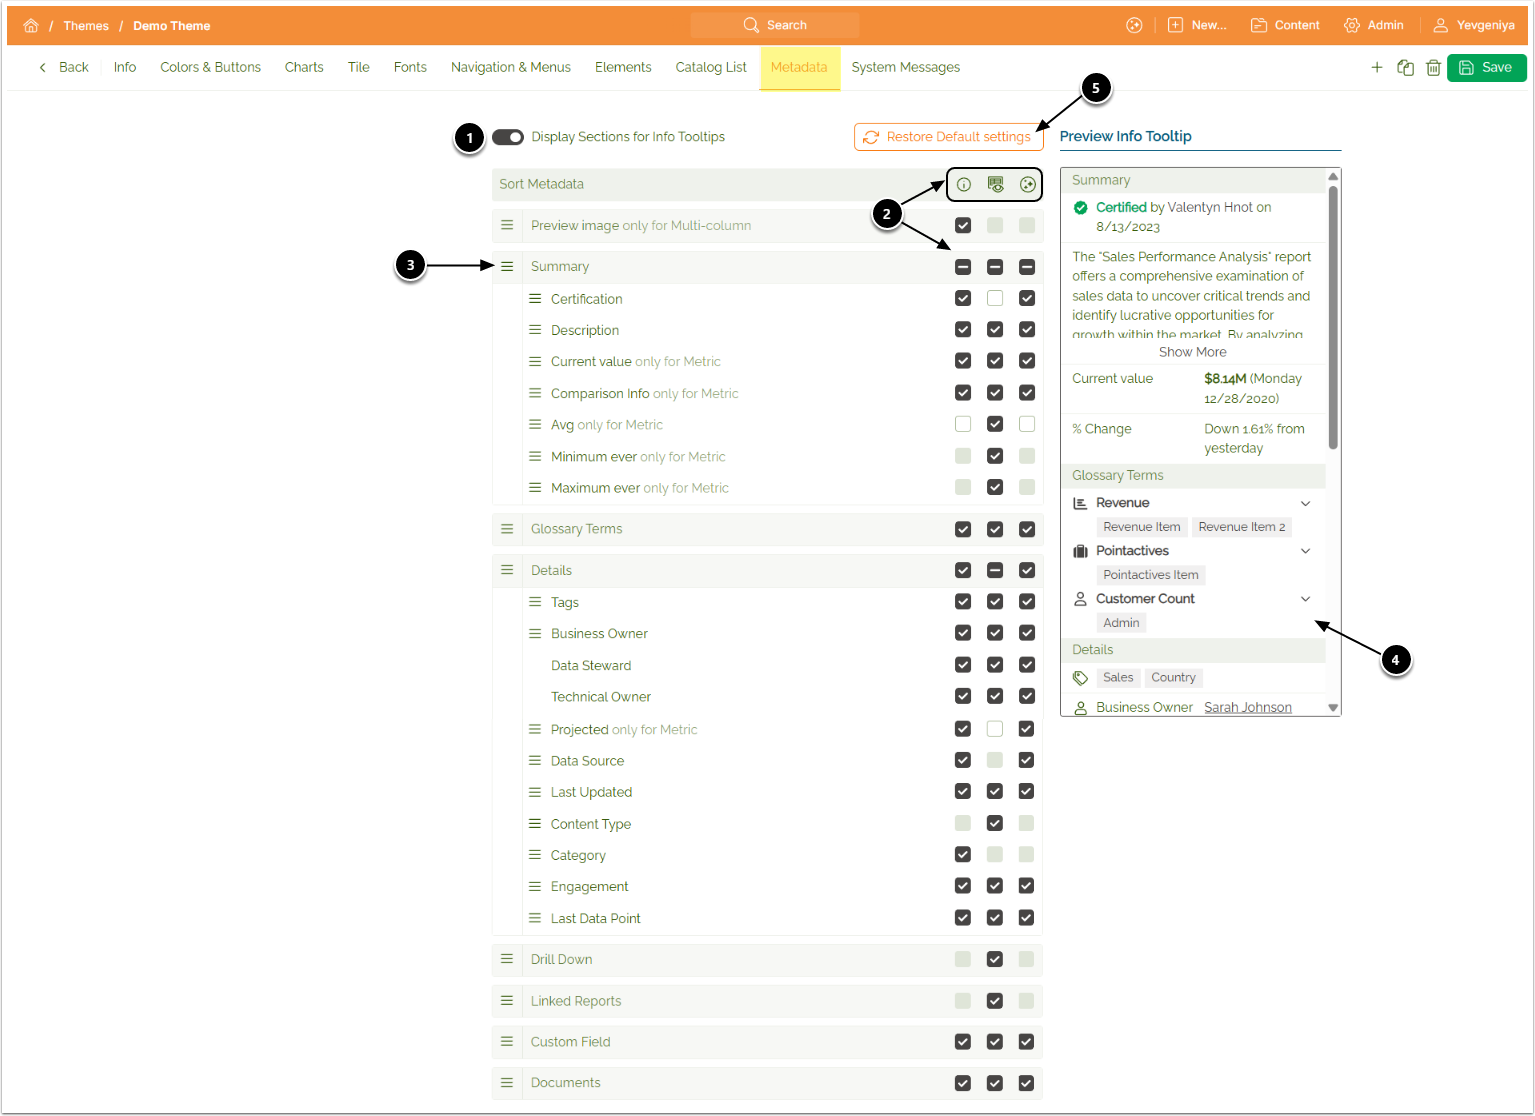
This tab allows you to configure which metadata fields are shown or hidden on Catalog Tiles and related UI components. You can:
- Control if you want display sections, such as Glossary Terms or Details, on Tile info tooltips;
- Hide/show specific metadata for info tooltips, Element Viewers and Previews, and info tooltips in Concierge;
- Reorder sections;
- Preview the example tooltip display;
- Restore default settings.
11. Provide Customized System Messages
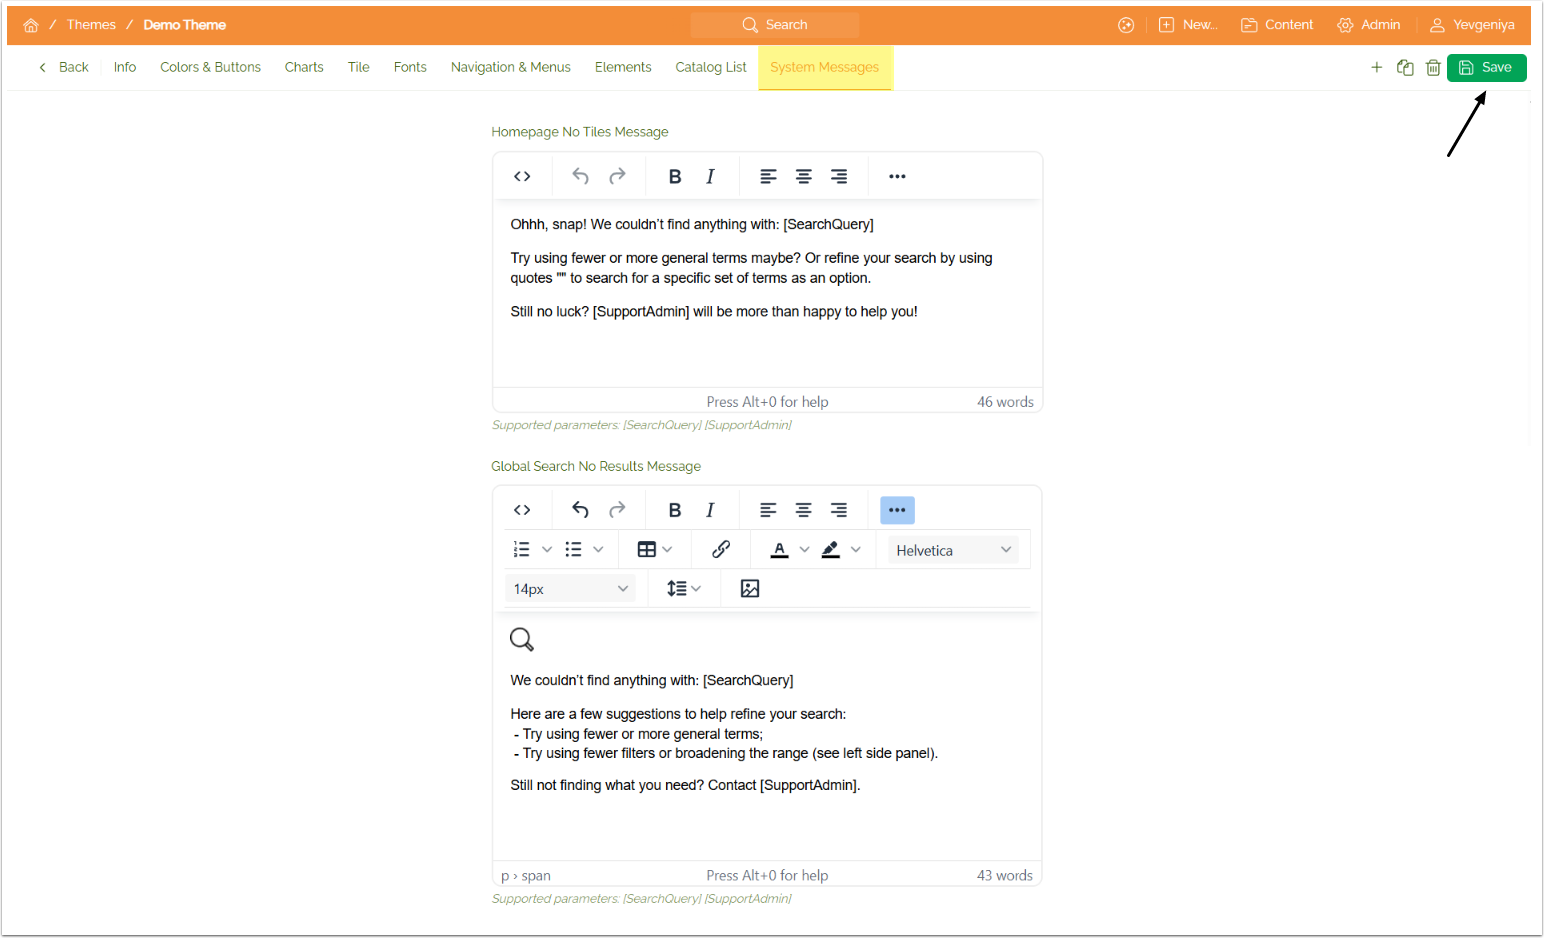
The System Messages Tab allows you to customize the default "No Tiles"(Homepage) and "No Results"(Global Search) messages.
NOTE: Support Admin is a user with the "Receive Access Notification" setting enabled in their User Editor.
Save you changes before leaving the Editor.
12. Apply Theme via Brand
Access Admin > System > Branding > Brand Name Link
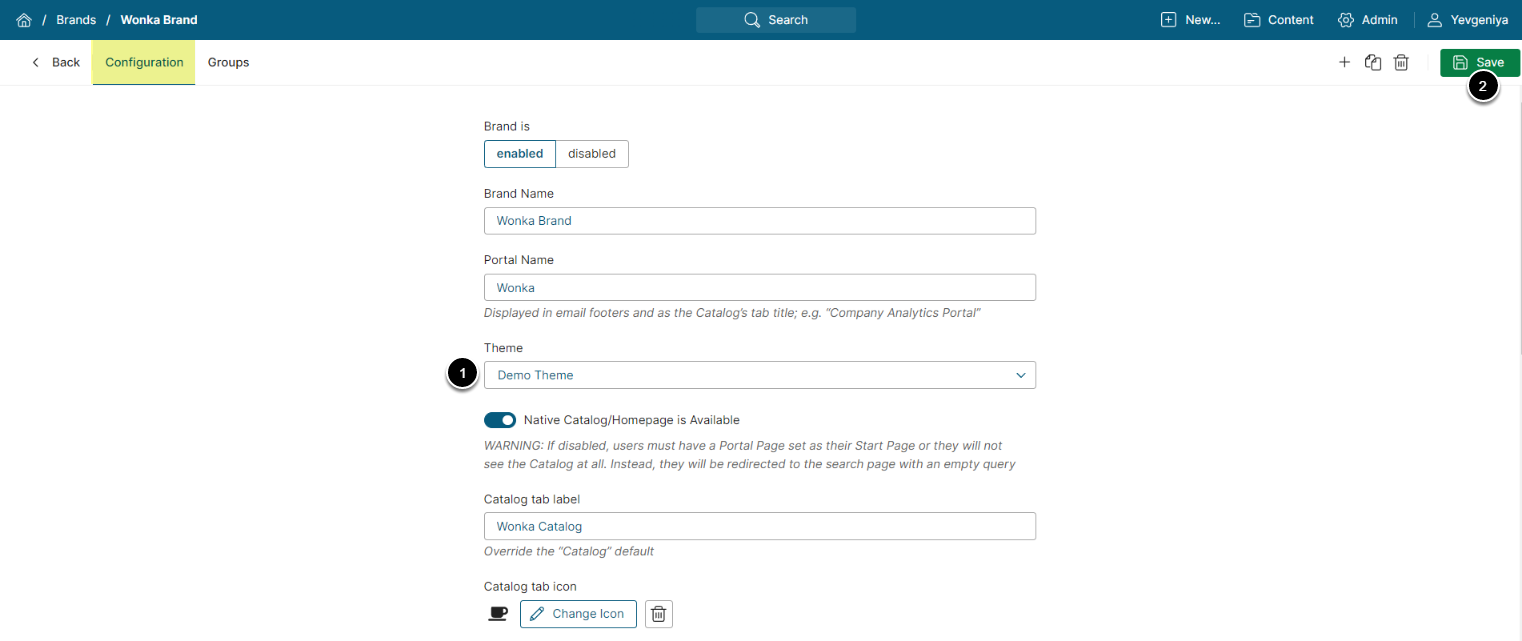
- To apply the theme, set it under the Brand of your choice.
- [Save]
NOTE: You cannot delete a Theme that is in active use by a Brand. Assign a different Theme to the the Brand if you would like to delete it.