This article outlines the prerequisites for connecting to ServiceNow. Before you begin, make sure you have the following:
- OAuth connections require a client ID and client secret issued by your provider.
- All connection types require specific permissions to be enabled — the exact scopes depend on your integration and are detailed in the sections below.
1. Enabling OAuth
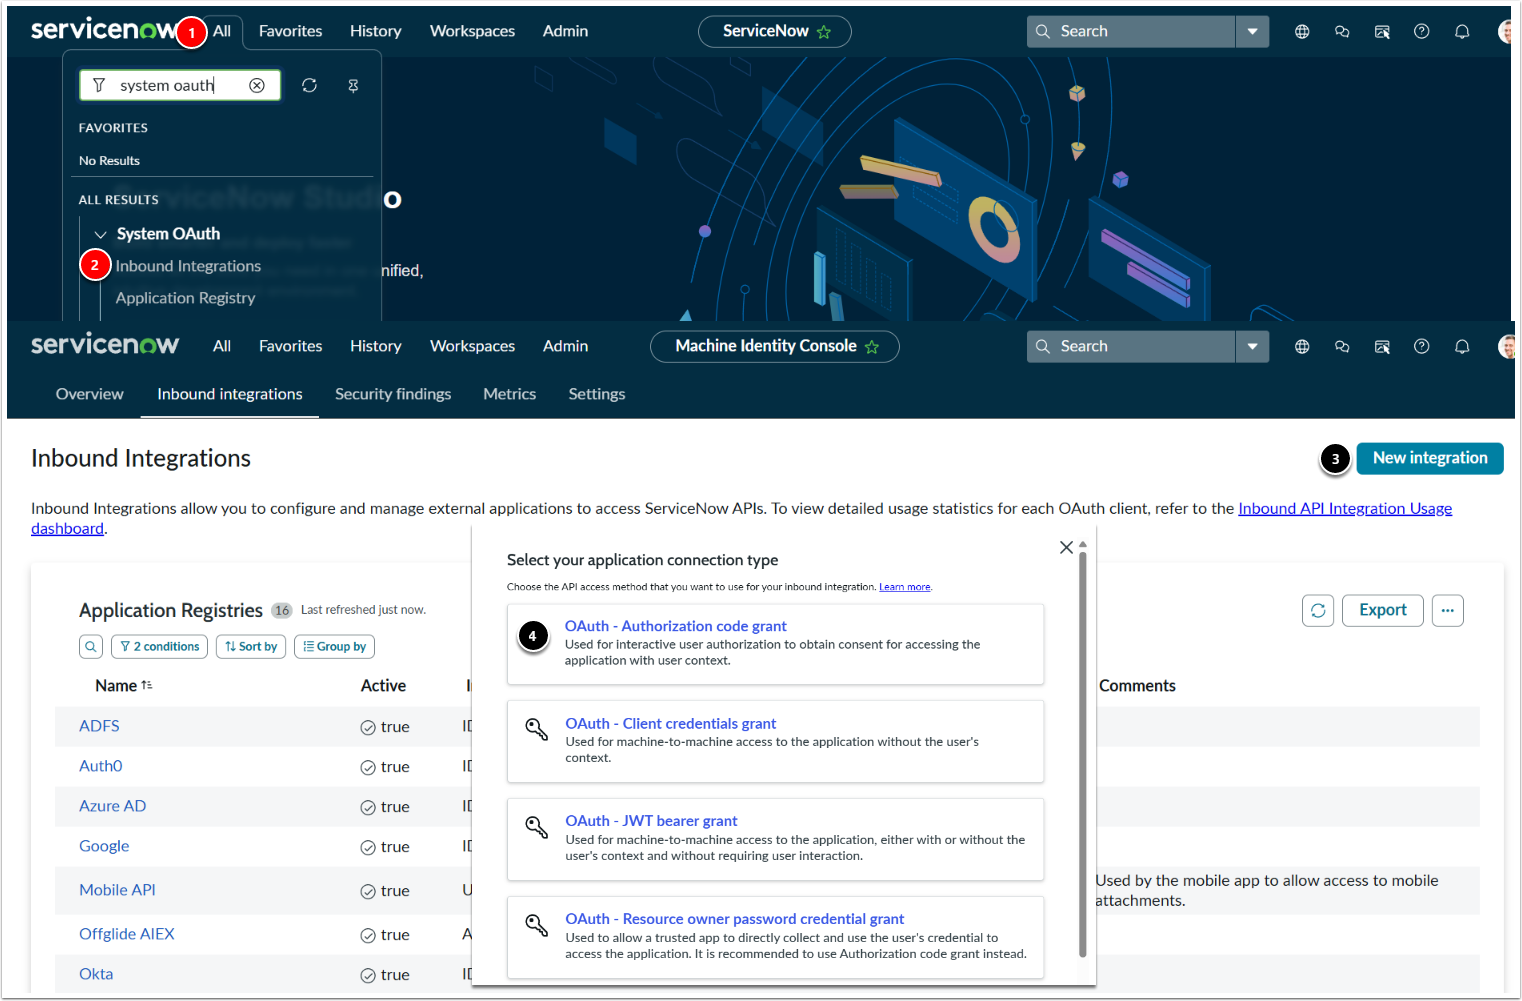
- System OAuth: In the navigation bar, search for system oauth.
- Select Inbound Integrations.
- [New integration]
- Select OAuth - Authorization code grant.
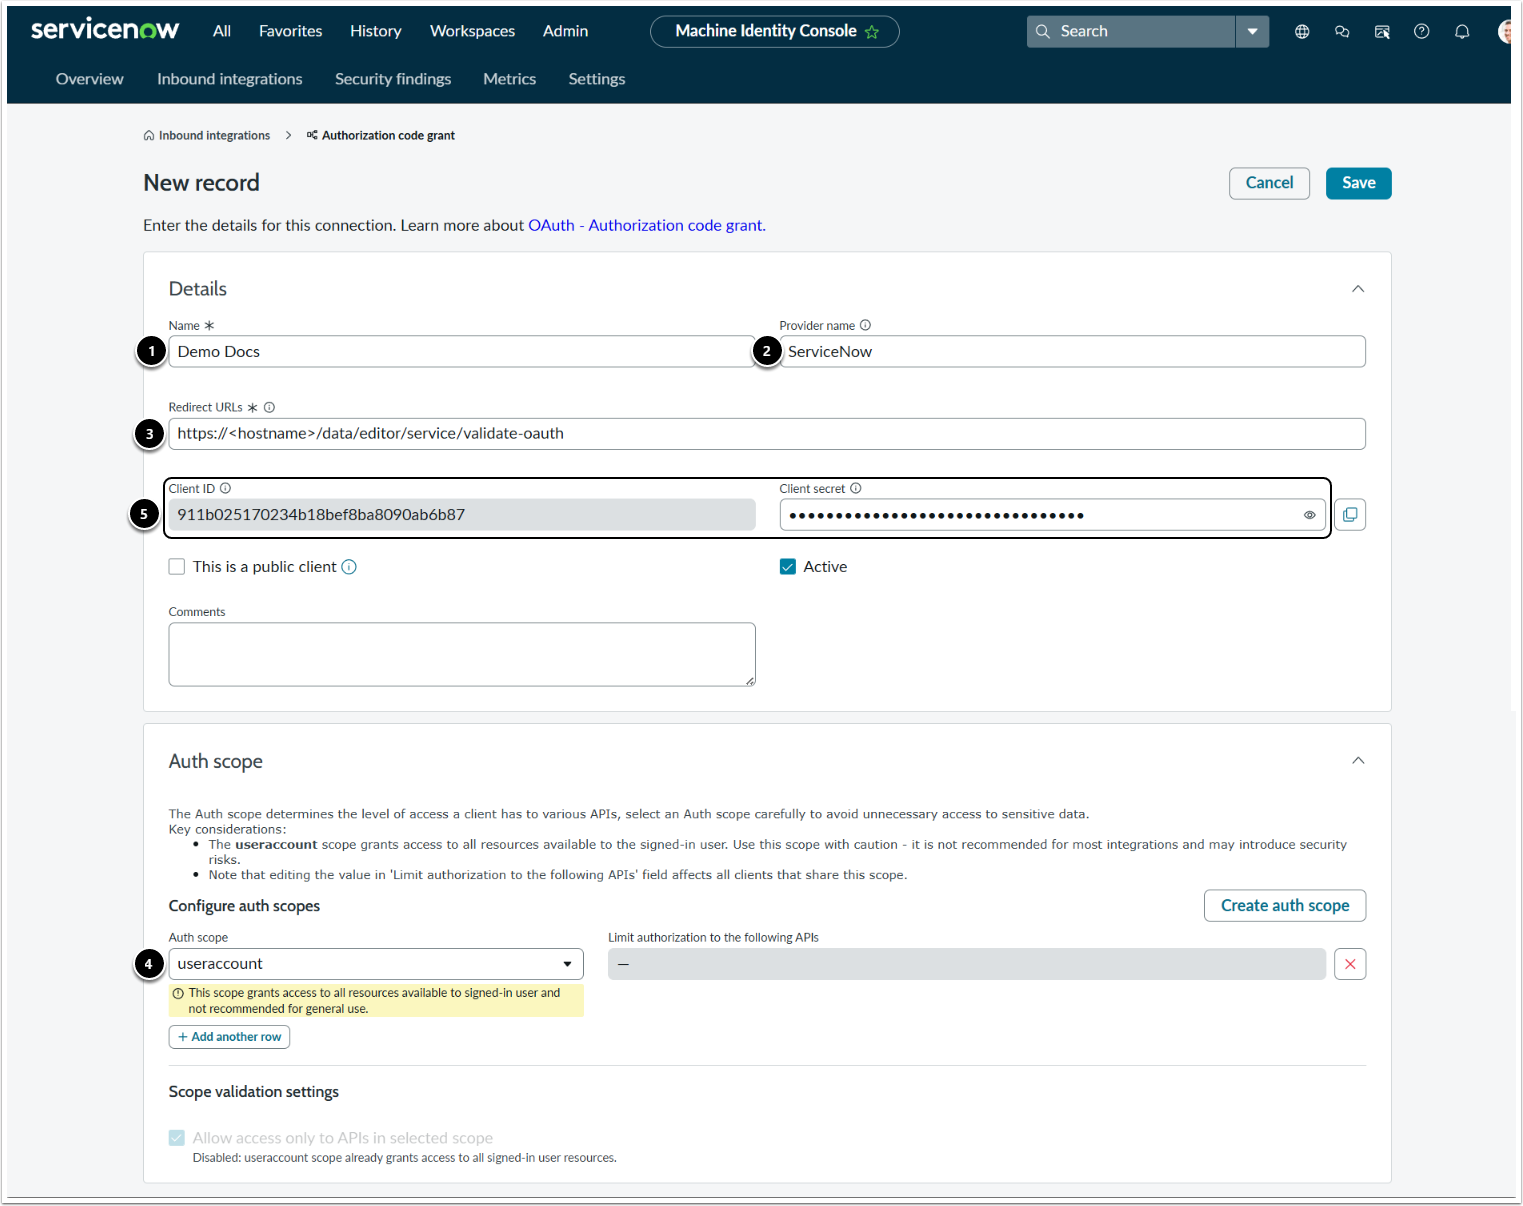
- Name: Enter a name for the connection.
- Provider name: Select the provider name.
- Redirect URLs: Enter your redirect URL in the following format: https://<hostname>/data/editor/service/validate-oauth.
- Auth scope: Select the auth scope.
- Copy Client ID and Client secret.
- [Save]
2. Enabling Permissions
Our recommendation is to use a Service Account to connect to the ServiceNow Rest API. The Service Account requires the following permissions in ServiceNow in order to integrate properly with Metric Insights:
- Required Standard User Roles:
- rest_api_explorer
- web_service_admin
- itil
- personalize_dictionary
- Required Custom User Role:
- u_just_db_viewer
- The u_just_db_viewer role must be added to the following ACL tables (see image below):
sys_upgrade_historysys_db_view
- The u_just_db_viewer role must be added to the following ACL tables (see image below):
- u_just_db_viewer
NOTE: Through the API, sys_upgrade_history is queried to get the ServiceNow version, and sys_db_view to get information about views. Both are required to pull data (if that is a use-case).
2.1. How to Find User Roles
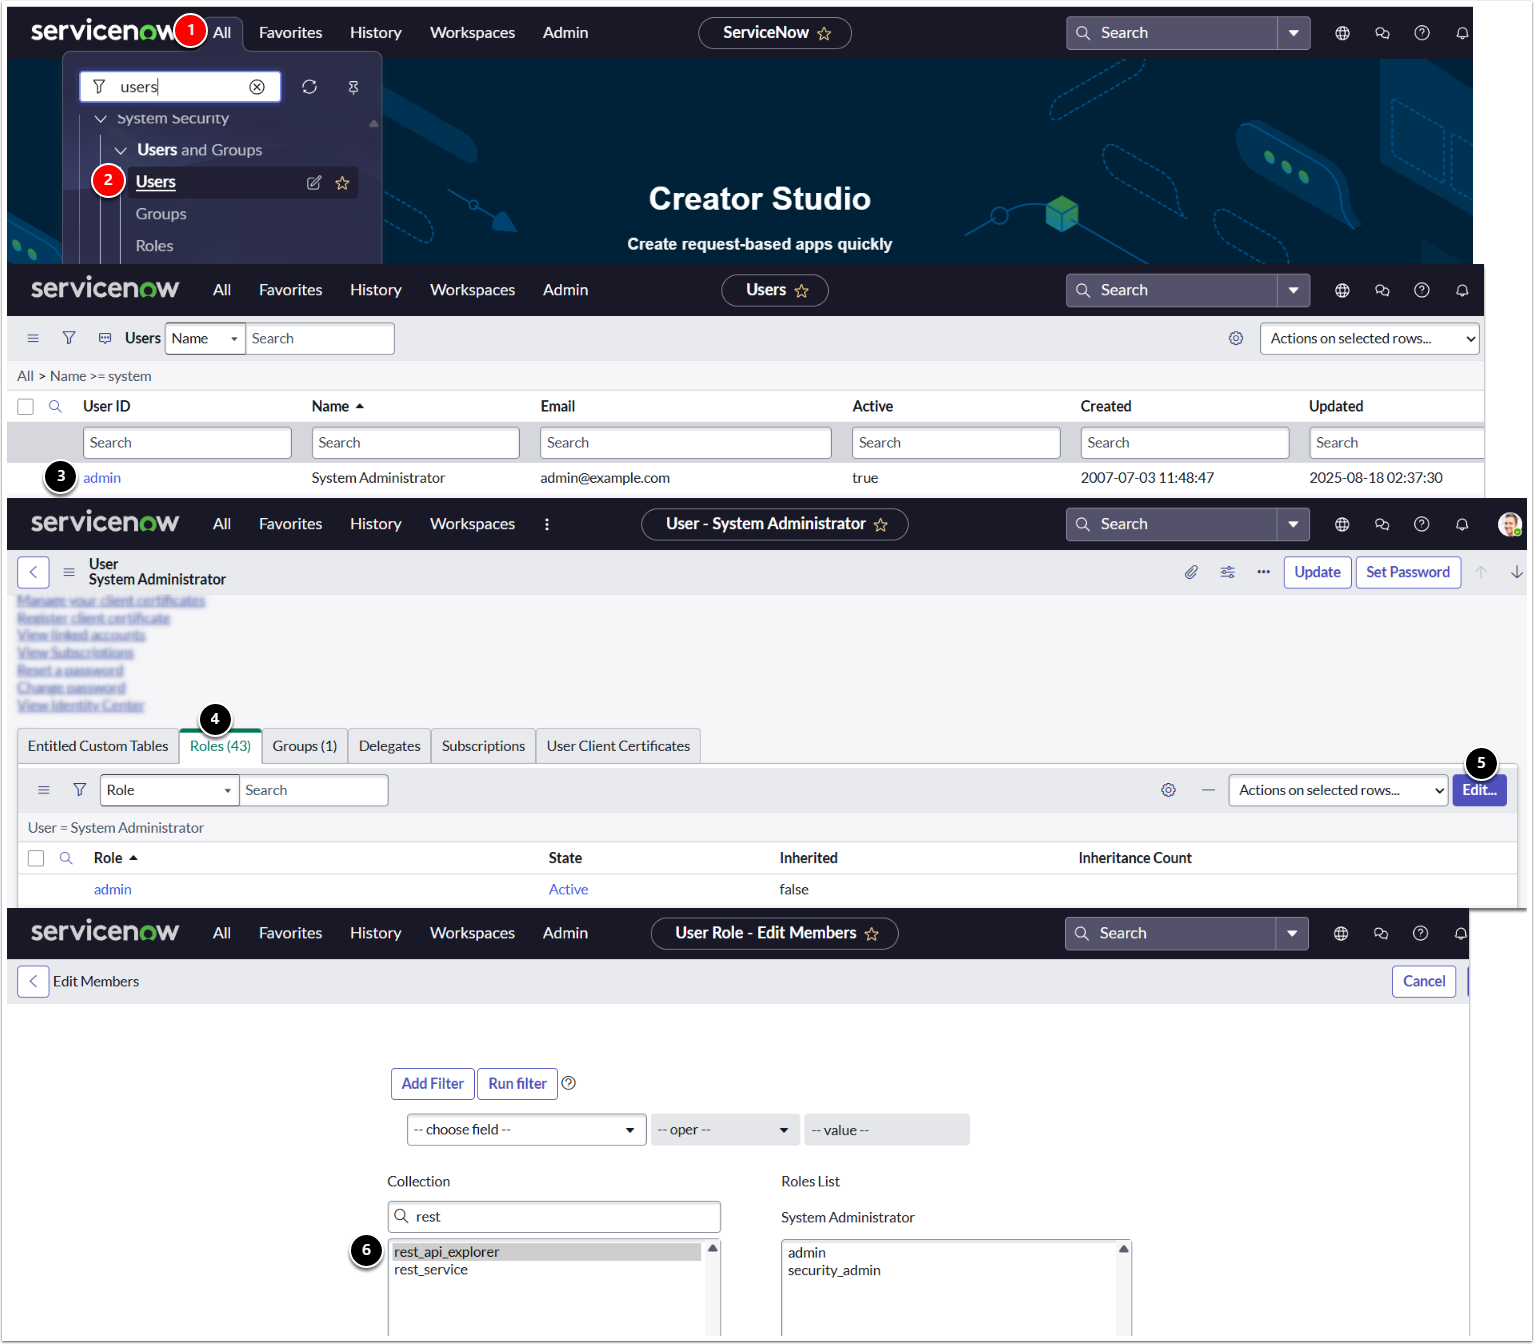
- System Security: In the navigation bar, search for users.
- Select System Security > Users and Groups > Users.
- Select the user.
- Roles: Open the Roles tab.
- Click [Edit...]
- Collection: Search for the required Roles.
2.2. How to Find Tables
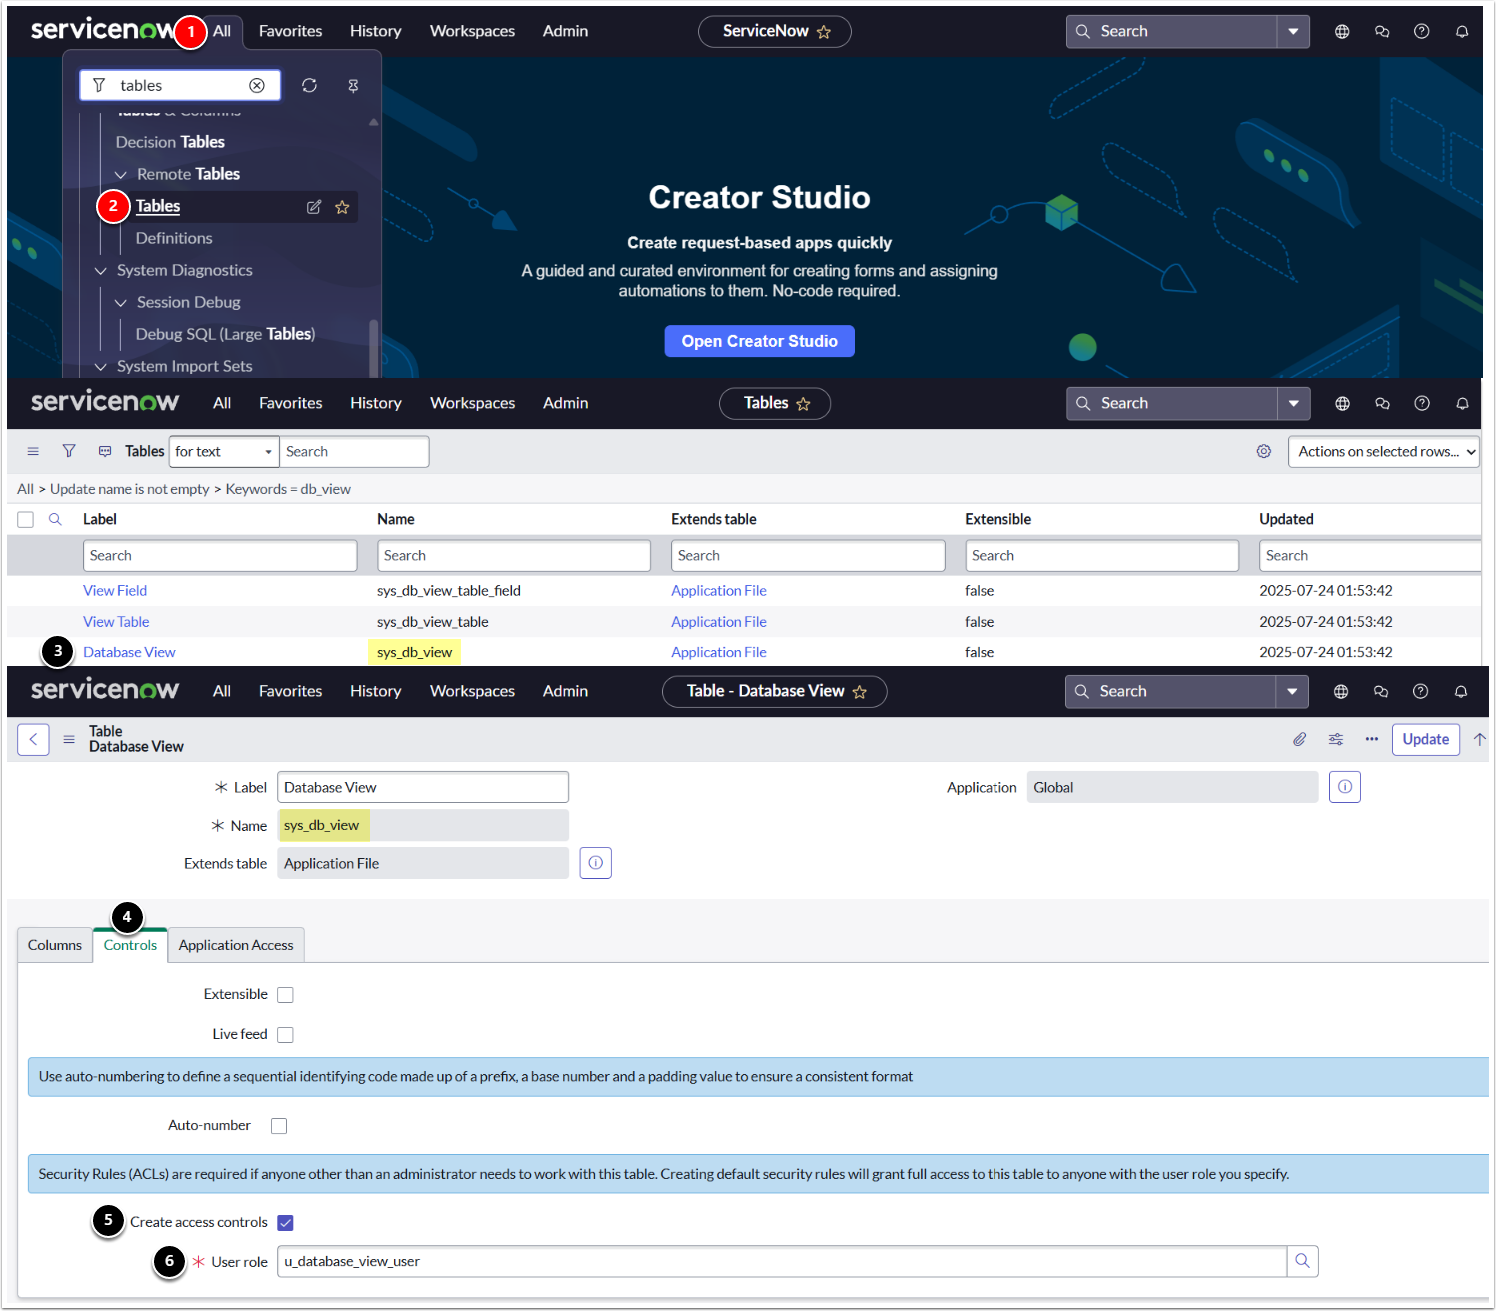
- Tables: In the navigation bar, search for tables.
- Select Tables.
- Find
sys_db_viewandsys_upgrade_history. - Controls: Open the Controls tab.
- Create access controls: Enable the checkbox.
- User role: Choose
u_database_view_userfor both tables.