Portal Pages have been renamed to Apps in 7.1.0.
Beginning v6.3.5 you can define Custom Domain for Apps. The example described in this article implies that Okta is used for user authentication, however, the same configuration can be applied with other single sign-on providers.
NOTE: Configuration can only be performed by a user designated as a System Admin.
The process comprises the following steps:
1. Configure Custom Domain in SSO Provider Settings
1.1. Access SAML Settings
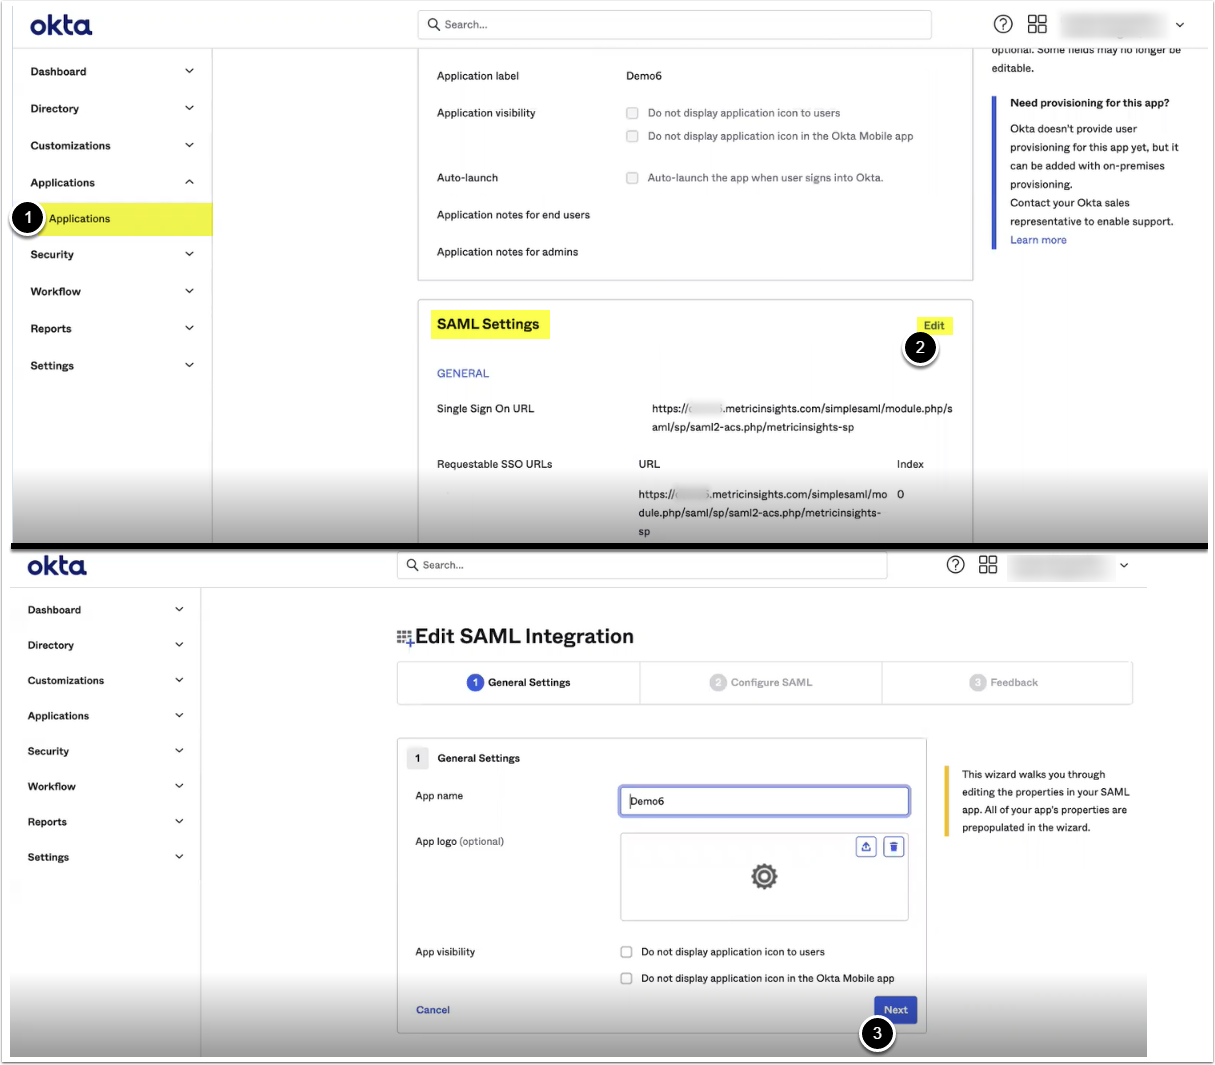
- Access Applications
- Under the SAML Settings section click [Edit]
- [Next]
1.2. Configure Advanced Settings
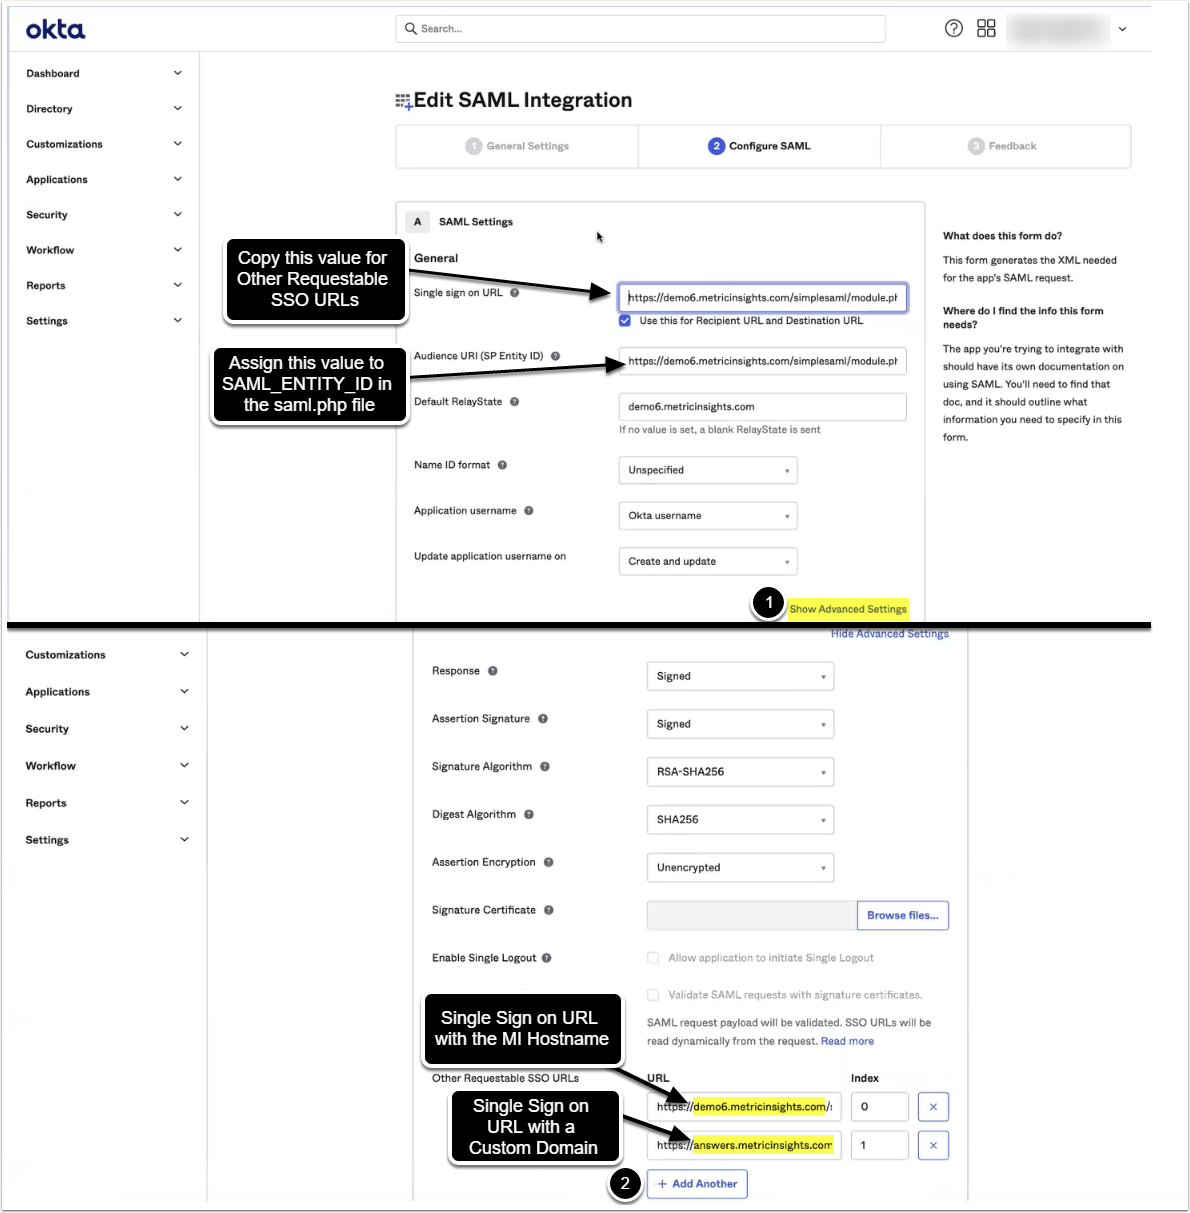
- [Show advanced settings]
-
Other Requestable SSO URLs: Click [+ Add Another] to add the following two values:
-
Entry 1:
- URL: Copy the value from the Single sign on URL;
- Index: 0
-
Entry 2:
- URL: Copy the value from the Single sign on URL and replace the hostname with the Custom App URL
- Index: 1
-
Entry 1:
2. Add DNS Name to Certificate
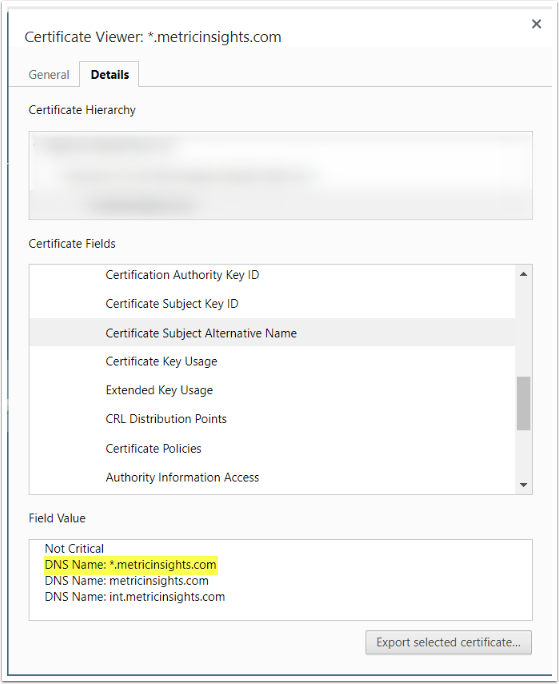
Alternatively, if your MI application is deployed on AWS, you can assign SSL certificate with Network Load Balancer.
3. Modify saml.php File
Access the web container
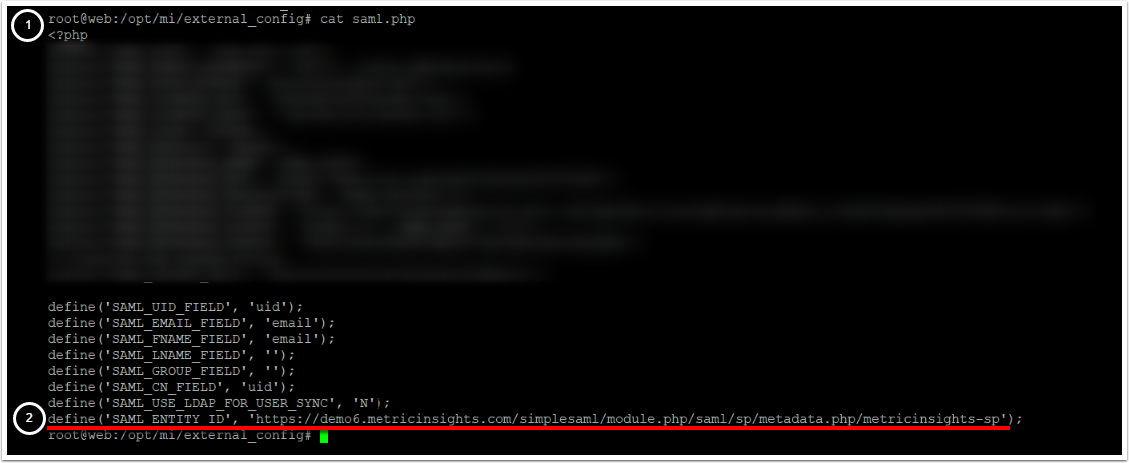
- Access
/opt/mi/external_config/saml.php - Assign the value of the Audience URI (SP Entity ID) to
SAML_ENTITY_ID:- See the screenshot from Configure Advanced Settings for details
- Example:
define('SAML_ENTITY_ID', 'https://<MI hostname>/simplesaml/module.php/saml/sp/metadata.php/metricinsights-sp');- Replace
<MI hostname>with the hostname of your Metric Insights application
- Replace
4. Configure Custom Domain for App
- For MI v7.1.0+: Access Content > Apps > Select an App > Advanced tab
- For MI versions prior to 7.1.0: Access Content > Portal Pages > Select a Portal Page > Advanced tab

- Enter a Custom Domain for your App that was previously configured in SSO provider settings and have been added to the certificate
- The App can be accessed by its Custom Domain