Portal Pages have been renamed to Apps in 7.1.0.
Portal Page Developer Helper allows you to write code for Portal Pages in any IDE and then upload it to your Metric Insights application as Portal Page asset or sync from a repository. Also you can launch your Portal Page on localhost before applying any changes to the actual Portal Page's code.
PREREQUISITE:
- Install Node.js
Table of contents:
- Create Portal Page
- Create package.json File in Portal Page Directory
- Install Portal Page Developer Helper Package
- Open Portal Page Directory in IDE
- Create pp-dev.config.js File
- Modify next.config.js File
- Configure package.json File
- Create Content for Portal Page
- Open Portal Page Locally
- Log In to Metric Insights and View Portal Page
- Build Application and Upload Changes to Portal Page
1. Create Portal Page
Access Content > Portal Pages
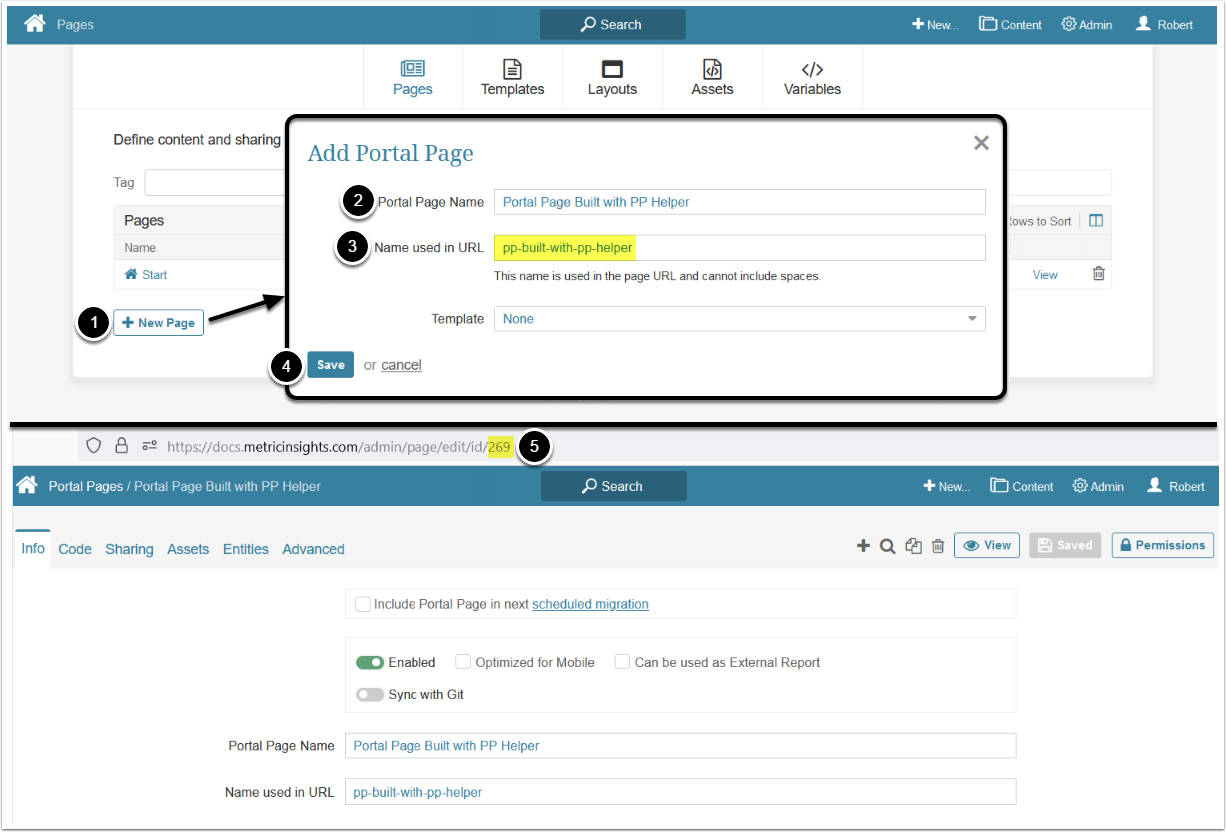
- [+New Page]
- Enter a Portal Page Name
- Enter a Name used in URL and note it down, it will be needed later for integration configuration
- Note: Letters, numbers, dashes and underscores are the only supported characters for Portal Pages' URL names
- [Save], this will open the created Portal Page
- Copy and note down the Portal Page's ID from the URL, this value will also be needed for further configuration
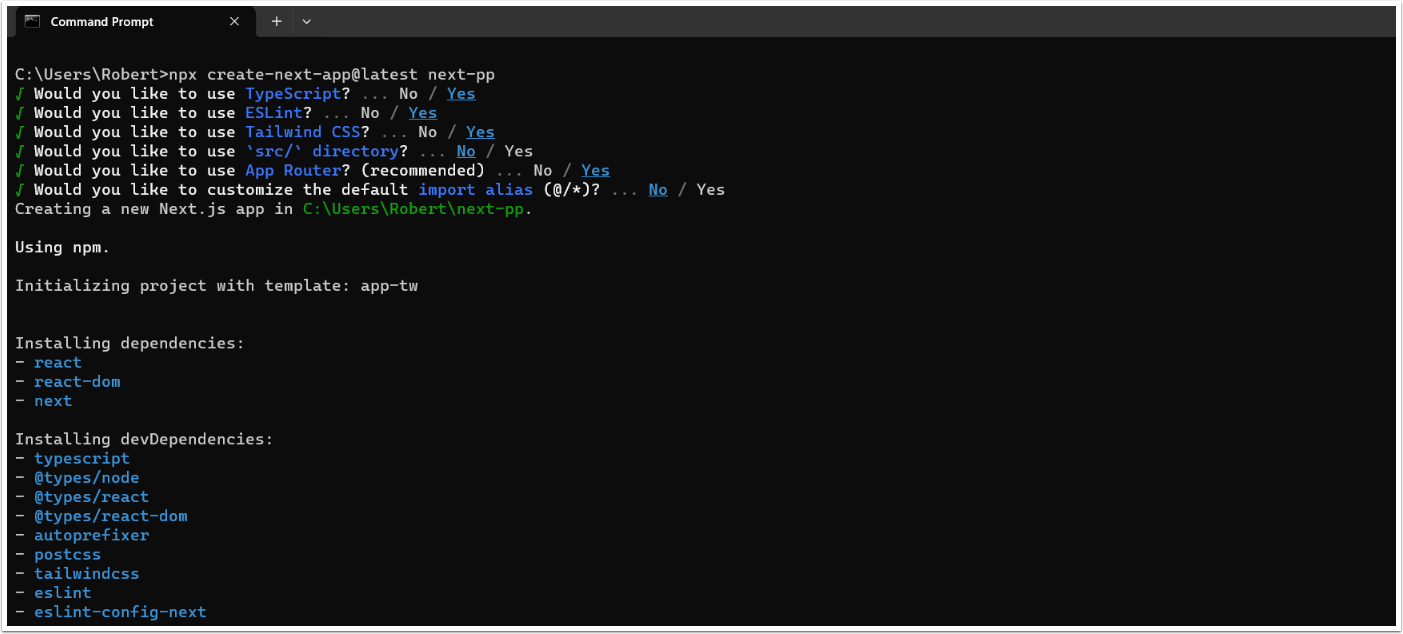
2. Create package.json File in Portal Page Directory
NOTE: Portal Page Developer Helper supports Next.js up to version 13.
If you already have a directory with a Next.js project, proceed to the Step 3: the installation of the Portal Page Developer Helper package.
Run npx create-next-app@latest <Project Name> from the local Portal Page directory replacing <Project Name> with the name of your project and proceed entering the needed data to create a package.json file.
3. Install Portal Page Developer Helper Package
Run npm i @metricinsights/pp-dev to install the Portal Page Developer package.
4. Open Portal Page Directory in IDE
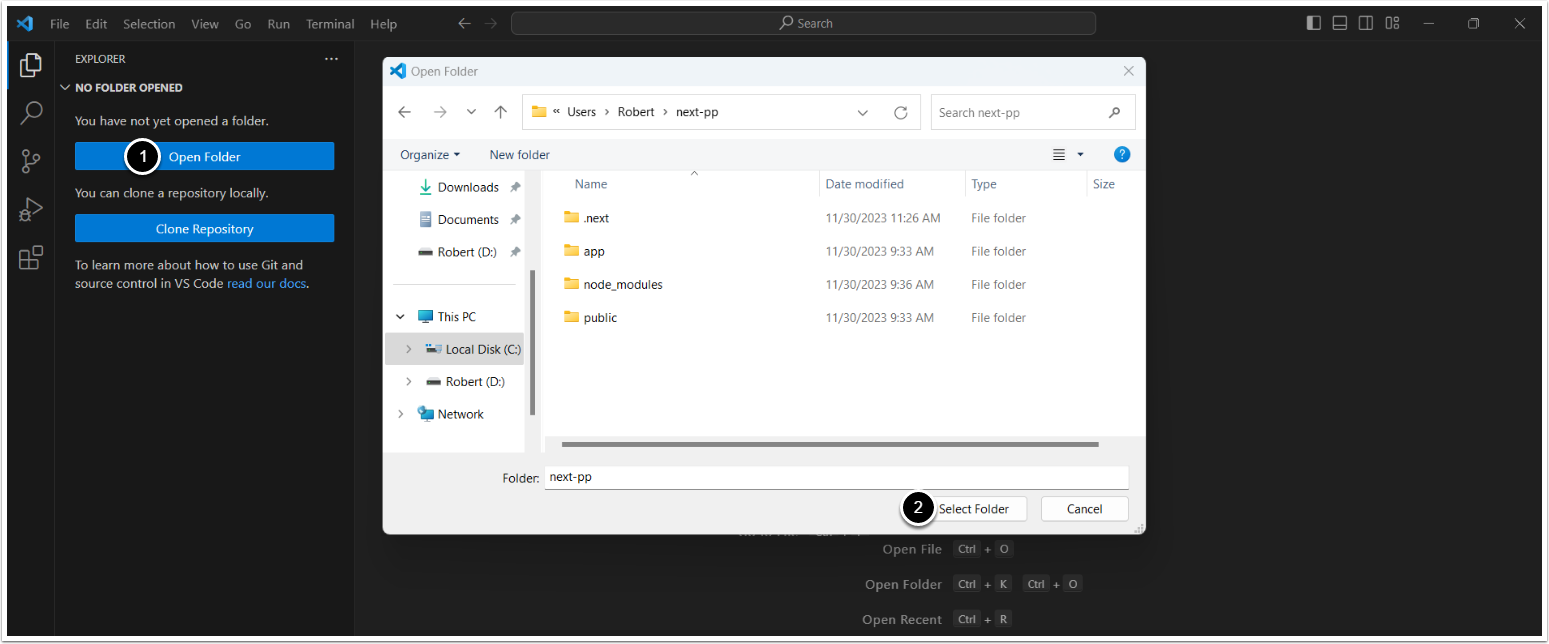
In an IDE:
- Ctrl + K Ctrl + O or [Open Folder]
- Select the Portal Page Folder, [Select Folder]
5. Create pp-dev.config.js File
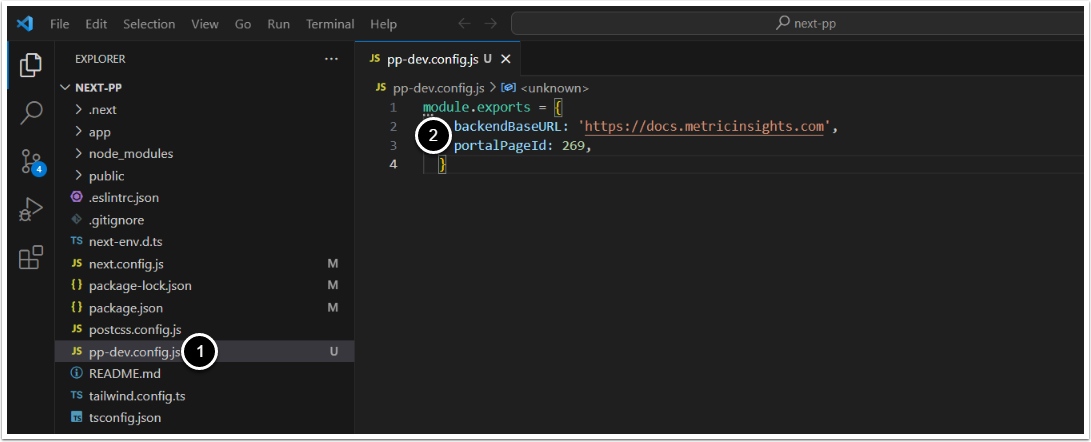
Note: The name of the config file must be pp-dev.config.
- Create a file named
pp-dev.config.js - Enter the following code:
module.exports = {
    backendBaseURL: '<MI Application Server>',
    portalPageId: <Portal Page ID>,
  };
Replace <MI Application Server> with the URL of your MI instance and <Portal Page ID> with the ID of the previously created Portal Page. Save the entered data.
6. Modify next.config.js File
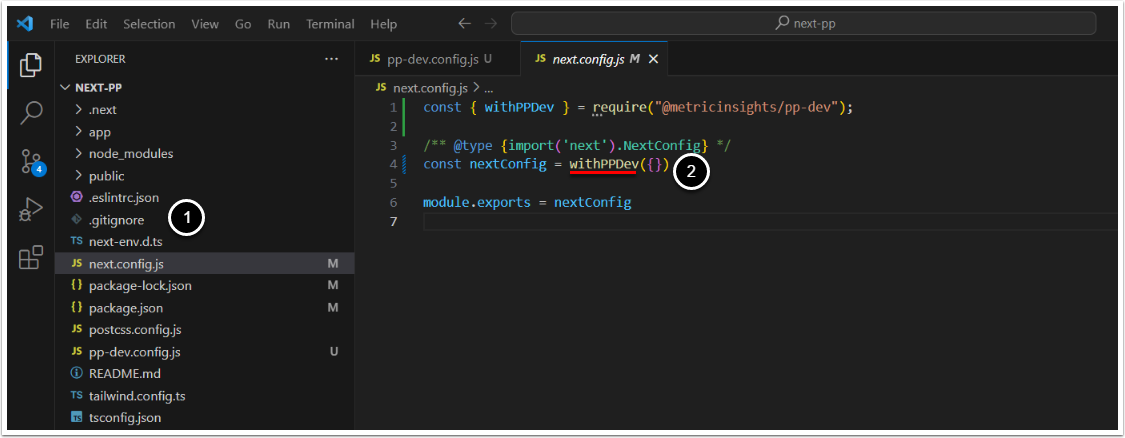
- Open a file named
next.config.js - Wrap the config options with the
withPPDevfunction
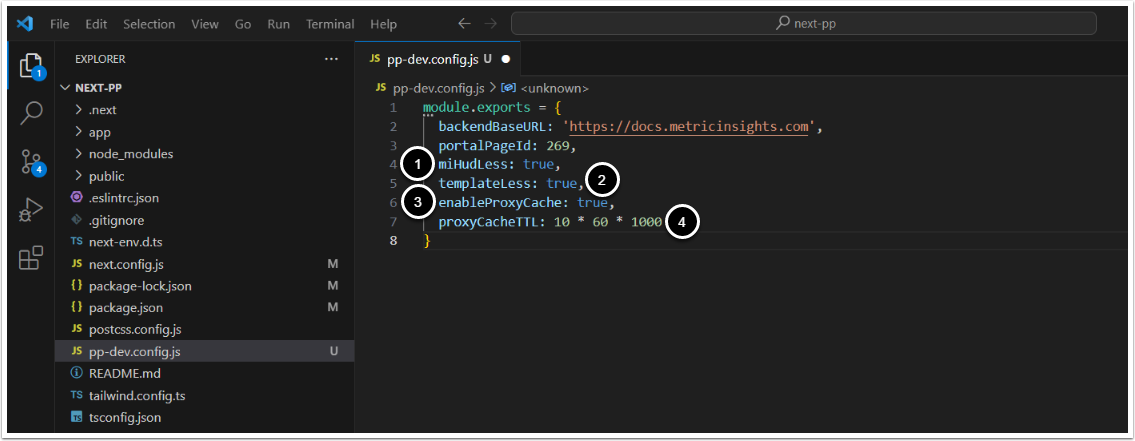
6.1. Optional Parameters
-
miHudLess:
- true: The default value.
- false: Metric Insights' navigation bar and back-end including jQuery are enabled for Portal Page's local development.
-
templateLess:
-
true: Portal Page Variables are not fetched from a Portal Page. Metric Insights' navigation bar is not displayed. If this parameter is set to true, the
portalPageIdparameter does not have to be provided. - false: The default value.
-
true: Portal Page Variables are not fetched from a Portal Page. Metric Insights' navigation bar is not displayed. If this parameter is set to true, the
-
enableProxyCache:
- true: The default value.
- false: The proxy cache is disabled. It is not recommended to change the value of this parameter, as the proxy cache is utilized to reduce the number of requests to the back-end. It caches the requests to different files, such as containing styles and images.
-
proxyCacheTTL: The proxy cache's time-to-live in milliseconds. The default value is
10 * 60 * 1000.
7. Configure package.json File

- Open
package.json - Assign the value of the
devscript to"pp-dev next"
Save the config file.
8. Create Content for Portal Page
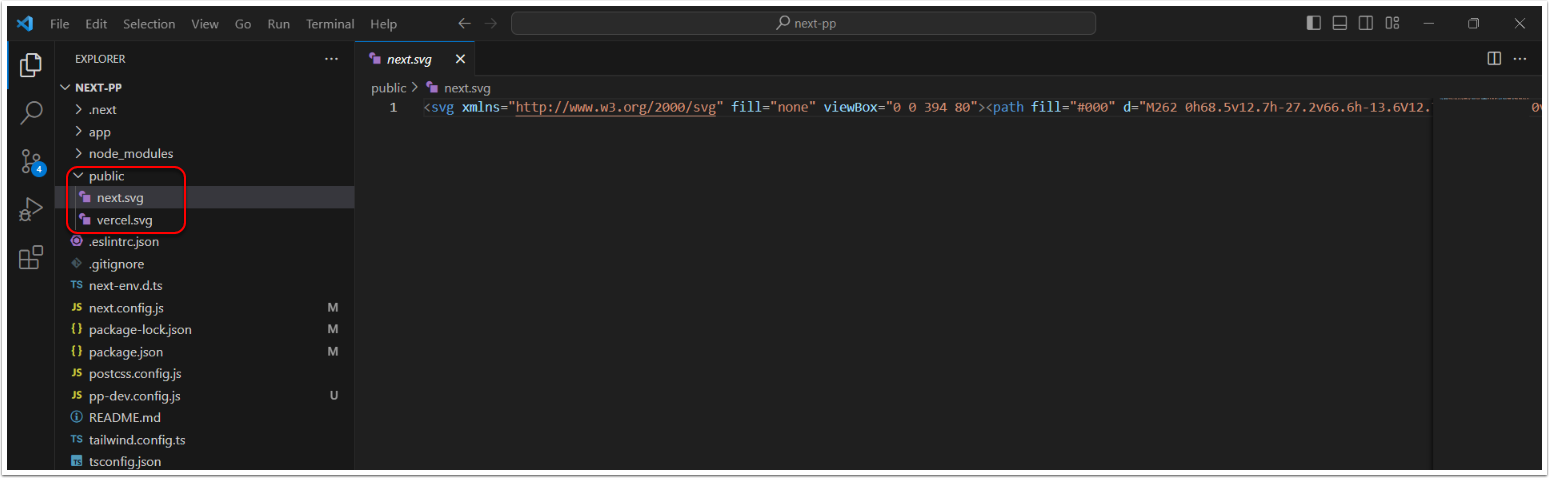
Note: Files that are not used in the Portal Page are not transferred to the archive with Portal Page assets. The exception is the directory public.
Proceed with creating content for your Portal Page. Optionally, create a directory named public the contents of which are transferred to the archive with Portal Page assets regardless of being utilized in the Portal Page. The contents of the public folder are transferred to the root of the archive with Portal Page assets. However, you can create folders inside the public, these folders and their contents will be transferred to the archive's root.
9. Open Portal Page Locally
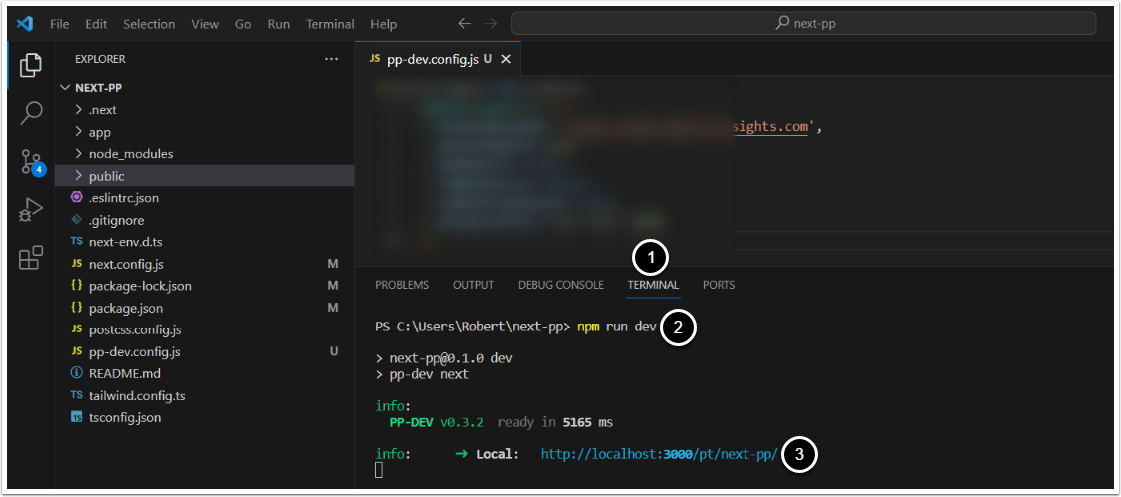
- Open a new Terminal
- Run
npm run dev - Ctrl + click on the local link or copy and open it in the browser
10. Log In to Metric Insights and View Portal Page
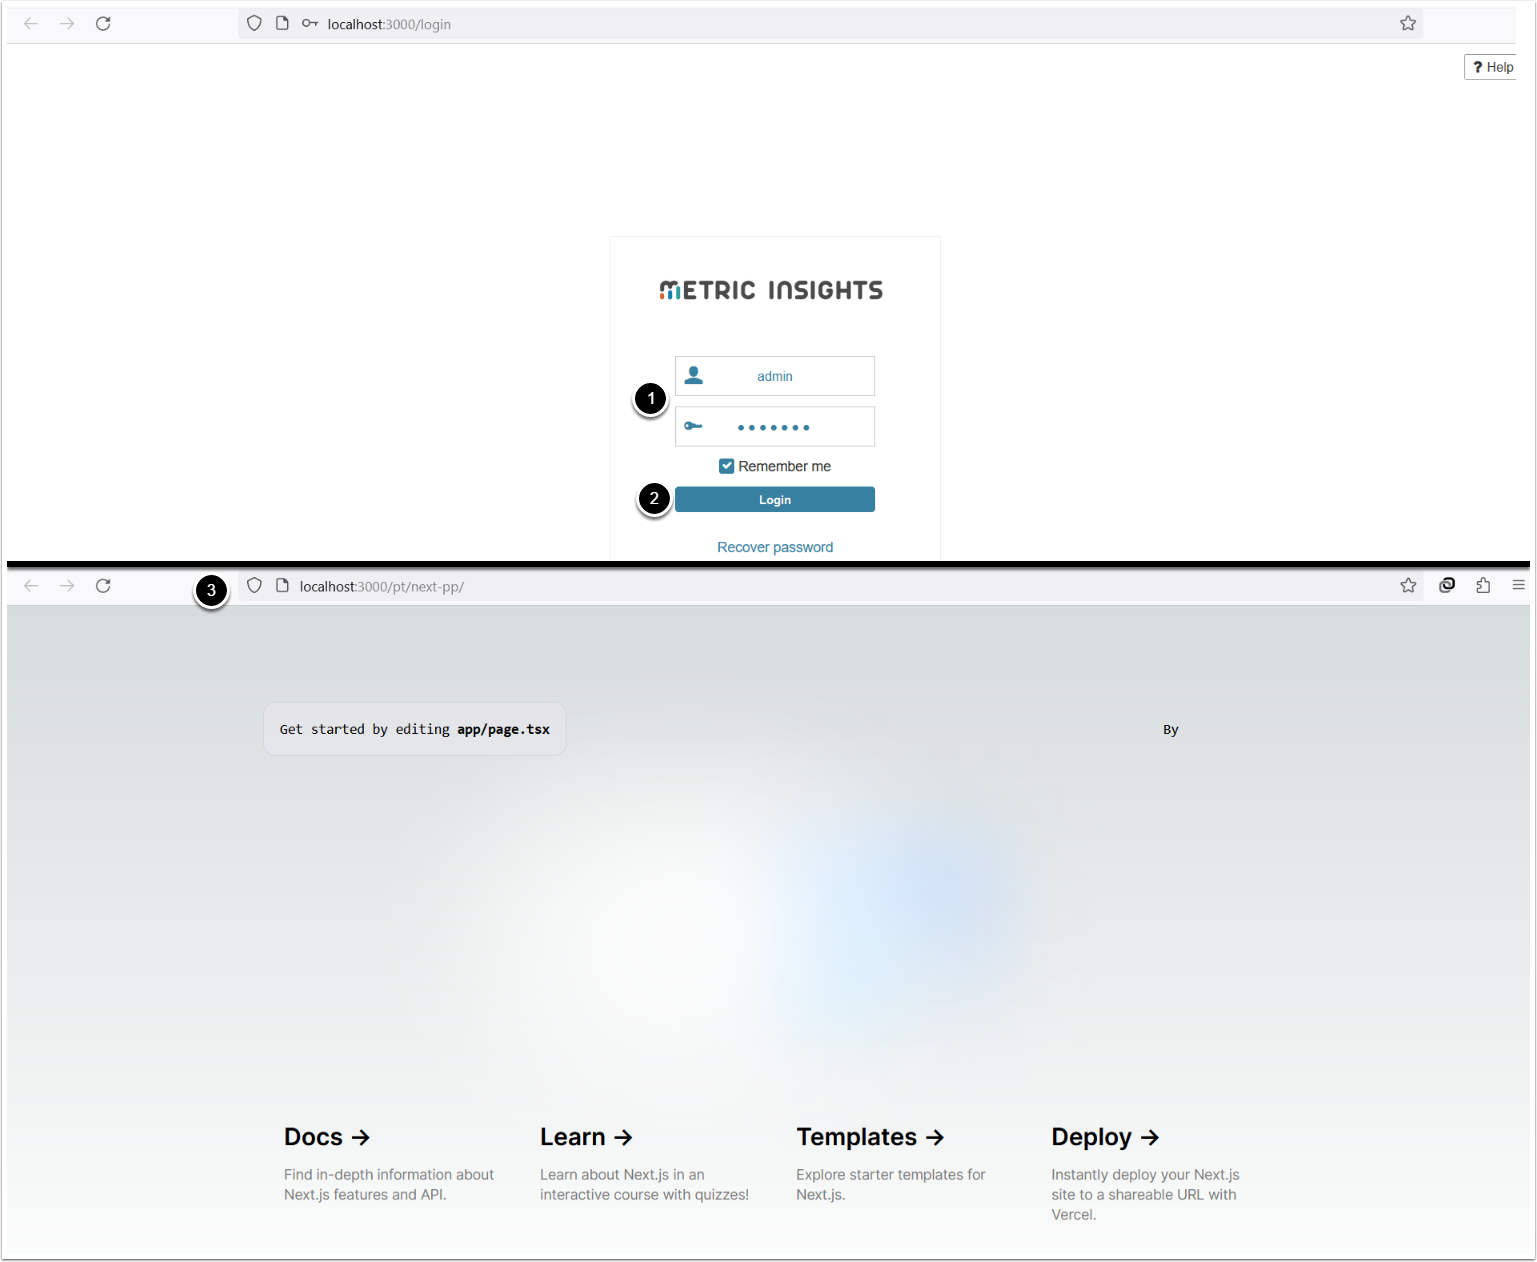
- Enter credentials of an Admin user from the MI application server that you have listed in the config file
- [Login]
- The Portal Page is opened
11. Build Application and Upload Changes to Portal Page
Once you have finished creating code for the Portal Page, see Next.js documentation for information on building the application.
After the application has been built, you can either archive the project and upload it as a Portal Page Asset or sync Portal Page with a repository hosted on GitHub, GitLab, or Bitbucket.