Portal Pages have been renamed to Apps in 7.1.0.
Apps allow for a wide range of customization. They are configurable via:
- Layouts that determine the structure of an App
- Templates that provide a more basic set of controls
This article details how to add and tailor App Templates to your specific needs. It assumes basic knowledge of HTML and the various objects in Metric Insights. The target audience is Administrators and Power Users with associated App Privileges.
For information on how to build an App, go to Overview of Apps (Portal Pages)
Table of contents:
1. Create a New Template
- For MI v7.1.0+: Access Content > Apps > Select an App > Templates tab
- For MI versions prior to 7.1.0: Access Content > Portal Pages > Select a Portal Page > Templates tab
The list page containing all available App Templates opens.
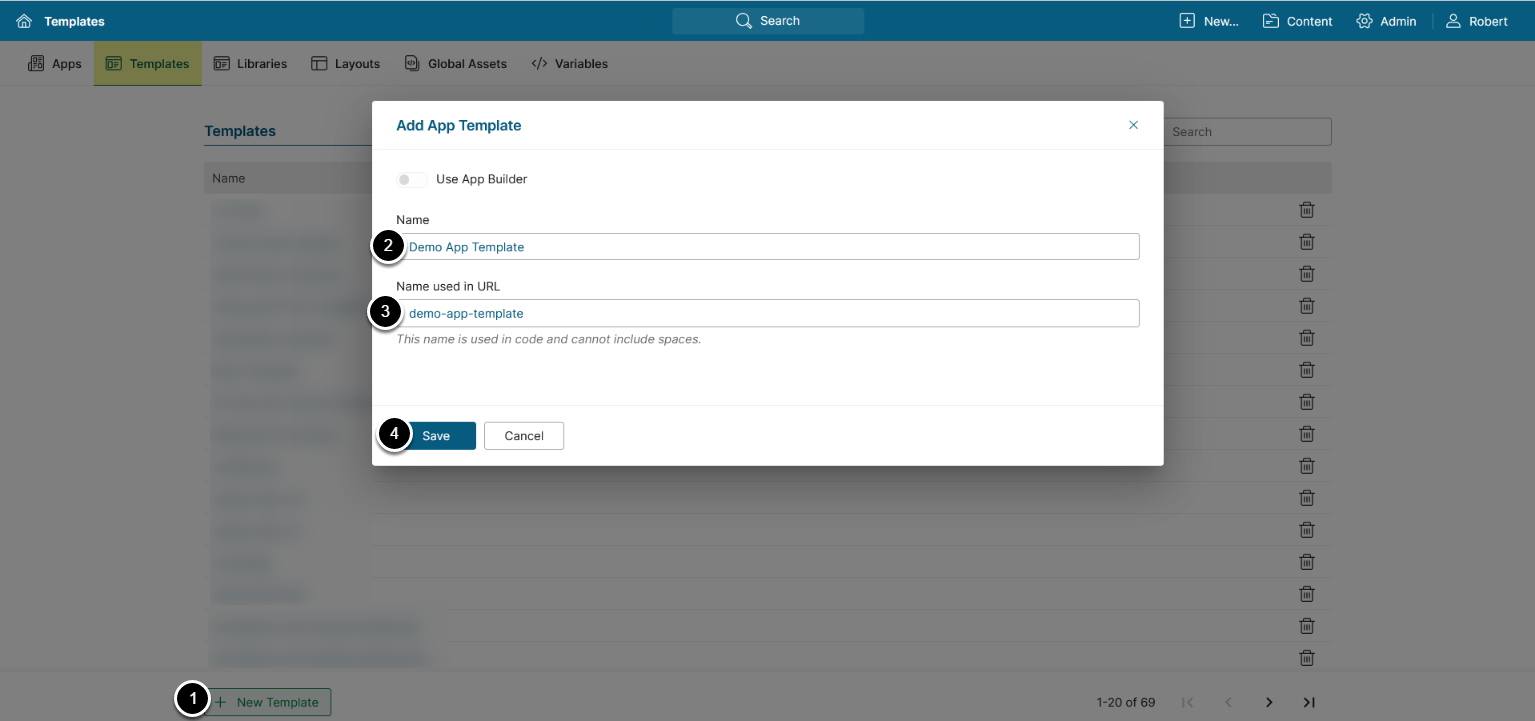
- Below the grid, click [+New Template]
- Name: The name you type here appears in the Templates list and drop-down lists in Metric Insights
-
Name used in URL: Provide a name which is used to build URL
- Letters, numbers, dashes, and underscores are the only supported characters for Apps' URL names
- [Save]
2. Configure Template
You may contact support@metricinsights.com to get App Template examples or configure your own Templates by adding the code yourself, as described below.
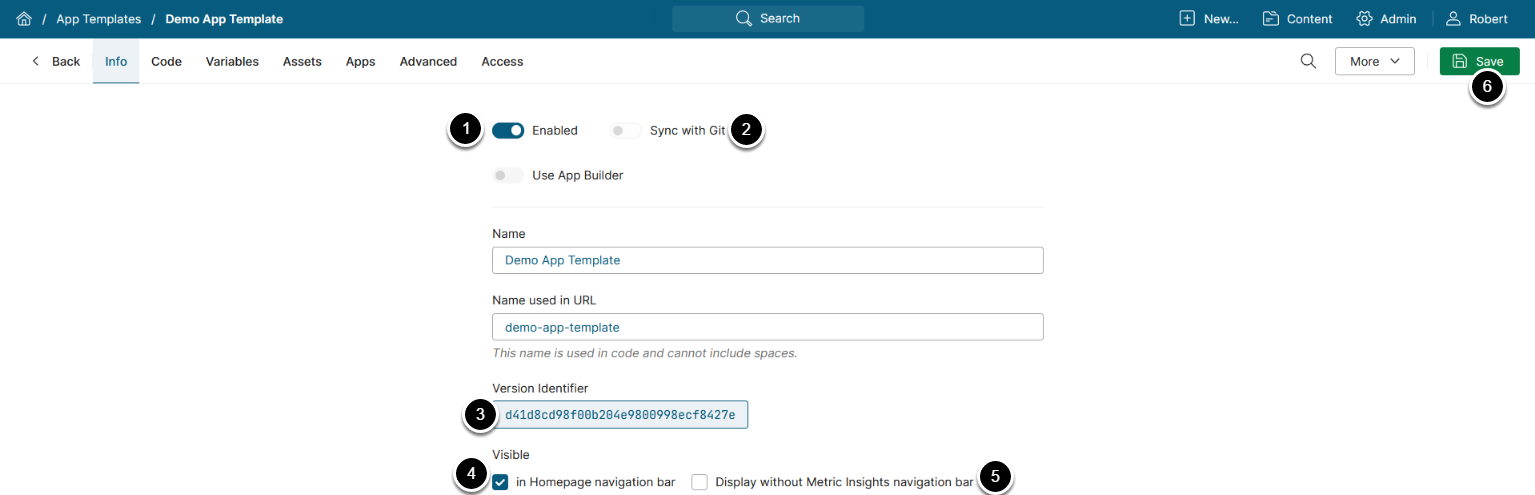
- To be able to use a Template, make sure it is enabled
- Enable Sync with Git to upload assets from a repository located in:
- Version Identifier displays a unique hash of each Template, which is used to identify the Template version and track changes. Click on its value to see the version history
- Optionally, exclude the populated Apps from Homepage navigation bar
-
Display without Metric Insights navigation bar: This checkbox allows switching from the default App layout. If this option is enabled, choose a personalized layout from the Layout drop-down
- Refer to Layouts for Apps (Portal Pages) for details
- [Save]
3. Enter Code
Access the Code tab
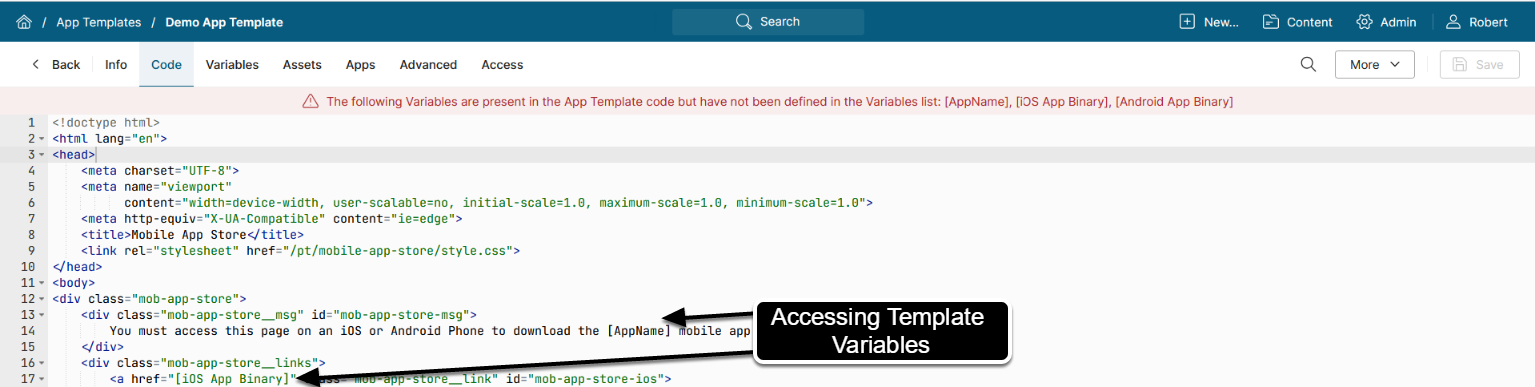
- Enter the HTML, CSS, and/or JavaScript Code in the provided field, or upload files manually from the Assets tab.
- [Save]
NOTE: App Template Variables can be accessed in the following format: [Variable Name], as shown on the screenshot.
- See Add Variables for details.
4. Customize the Image Capture Setting
Access the Advanced tab

The Image Capture setting allows to configure the condition to take an App screenshot for an External Report.
-
Asset Browser Cache Setup: Set up cache lifetime for Assets
- See Portal Page Asset Caching for Improved Performance for details
- Timeout: Specify a time interval after which a screenshot is taken once the App is opened
-
Screenshot on: Select a condition of taking a screenshot. Note that a screenshot will be taken when the selected condition is met or after the time interval specified in the Timeout field has elapsed
- Only on Timeout: A screenshot is taken after time interval specified in the Timeout field
-
Element Removed from Page: This condition is appropriate if you want a screenshot to be taken after some element disappears from an App. The element can be set in the CSS Selector field; e.g., if you want a screenshot not to be taken until the App is fully loaded, enter
.loadingto the CSS Selector field - Element Added to Page: Select this condition if you want a screenshot to be taken when some element appears on an App. The element can be set in the CSS Selector field
- [Save]
5. Add Variables
Metric Insights allows you to define and add your own Variables to the code in order to have more control over how your Apps are populated.
NOTE:
- Variable names in the code must match the Names of Variables that are custom-added. Otherwise, they will be treated as "undefined" and the corresponding warning message will appear
- Variable Names are case-sensitive, the maximum length of Variable Name is 255 characters
- The maximum size of Variable Value is 64 Kb of text
Access Variables tab
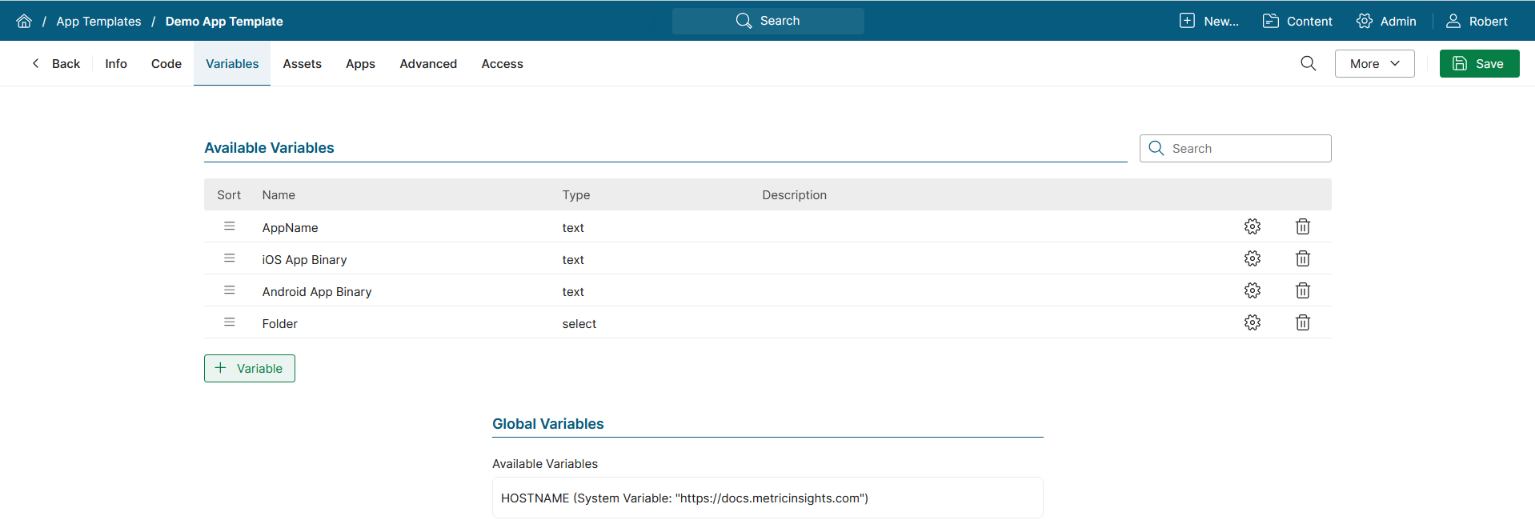
- Define your Variables' settings. For more details check the Modifying Portal Page Template with Custom Variables article
- View the list of Global Variables