Users who interact with Concierge can leave their positive/negative feedback on the answers it provides by clicking the thumbs up/down icons. Optionally, feedback can be collected for assessment and analysis. The feedback collection is achieved through configuring a Custom Script that pulls User reactions that are stored in the entity by the Portal Page and populates this data into a Dataset.
The process is comprised of the following steps:
- Checking Portal Page Entity
- Creating the Feedback Dataset
- Configuring an External Application
- Checking the Feedback Custom Script
- Creating Notification Schedule for Collecting Feedback into Dataset
- Verifying the Result
PREREQUISITES:
1. Checking Portal Page Entity
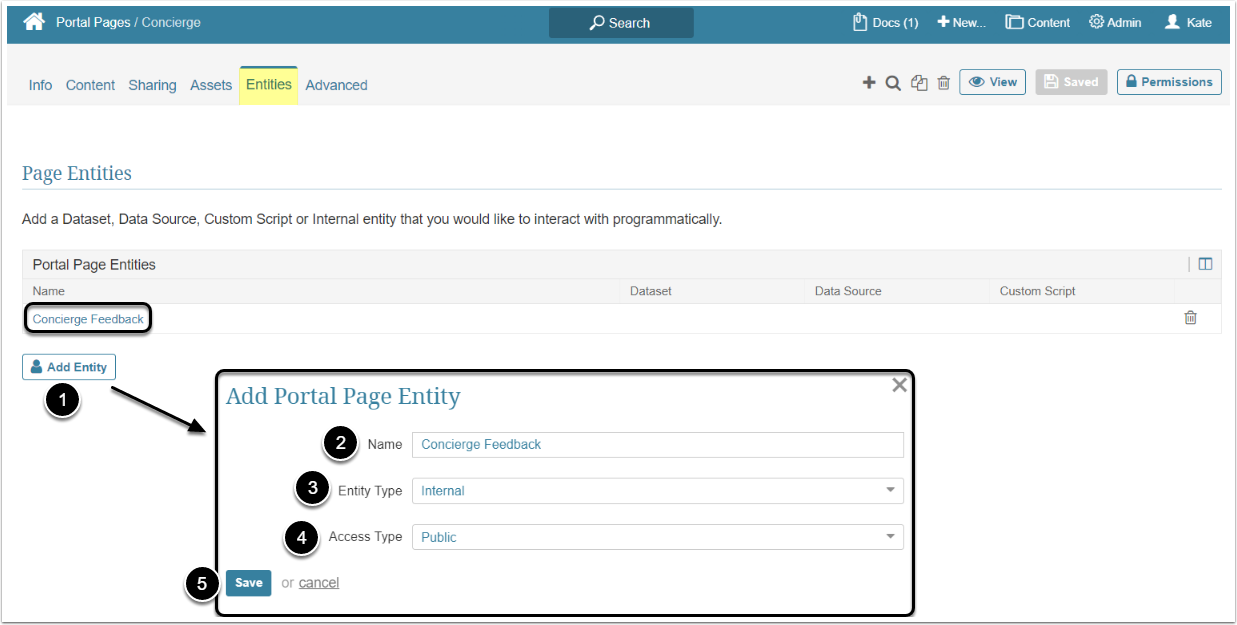
Access Content > Portal Pages > the Concierge Portal Page > Entities Tab
Make sure that the Concierge Feedback Entity is already created. If not, follow the instructions below to add it.
- [Add Entity]
- Input "Concierge Feedback" as a Name
- Set Entity Type to "Internal"
- Set Access Type to "Public"
For more information on Portal Page Entities, refer to Understanding Portal Page Entities.
2. Creating the Feedback Dataset
This Dataset stores feedback and comments from Users who interact with Concierge. The underlying table is created and populated by the Custom Script configured in Step 4.
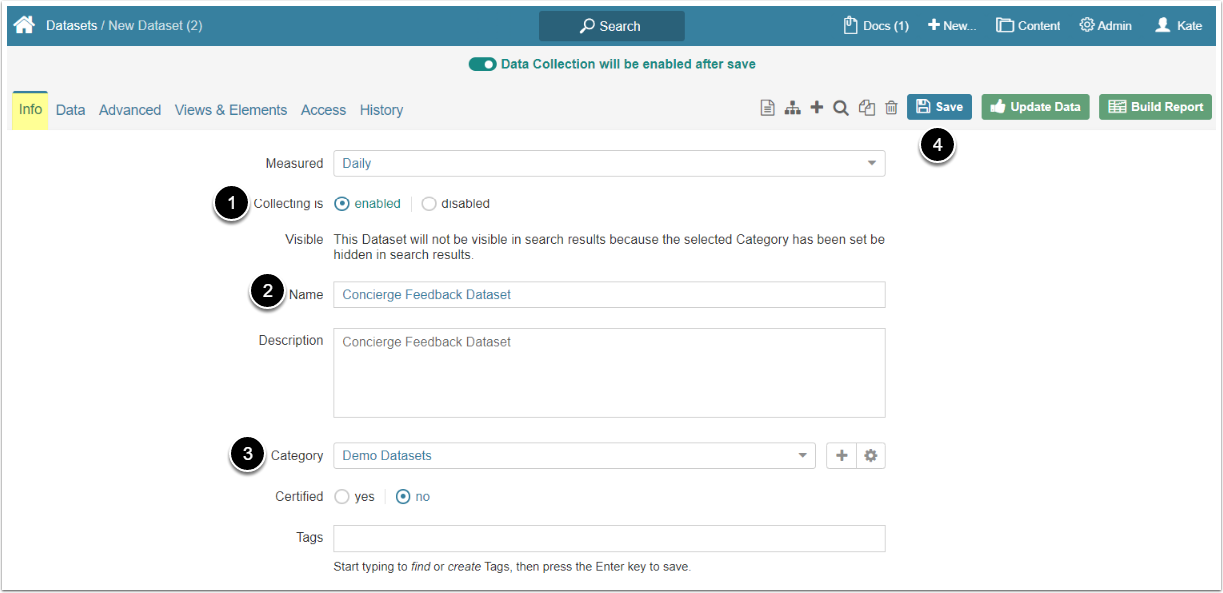
Access +New > Dataset > Create New
- Set Collecting is to "enabled"
- Provide a descriptive Name
- Choose a Category
- [Save]
Once the Dataset is created, note its ID from the Dataset URL or Dataset List Page. The ID will be then used for the Custom Script configuration in Step 4.
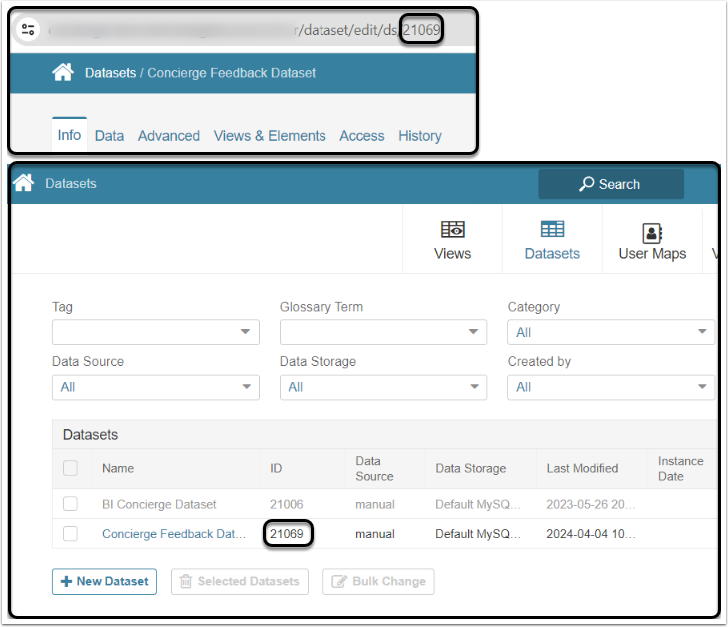
For more information on how to create Datasets, refer to Understanding Datasets.
3. Configuring an External Application
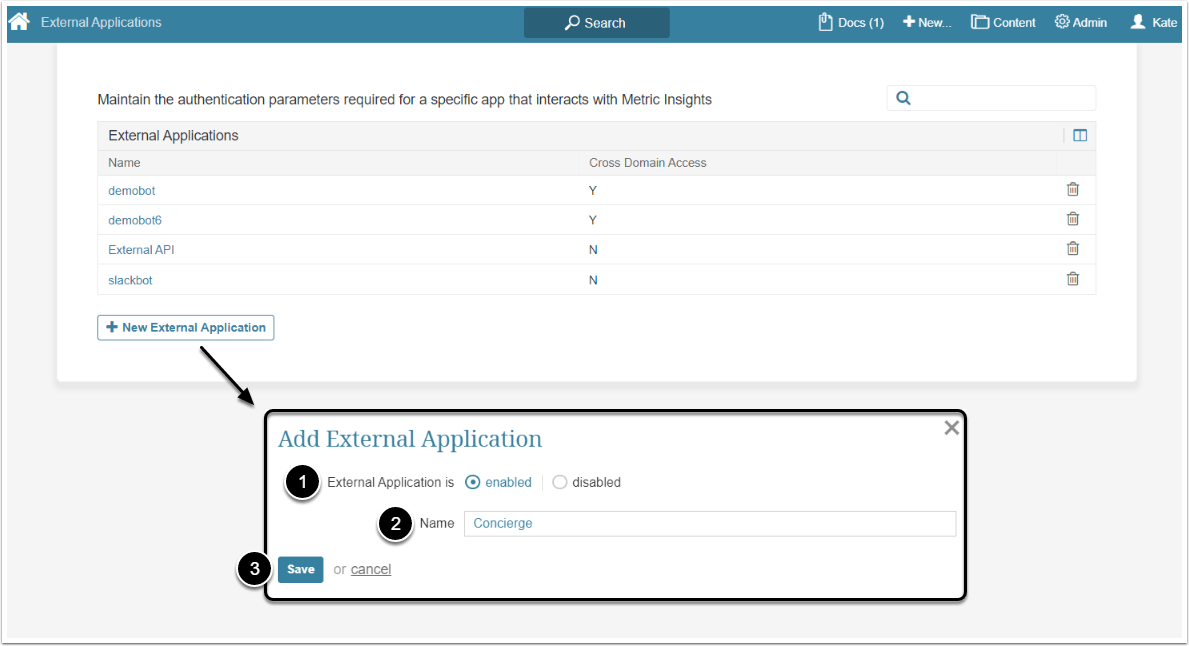
Access Admin > System > External Applications
- [+New External Application]
- Set External Application is to "enabled"
- Provide a descriptive Name
- [Save]
4. Checking the Feedback Custom Script
The Concierge Feedback Custom Script should be created by default with the Concierge Portal Page, so open its Editor
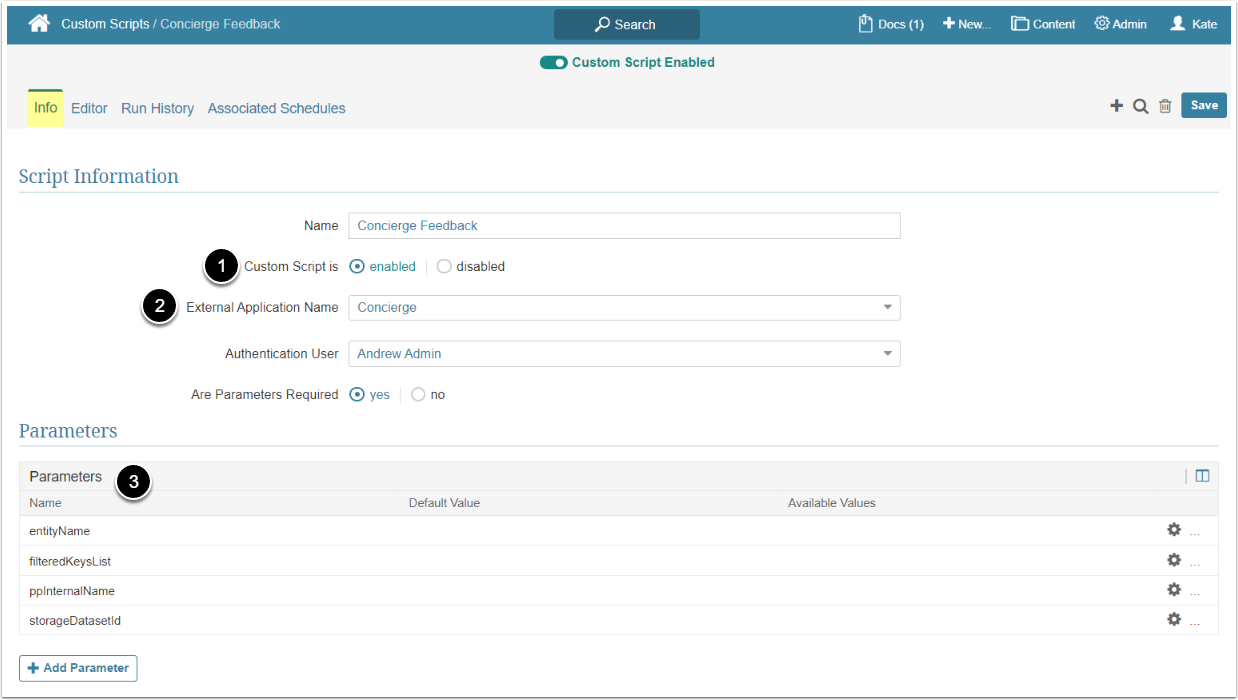
Access Admin > System > Custom Scripts, find the Concierge Feedback Script and click its Active Name link
- Enable the Custom Script
- Choose External Application configured in Step 3
- For more information on External Applications, refer to Set up API Access.
- Check if there are following Parameters:
-
entityName:
- Type: String; Required: Yes
-
filteredKeysList:
- Type: String; Required: Yes
-
ppInternalName:
- Type: String; Required: Yes
-
storageDatasetId:
- Type: String; Required: Yes
-
entityName:
NOTE: Parameters can be added in any order, but are case sensitive and must be copied exactly as shown.
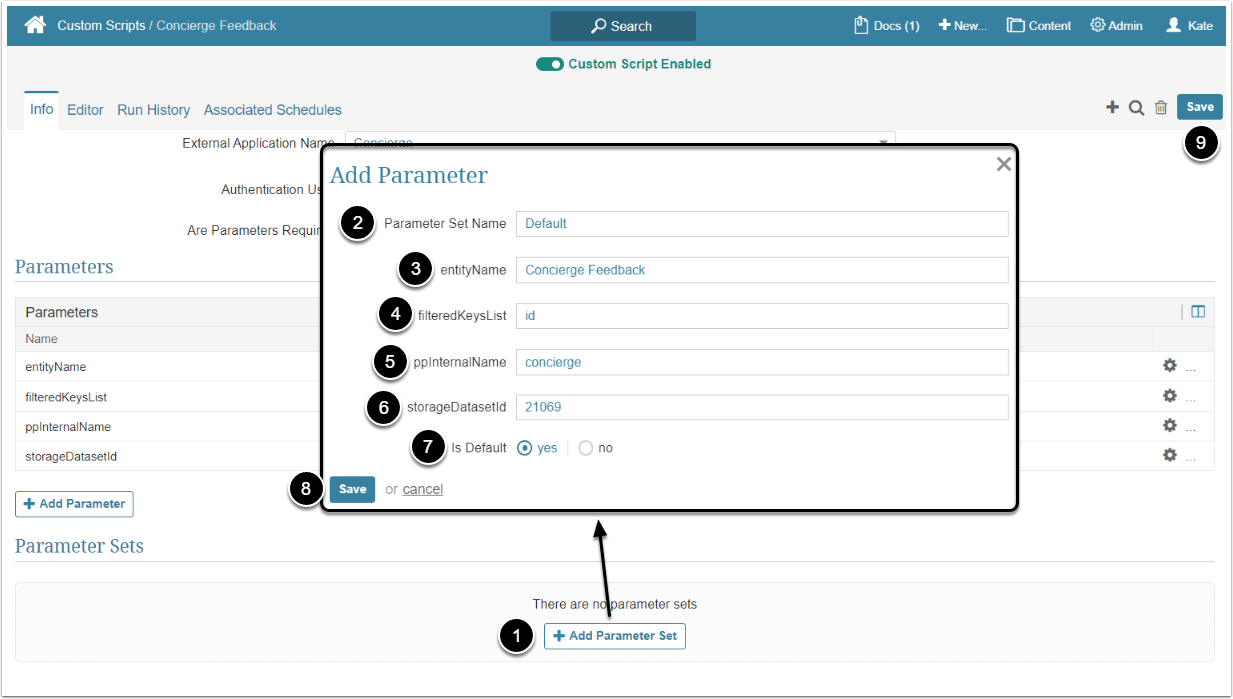
4.1. Add a Parameter Set
Scroll the page to the bottom.
- [+Add Parameter Set]
- Input a descriptive Parameter Set Name
- Set the entityName
- Choose the filteredKeysList
- Set the ppInternalName
- The Value for storageDatasetId is the Dataset ID saved from Step 4
- Set Is Default to "yes"
- [Save]
- [Save] all the changes
For more information on configuring Custom Scripts, refer to Configure Custom Scripts.
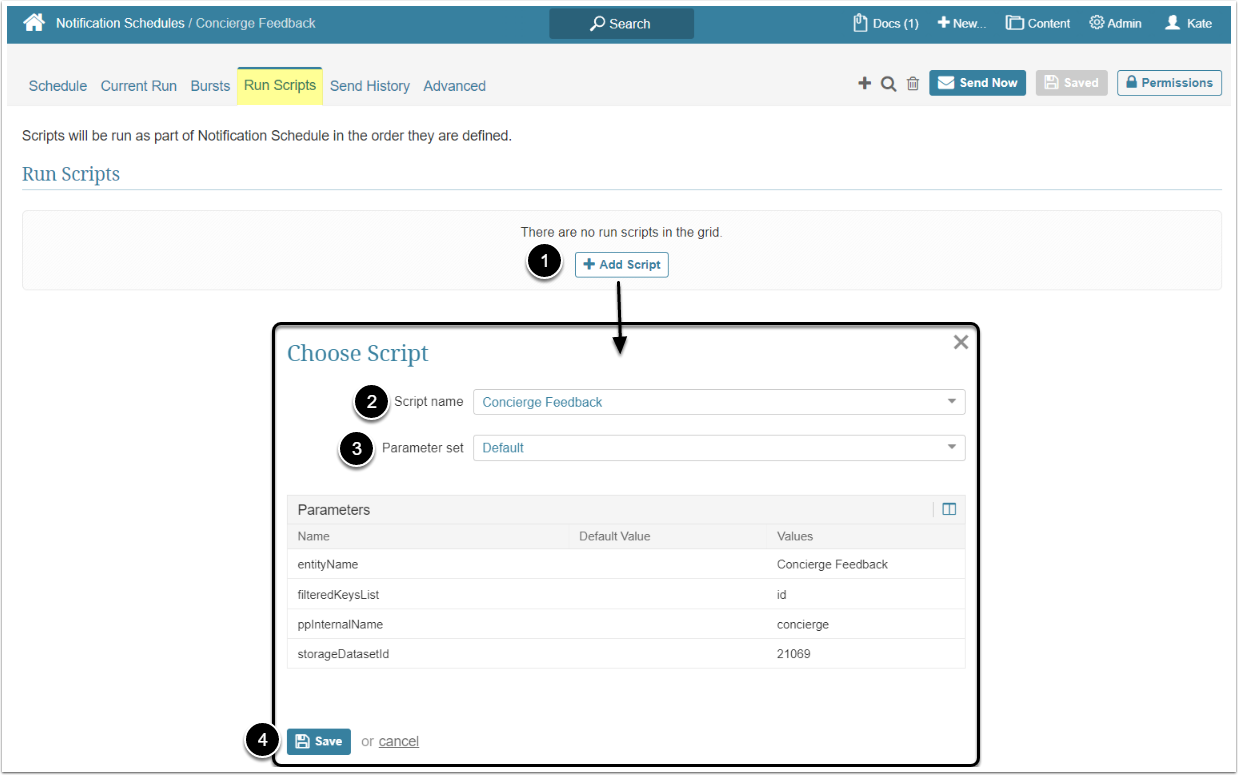
5. Creating Notification Schedule for Collecting Feedback into Dataset
Access Admin > Distribution > Notification Schedules
- [+New Notification Schedule]
- Set Frequency to "Every few minutes"
- The recommended frequency is "30 minutes"
- Provide a descriptive Schedule name
- [Save]
For more information on Notification Schedules, refer to Create or Modify a Notification Schedule (via Notification Schedule Editor).
6. Verifying the Result
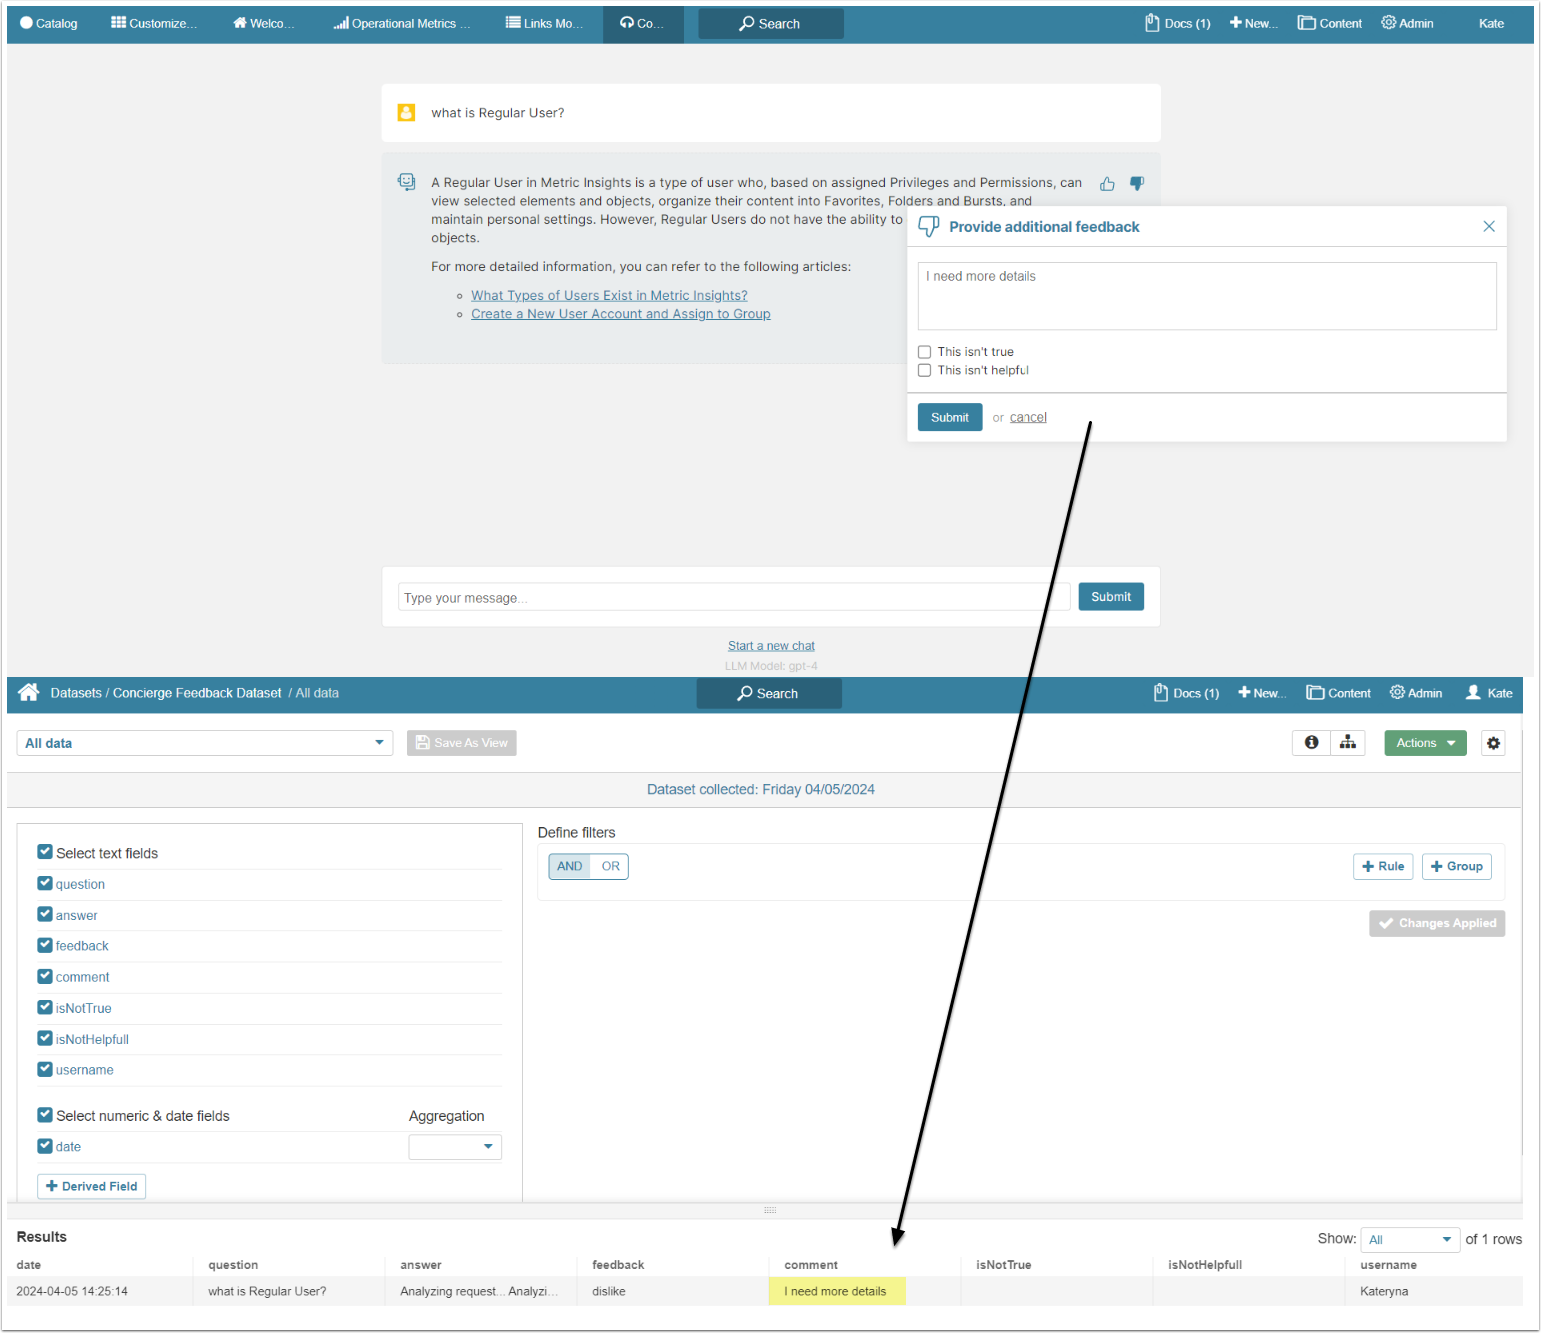
To verify that feedback is properly collected, follow the below steps:
- Access the Concierge Portal Page from the Viewer
- Type in a question or select one of the example questions
- Click the thumb down icon and submit some negative feedback
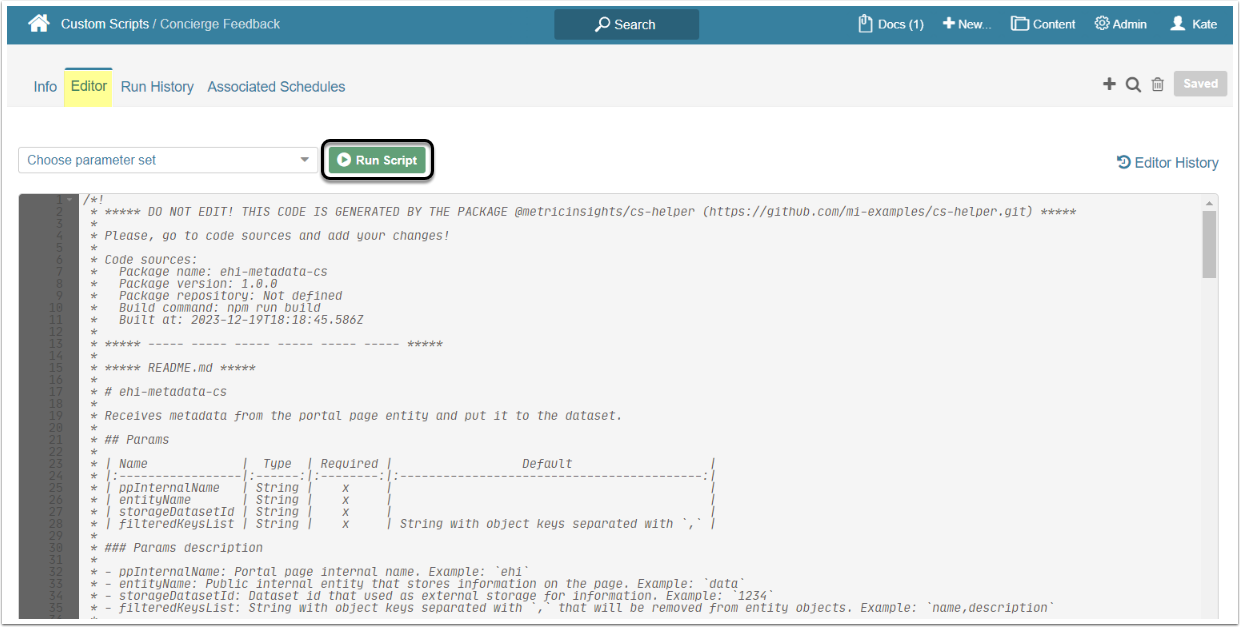
- Access the Custom Script and run it
- Update data in the Feedback Dataset
- The result is expected to be as shown below.
