By default, Metric Insights displays on the Homepage only the tiles for Elements that a User has permission to view or edit. However, Administrators can make specific Elements discoverable to Users who don’t yet have access. In such cases, Users will be able to request access directly.
Metric Insights supports three Access Request Processing options:
- Distributed Access Request processing entirely within Metric Insights;
- Centralized Access Request processing (via a tool like SAP's GRC);
- Access Requests sent to a Webpage.
This article explains the different types of Access Requests that Administrators can configure in Metric Insights.
Table of contents:
- Setting the Access Request Processing
- Optional Settings
- Process Access Requests within Metric Insights
1. Setting the Access Request Processing
1.1. Managed Within Metric Insights
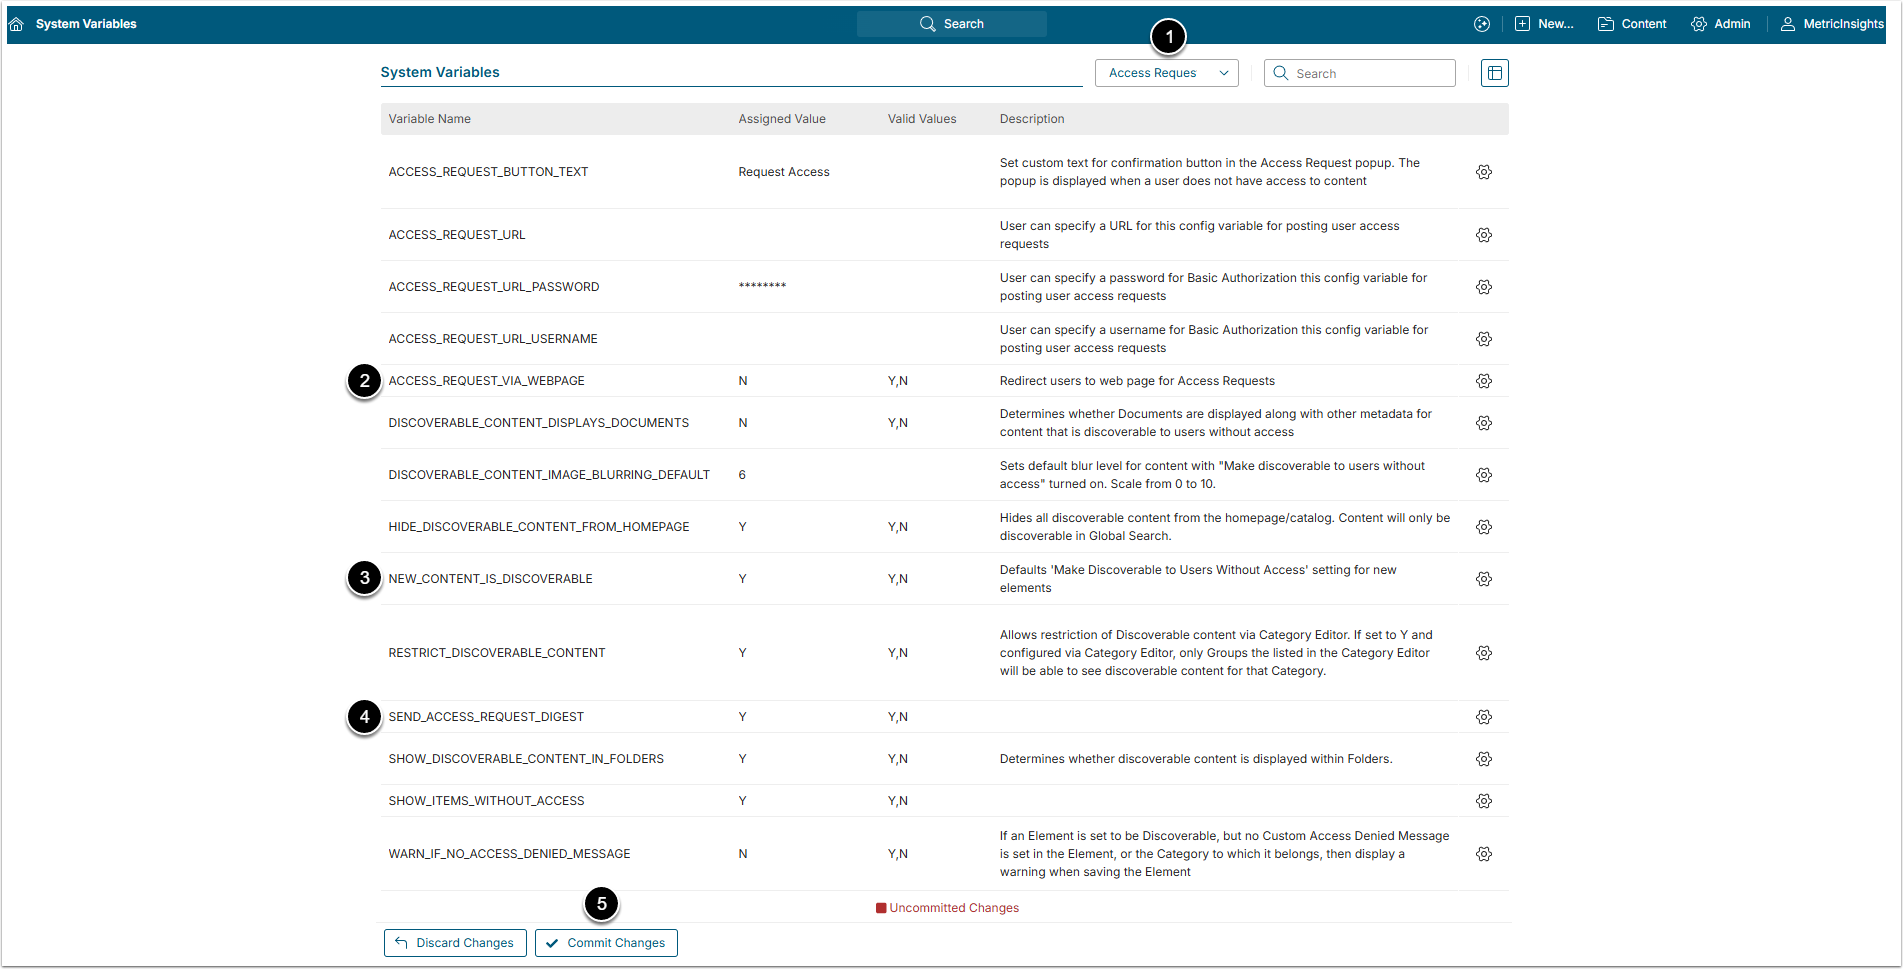
Access Admin > System > System Variables
- Select "Access Requests & Discoverabilty" option in the Search field to narrow the options.
- Set "ACCESS_REQUEST_VIA_WEBPAGE" to "N".
- Set "NEW_CONTENT_IS_DISCOVERABLE" to "Y".
- Set "SEND_ACCESS_REQUEST_DIGEST"TO "Y" or no requests will be sent.
- NOTE: No Notification Schedule is used for Access Request Digest; it will be sent when the next Schedule is run (this is usually Immediately).
- [Commit Changes]
1.2. Manage via Access Request API
Access Admin > System > System Variables
- Select "Access Requests & Discoverability" in the Search field to narrow the options.
- Set "ACCESS_REQUEST_URL" to the <URL> set as an endpoint to process your company's Access Requests.
- (Optional) Set "ACCESS_REQUEST_URL_PASSWORD" if required.
- (Optional) Set "ACCESS_REQUEST_URL_USERNAME" if required.
- Set "ACCESS_REQUEST_VIA_WEBPAGE" to "N".
- Set "NEW_CONTENT_IS_DISCOVERABLE" to "Y".
- [Commit Changes]
NOTE: When the "Request Access" button is clicked on Homepage Tile, a request will be sent to the endpoint set via "ACCESS_REQUEST_URL", passing Access Request Group set on the Element Editors.
1.3. Manage via External Form/Webpage
Access Admin > System > System Variables
- Select "Access Requests & Discoverability" in the Search field to narrow the options
- Set "ACCESS_REQUEST_URL" to the <webpage> set to process your company's Access Requests
- (Optional) Set "ACCESS_REQUEST_URL_PASSWORD" if required
- (Optional) Set "ACCESS_REQUEST_URL_USERNAME" if required
- Set "ACCESS_REQUEST_VIA_WEBPAGE" to "Y"
- Set "NEW_CONTENT_IS_DISCOVERABLE" to "Y"
- [Commit Changes]
NOTE: Any Custom Access Request messages or email recipients that are set on either the Element Editor or Category Editor will be ignored in this flow. When [Request Access] is selected the Request is sent directly to the Webpage (Request URL).
2. Optional Settings
2.1. Remove or Rename the [Access Request] Button
Access Admin > System > System Variables
- Select "Access Requests & DIscoverablity" Search option.
- Click the gear icon in the ACCESS_REQUEST_BUTTON_TEXT row.
- Assigned value: Enter the new button name.
- If this field is left blank – the button will be removed.
- [Save]
- [Commit Changes]
2.2. Customize Homepage Tile Image
Access Element Editor and open Access & Ownership tab
- Make Discoverable to Users Without Access: Enable this toggle switch.
- Access Request Group: This field is only used when processing is done via a company-created webpage. Select the Group from the drop-down menu. Its Members will be able to see this Element without having access to it.
- Preview Image Blur: Move the slider to alter the level of image blur.
- Blurring is only available for the default image.
- Preview Image: Upload a Homepage Tile preview image from the PC. This image will display on Tiles instead of the the default one.
- Use Custom Access Denied Message: To set Custom Access Denied Message, activate this toggle switch and proceed to one of the following:
- Access Request Email: Enter an Email address to which this Access Request will be delivered. This overrides the default of sending emails to all System Admins. This address can also be set at the Category level.
2.3. Customize Access Denied Message on the Element Editor
NOTE: If an Access message is not specified at the Element Editor level, the system will check the associated Category for a message. If message is not specified there,the Standard Message will display.
- Use Custom Access Denied Message: Activate the toggle switch.
- Access Denied Message: The Message display can be controlled using the standard formatting options.
- This field supports rich text. Use the “/” key to insert headings, lists, and images. Select text to customize it.
- Type the message and highlight the necessary word to open the editing panel.
2.4. Customize Access Denied Message in Category Editor
Access Content > Categories, click the necessary Category Active Name link to open the Category Editor and go to Access & Ownership tab
NOTE: If Access Denied Message is NOT set at the Element level, the message set at the associated Category level will be used or all Elements it contains.
- Use Custom Access Denied Message: Activate the toggle switch to open additional fields and complete the message text.
- Access Denied Message: The Message display can be controlled using the standard formatting options.
- This field will over-ride the Standard option to send email to your Support Admin(s) for Access.
- This field supports rich text. Use the “/” key to insert headings, lists, and images. Select text to customize it.
- Type the message and highlight the necessary word to open the editing panel.
3. Process Access Requests within Metric Insights
The Access Request can be processed by going to the Requests page. The Admin can reach it by:
- Clicking the [Process Request] button in email sent when Access was requested;
- Via Admin Menu.
Request emails will be sent to either the Access Request Email if specified in Category or Element Editor, or will default to your Support Admins' email address(es) that are set in"Receive Access Notifications" of User Record.
- Click [Process Request] in the email.
- Process Request using Controls:
- Click check mark to Grant Access and proceed to next step.
- Click "x" icon to Reject the Request and remove it from list.
3.1. Accessing User Access Requests via Admin Menu
Access Content > Content Center and go to Requests tab
Process Request using Controls:
- Click check mark to Grant Access and proceed to next step.
- Click "x" icon to Reject the Request and remove it from list.
3.2. Granting Access Request
- Grant View Access for User <...> to: Select either to grant the User Access to the specific Element or to the Category and all its Elements.
- [Grant Access] to complete request.