The Discoverability feature grants Admins an ability to allow Users to see Tiles on the Homepage that they do not have Permission to view. Users then can submit an Access Request and Admins and privileged Power Users can grant them access via the Access Request screen.
The system will default to standard "Access Denied" message if no customization has been set up. See Adding Document Links on Access Denied Message article for more information.
1. Set Element to be Discoverable
Access Element Editor and open the Access & Ownership tab.
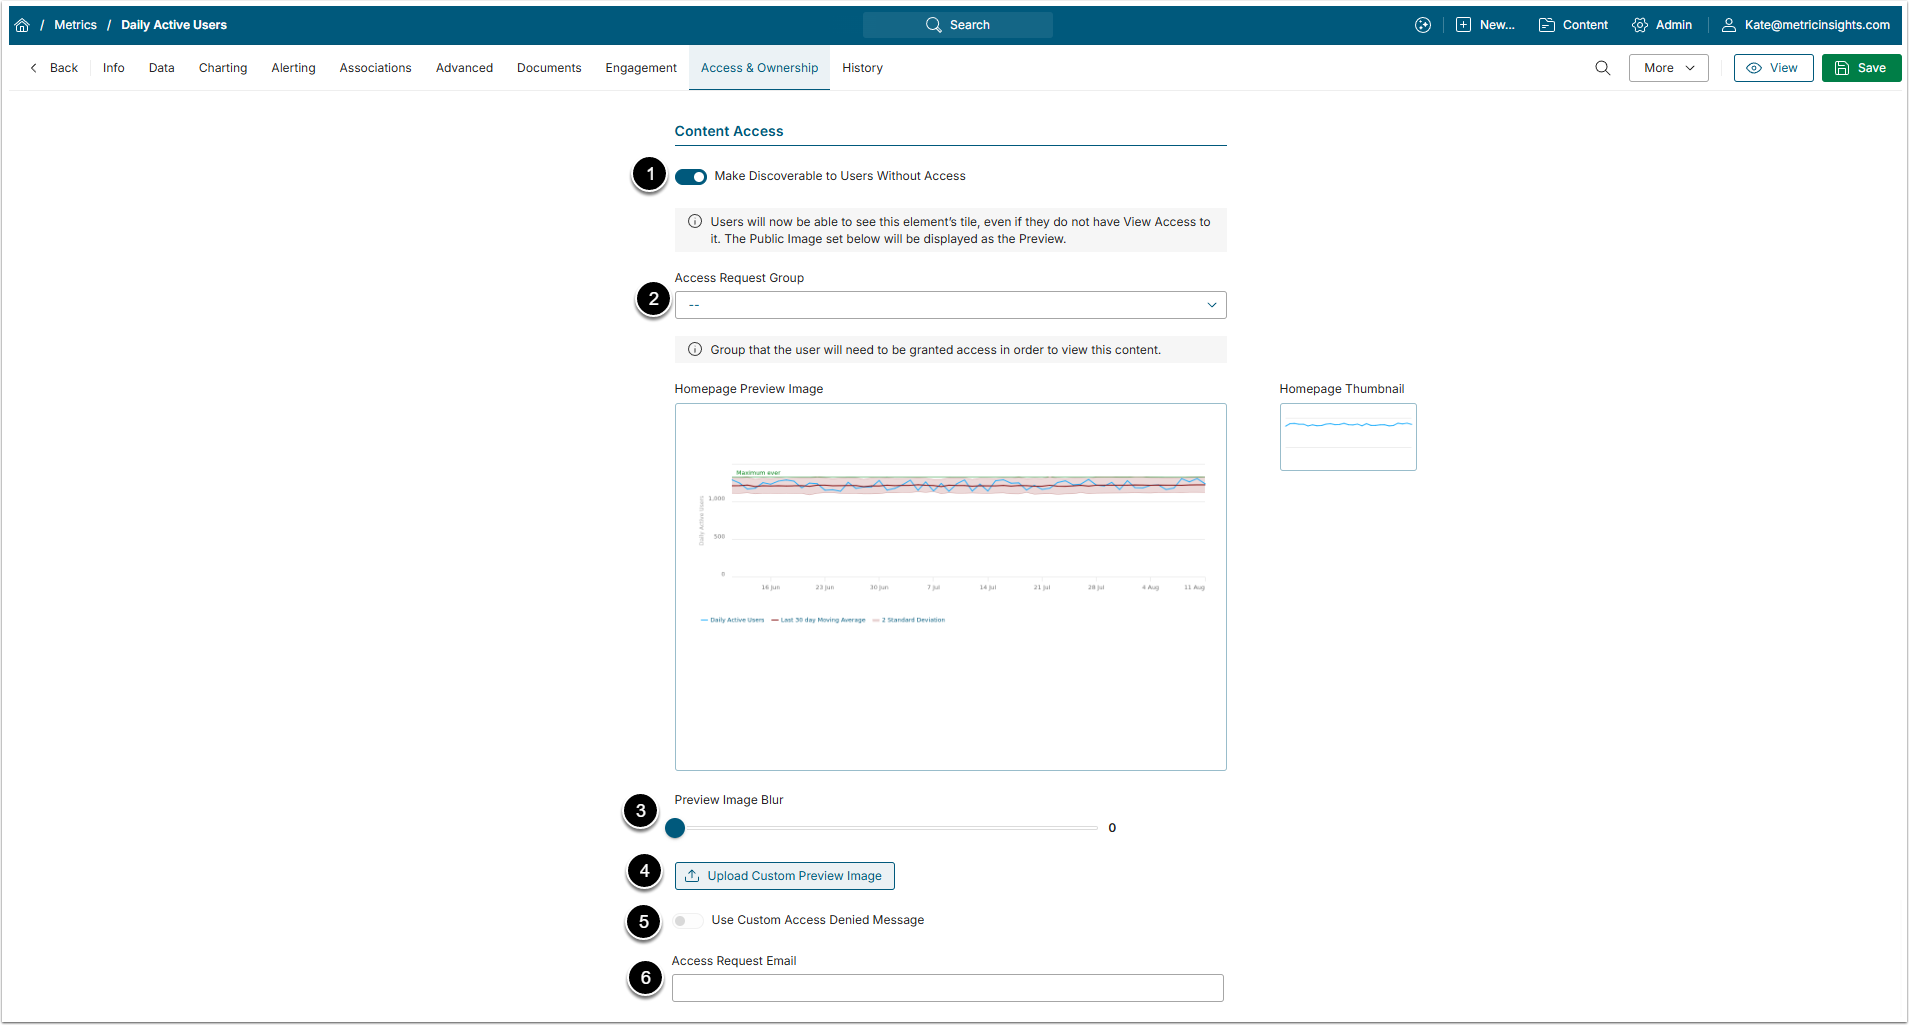
- Make Discoverable to Users Without Access: When enabled, Users can see the Tile of this Element on the Catalog Page even if they don't have access to the Element.
- Access Request Group: Users that belong to the Group chosen here can see the Tile of the Element even if they don't have access to the Element. Users that don't belong to this Group and don't have access to the Element won't be able to see the Tile.
- Preview Image Blur: This field allows to blur the Preview Image Users will see on the Tile.
- [Upload Custom Preview Image]: Upload a custom image to display on the Element’s Tile.
- Use Custom Access Denied Message: When enabled, allows you to enter a custom message for Users who attempt to view the Element Preview without access.
- Access Request Email: Add an email to which Access Request messages will be sent.
2. Restrict Discoverability to Groups by Category
Since not all Groups need to see all Discoverable content as it is not relevant to them, it is possible to restrict Discoverability to certain User Groups for an entire Category.
2.1. Set System Variable for Restriction
Access Admin > System > System Variables
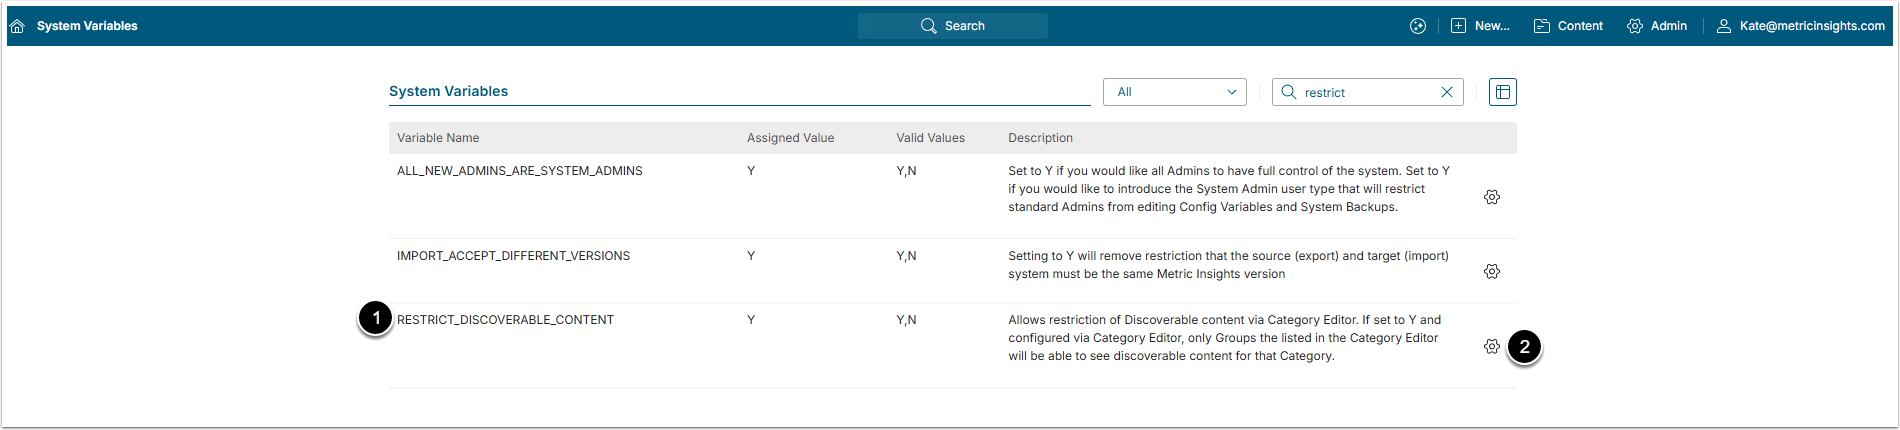
- Find RESTRICT_DISCOVERABLE_CONTENT Variable.
- Click gear icon to open popup and set variable to "Y".
2.2. Select Groups
Access Content > Categories click the Category's Active Name Link to open the Editor
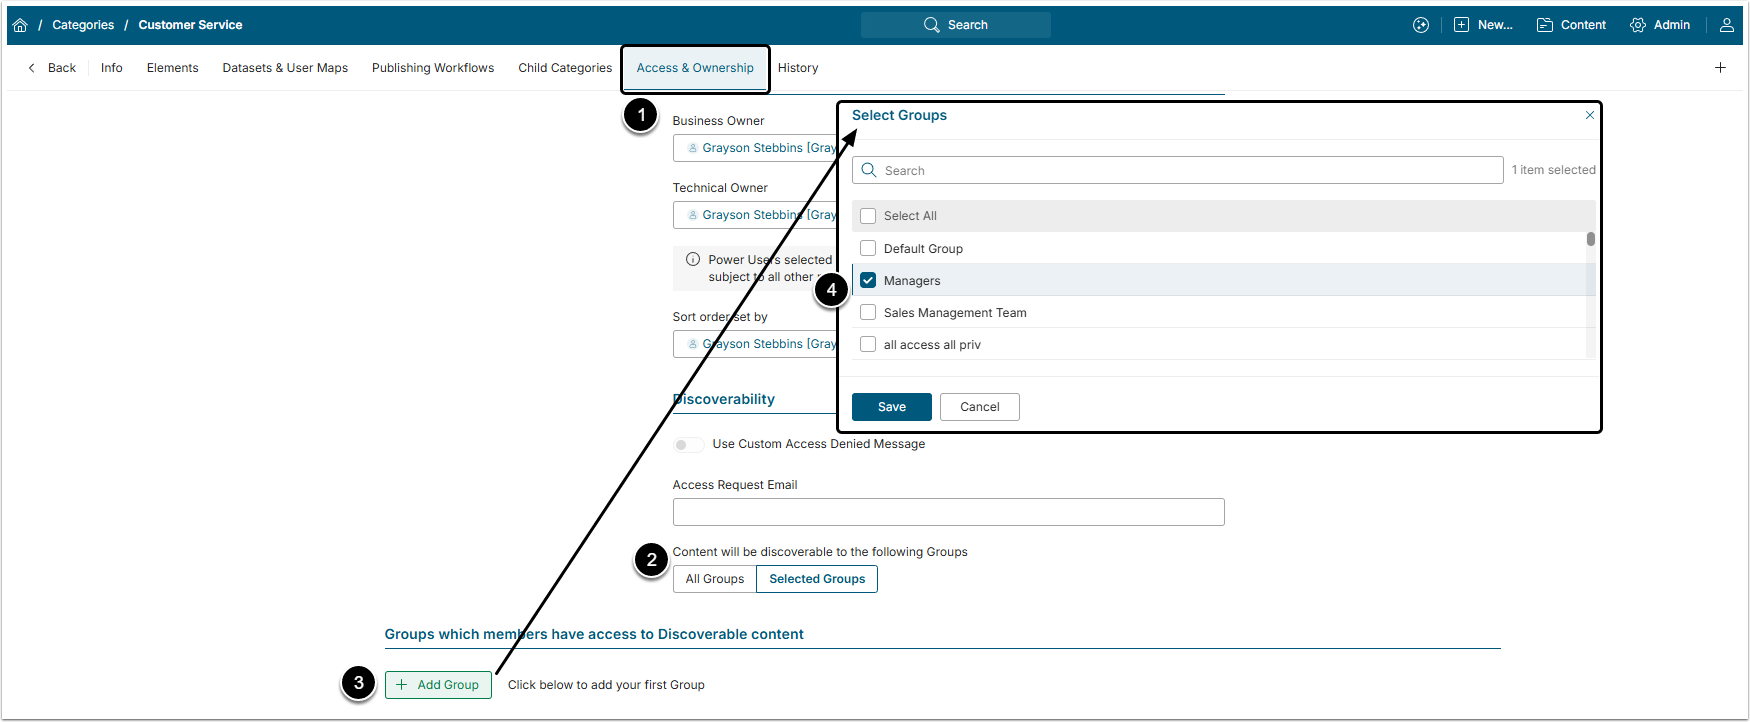
- Open Access & Ownership tab;
- Content will be discoverable to the following Groups: Select "Selected Group" option
- [+ Add Groups] to open Select Groups popup.
- Select Groups via checkboxes and [Save].