In Metric Insights, Power Users can use any available Tag when editing an Element or Dataset to which they have Edit Access. However, they have to be granted specific Privilege and Permission to be able to edit a Tag. This article describes the steps an Administrator should take to give the Power User Edit Access to a Tag.
Granting Edit Access
Edit Access to the Tag allows the Power User to:
- Access the Tags list page
- Edit Tags that the User created or the ones User has Permission to Edit
- Use "Replacement" button on the Tag List Page to replace an existing Tag with a different one
- Create a new Tag on the Info tab of Element's Editor
A Power User can get access to the Tag individually or inherit it from the Group he/she is a member of. A Power User can grant Edit Access Permissions to Groups to which the Power User belongs and to other Power Users who are members of these Groups.
Access Admin > Users & Groups and click on the PU's Active Name link to open the User Editor
NOTE: "Create Tags" Privilege can be a part of a Privilege Set. Assigning Privilege Sets rather than specific Privileges is recommended in Metric Insights, so check the Privileges List at the bottom of the page. If the "Create Tags" Privilege is not in the list, proceed with this step.
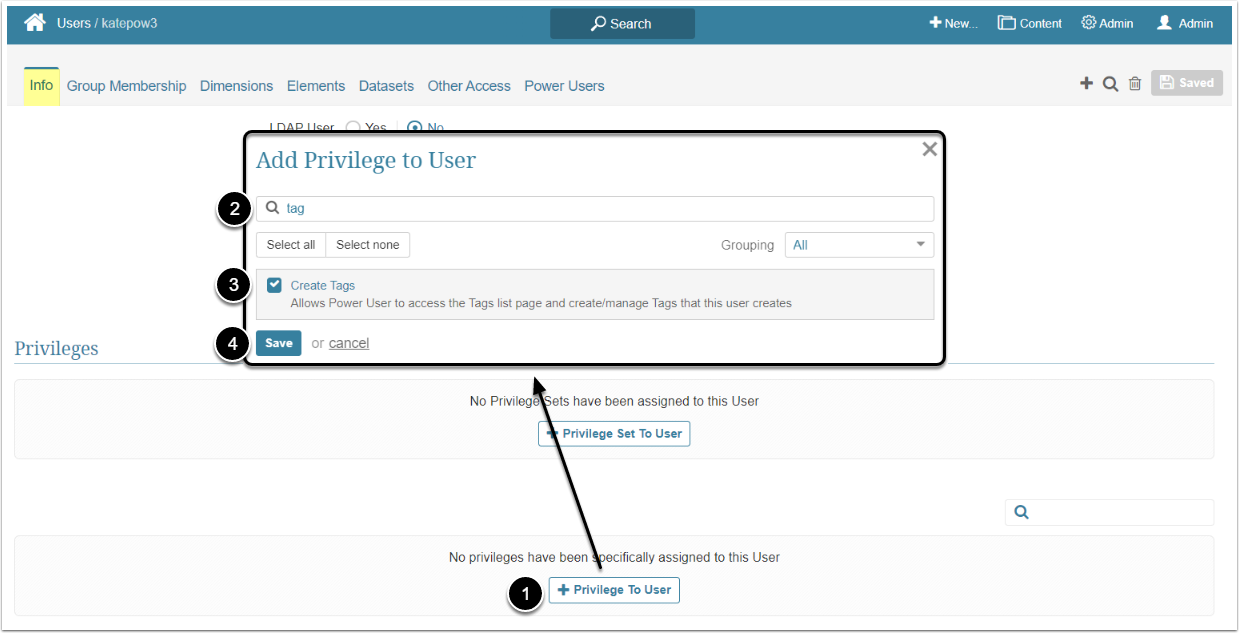
- [+Privilege To User]
- Filter the list by "tag"
- Find the "Create Tags" Privilege and select the checkbox
- [Save]
This can be done either from the Tag Editor or from the User Editor.
Access Content > Tags and click the necessary Tag Active Name link to open the Editor
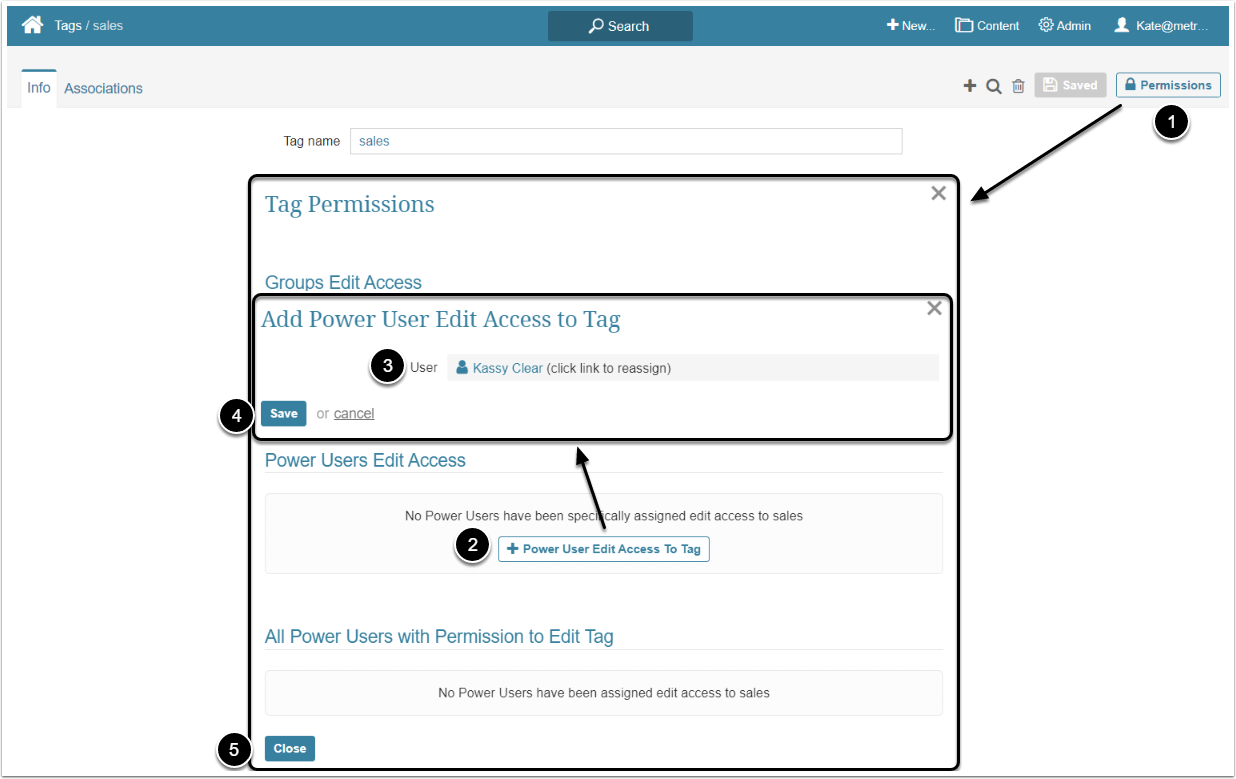
- [Permissions]
- [+Power User Edit Access To Tag]
- User: Select the Power User to whom access is granted
- [Save]
- [Close]
Access Admin > Users & Groups and click on the PU's Active Name link to open the User Editor
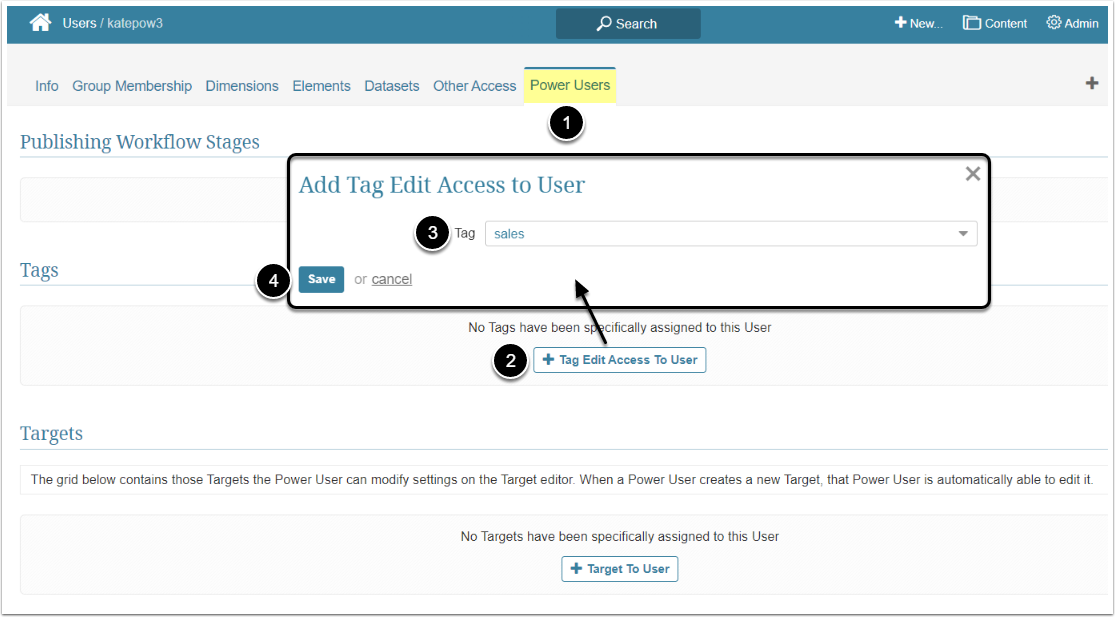
- Go to the Power Users tab
- [+Tag Edit Access To User]
- Tag: Select the Tag from the dropdown list
- [Save]