Beginning v6.4.3 Redis is used as a default storage for user session information and has its own container as a part of MI Installation. Optionally, Redis can also be utilized to store cache. This article describes how to set up Redis as a storage for cache.
There are 2 layers of caching in Metric Insights application:
- Layer 1 caches user-related data: privileges, branding information, specific permissions, user sessions.
- Layer 2 caches Dataset queries' responses and queries to API endpoints.
By default, cache is stored locally in files, but this behavior can be overwritten. To improve performance Redis can be used as a cache storage by configuring the corresponding System Variables.
Table of contents:
Recommended Configuration of System Variables
System Variable API_QUERY_CACHE_LIFETIME is responsible for cache lifetime. If a Portal Page or an Element is changed via the UI, the changes will be visible in the Portal Page Viewer or via API only after API_QUERY_CACHE_LIFETIME seconds. If changes are made via API, they should be accessible immediately.
API_QUERY_CACHE_LIFETIME: 30
CACHE_LAYER_1_SAVE_PATH, CACHE_LAYER_2_SAVE_PATH: <Redis path same as for session storage>, see Configure Cache Layer Save Path for details
CACHE_LAYER_1_SAVE_HANDLER, CACHE_LAYER_2_SAVE_PATH: redis
REDUCE_CACHE_USAGE: N
DEFAULT_DATASET_STORAGE_USE_CONFIG: Y
DA_ENABLE_OPENSEARCH: Y
1. Access Admin > System > System Variables
2. Configure Cache Layer Save Handler
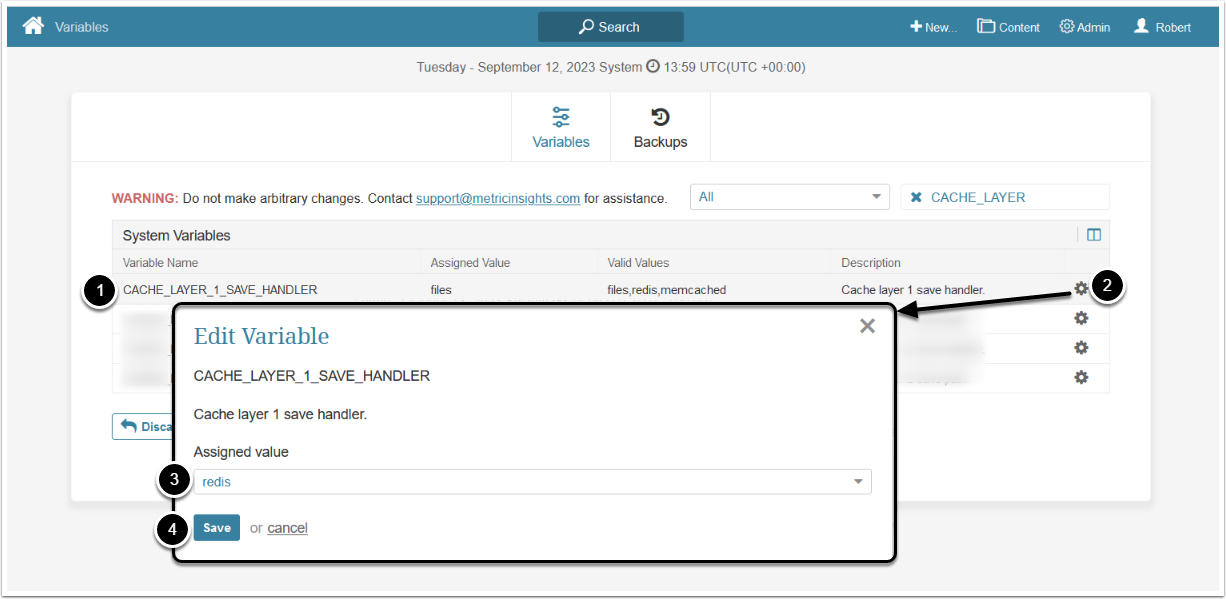
- Search for
CACHE_LAYER_1_SAVE_HADNLERand/orCACHE_LAYER_2_SAVE_HADNLERfor Layers 1 and/or 2 correspondingly - Click the gear icon
- Define where cache data is stored by selecting one of the following values:
-
files: Locally, the default value. -
redis: In Redis container. -
memcached: On Memcached server. This service needs to be configured separately, it is not a part of MI Installation.-
Note: If
memcachedis selected, the value ofCACHE_LAYER_1_SAVE_PATHand/orCACHE_LAYER_2_SAVE_PATHis<Custom Memcached server address>:11211
-
Note: If
-
- [Save]
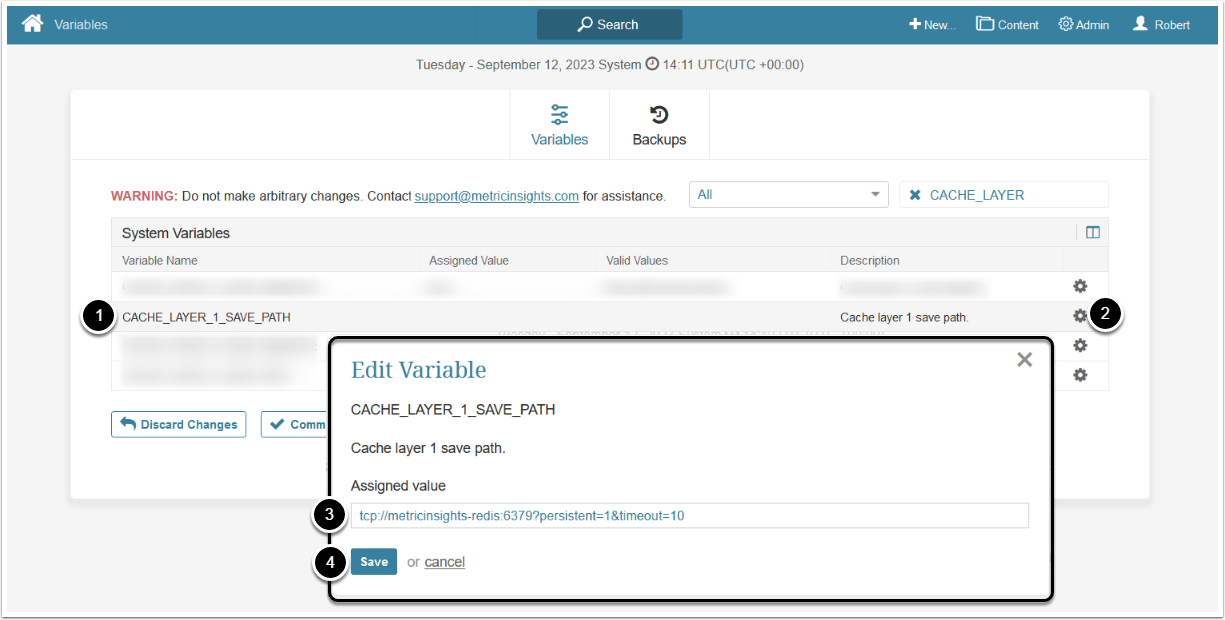
3. Configure Cache Layer Save Path
Note: The value(s) of CACHE_LAYER_1_SAVE_PATH and/or CACHE_LAYER_2_SAVE_PATH will be ignored if the value(s) of CACHE_LAYER_1_SAVE_HADNLER and/or CACHE_LAYER_2_SAVE_HADNLER is set to default value files.
- Search for
CACHE_LAYER_1_SAVE_PATHand/orCACHE_LAYER_2_SAVE_PATHfor Layers 1 and/or 2 correspondingly - Click the gear icon
- Define the specific path under which the cache data is stored. To get the needed path:
- Access the
webcontainer - Execute
env | grep PHP_SESSIONS_PATH - Copy the value of
PHP_SESSION_PATHand use it as the value ofCACHE_LAYER_1_SAVE_PATHand/orCACHE_LAYER_2_SAVE_PATH
- Access the
- [Save]
4. Save Changes
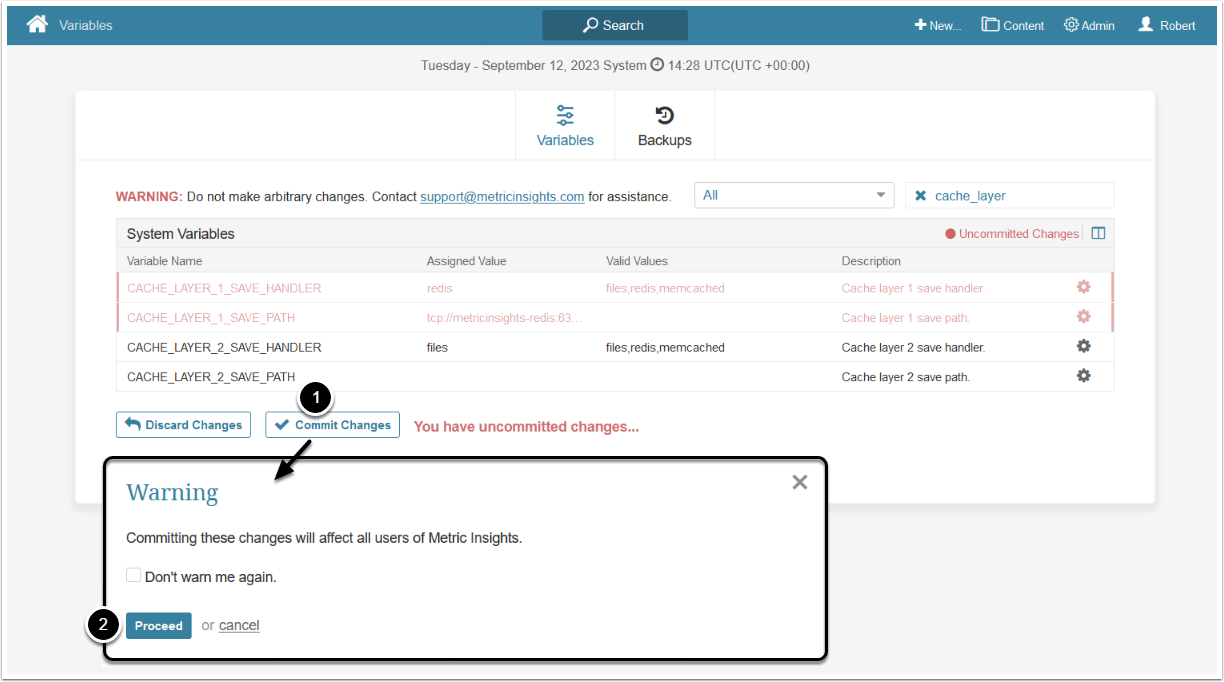
- [Commit Changes]
- [Proceed]