This article describes how to deploy MI application on Google Cloud Kubernetes Engine (GKE).
Table of contents:
GKE Architecture Diagram for High Availability Deployment

*NOTE: Opening port 80 is optional. Opening port 80 allows browser redirection to HTTPS when a user enters subdomain.domain.com in the browser without the protocol.
1. Create Infrastructure
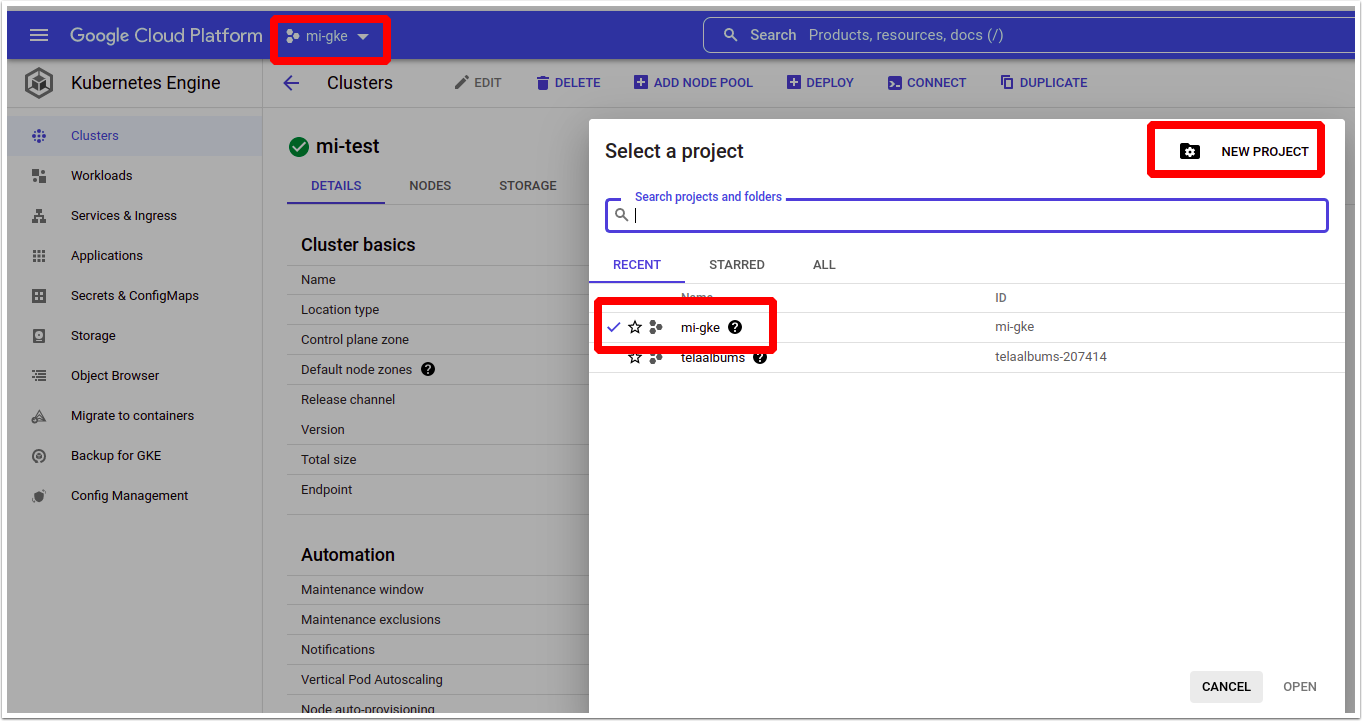
1.1. Create or Choose a Project
In Google Cloud, related resources are organized in projects. A project is required to create a GKE cluster.
1.2. Enable GKE API
Access Google Cloud Platform > APIs & Services > Library
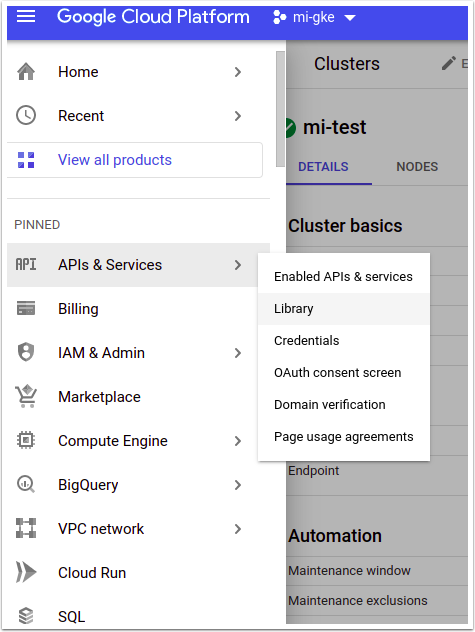
Search for 'Kubernetes Engine API', [Enable] if it has not been already enabled.
1.3. Create Kubernetes Cluster
Access Kubernetes Engine > Clusters
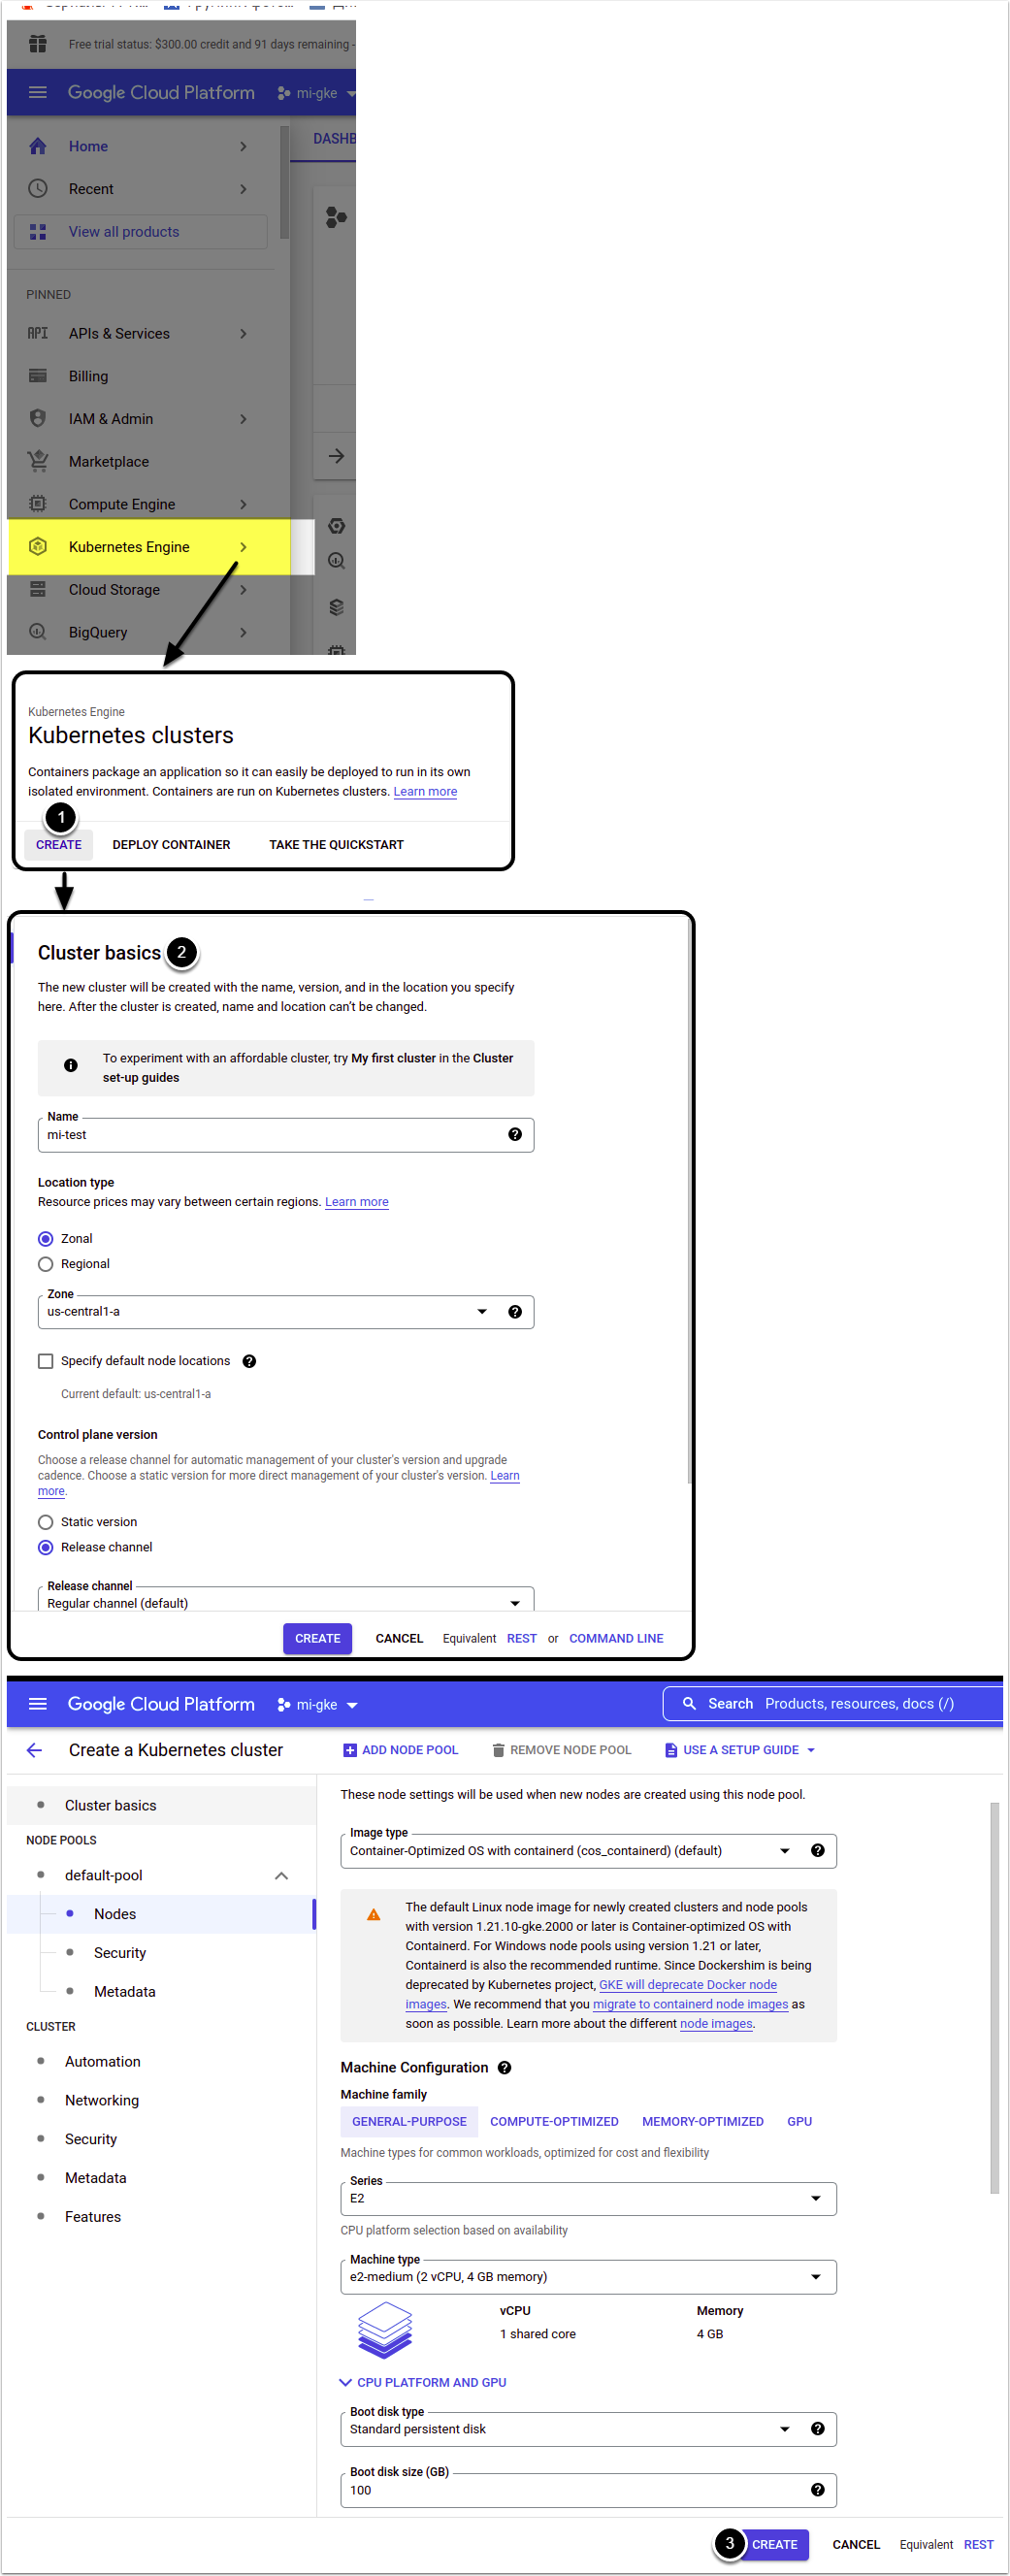
- [Create]
- Fill out cluster parameters
- Once you have configured your cluster settings, click [Create]
1.4. Configure gcloud and kubectl on your Local Machine
For detailed instructions based on your operating system, see the following documents:
- Add your cluster to kubectl:
gcloud container clusters get-credentials <Your Cluster> --zone <Cluster Zone>- Verify the cluster is available:
kubectl get nodes1.5. Create Google Filestore Instance
Access Storage menu > Filestore > Instances
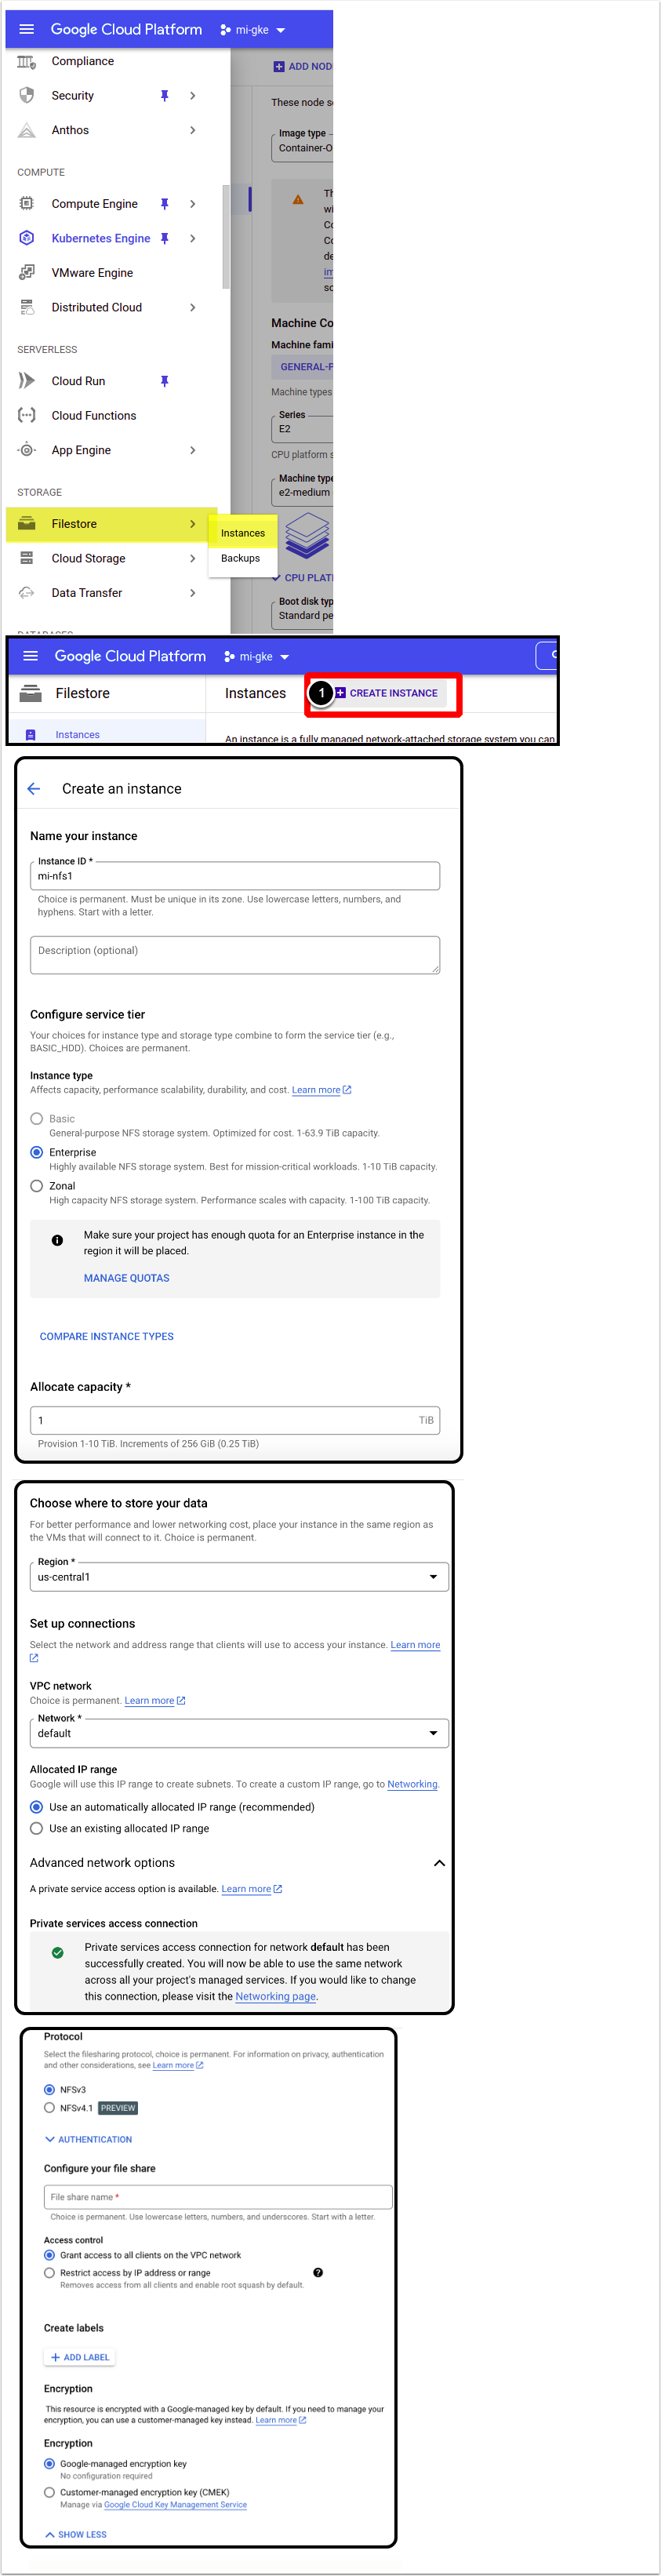
- [Create Instance]
- Fill out the instance details, then [Create]
- Wait until the instance is created and note the following:
- Assigned IP
- Fileshare name that you have entered
1.6. Create MySQL Database Instance
Access Main menu > SQL
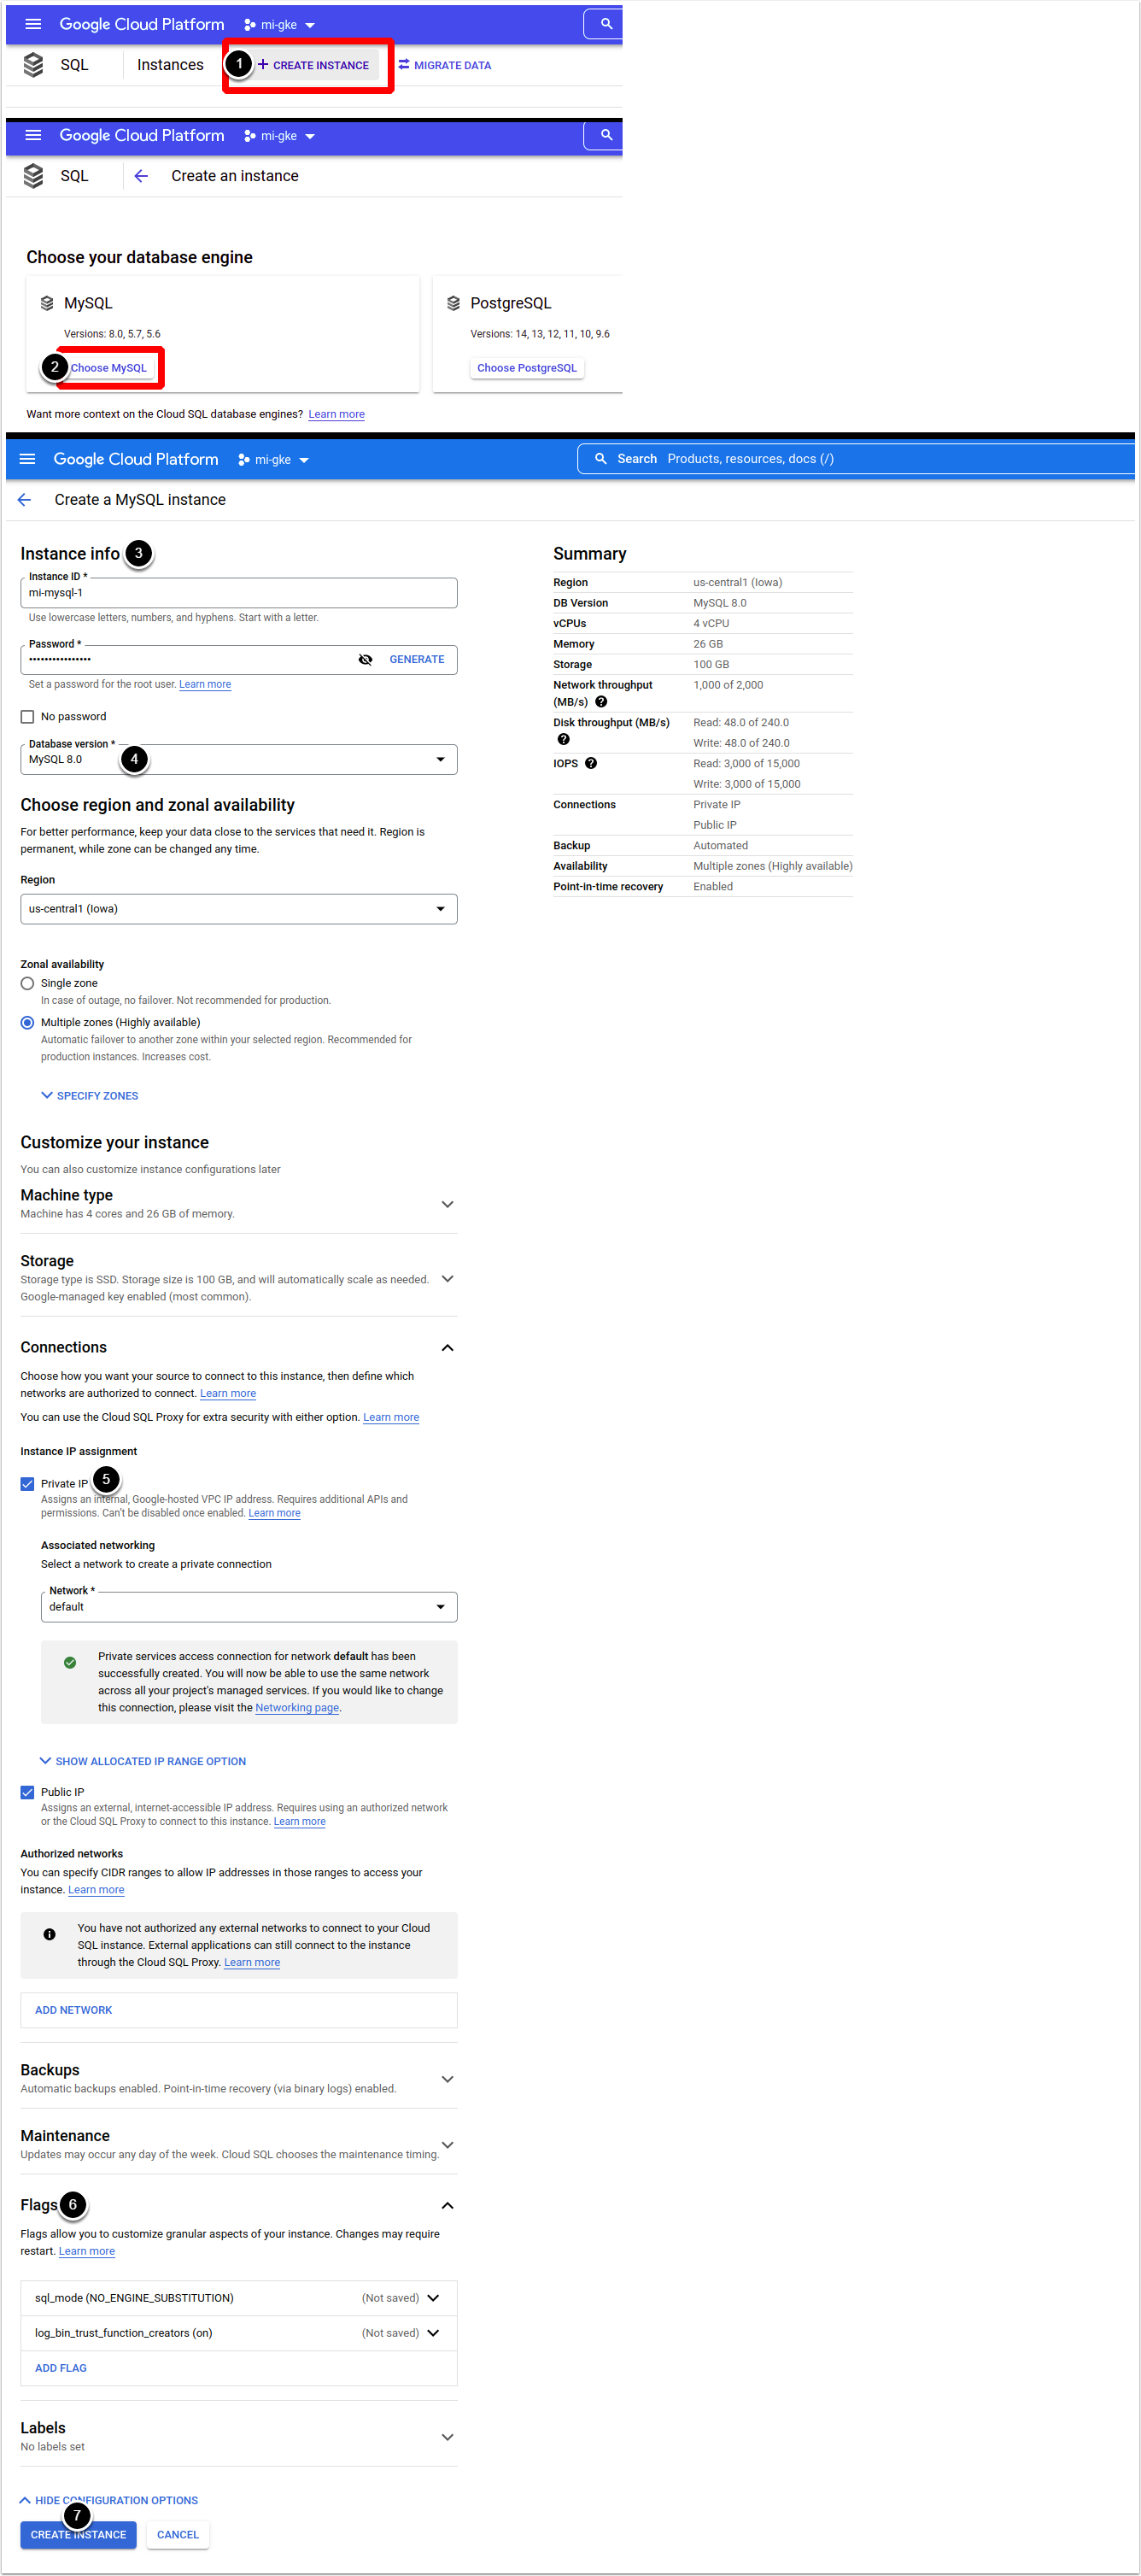
- [Create Instance]
- [Choose MySQL]
- Note down your root password
- Choose MySQL 8.0 as Database version
- Enable Private IP under connections
- Set the following Flag values:
log_bin_trust_function_creators: onsql_mode: NO_ENGINE_SUBSTITUTIONrequire_secure_transport: OFF
For the recommended settings for other flags, refer to the following article:
NOTE: not all of these are available on Google SQL Instances. As of May 2022, the following flags can not be set:
skip-log-bin,mysqlx,key_buffer_size,innodb_adaptive_hash_index,connect_timeout,innodb_open_files,innodb_flush_method,gtid_mode.
- [Create Instance], wait until the instance is created and note down the Private IP
2. Install MI Application
- Go to your MI installer folder, and generate Kubernetes manifest and related commands by running the following command:
./installer.py kubernetes --db-hostname <YOUR_MYSQL_PRIVATE_IP> --db-user root --db-password <YOUR_MYSQL_ROOT_PASSWORD> --load-balancer-type external --service-type LoadBalancer --storage-class nfs --nfs-server-address <YOUR FILESERVER_IP> --images-pull-secret-name metricinsights-docker-registry --dp-hostname metricinsights-dataprocessor --nfs-shared-folder <YOUR_FILESERVER_SHARE_NAME> --namespace mi -o deployment.ymlThis command will generate several Kubernetes commands, execute each one in sequence.
- Run the following command to get deployments.
kubectl get deployments -n miIf everything is set up correctly, you should see output similar to the following:

- Obtain the MI public IP:
kubectl get services -n mi
- List pods available. Make sure all nodes are in a Ready state, and Status is Running. Otherwise, try again later:
kubectl get pods -n miNote the metricinsights-web-master pod name:

- Copy key and certificate to the pod
kubectl cp /path/to/server.crt <metricinsights-web-master>:/opt/mi/ssl/server.crt -n mi
kubectl cp /path/to/server.key <metricinsights-web-master>:/opt/mi/ssl/server.key -n mi- Restart apache service
kubectl exec -ti -n mi <metricinsights-web-master> -- service apache2 restart- Go to your site’s URL in a web browser to ensure that the SSL/TLS certificate is properly installed and working