This article describes how to deploy MI application in Azure Database for MySQL.
Table of contents:
2. Create Azure Database for MySQL Flexible Servers
- Access Databases
- Select Azure Database for MySQL flexible servers, [Create]
3. Select Service Type
- Select Flexible server, [Create]
- Selecting this option will allow you to chose the MySQL version later on
4. Configure Flexible Server
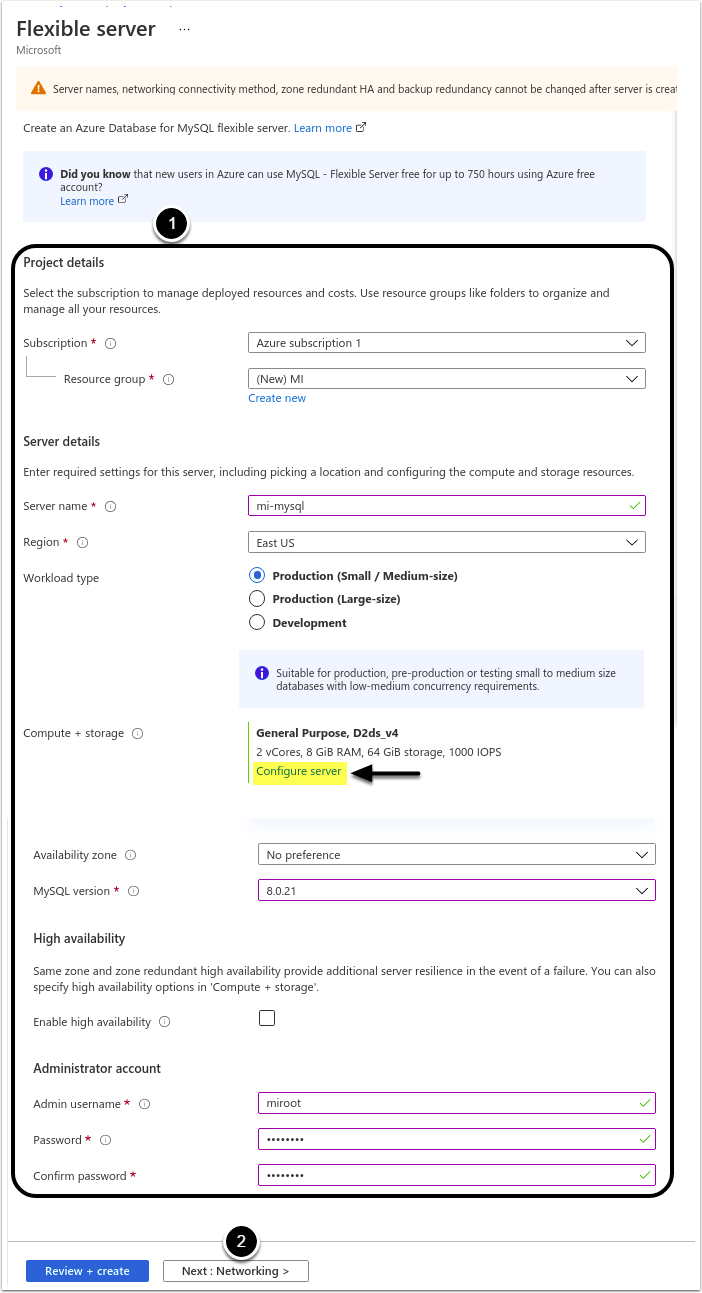
- Fill the details of your Flexible Server configuration
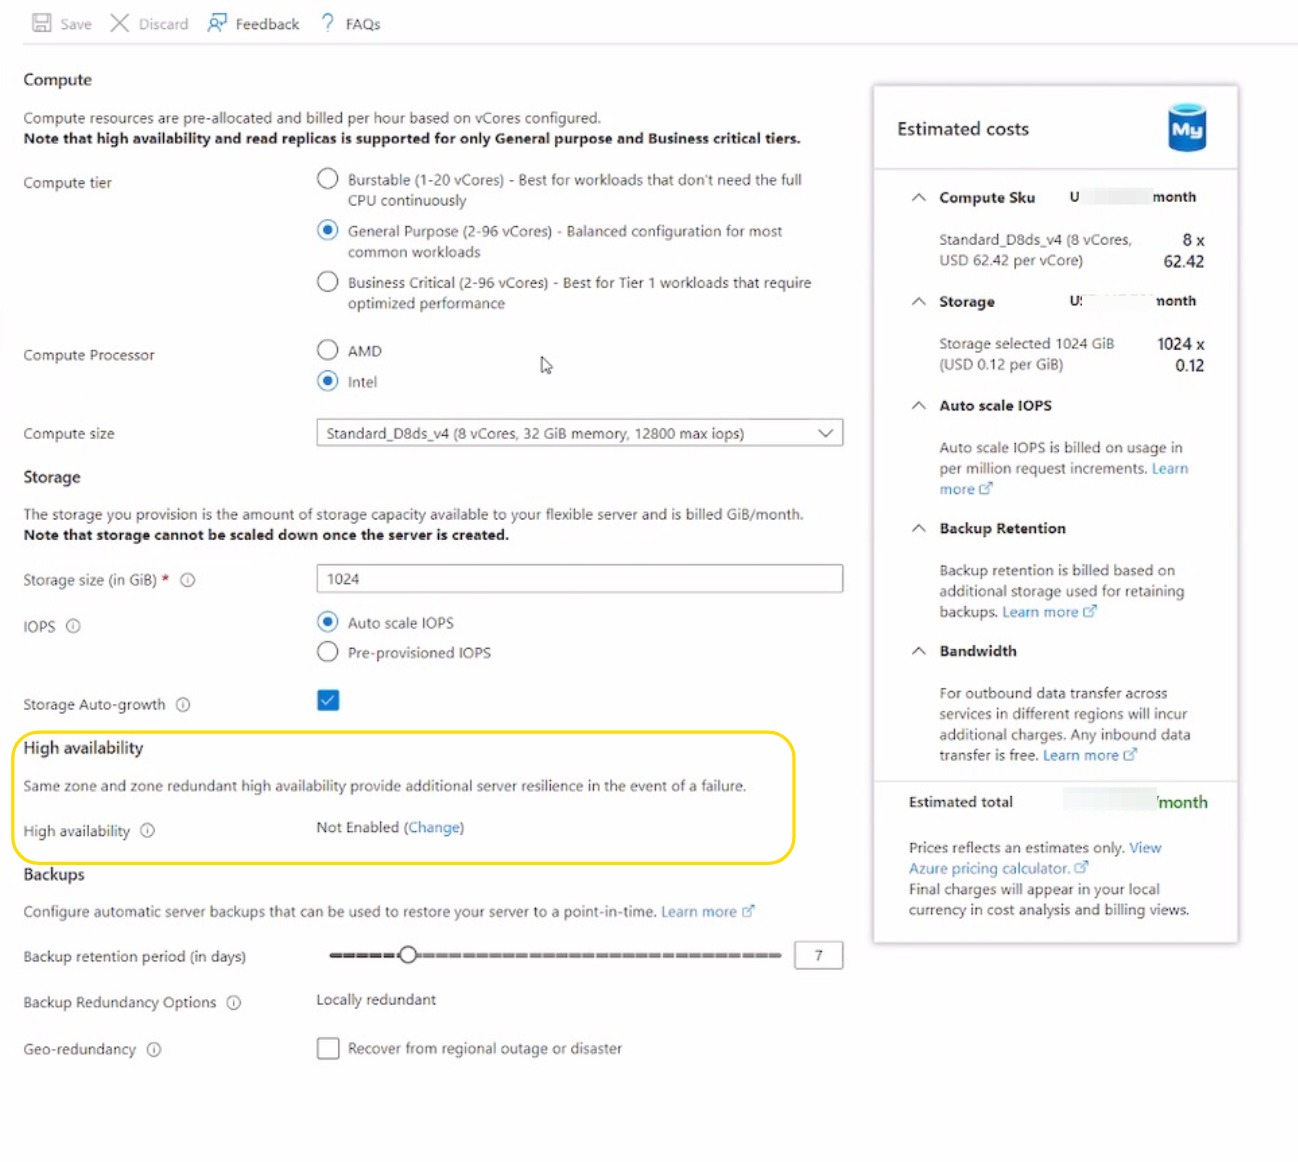
- Optionally, click Configure Server link in the Compute+Storage section and tune the server size according to your needs.
- [Next: Networking]
^ Note: The High availability setting should not be chosen. High availability requires GTID_MODE parameter to be enabled, which is not compatible with Metric Insights.
5. Configure Networking
Access Networking
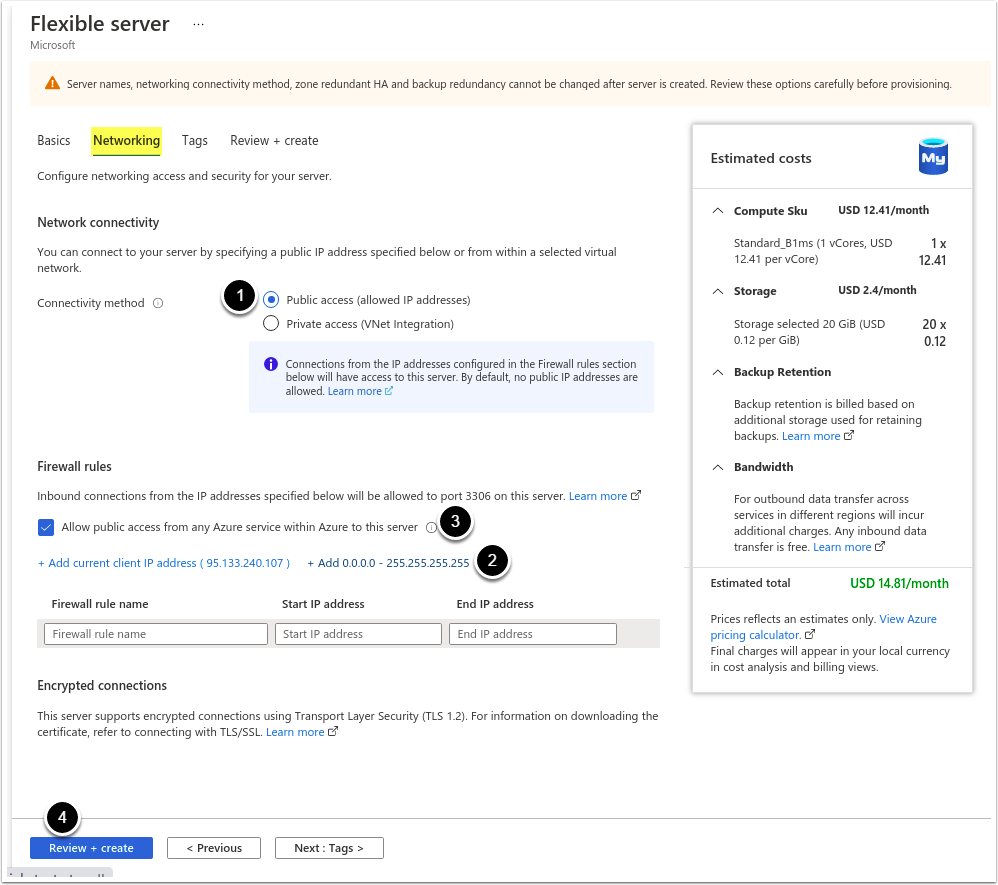
- Set Connectivity method to 'Public access (allowed IP addresses)'
- Click [+Add 0.0.0.0 - 255.255.255.255] to allow access to your database outside of Azure
- If you have your own static IP or IP range on the server where the MI app will be hosted, you may fill out the Firewall rule form instead
- If you need access from Azure, activate the Allow public access from any Azure service within Azure to this server checkbox
- [Review and create], check the settings, then [Create]
6. Access Server Parameters
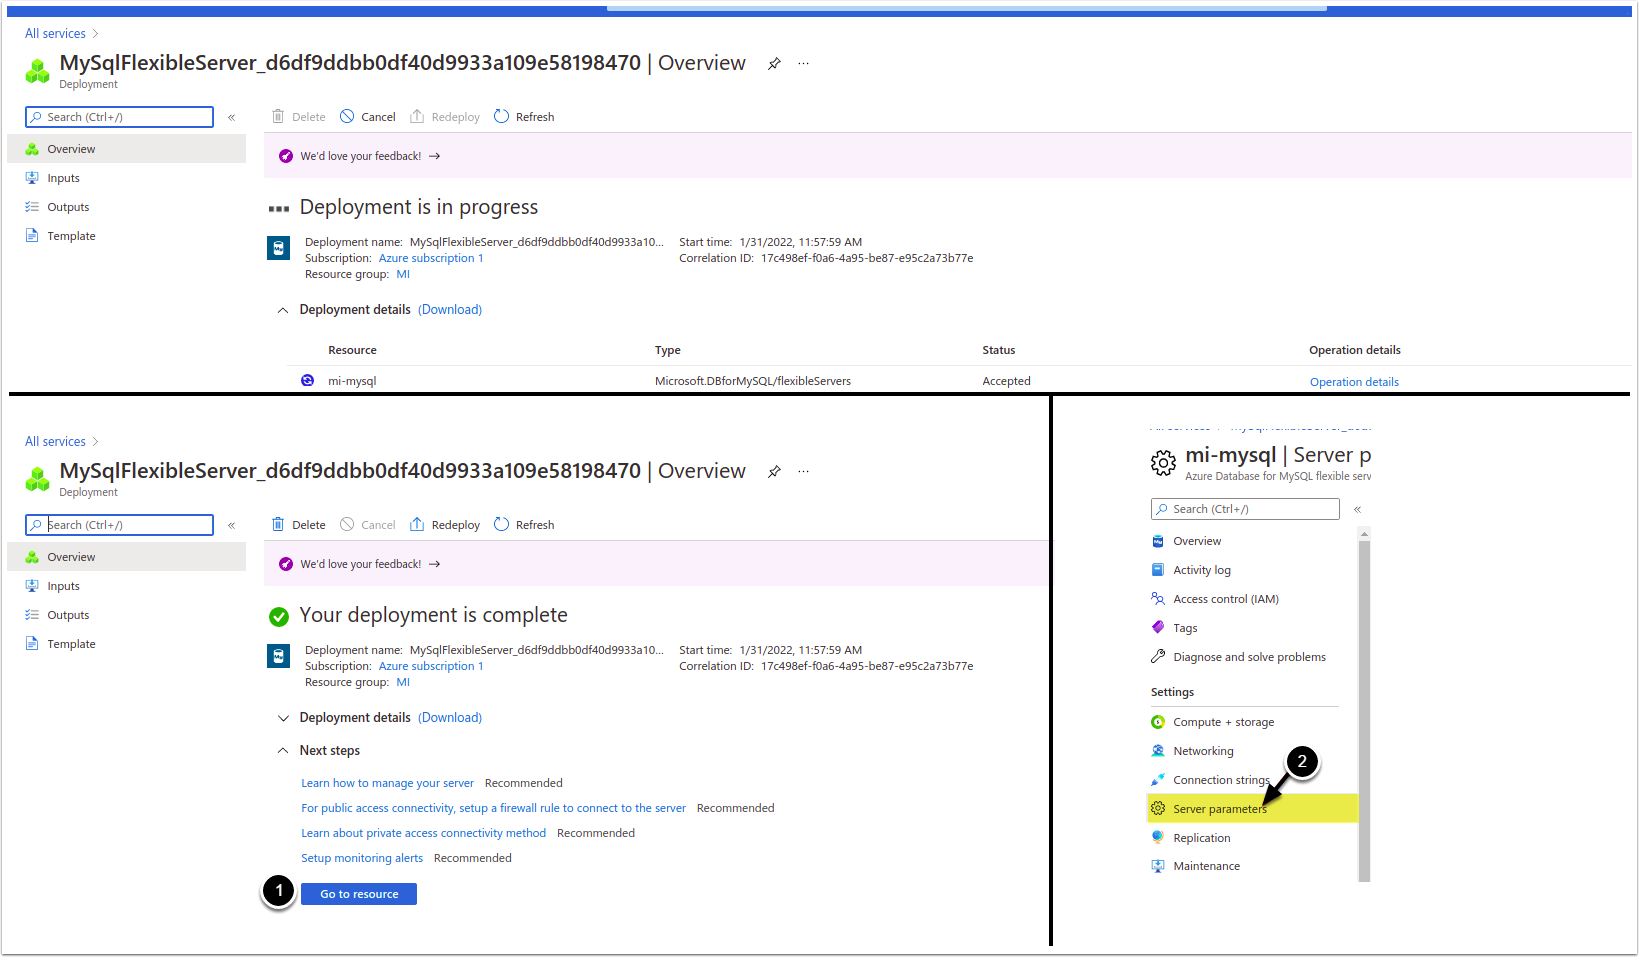
You will be redirected to the Overview page, once deployment is finished:
- [Go to resource]
- [Server parameters]
7. Configure Server Parameters
- Enter require_secure_transport in the search string, set its value to 'OFF',
- [Save], then choose Save without restart.
Do the same for all the parameters from the table below, according to the DB RAM size.
- For the sql_mode parameter, additionally, uncheck NO_ZERO_IN_DATE and NO_ZERO_DATE modes.
NOTE: See Fine-Tuning MySQL Parameters for details.
7.1. Set Low Priority Updates
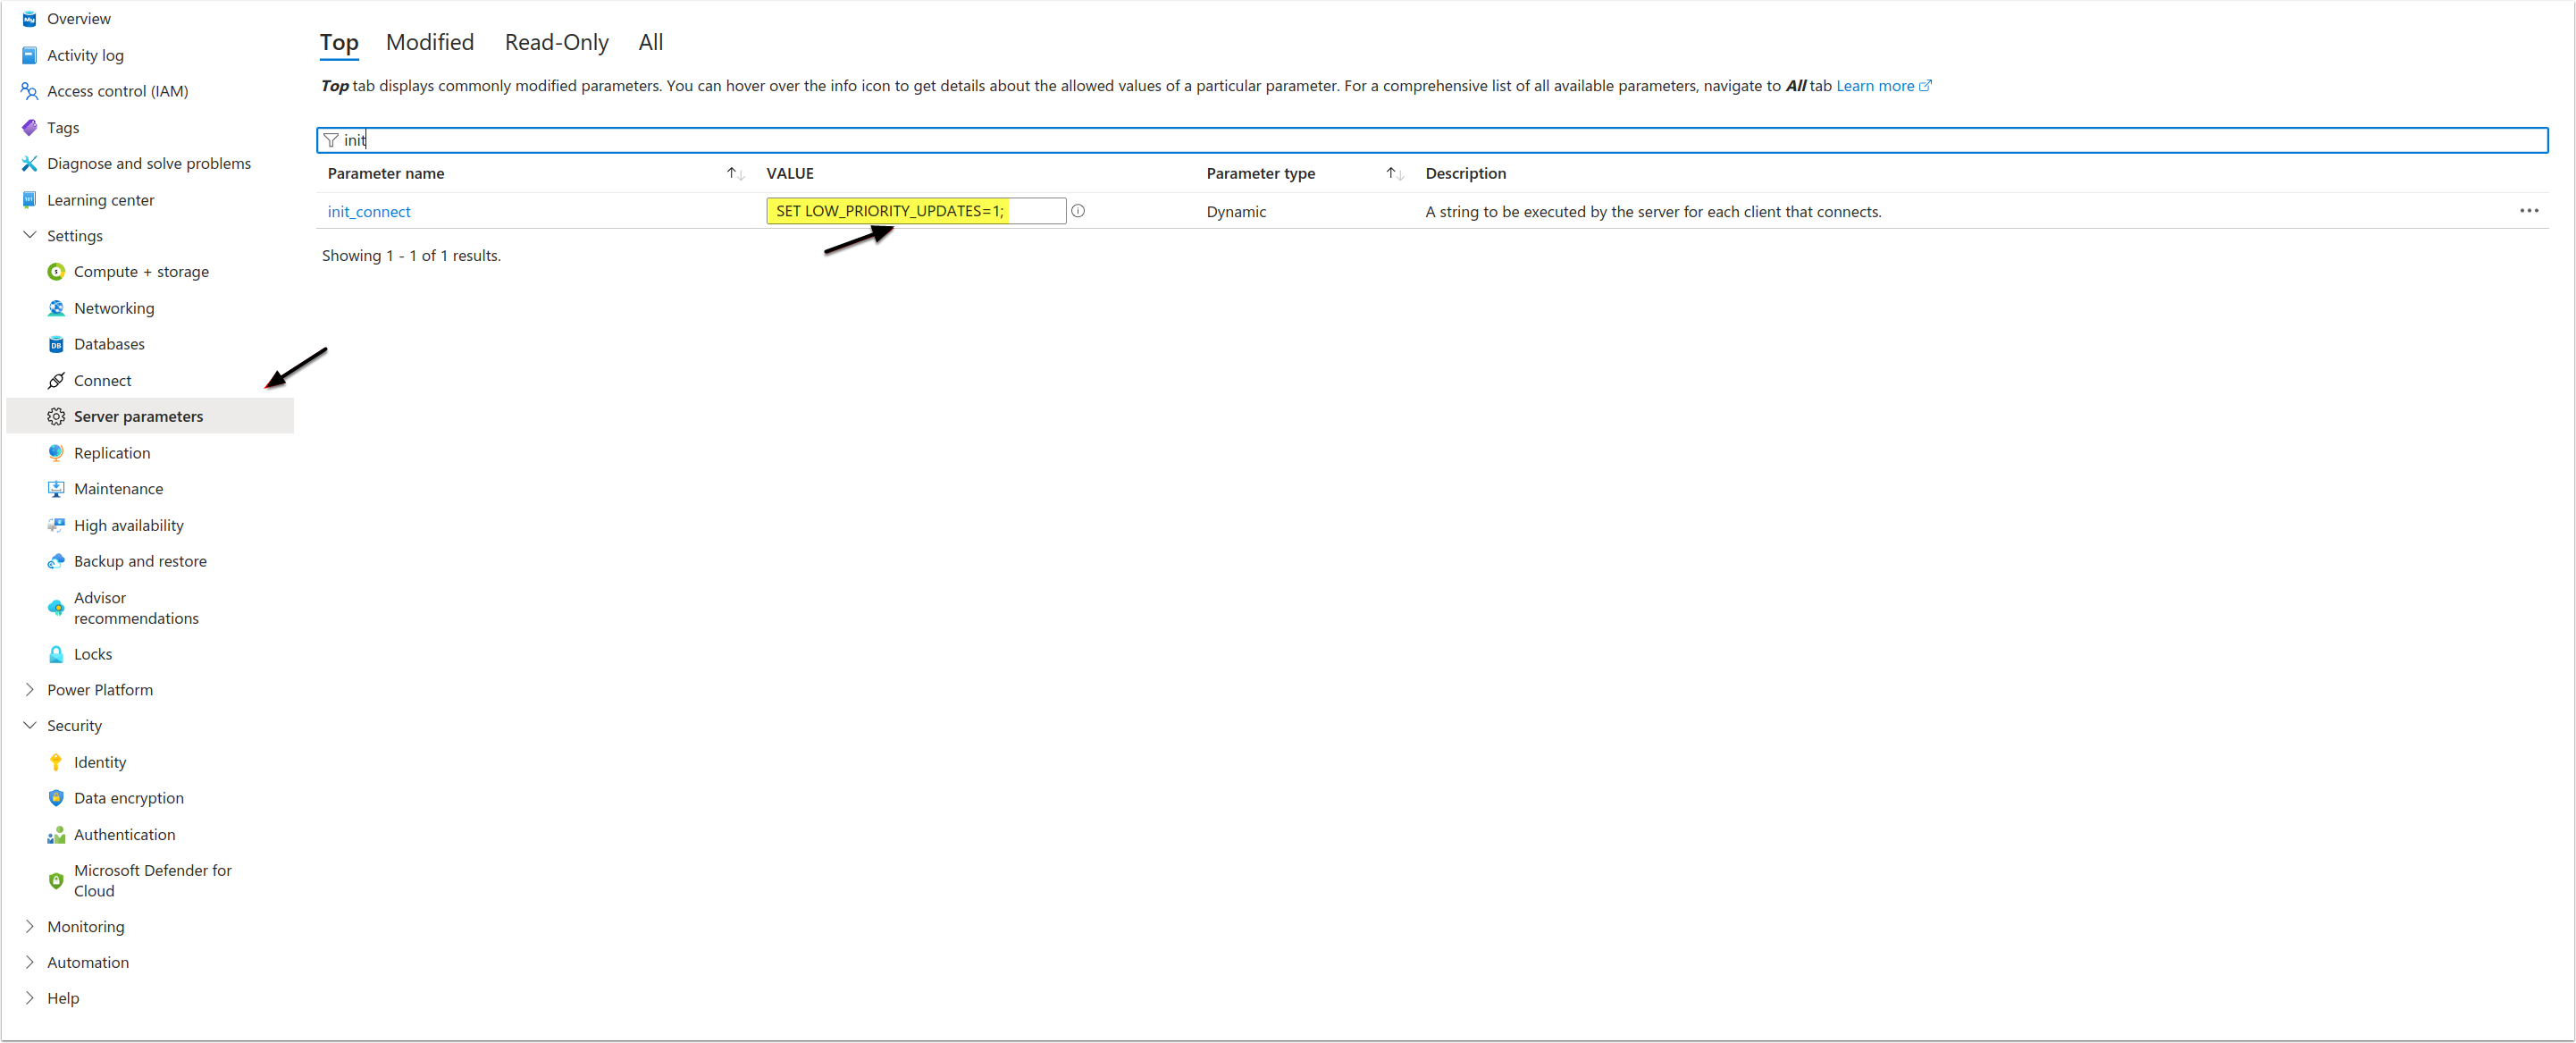
It is possible to set LOW_PRIORITY_UPDATES value on the session level only. To set it for every connection to the server, please set init_connect parameter to SET LOW_PRIORITY_UPDATES=1;
NOTE: init_connect parameter can be used to change parameters that do not require SUPER pivilege(s) at the session level.
8. Restart MySQL Server
Access Overview
After all server parameters have been configured, [Restart] MySQL server.
9. Find Server Address
After the restart is completed, you can use your new database server. The server address is located under the Essentials section. Use it along with admin user login and password (see Configure Flexible Server for details) to run the installation against your Azure DB.
10. Run MI Installer
Run the MI application installation via the following command:
./installer.py --components web,seed,data-analyzer,dataprocessor,monitoring --db-hostname <Your Azure DB Hostname> --db-user <Admin User> --db-password <Admin User Password>


