This article explains how to deploy Metric Insights on Amazon EC2 using a pre-configured AMI (Amazon Machine Image). You’ll request the AMI from support@metricinsights.com, provide your AWS Account ID and preferred EC2 region, and then use the provided AMI ID to launch a new EC2 instance that meets the required system specifications. Once deployed, you’ll access the instance in your browser and log into the Metric Insights application to complete the setup.
- If you don’t yet have an AWS account, you can create one at http://aws.amazon.com/ec2/.
PREREQUISITE:
Ensure that the system requirements for a Metric Insights server are met.
Table of contents:
1. Get Your AWS Account ID
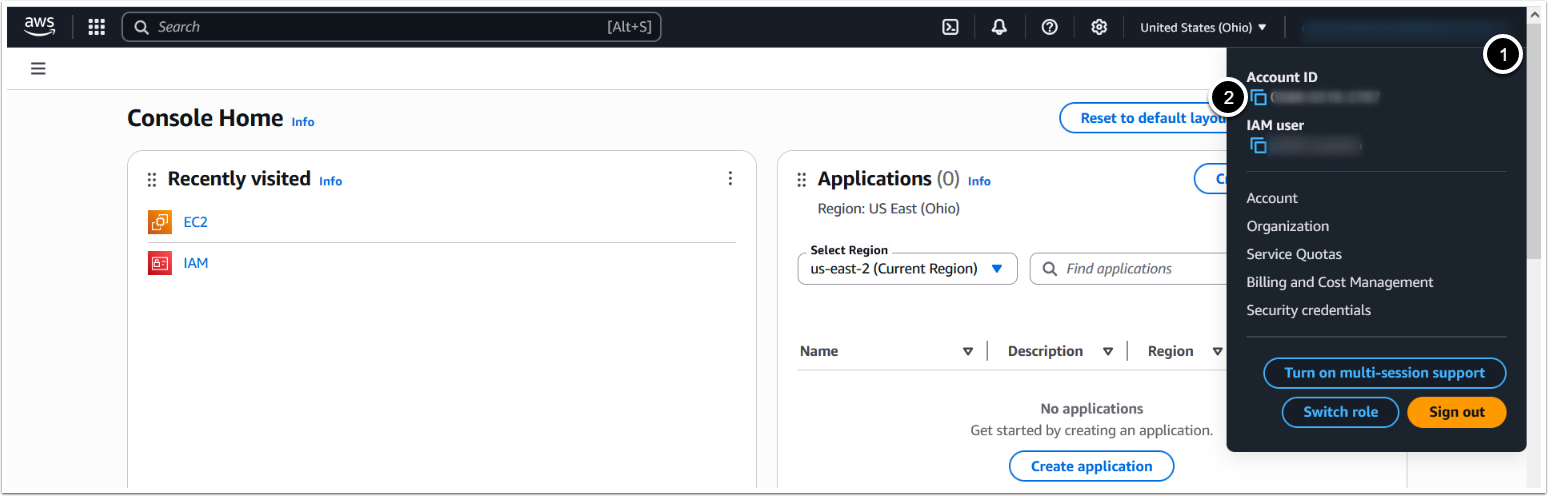
- Click on the top-right Account menu
- Copy the Account ID
- It is a 12-digit number in the form
XXXX-XXXX-XXXX
- It is a 12-digit number in the form
2. Get Metric Insights AMI
Contact support@metricinsights.com to request the Metric Insights software. You will receive an email asking for your AWS Account ID and desired EC2 region. Once you share that information via email, we will respond by sharing an AMI ID (Amazon Machine Image ID) that you can use to launch your EC2 image.
3. Launch a Metric Insights EC2 Instance
At this point, you should have received an AMI ID (Amazon Machine Image ID) for the Metric Insights server. Use this AMI ID to launch an EC2 instance.
3.1. Open AMI Menu in AWS Console
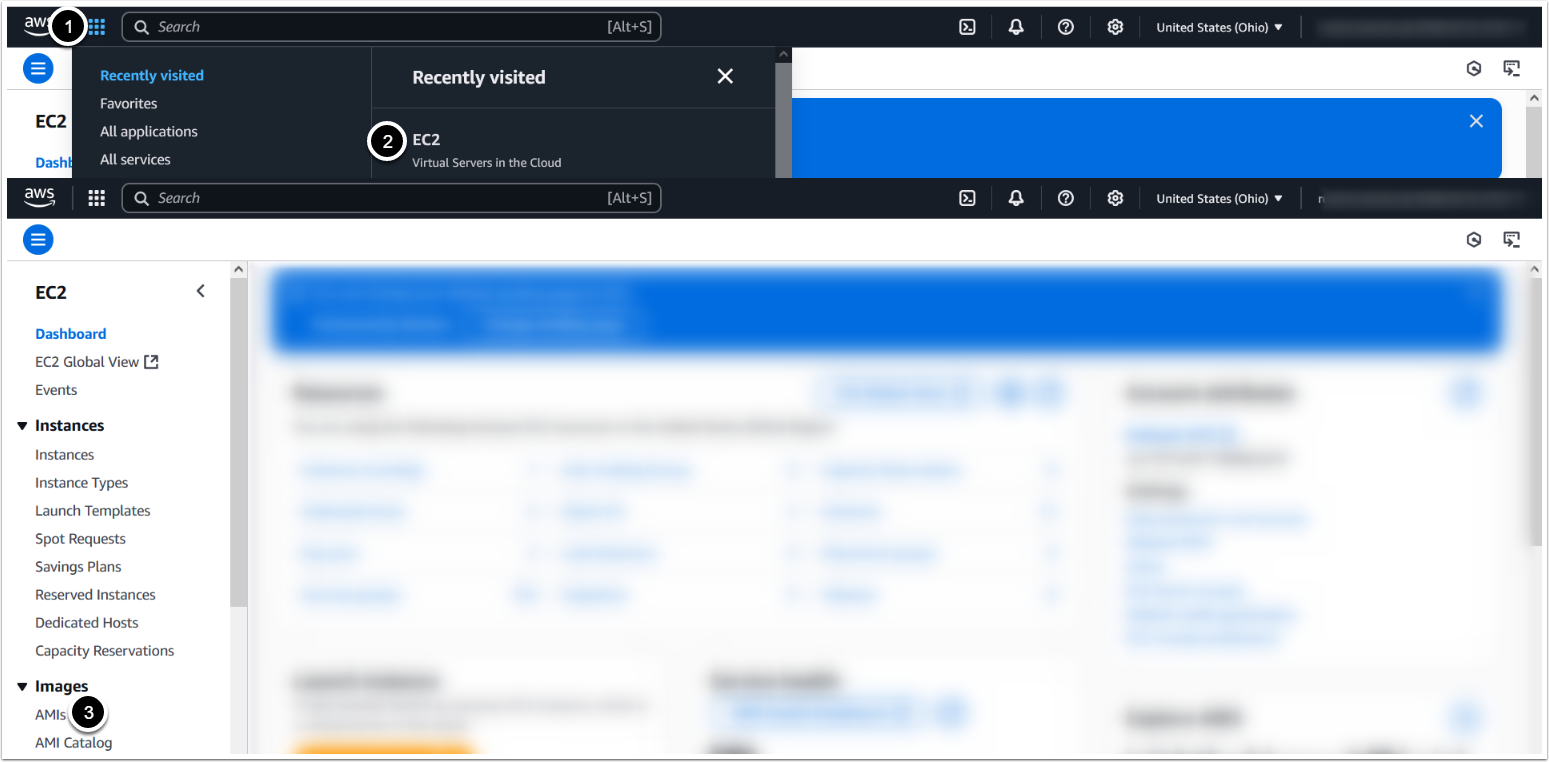
- Open Services menu
- Search for EC2
- Access AMIs
3.2. Find the Metric Insights AMI
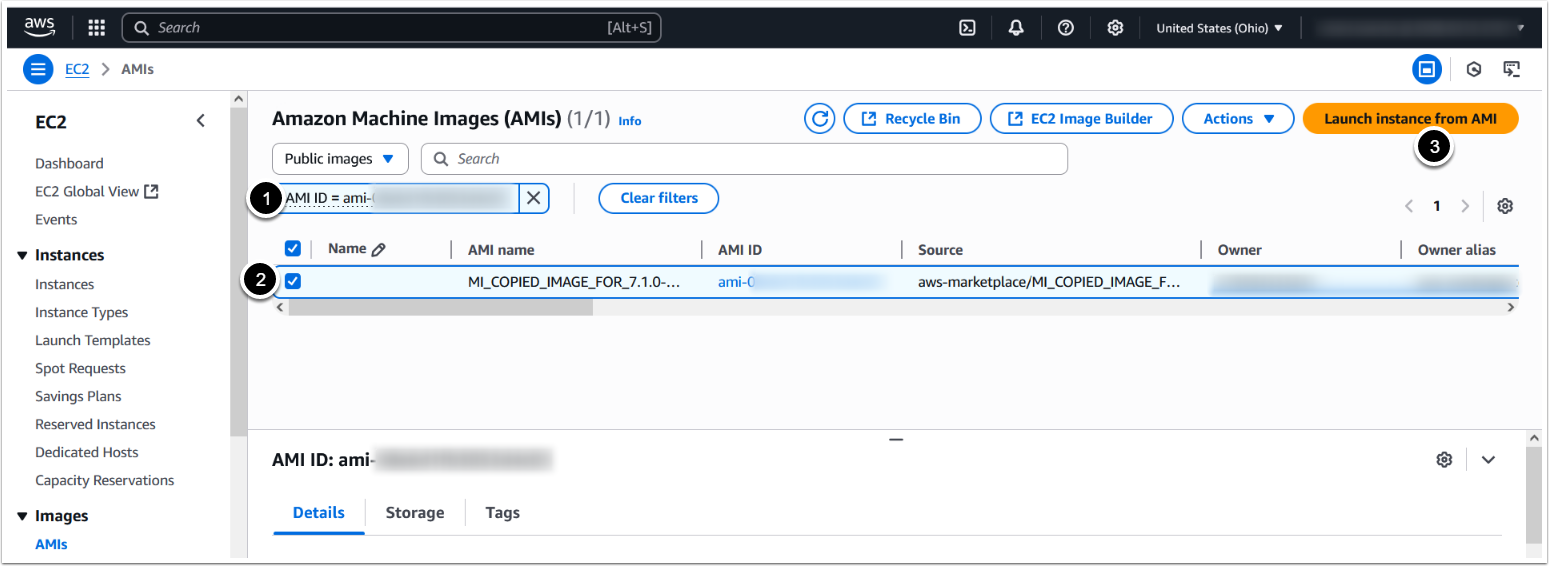
- In the AMI list, insert the AMI ID in the search bar and select 'Public Images'.
- Select the Metric Insights AMI
- [Launch instance from AMI]
3.3. Launch EC2 Instance with Enough Resources

- Enter a Name for the instance
-
Select Instance Type
- See the minimum system requirements for the Metric Insights Server
- Select a Key pair name for instance access
- [Launch instance]
3.4. Obtain Instance URL
Access Instances
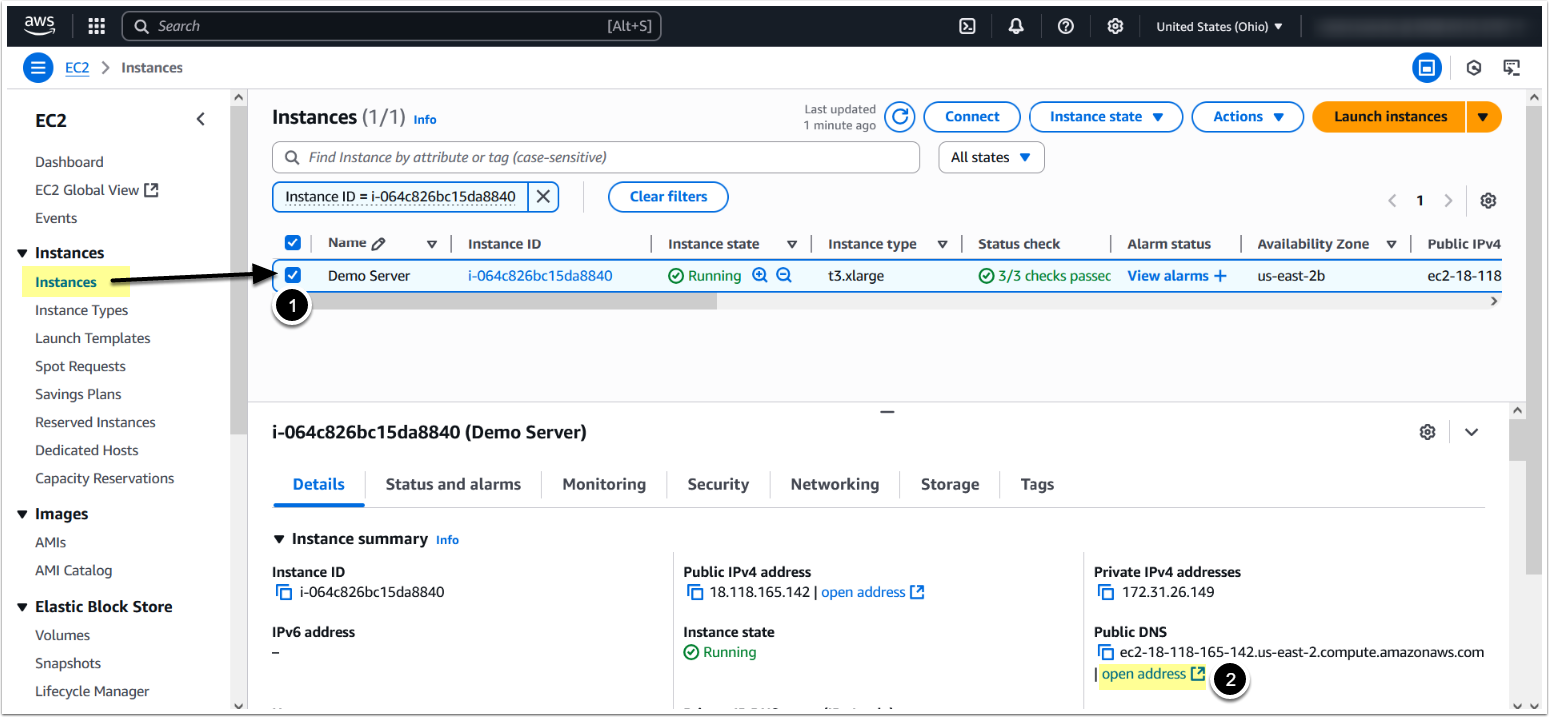
- Select the launched Instance
- Copy Public DNS and open it in a new tab, or just click [Open address]
4. Access EC2 Instance from Browser
4.1. Accept the SSL Warning
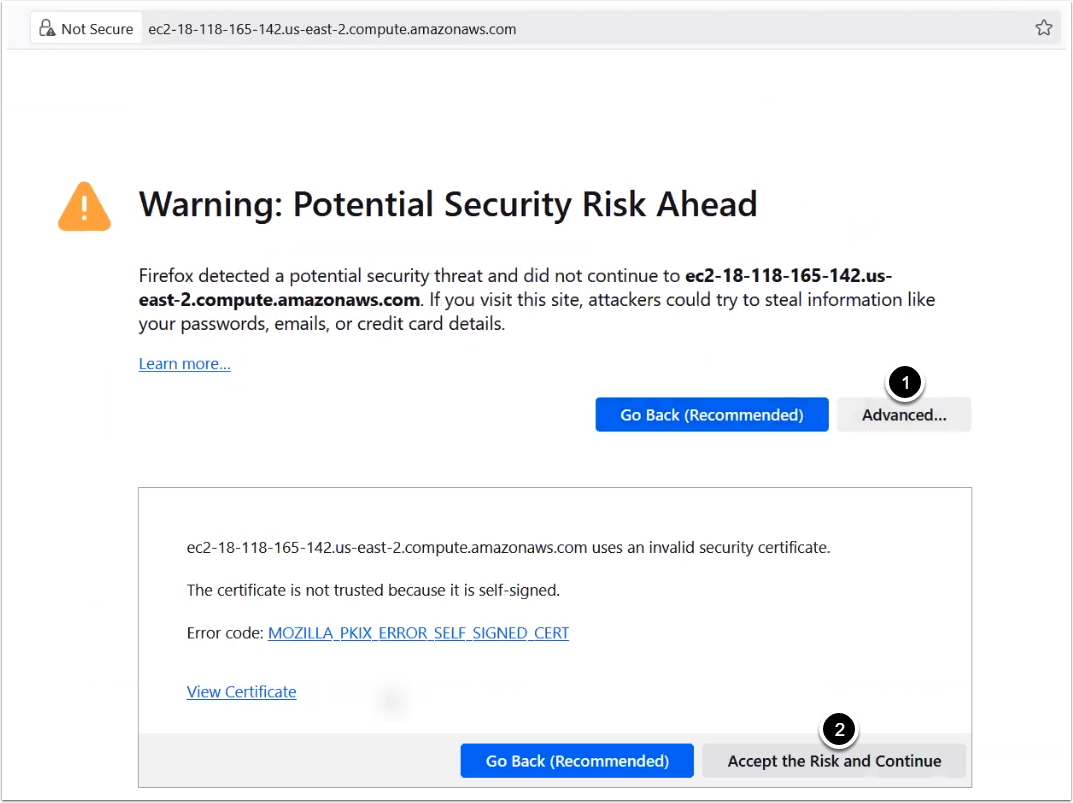
NOTE: Depending on your browser, you might get an SSL warning because the instance is using a self-signed certificate.
- [Advanced...]
- [Accept the Risk and Continue]
4.2. Log in to Metric Insights
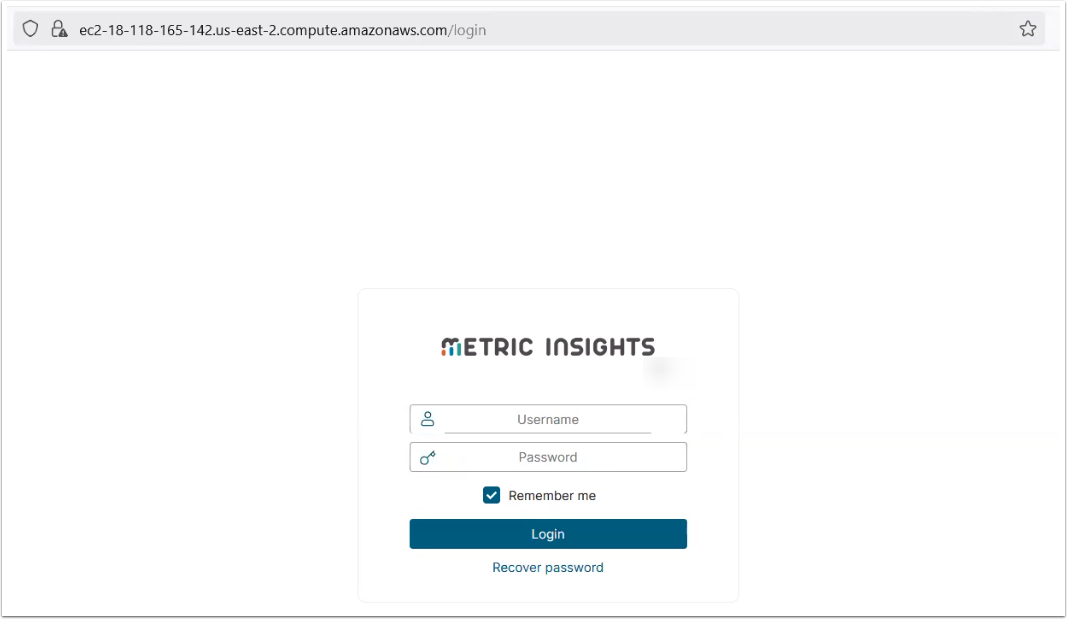
Log in with the username and password supplied to you via email.