This article describes how to deploy MI application in AWS with RDS for MySQL.
Table of contents:
1. Create RDS Security Group and Allow Access to the DB
Log in to your AWS account > Services > VPC
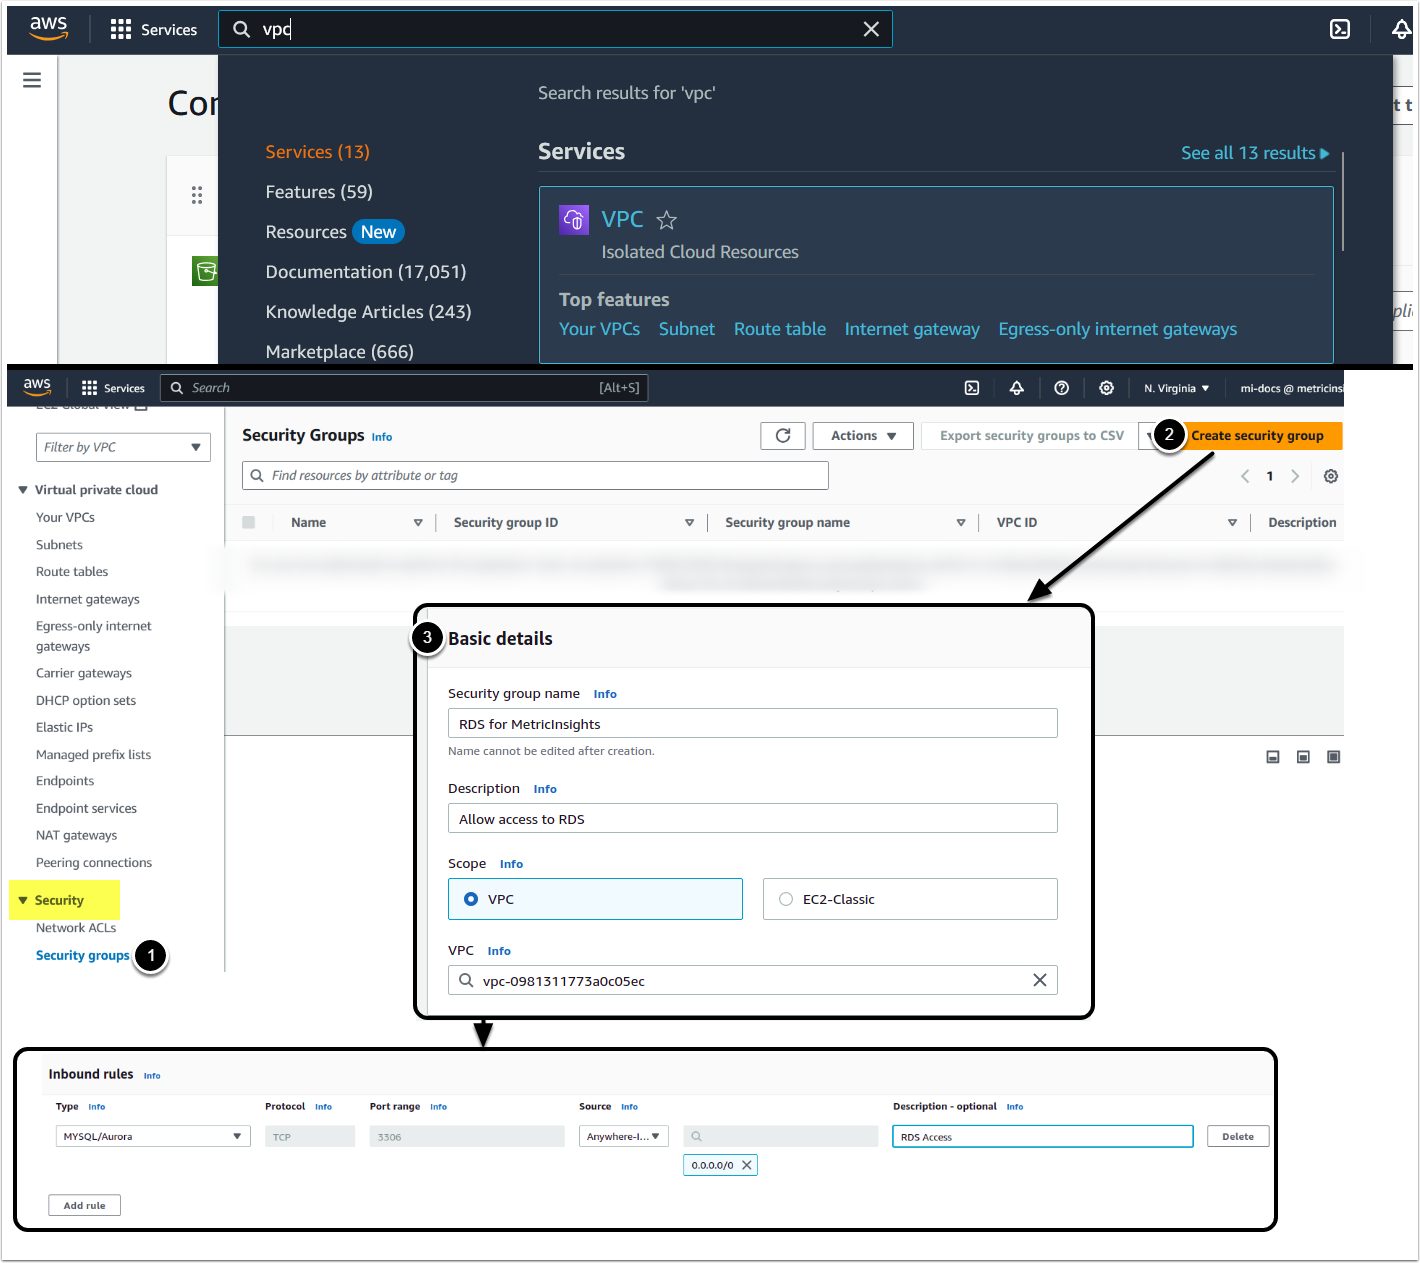
- Select Security Groups under the Security section on the left part of the Console
- [Create Security Group]
- Fill out the Basic details section, enter the Security group name and Description, leave other fields as-is
- Leave the Outbound section as is and click [Create Security Group] button at the bottom of the page
2. Create RDS DB Instance
2.1. Create New Database
Access Services > RDS
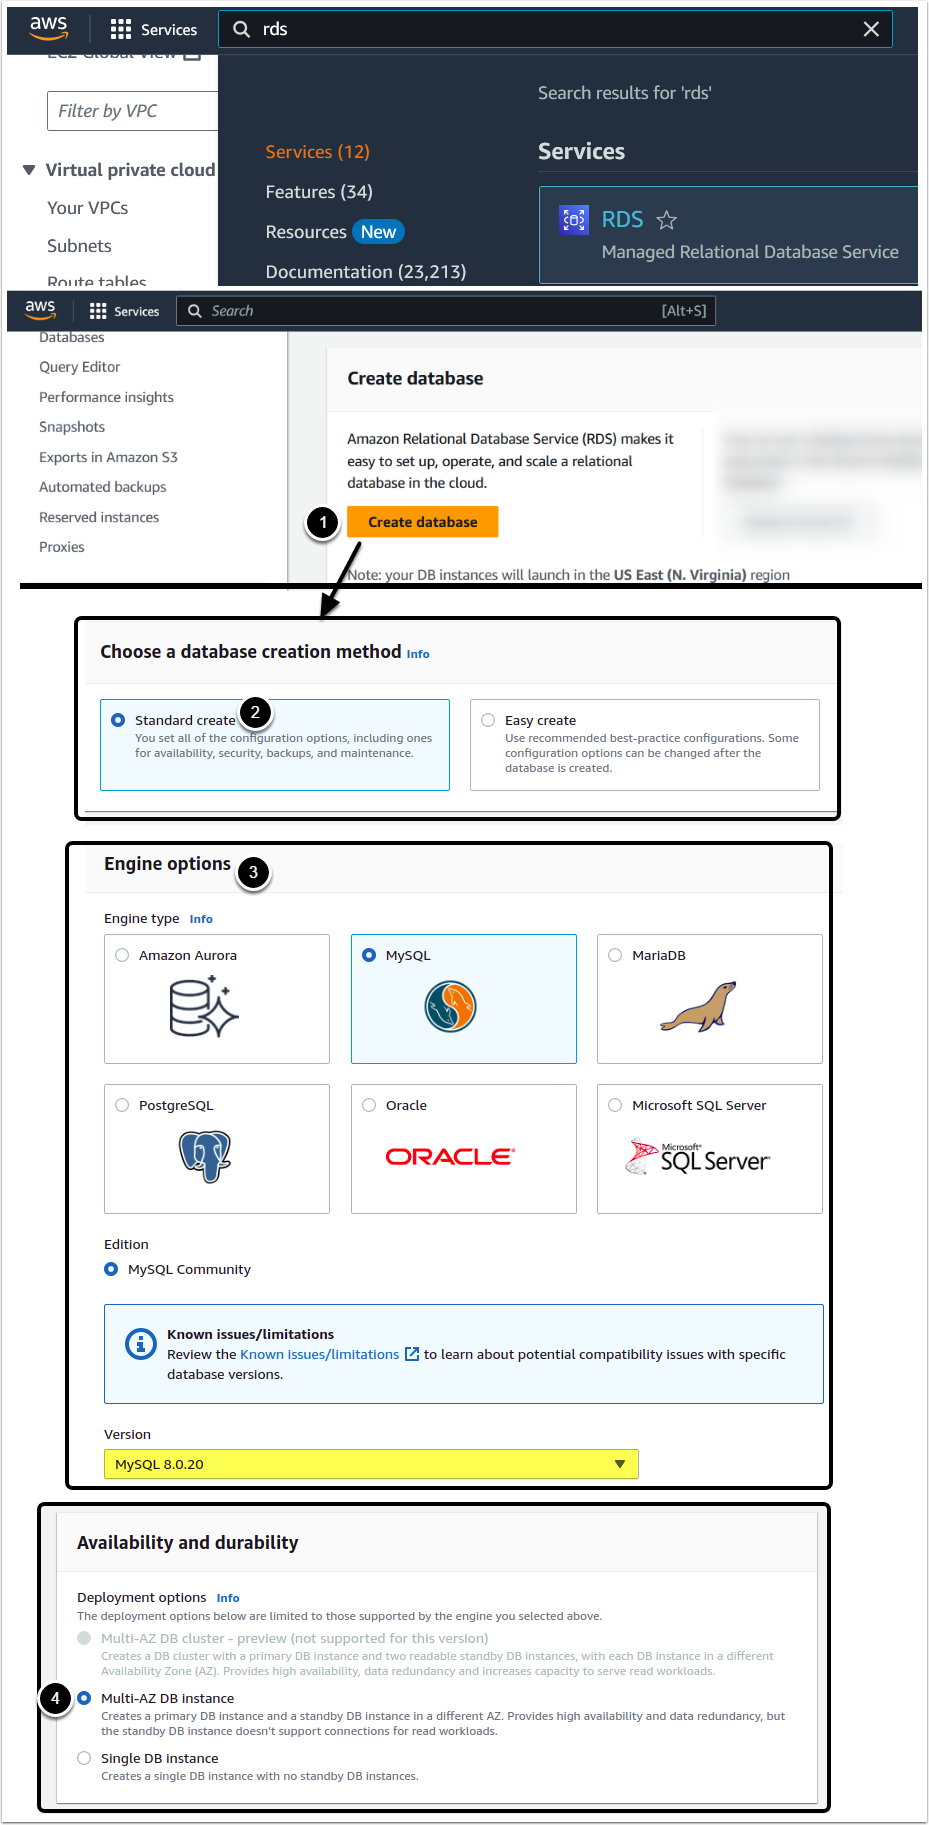
- [Create Database]
- Choose Standard Create method
- Under the Engine Options section select Engine type as MySQL and Edition as 8.0.20
- Deployment options: select Multi-AZ DB instance
- Please note that the pricing for this edition can be up to three times higher than that of a Single DB instance.
- Read more about Multi-AZ DBs at https://aws.amazon.com/rds/features/multi-az/
2.2. Provide DB Settings

2.3. Set DB Instance Class
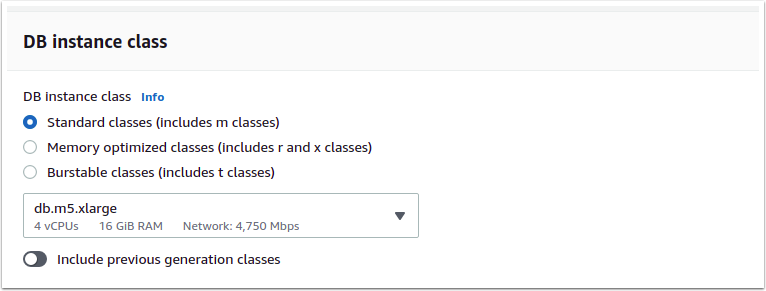
Set DB instance class to Standard classes (includes m classes)
2.4. Configure Storage Options

Under the Storage section select the appropriate storage size and whether to auto-scale it or not and scaling limits
2.5. Set DB VPC
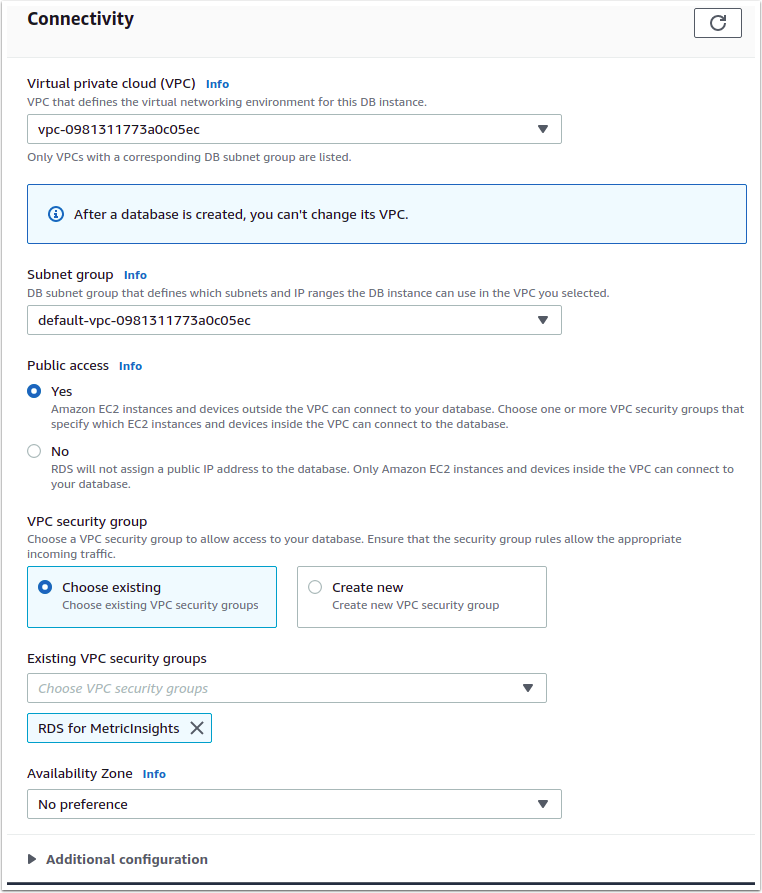
Under the Connectivity section select your VPC, set Allow Public Access to 'Yes'. For the VPC Security Group option set Choose Existing and select the Security Group that you have previously created.
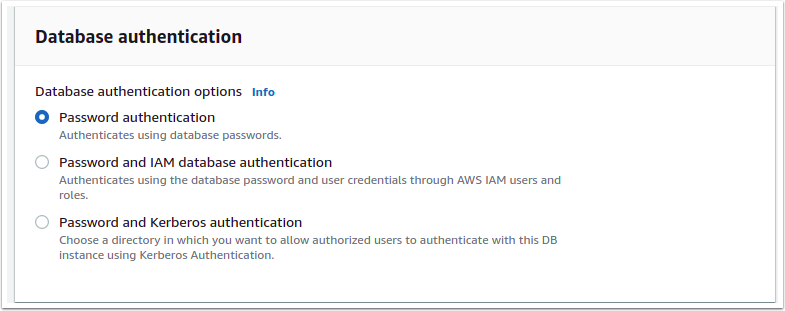
2.6. Set DB Authentication
2.7. Additional Configuration
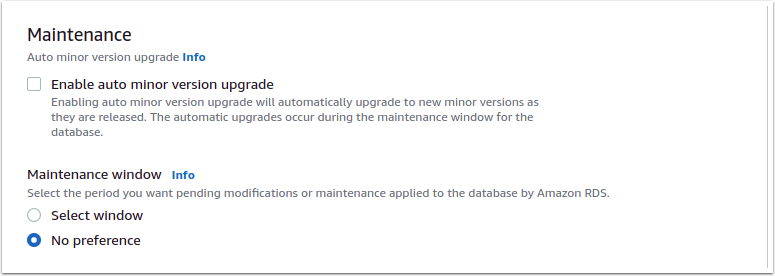
Expand the Additional Configuration section and scroll down to the Maintenance options. Deactivate Enable auto minor version upgrade checkbox. You can also set the desired Maintenance Window here.
2.8. Configure Backup
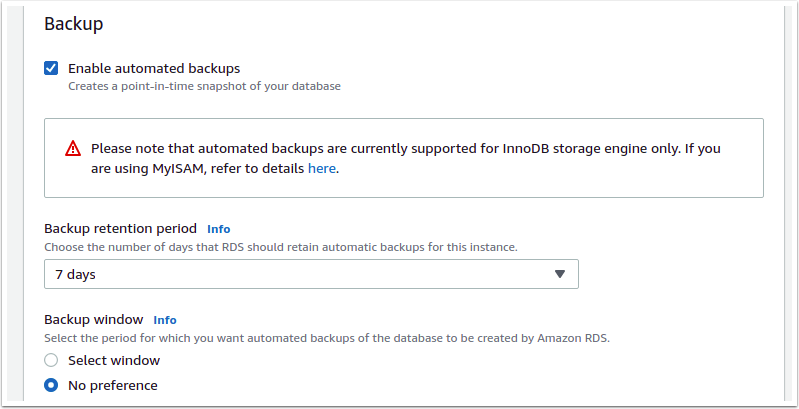
An important part of every DB setup is backup configuration. By default, automated backups are enabled with a retention period of 7 days. You can change the retention period under Backup options in the same section, as well as set the desired backup window.
2.9. Finish DB Creation
Once you have finished providing DB settings, click [Create Database]. The RDS list is opened, and the new database is shown as Creating.
3. Configure RDS Parameter Group Based on MI Recommendations
Access RDS Console > Parameter Groups > [Create Group]
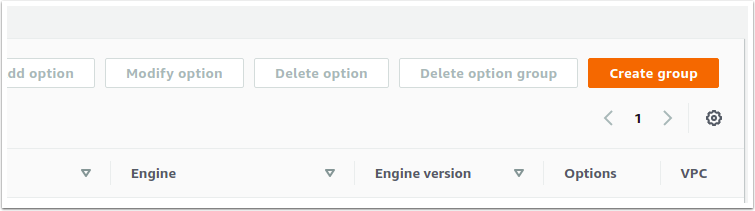
Fill the form, select 'mysql-8.0' from Parameter group family, DB Parameter Group from Type drop-down. Enter Group name and Description of your choice. Click [Create].
4. Provide Parameters' Values
4.1. Access Parameter Group
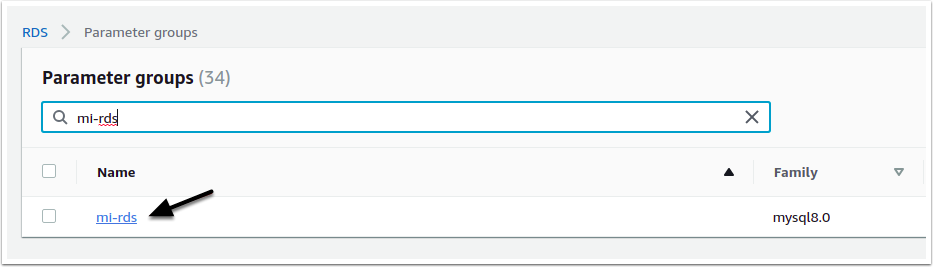
RDS Parameters list will open up, click on the newly created group name to open it with recommended parameters for different instances sizes based on RAM available.
4.2. Edit Parameters

Click [Edit Parameters], locate the parameters listed in the table below and for each parameter enter the recommended values based on your instance's RAM size. [Save] after modifying each parameter.
Recommended RDS Parameters for MI Application
| Key | RAM Amount | ||
| 16 GB | 32 GB | 64 GB | |
sql_mode | NO_ENGINE_SUBSTITUTION | NO_ENGINE_SUBSTITUTION | NO_ENGINE_SUBSTITUTION |
log_bin_trust_function_creators | 1 | 1 | 1 |
performance_schema | OFF | OFF | OFF |
max_heap_table_size | 1610612736 | 1610612736 | 1610612736 |
key_buffer_size | 34217728 | 536870912 | 536870912 |
join_buffer_size | 8388608 | 16777216 | 16777216 |
sort_buffer_size | 8388608 | 8388608 | 8388608 |
read_buffer_size | 8388608 | 8388608 | 16777216 |
read_rnd_buffer_size | 4194304 | 8388608 | 8388608 |
table_definition_cache | 8192 | 16384 | 16384 |
table_open_cache | 16384 | 16384 | 16384 |
table_open_cache_instances | 1 | 1 | 1 |
tmp_table_size | 536870912 | 536870912 | 536870912 |
innodb_buffer_pool_size | 4294967296 | 10737418240 | 10737418240 |
innodb_file_per_table | 1 | 1 | 1 |
innodb_adaptive_hash_index | 0 | 0 | 0 |
optimizer_search_depth | 12 | 12 | 12 |
thread_stack | 1048576 | 1048576 | 1048576 |
connect_timeout | 10 | 10 | 10 |
wait_timeout | 28800 | 28800 | 28800 |
innodb_open_files | 2048 | 2048 | 2048 |
max_connections | 400 | 400 | 400 |
innodb_lock_wait_timeout | 600 | 600 | 600 |
innodb_flush_method | O_DIRECT | O_DIRECT | O_DIRECT |
innodb_flush_log_at_trx_commit | 2 | 2 | 2 |
innodb_purge_threads | 1 | 1 | 1 |
max_allowed_packet | 107341824 | 107341824 | 107341824 |
gtid_mode | 0 | 0 | 0 |
low_priority_updates | 1 | 1 | 1 |
require_secure_transport | OFF | OFF | OFF |
NOTE: See Fine-Tuning MySQL Parameters for more details on MySQL parameters.
5. Assign Parameter Group to RDS Instance
Access RDS instances list > Your RDS Instance > [Modify] > Additional Configuration
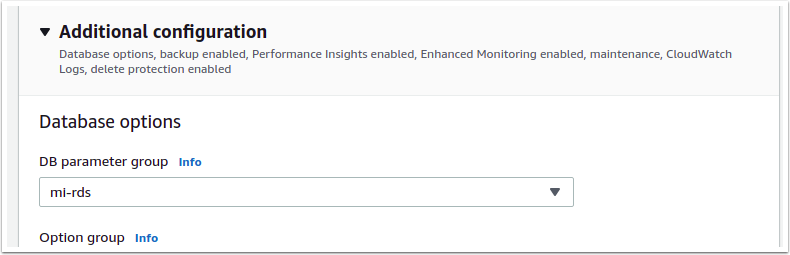
Select the newly created parameter group from the DB parameter group drop-down, then [Continue] at the bottom of the page.
6. Reboot DB Instance

- In the Scheduling of Modifications section, select Apply Immediately
- [Modify DB Instance]
- Wait for the instance state to return to Available
- To apply the new parameters to the DB engine, reboot your RDS instance:
- In the DB Instances list panel, select Reboot from the Actions menu at the top-right corner.
7. Install MI Using RDS
Navigate to your installation folder of Metric Insights application and issue the following command:
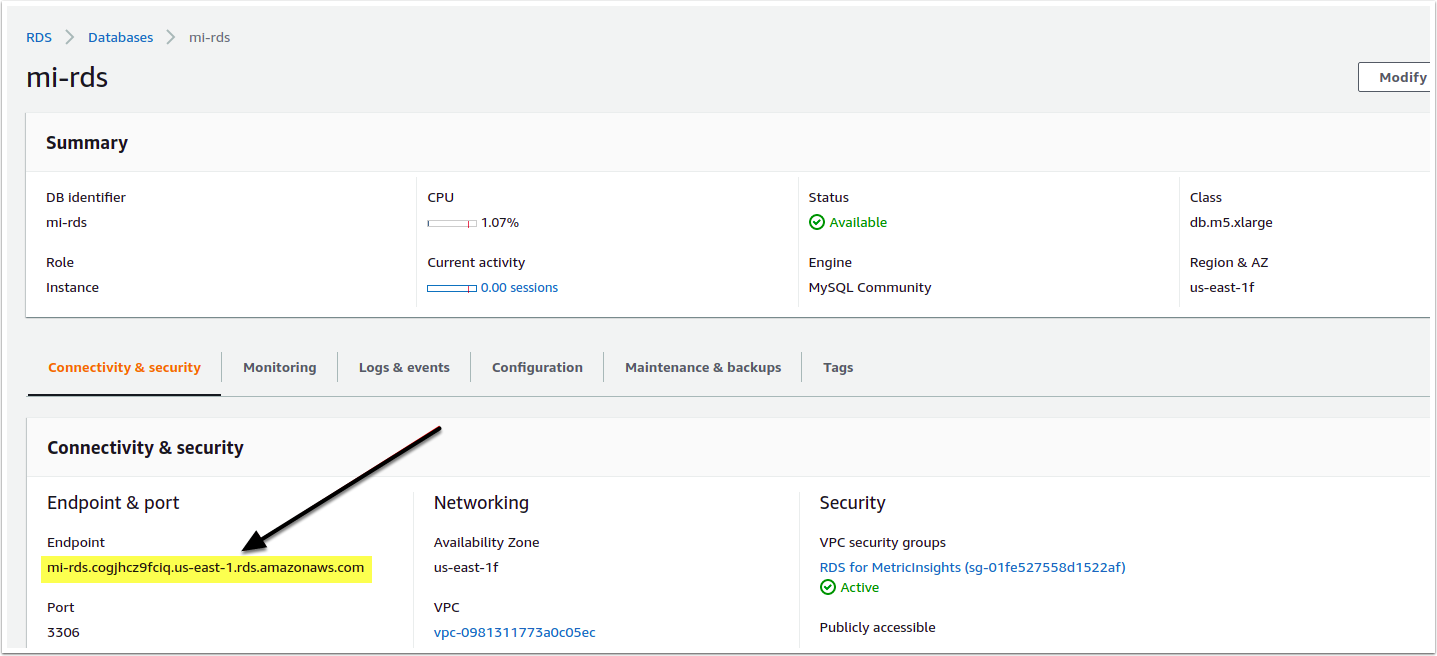
./installer.py --components web,seed,data-analyzer,dataprocessor,monitoring --db-hostname <Your RDS Hostname> --db-user admin --db-password <Your RDS Password>You can find your DB hostname via RDS > Databases > Your RDS Instance > Connectivity & security > Endpoint & port > Endpoint
If your MI installation is using a timezone other than RDS do, then the --mysql-timezone option should be passed as well with the MI Installation timezone specified as its value.
- RDS use UTC by default, for details on setting RDS Timezone please see https://aws.amazon.com/premiumsupport/knowledge-center/rds-change-time-zone/