New in v6.3.2, it is possible to host multiple distinct Brands on the same instance, with the same domain (all users will access Metric Insights via the same domain/hostname). This new functionality is an improvement over the previous version, but there are considerable differences.
The new approach:
- Requires the same domain for all users
- Maps branding based on a User's Group, rather than the domain at which the instance was accessed (in other words, User A in Group A will see Brand A, User B in Group B will see Brand B)
- Is more complete; a full-featured Brand Editor is available for configuration of each brand
This article covers the following functions:
As an Admin when you want to test out Branding options you have to:
- Assign yourself as a member of the assigned Group temporarily
- Log off
- Clear cache
- Sign back on to Metric Insights to view associated Branding settings
1. Create a New Brand
Access Admin > System > Branding
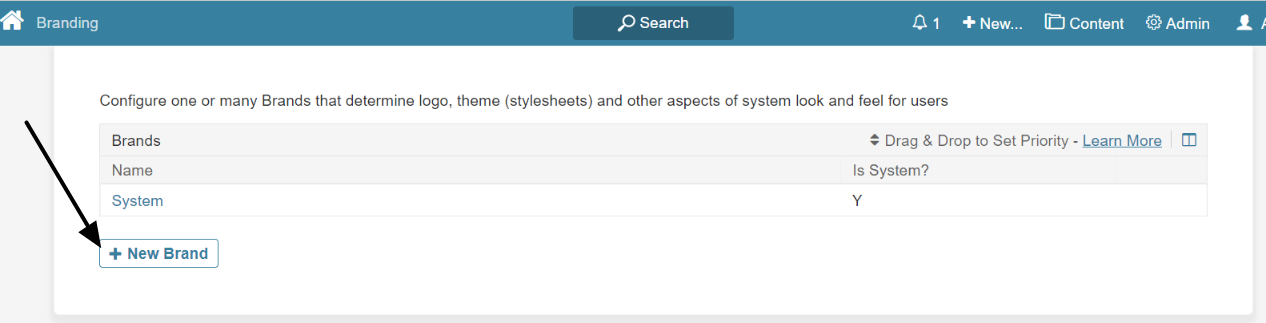
[+New Brand] to open the Add Brand window.
1.1. Enter Basics
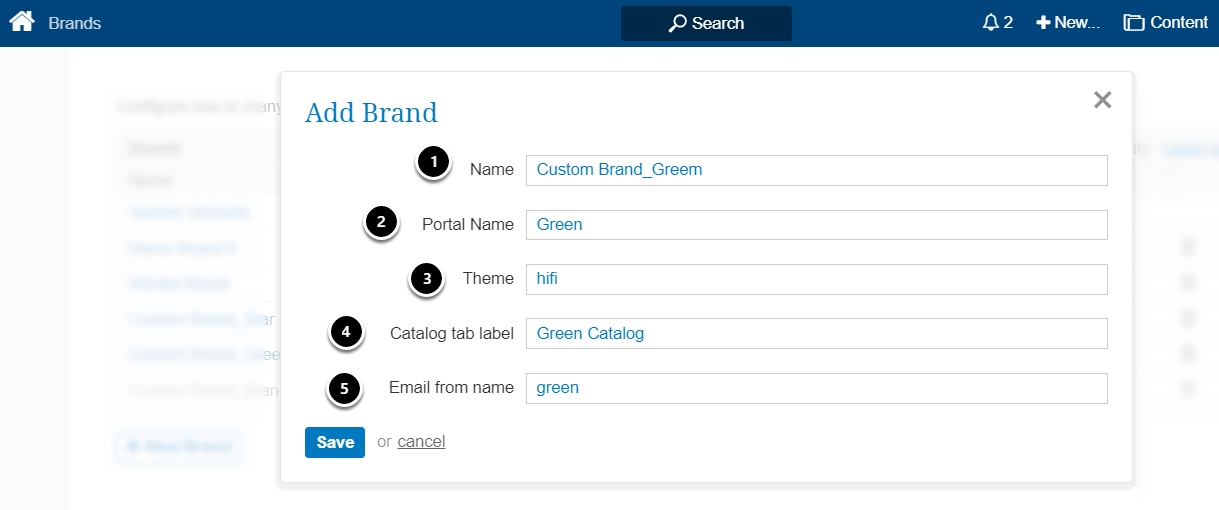
- Name:Give the new Brand a descriptive name
- Portal Name:Define the name that appears on Portal tab
- Theme: The theme is created by our Support Team. To obtain the name, please contact "support@MetricInsights.com".
- Catalog tab label: Define a specific name that replaces the default Catalog tab for this Brand
- Email from name:Select what name will be automatically added to the "From" row of the email Burst
[Save] to open Editor
1.2. Complete Configuration
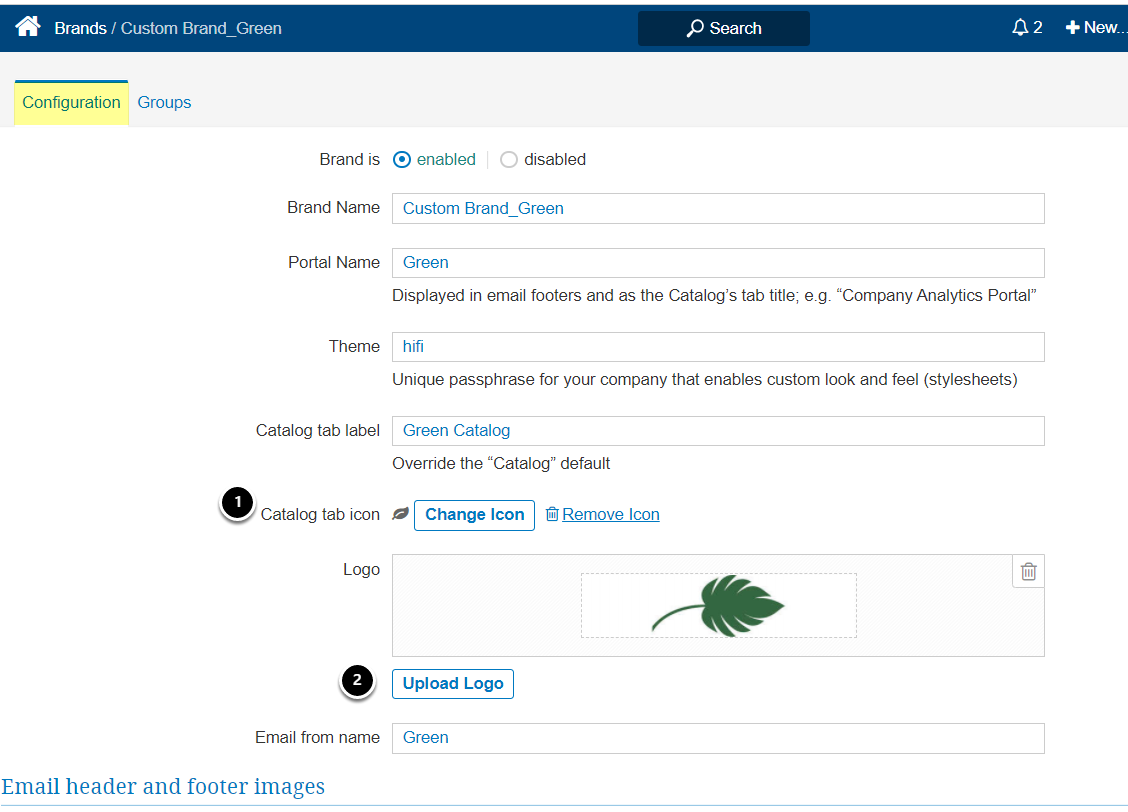
- Upload a Catalog tab Icon from the PC
- [Upload Logo]
- Maximum size is 5mg, supported types: JPEG, PNG, GIF, BMP
1.3. Upload Header and Footer Images
Scroll Down to Email header and footer images Section
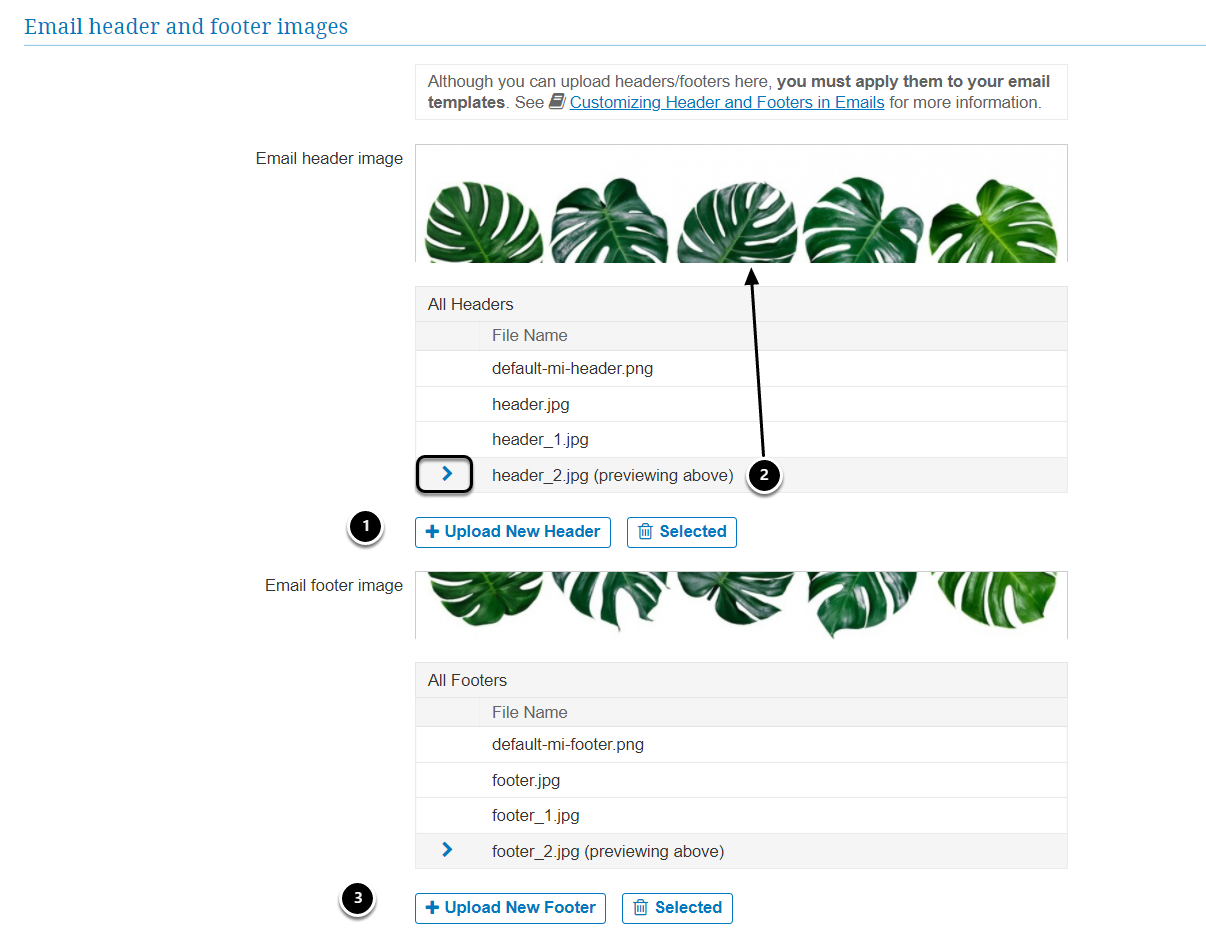
- [+Upload New Header] to upload custom images from your computer.
- Select a new Header from the grid. It will be displayed in the preview above
- Repeat for Footer images
You can upload as many images as needed. These images will then appear as options for custom headers/footers for Digest Templates.
For more details on Applying Headers, Footers, and Themes to Email/Digest Templates, see Configuring Custom Email Template Header/Footer Images for a Brand
1.4. Enable and Save

- Brand is: Select "enabled" option
- [Save] changes
2. Assign Brand to Group(s)
Access Groups tab
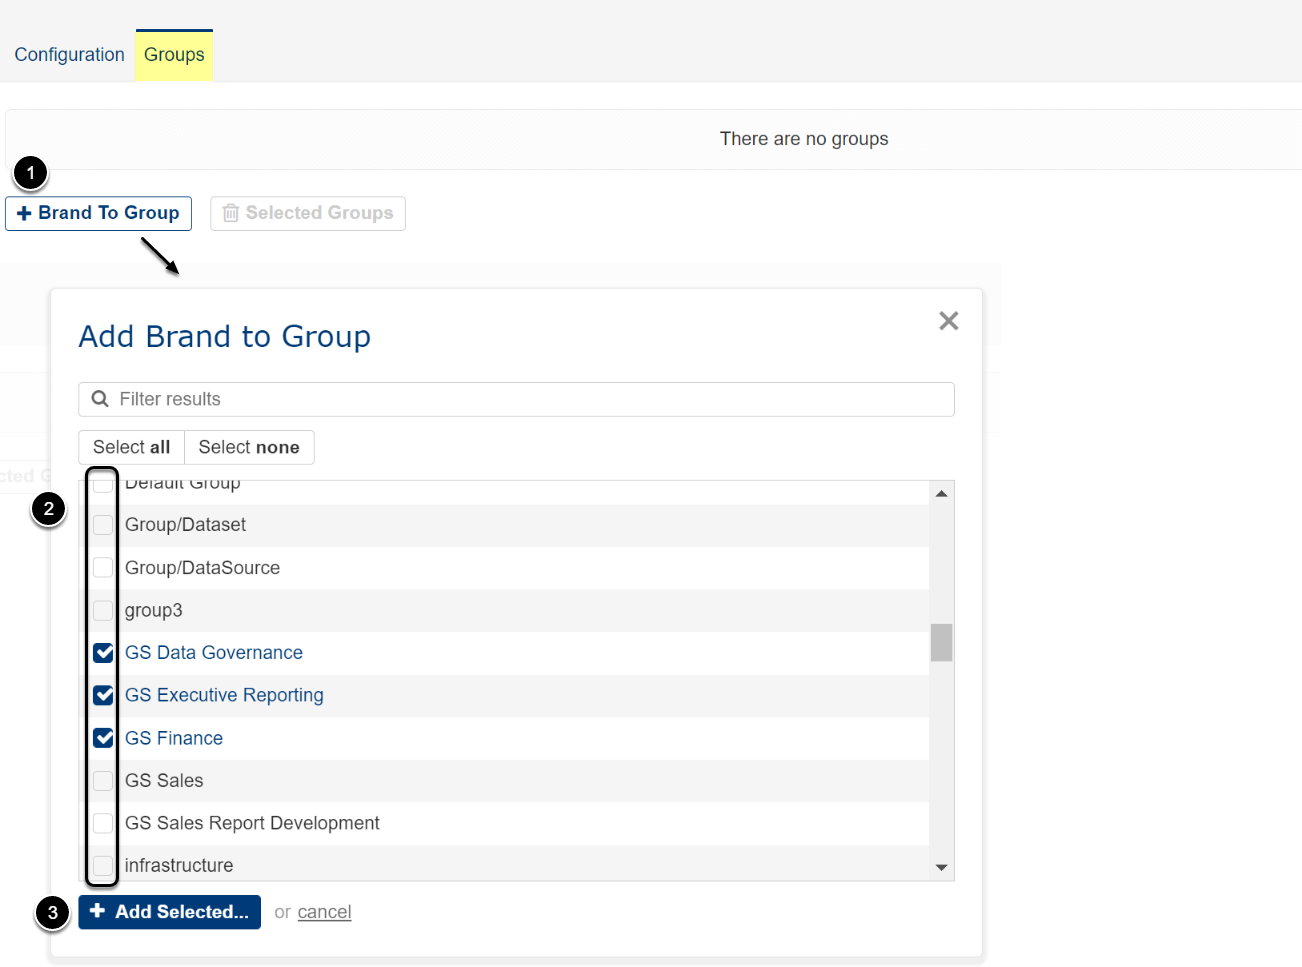
- [+Brand To Group]
- Select one or several Groups to which the brand will be assigned
- [+Add Selected]
3. Set Priority
In Metric Insights, a User can be a member of several Groups. If each of those Groups has a different Brand assigned to it, the Priority of Brands will define which one the User will see. Priority is set on the Brands page.
Access Admin > System >Branding
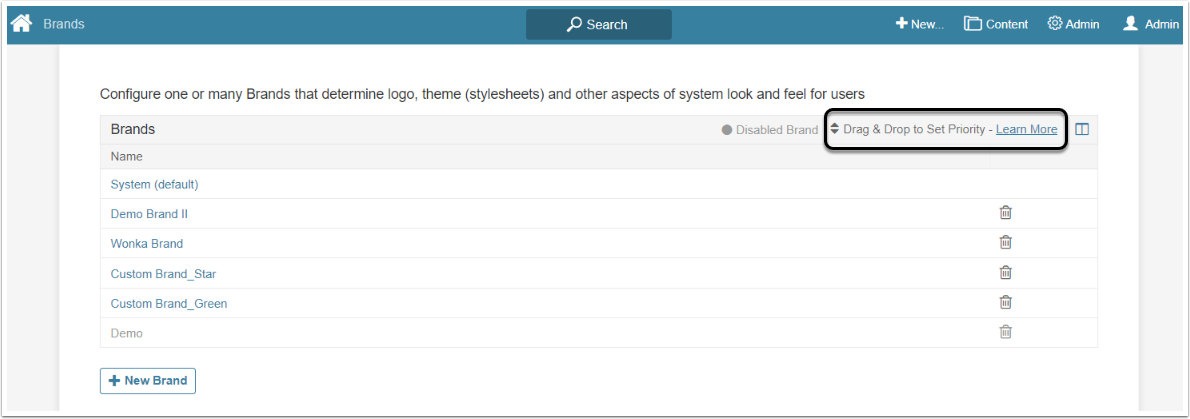
Drag and drop the Brand rows to set the Priority. If via Groups the User is assigned to several Brands, the one placed highest will be shown in the instance.