To have access to a Dimensioned Element, the User must have access to both the Element and at least one Dimension Value it is Dimensioned with. Users can only see the Element's tiles or Charts for those specific Dimension Values to which they have been granted access, and only if data has been collected for a Dimension Value. This article describes how to grant access to Dimension to the Group members.
Granting a Group a Permission means that all the members of that Group receive that Permission. Users who are members of multiple Groups receive the aggregate Permission set from all the assigned Groups.
It is possible to grant a Group View or Edit access to a Dimension from Dimension Editor and Group Editor.
In this article:
1. Access Group or Dimension Editor
1.1. Group Editor
Access Group Editor and open the Dimensions tab
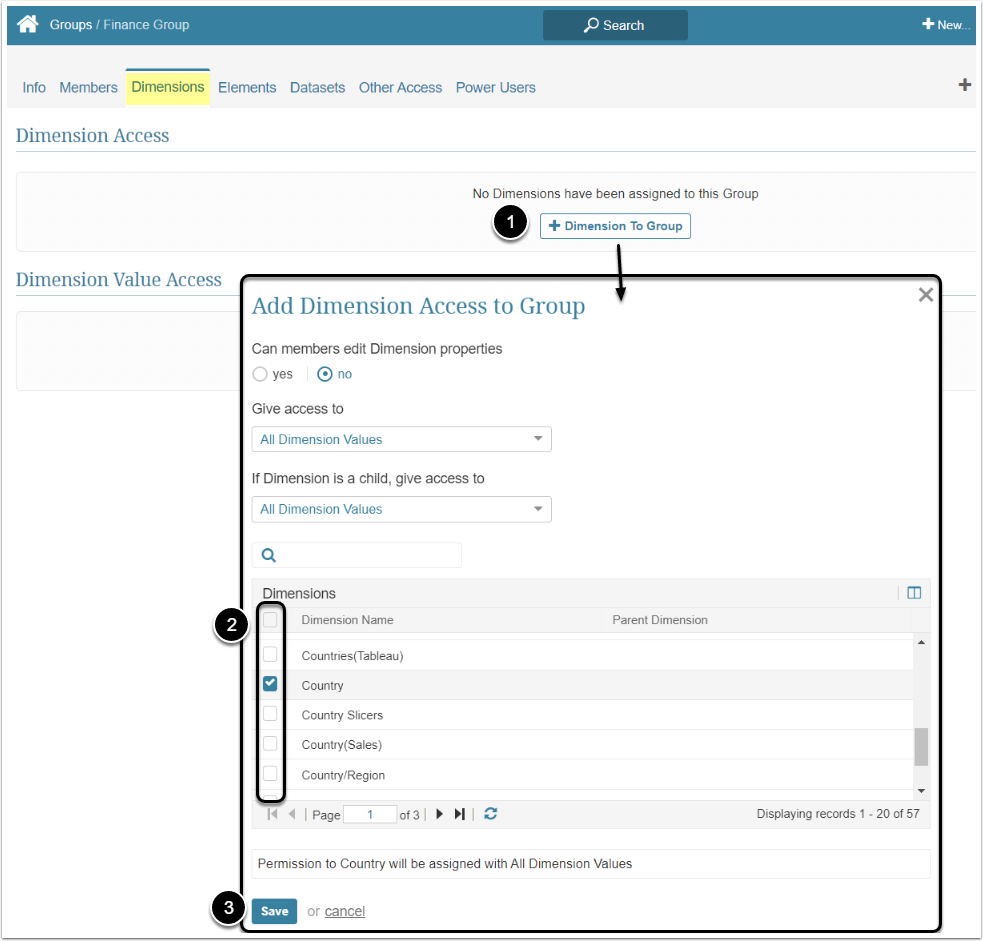
- [+Dimension access to Group]
- In the Dimensions table choose those Dimensions you want Group members to have access to
- [Save]
1.2. Dimension Editor
Access Dimension Editor and open the Access tab
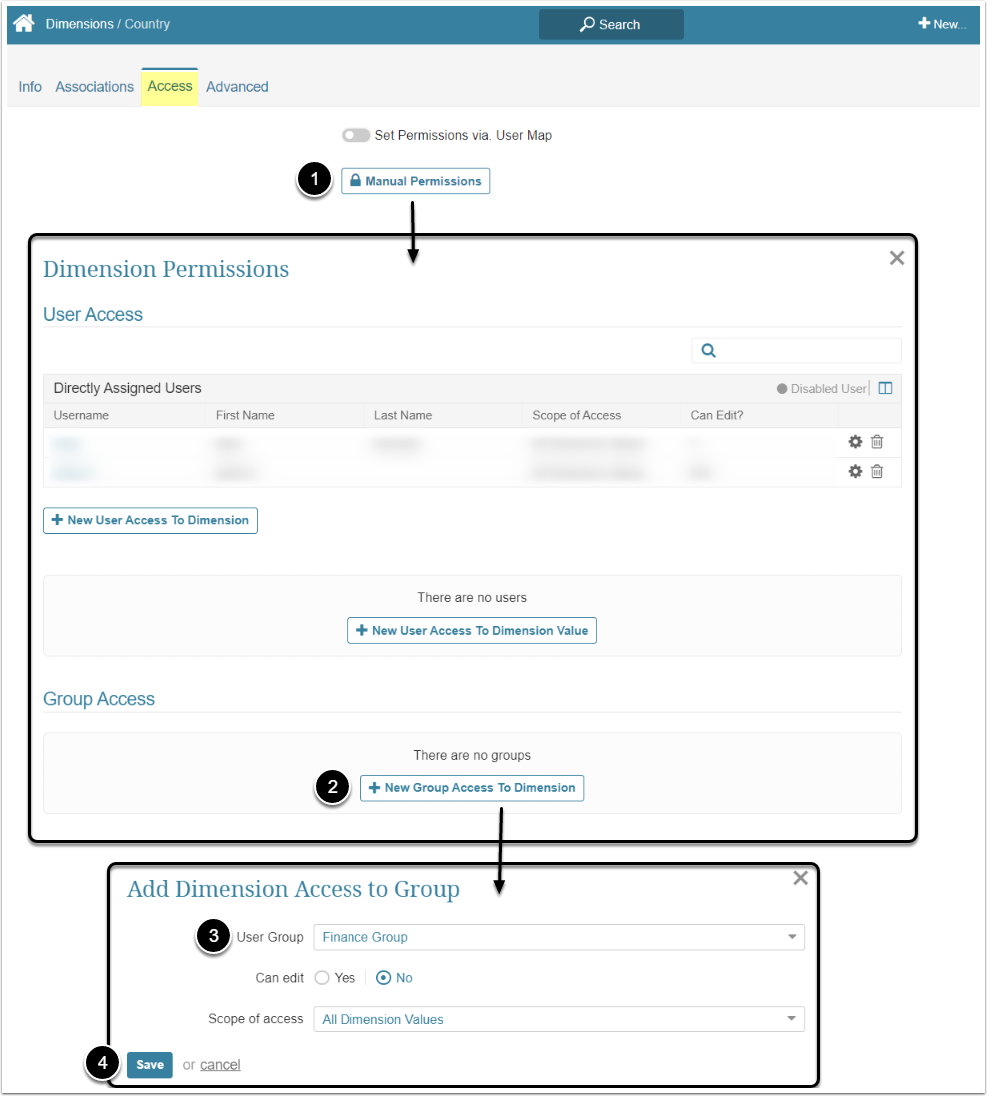
- [Manual Permissions]
- [+ New Group Access to Dimension]
- User Group: Choose a Group that should be given access the the Dimension from the dropdown list
- [Save]
2. Grant Group Members View or Edit Access to the Dimension
2.1. View Access
Regardless of the Editor you started with, the logic of the following actions is going to be identical.

- Can members edit Dimension properties / Can edit: By setting this field to "no", you give Group members View Access only
- Give access to / Scope of access: Can be limited and Group Users can either see:
- "All Dimension Values": This option grants the Group members access to all Dimension Values
- "Specific Dimension Values": After selecting this option, you choose Dimension Values to which the Group members will have access
2.1.1. Granting View Access to Specific Dimension Values
Dimension appear in the grid, highlighted in yellow, since "Specific Dimension Values" is its scope of access and those Dimension Values have not been specified yet.
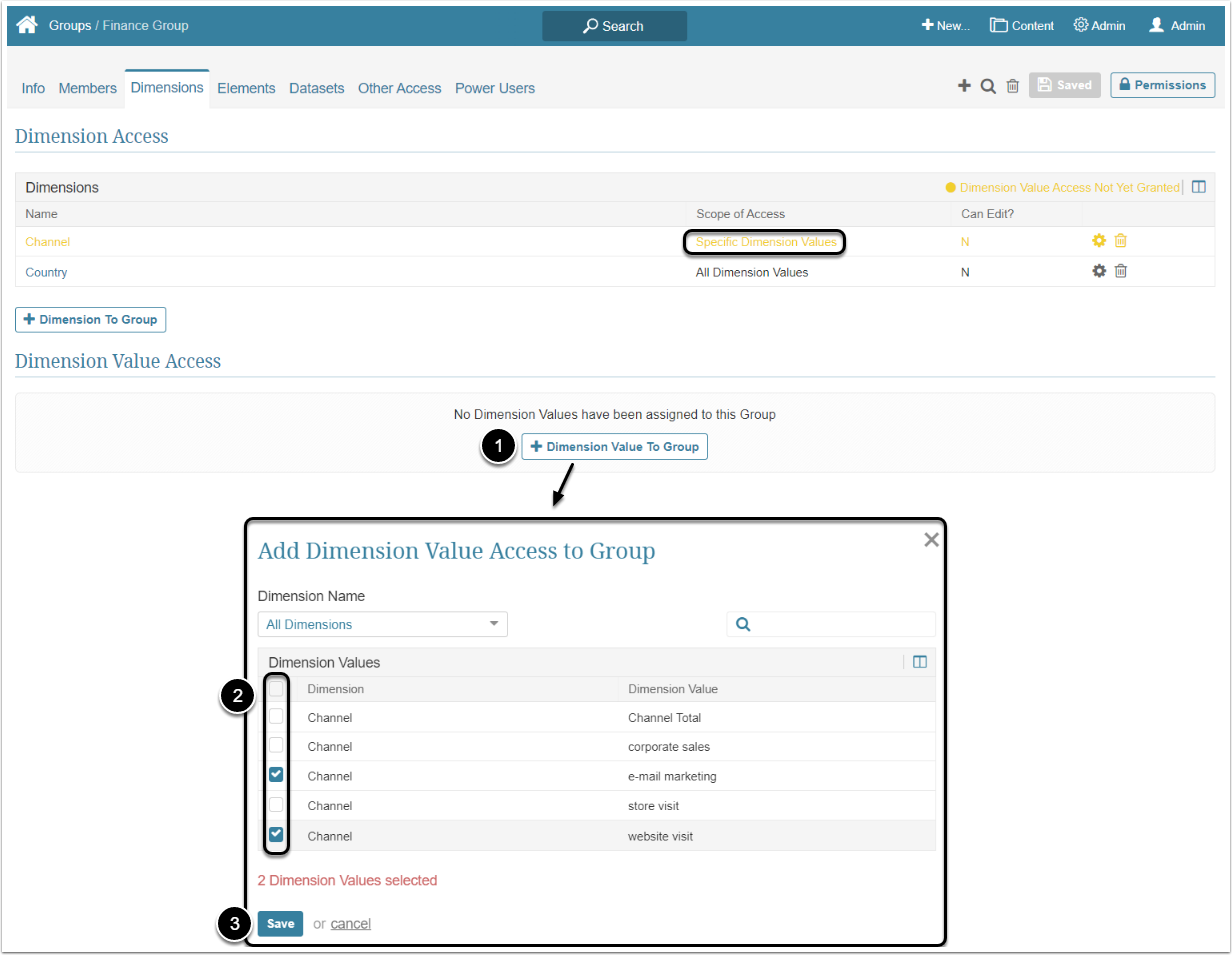
- [+ Dimension Values access to Group]
- Select Dimension Values from the list
- [Save]
2.2. Edit Access
It is applicable for Power User members of the Group only.
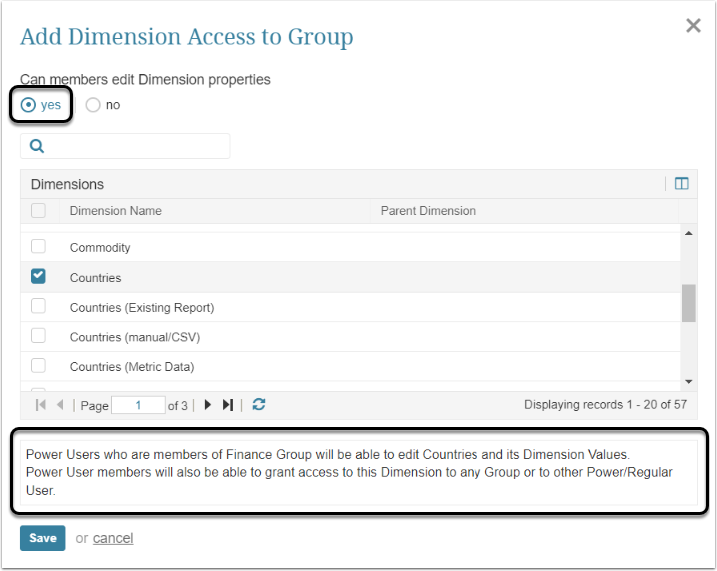
NOTE: If edit access is given to a Dimension, it is given to all Dimension Values by default.
Define whether Power Users who are members of this Group should have an ability to edit this Dimension. If you set the Can members edit Dimension properties field to "yes", here are things to consider:
- Power Users who are members of this Group will be able to edit this Dimension and all its Values
- Power User members will only be able to grant access to this Dimension to Groups of which that Poser User is a member or to other Power/Regular Users who belong to the same Group as this Power User.
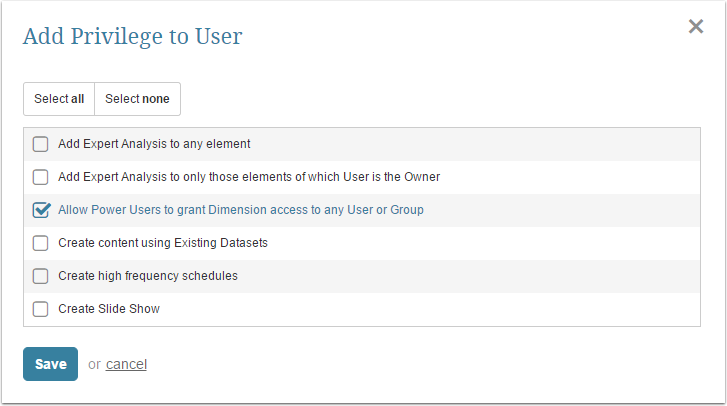
- However, the individual member Power User can directly give the Privilege to grant Dimension access to any Group or Regular/Power User. To grant this Privilege, go to Power User Editor > open the Info tab > scroll to Privileges section > [+Privilege to User] > select "Allow Power Users to grant Dimension access to any User or Group" Privilege
2.2.1. If the Dimension Values Source is SQL / Plugin
If the Data Source of a Dataset is a SQL Data Source or Plugin connection Profile, you should add a Permission to use this Data Source in its Editor.
Access Dimension Editor > Info tab
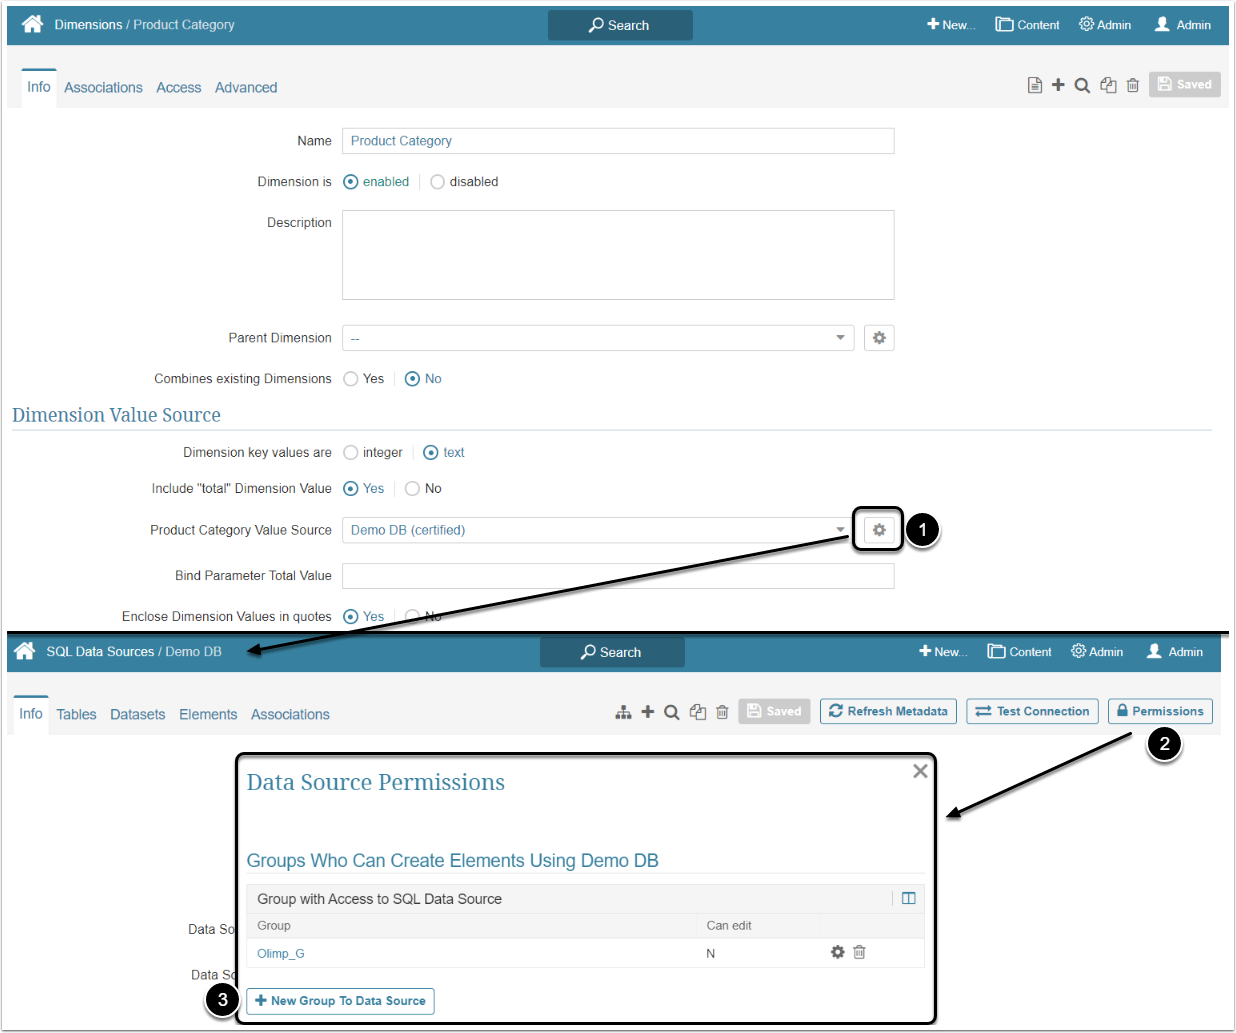
- In the Value Source field click the gear icon to open the Data Source Editor
- [Permissions]
- [+New Group to Data Source] and choose a Group from the drop-down list
2.2.2. If the Value Source is a CSV file
If the Data Source is a CSV file, you should grant a Privilege to use this kind of Data Source to a Group.
Access a Group Editor, open the Info tab and scroll the page down to Privileges section
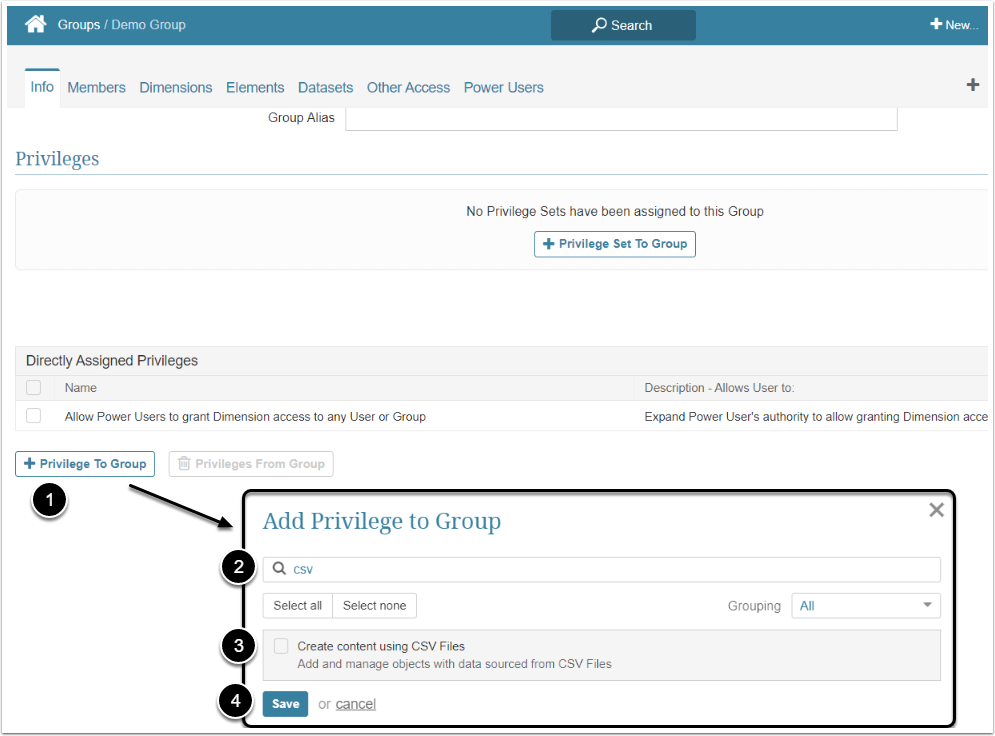
- [+Privilege to a Group]
- Filter the list by "CSV"
- Select the Create content using CSV Files Privilege
- [Save]
Special Handling for "All Access" Groups
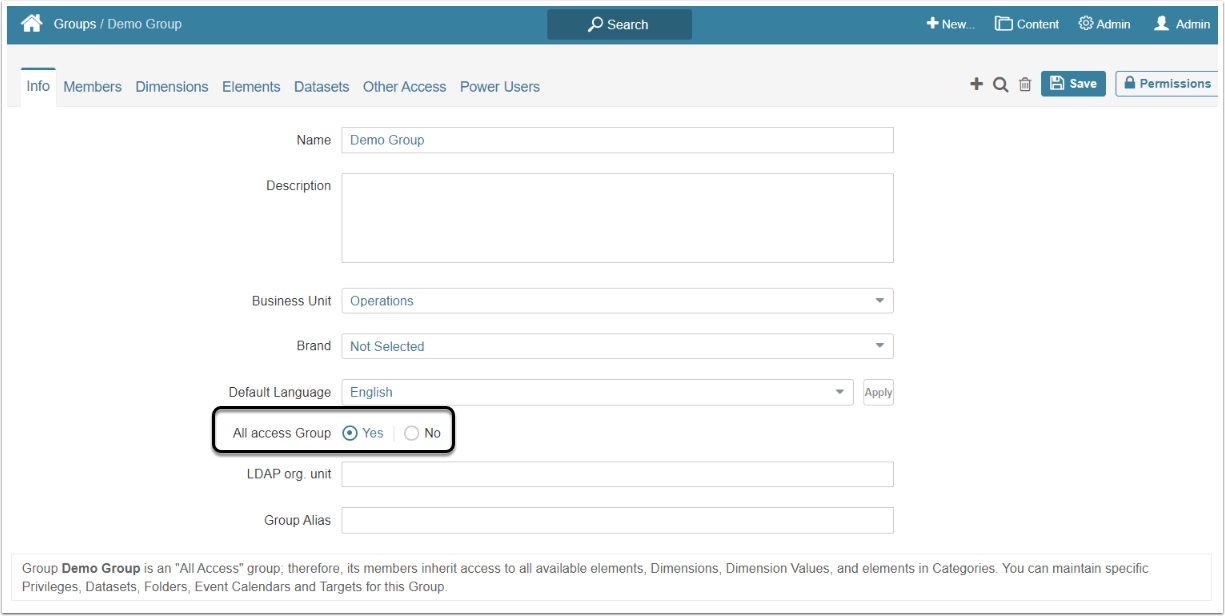
As noted in the hint text, when All Access Group is set to "Yes", the Group already has access to all Dimensions and Dimension Values. This access is VIEW access, not EDIT ACCESS. Note, however, that permission to use Data Sources is not automatically granted to All Access Group.
For more details about All Access Groups, check the Group Types Overview article.