This article details how to establish connectivity to an Amazon S3 bucket to use it as Data Source for creating Elements in Metric Insights.
General instructions on establishing data sources based on plugins can be found in Create a New Plugin Data Source.
1. Create New Data Source
Access Admin > Collection & Storage > Data Sources
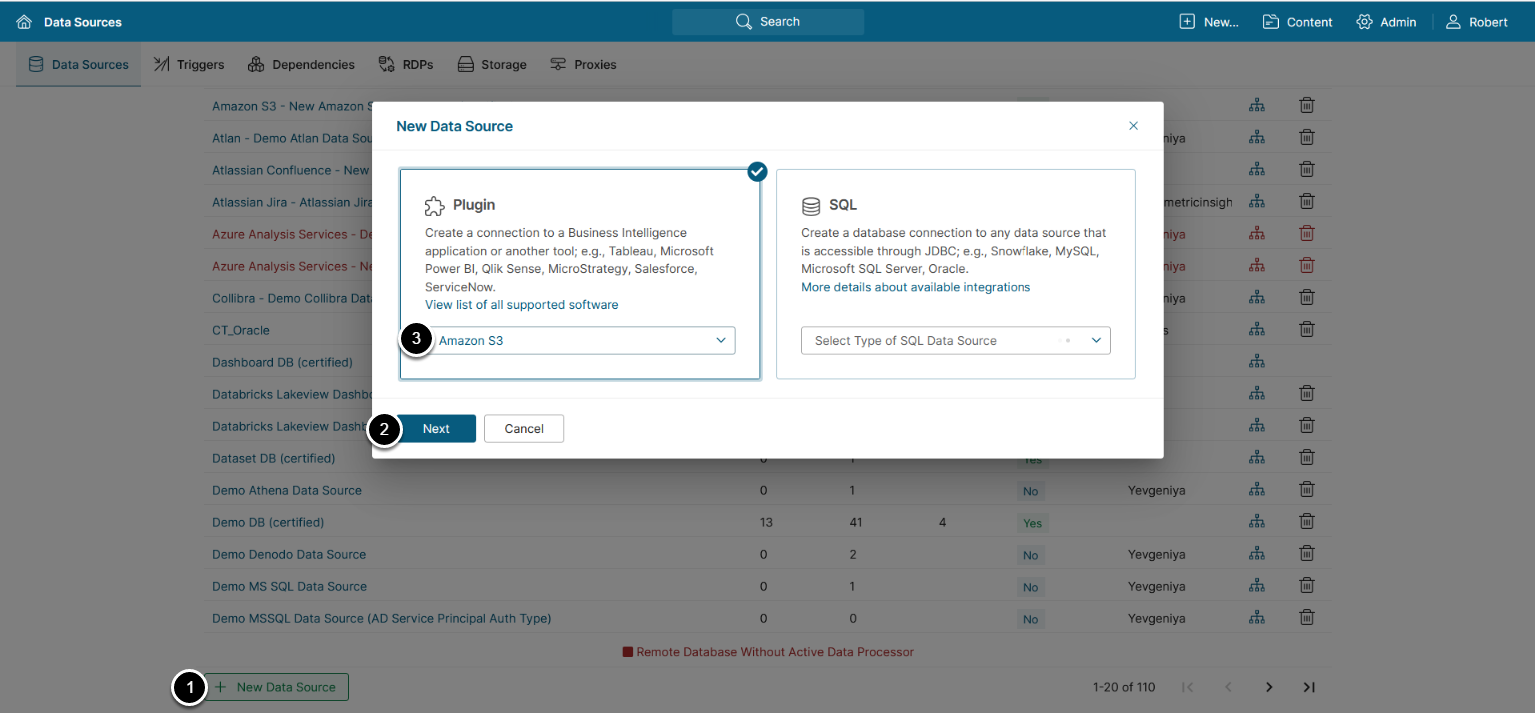
- [+New Data Source]
- Choose "Amazon S3" from Plugin drop-down list
- [Next]
2. Provide Required Parameters

- Data Source Name: Enter a Data Source name
- [Create]
- Select an auth method:
-
IAM roles (v7.1.2+): See Configure IAM Role Access for Amazon S3 Plugin in Kubernetes (EKS) for details
- Leave Access key and Secret key empty.
-
Access key and Secret key:
-
Access key: Enter the S3 access key
- To find the S3 access key value: Log in to your S3 account, access My Security Credentials > AWS IAM Credentials > Access keys for CLI, SDK, & API access
- Secret key: Enter the S3 secret key that is generated when a new access key is created
-
Access key: Enter the S3 access key
-
IAM roles (v7.1.2+): See Configure IAM Role Access for Amazon S3 Plugin in Kubernetes (EKS) for details
NOTES:
-
s3:ListAllMyBucketspermission is required for both auth methods. - If this permission is not allowed by your security policy, configure the additional plugin parameter
testFilewith the values3://<your-bucket-name>/<path-to-test-file>. Replace<your-bucket-name>and<path-to-test-file>with valid values from your S3 bucket
- Bucket: Enter the S3 bucket name
-
Path: Enter the path to the exact files/folders in the bucket.
- NOTE: If this setting is empty, all files and folders in the bucket will be accessed.
- [Test Connection] and [Save]
3. Provide Optional Parameters
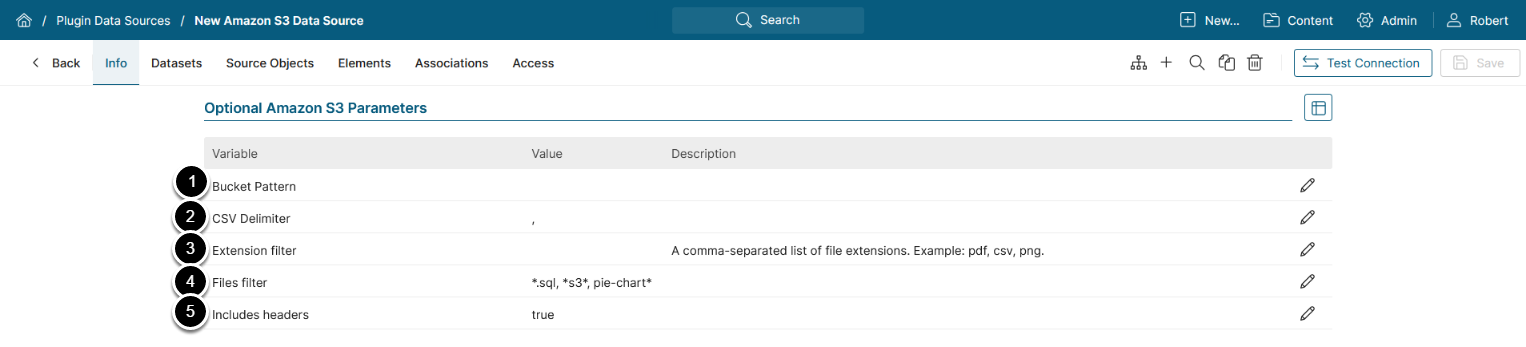
- Bucket Pattern: unused
-
CSV Delimiter: Choose the delimiter character used in your CSV files
- "," is the default value
-
Extension filter: Provide a comma-separated list of file extensions to fetch only files with the specified file extensions
- Supported extension values for filtering:
json,avro,xml,proto,pdf,png,jpeg,txt,gz,csv,tar.gz,xlsx,xls,docx,doc,pptx,ppt,xlsb,xlsm
- Supported extension values for filtering:
-
Files filter: Collect only files that match the defined filters
- "*" can be used as a wildcard
-
Includes headers: choose whether to add default column headers to the CSV.
- Accepts "true"/"false"
- "True" is the default value.
4. Advanced Configuration
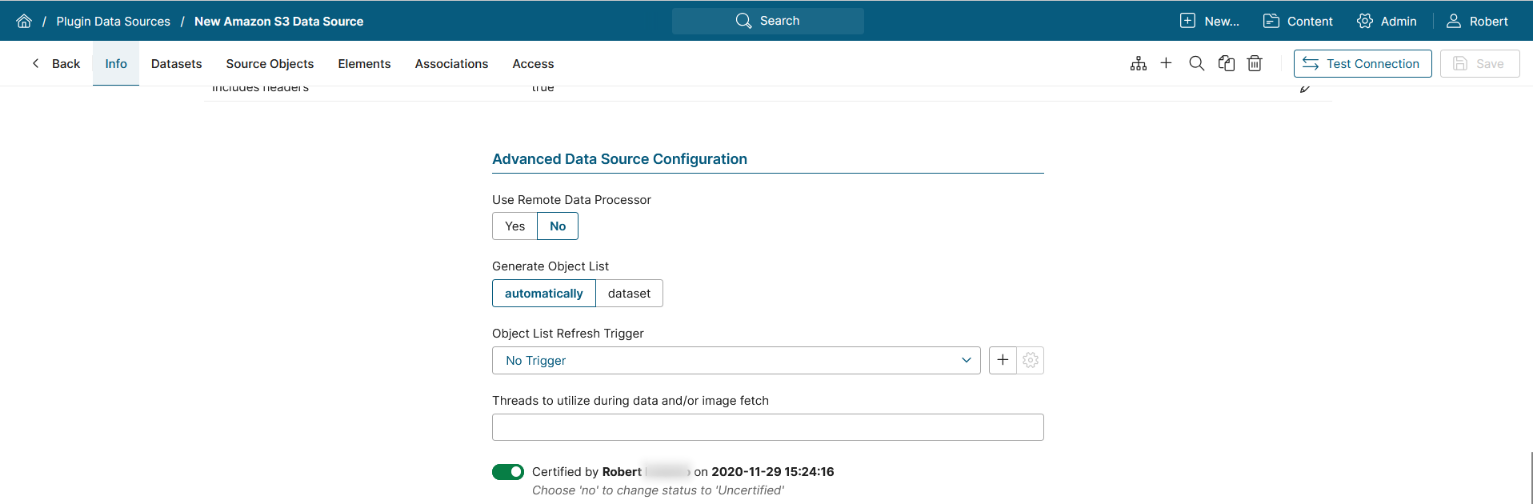
Advanced Configuration settings can be set to default values unless Data Source requires more precise tuning. For more details on how to proceed, refer to Advanced Data Source Configuration.
5. Other Settings
Access Source Objects

- You can create Datasets and view all the elements or Datasets using this Data Source from the respective tabs
- Open the Access tab to assign Data Source access to Groups or Power Users