This article describes the creation of a Plugin Data Source to connect to Graphite Plugin. This Data Source will allow data from existing Graphite objects to be used in building Elements using Metric Insights tools.
1. Create New Data Source
Access Admin > Collection & Storage > Data Sources
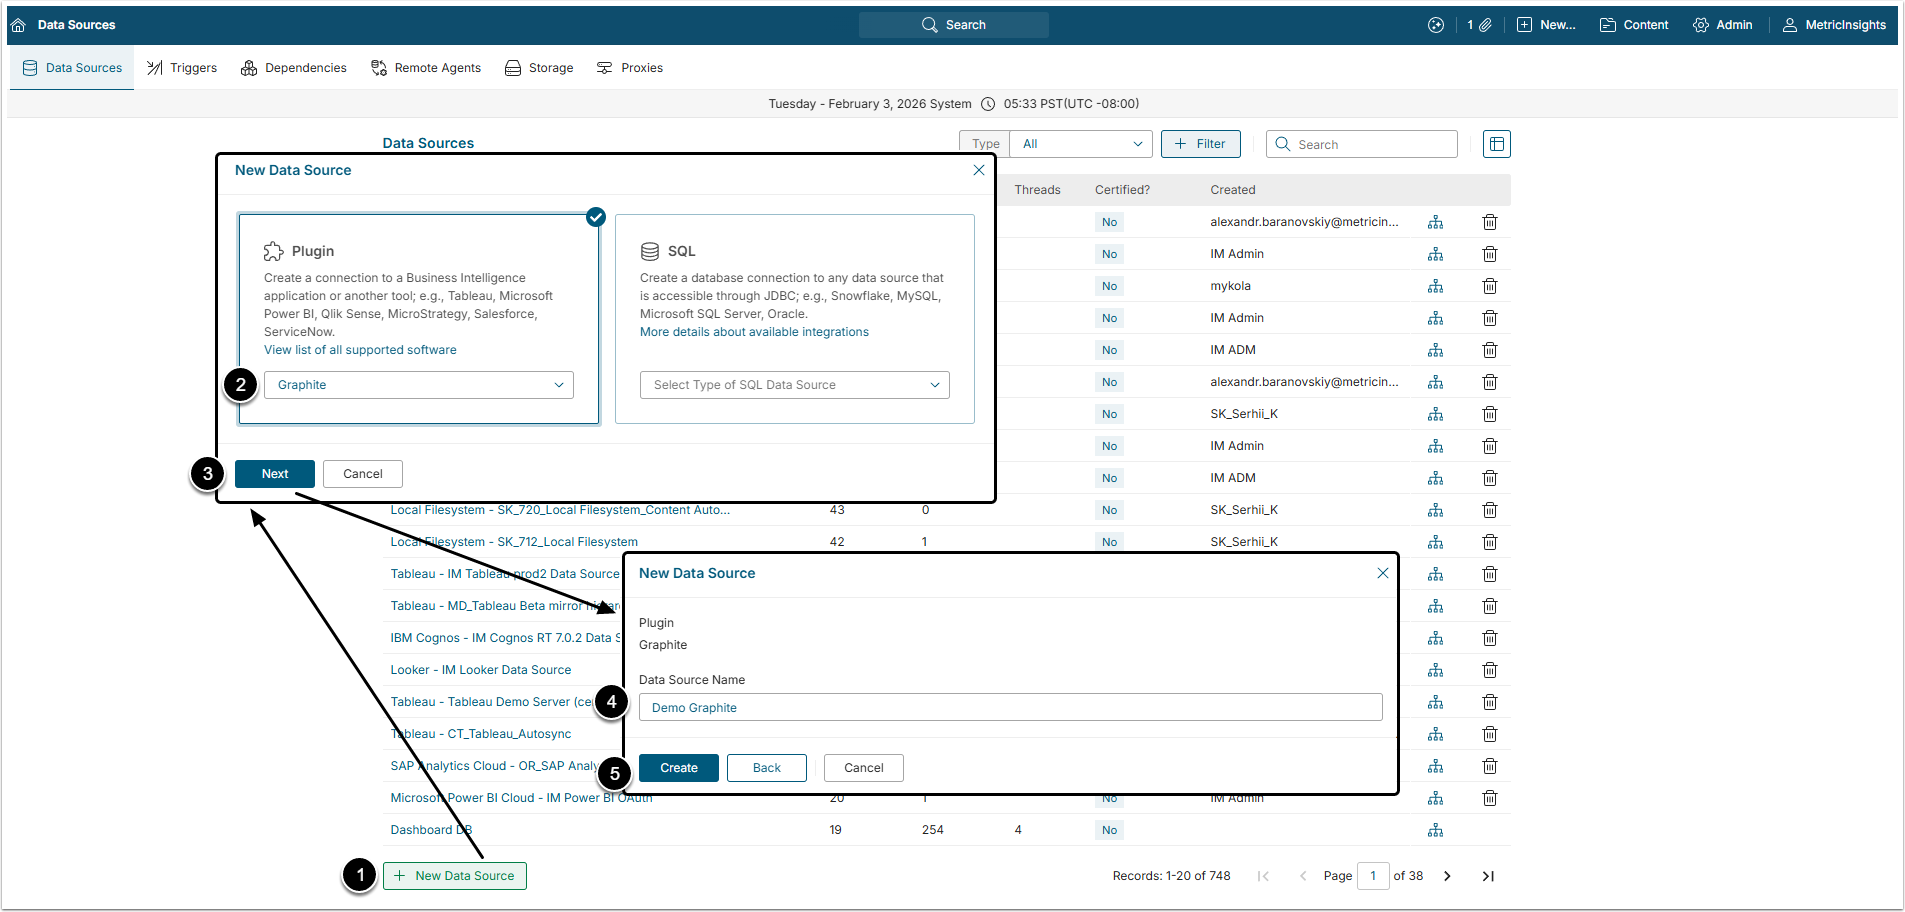
- [+New Data Source]
- Choose "Graphite" from Plugin drop-down list.
- [Next]
- Data Source Name: Give the data Source a descriptive name.
- [Create]
2. Provide Required Parameters
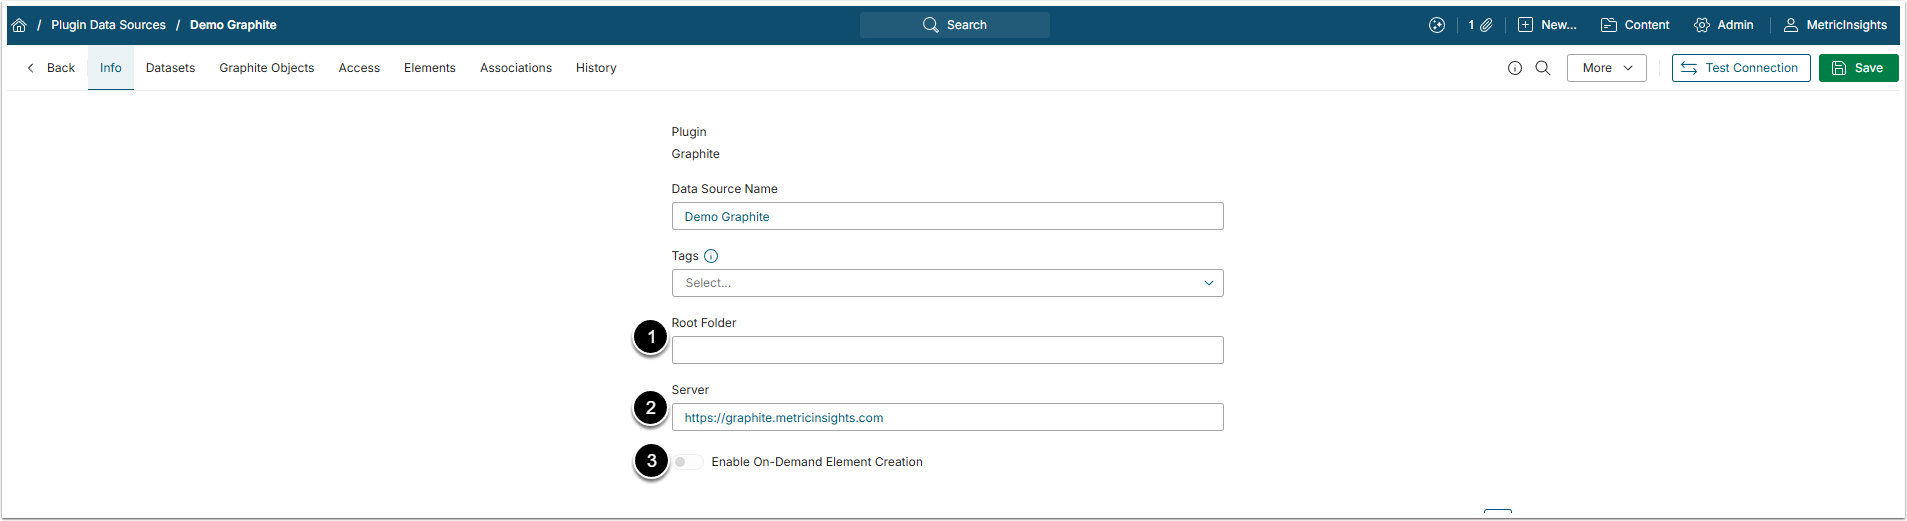
- Roof Folder: Specify the Folder, where necessary data is stored.
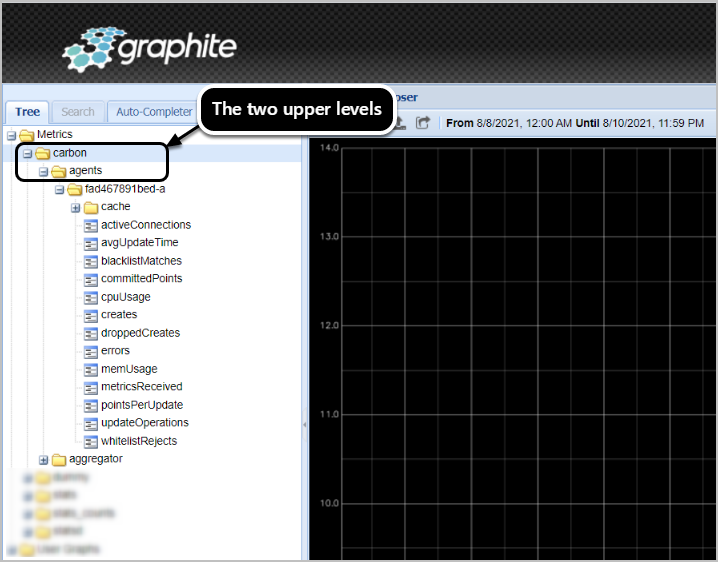
- NOTE: Leaving Root Folder unspecified will return all Graphite Objects. Graphite allows users to specify only two upper levels of folders (see the example on the screen below).
- To collect all Objects from a specific folder, specify its name in the following format: folder.*; e.g., carbon.*.
- To collect all Objects from a specific sub-folder, specify the path to it in the following format: folder.sub-folder; e.g., carbon.agents or carbon.aggregator.
- NOTE: Leaving Root Folder unspecified will return all Graphite Objects. Graphite allows users to specify only two upper levels of folders (see the example on the screen below).
- Server: Enter Graphite Server address.
- Optionally, toggle on Enable On-Demand Element Creation.
3. Configure Optional Parameters

The Optional Graphite Parameters grid allow for configuring date parameters for data collection.
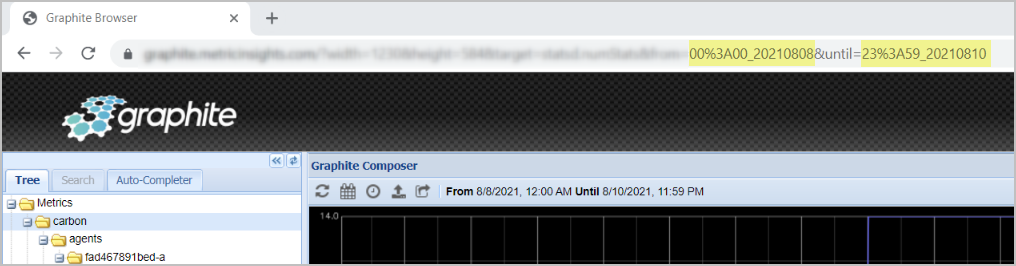
NOTE: It is strongly recommended to use native date and time format: 00%3A00_20210806. Refer to the Graph URL for correct dates (see the screen below).
4. Proceed with Advanced Configuration
Advanced Configuration settings can be set to default values unless Data Source requires more precise tuning. For more details on how to proceed, refer to Advanced Data Source Configuration.
Click [Test Connection] in the upper right corner to check if Metric Insights is able to connect to Graphite correctly.