This introductory article describes how to define the basic settings for a Dataset sourced from Microsoft SharePoint Online.
PREREQUISITES:
- Established connectivity with MS SharePoint
- Enabled "Include lists" Optional Parameter
1. Create New Dataset
Access New > Datasets > Create New
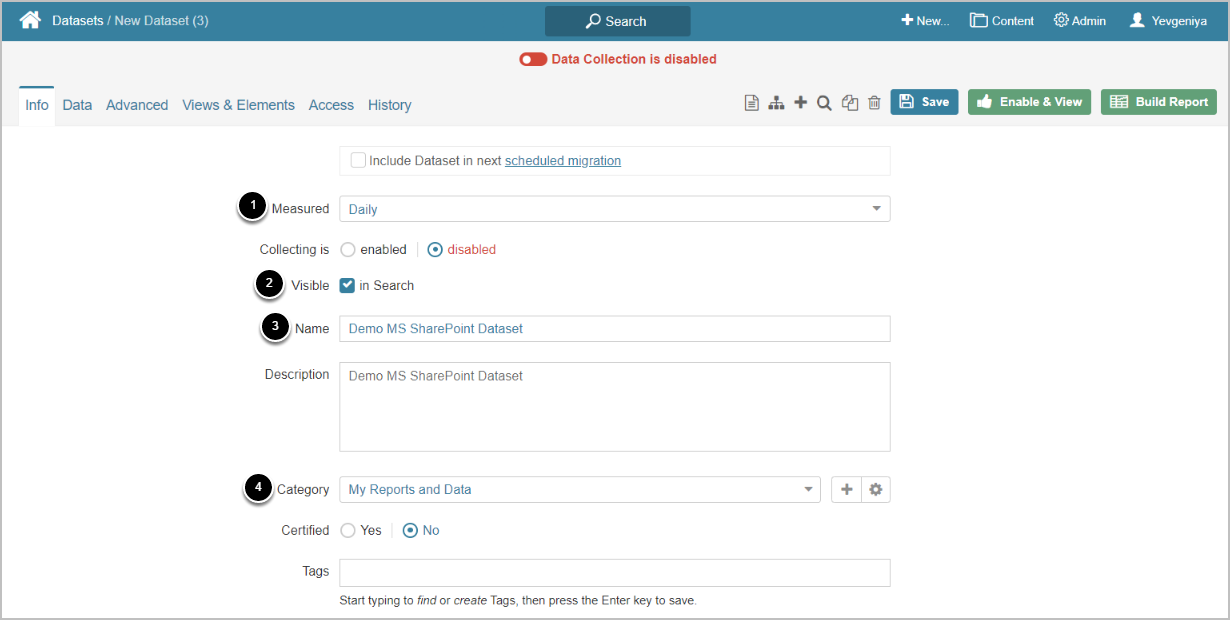
Enter the basics:
- Select the measurement interval that applies to the level of aggregation that you want in your result set
- Define if Dataset is to be searchable
- Input a descriptive phrase in Name
- Specify Category to place the Dataset
Proceed to Data tab to define details
2. Define Data Collection Details
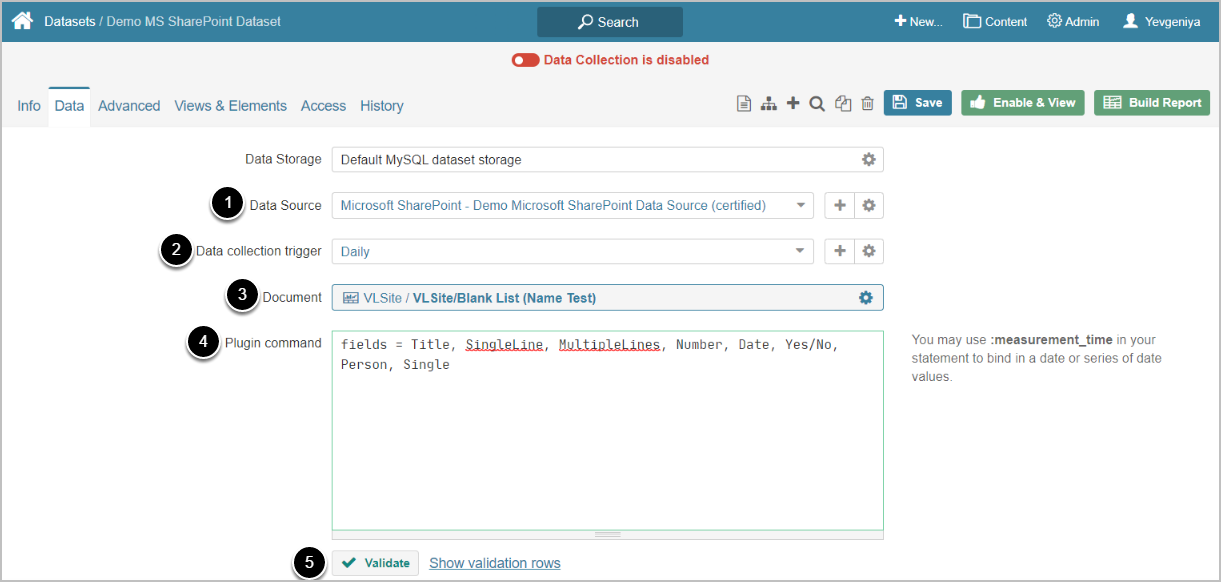
- Select the SharePoint Data Source
- Specify Data collection trigger that will be used to collect data for Dataset
- Select a List to be used as a basis for Dataset under Document
-
NOTE: The additional #Sharepoint Metadata & Content Access folder on the list of collected Documents includes documents' metadata pulled from Microsoft SharePoint Online such as:
- User Access List
- Group Access List
- Custom Columns Map
- Custom Columns
- Version history
- SharePoint Group Membership (requires Certificate Auth)
-
NOTE: The additional #Sharepoint Metadata & Content Access folder on the list of collected Documents includes documents' metadata pulled from Microsoft SharePoint Online such as:
- Specify fields to be fetched in Plugin Command as exemplified above. To collect all fields, input a space ( ).
- NOTE: Fields with spaces in their names are passed to MI merged into one word. Remove spaces from field names to be able to fetch data for them. See the "SingleLine" and "MultipleLines" examples above. Column names can be edited. See the following section.
-
[Validate]
- If the statement is valid, the Validation Rows Preview section pops up at the bottom of the screen.
- You can also open it by clicking Show validation rows under the Plugin command box.
[Enable & View] to proceed to Dataset Viewer
3. [Optionally] Edit Column Names
You can rename columns to have same names as in SharePoint. In this example, we consider removing space from the "SingleLine" column name for consistency.
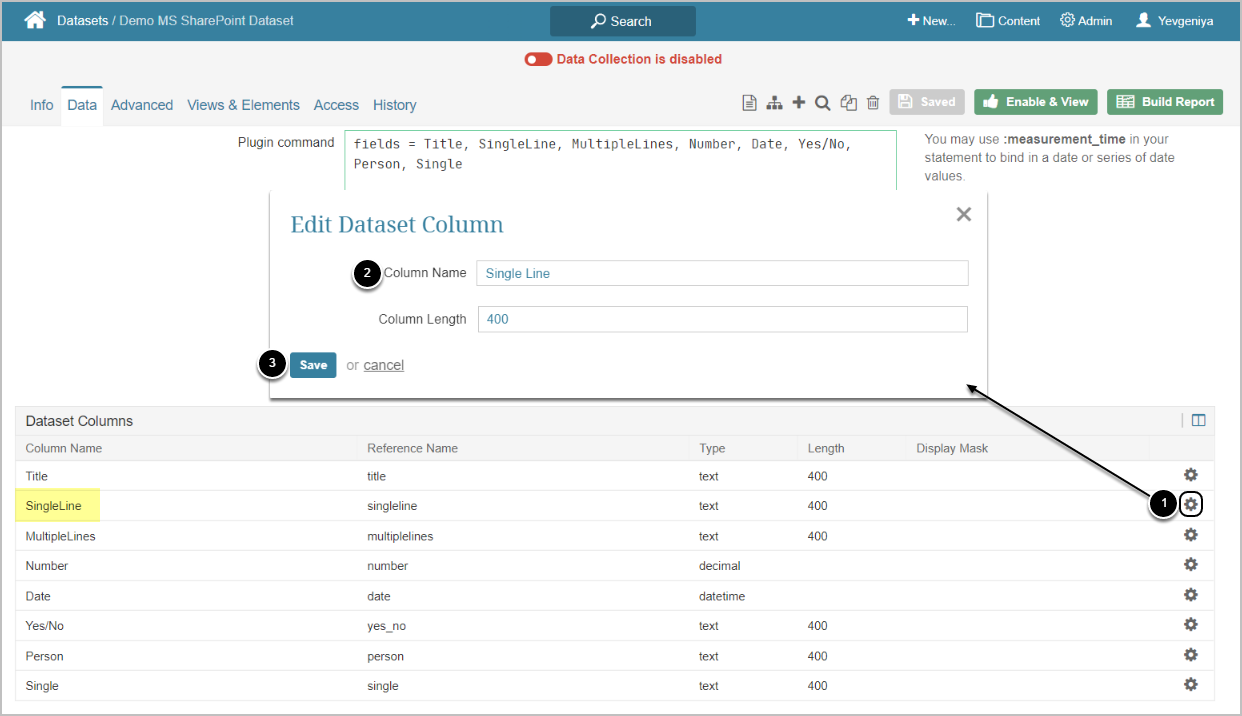
- Click the gear icon
- Input the desired value in Column Name
- [Save]
[Enable and View] to proceed to Dataset Viewer