To integrate with Tibco Spotfire, particularly for getting data, you must deploy Metric Insights' Remote Data Processor (RDP) to your server and install a custom MIAddIn package (extension) on a Spotfire server.
NOTE: Spotfire does not have a REST API for Metric Insights to work with. Therefore, an extension that runs directly on Spotfire server is the only viable to connect. Ensuring the extension runs properly requires your Spotfire server to be configured correctly including folder browser+access permissions.
This article assumes that you have already configured a Remote Data Processor profile in the Metric Insights UI and installed a Remote Data Processor.
1. Connect to Spotfire Remote Desktop Client
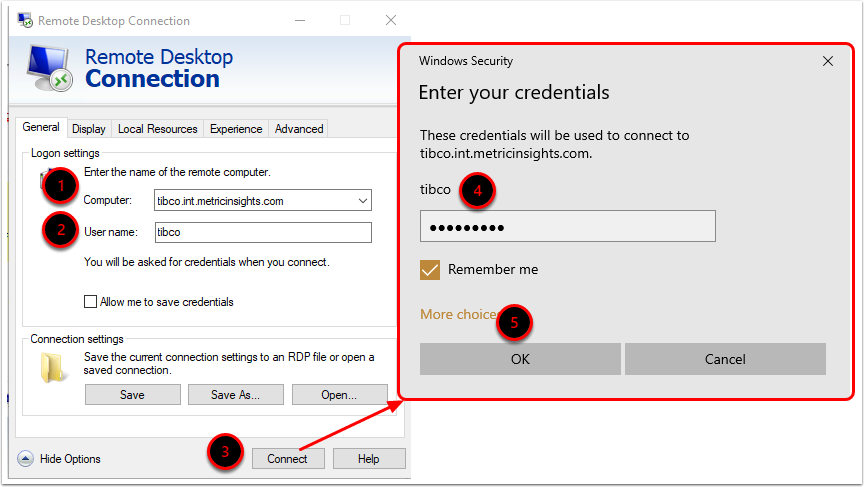
- Enter the hostname of the computer with the installed Remote Desktop client
- Specify the User name of the remote computer
- Click [Connect]
- Provide your Password credential
- Click [OK] to proceed
2. Access Spotfire Server
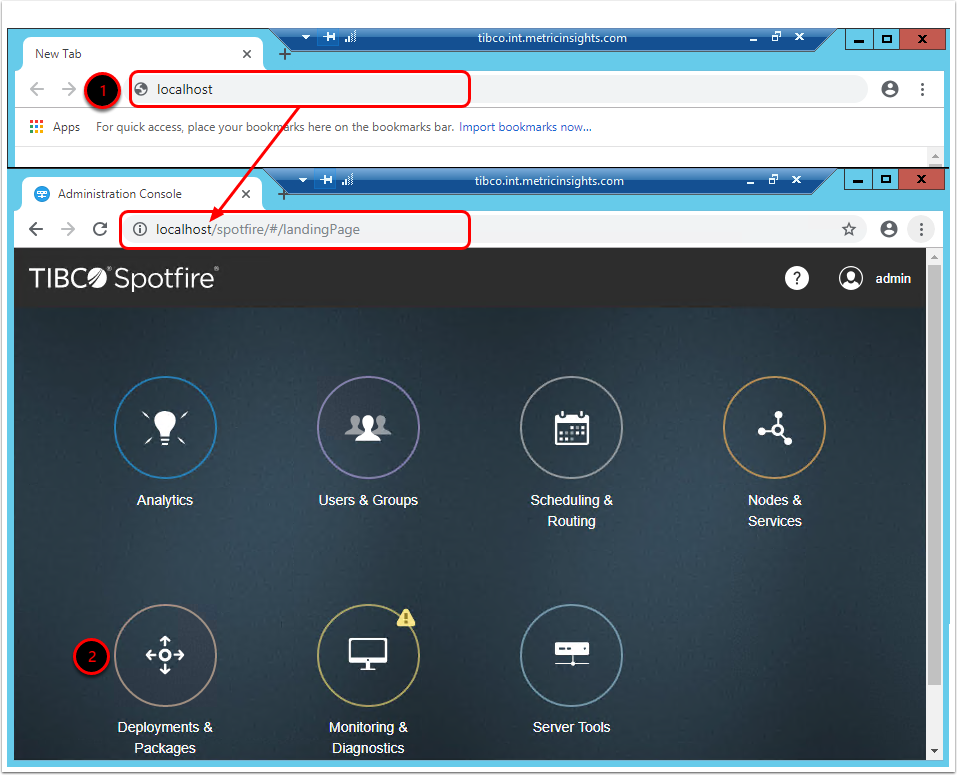
- Open your browser and type "localhost" in the address bar
- When you press enter, you will be redirected to the Spotfire Homepage
- Click Deployments & Packages icon in the Homepage navigation menu
3. Add the Extension to Deployment Area
Spotfire extensions are functional units included in Spotfire add-ins. When added, they enable custom capabilities.
Extension artifacts are compiled and packaged into Spotfire packages,.spk files (containing the .dll's for the extension code and other resources as well as a module.xml file describing the metadata of the extension).
Since the .spk (extension) file can be large, we recommend uploading this file from the Spotfire server directly (localhost). Otherwise, you may get the error "Request Entity Too Large" (413).
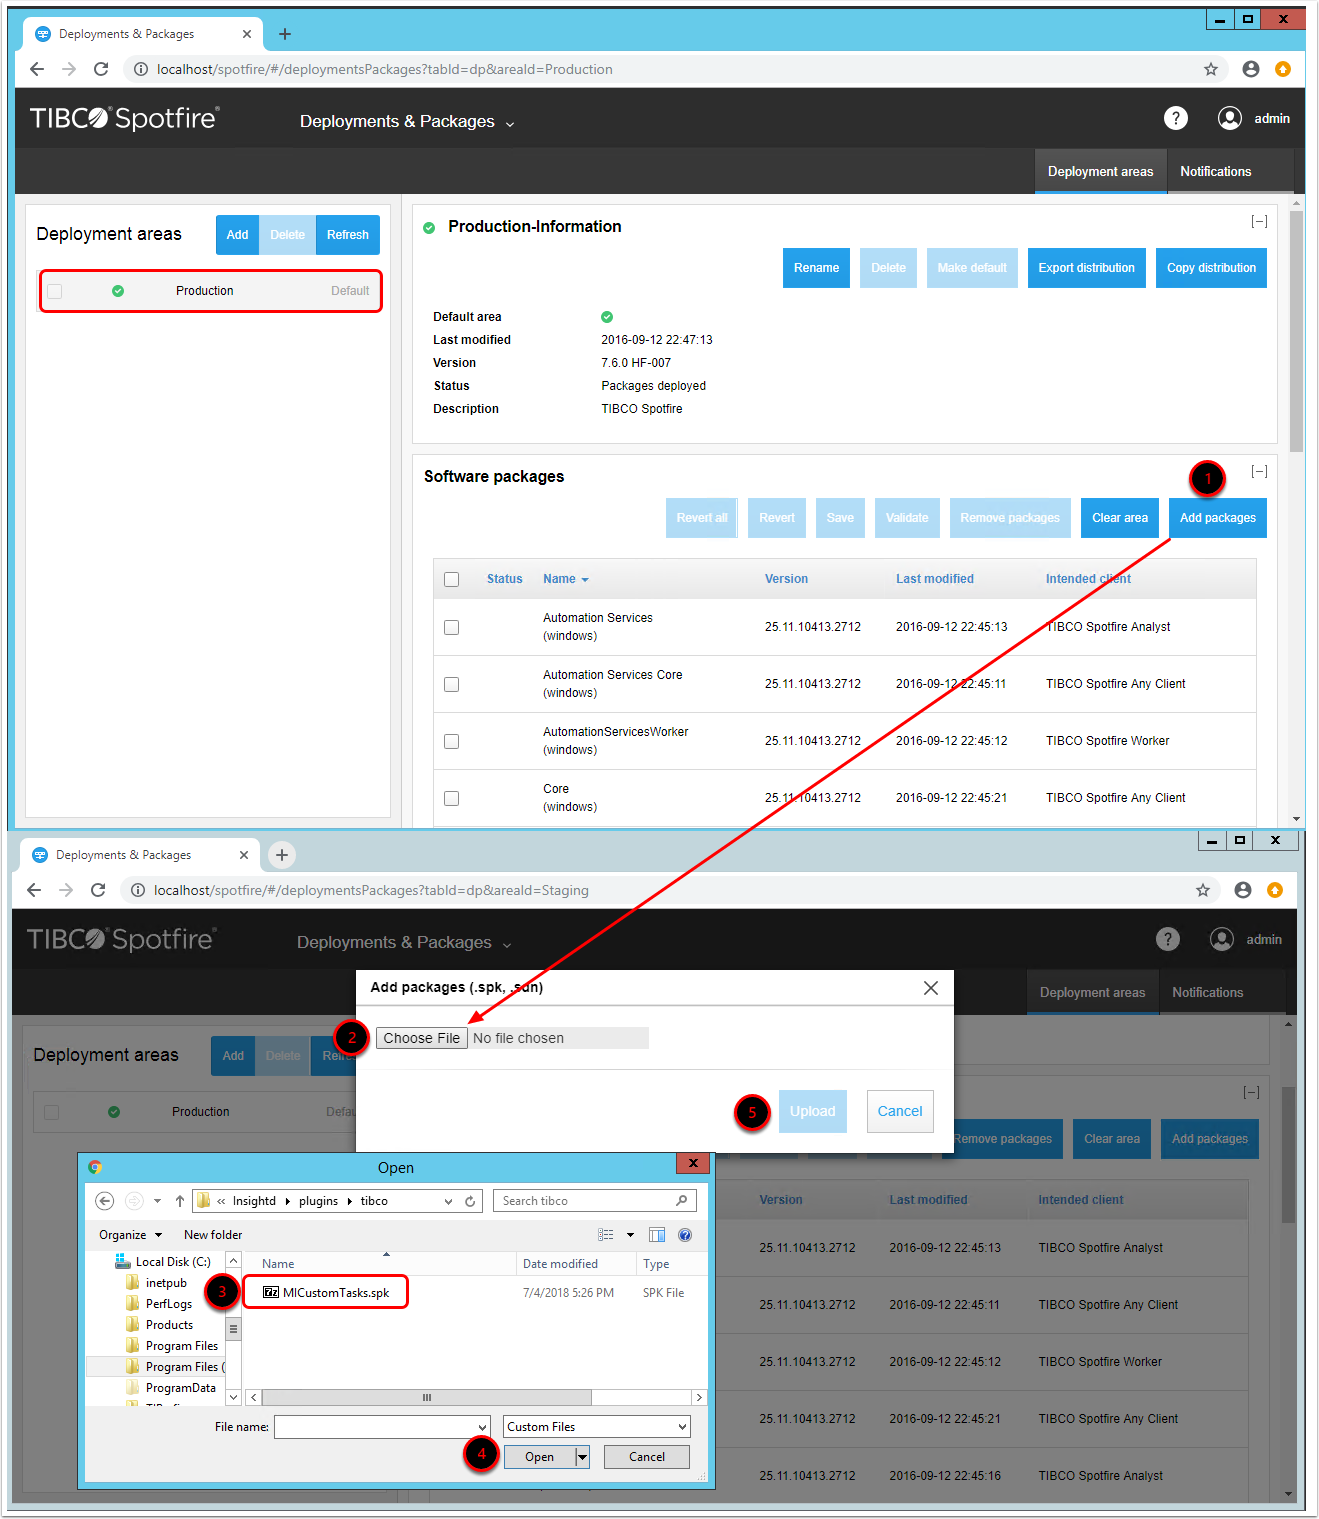
- Deployment areas page will display available areas for deploying your extension
- [Add packages]: clickto add a package to a deployment area
- [Choose File]: click to access the MICustomTasks.spk file
- The file is located in the Tibco plugin directory
C:\Program Files (x86)\Metric Insights\Insightd\plugins\tibco\MICustomTasks.spk
- The file is located in the Tibco plugin directory
- [Open]
- [Upload]
4. Save the New Distribution
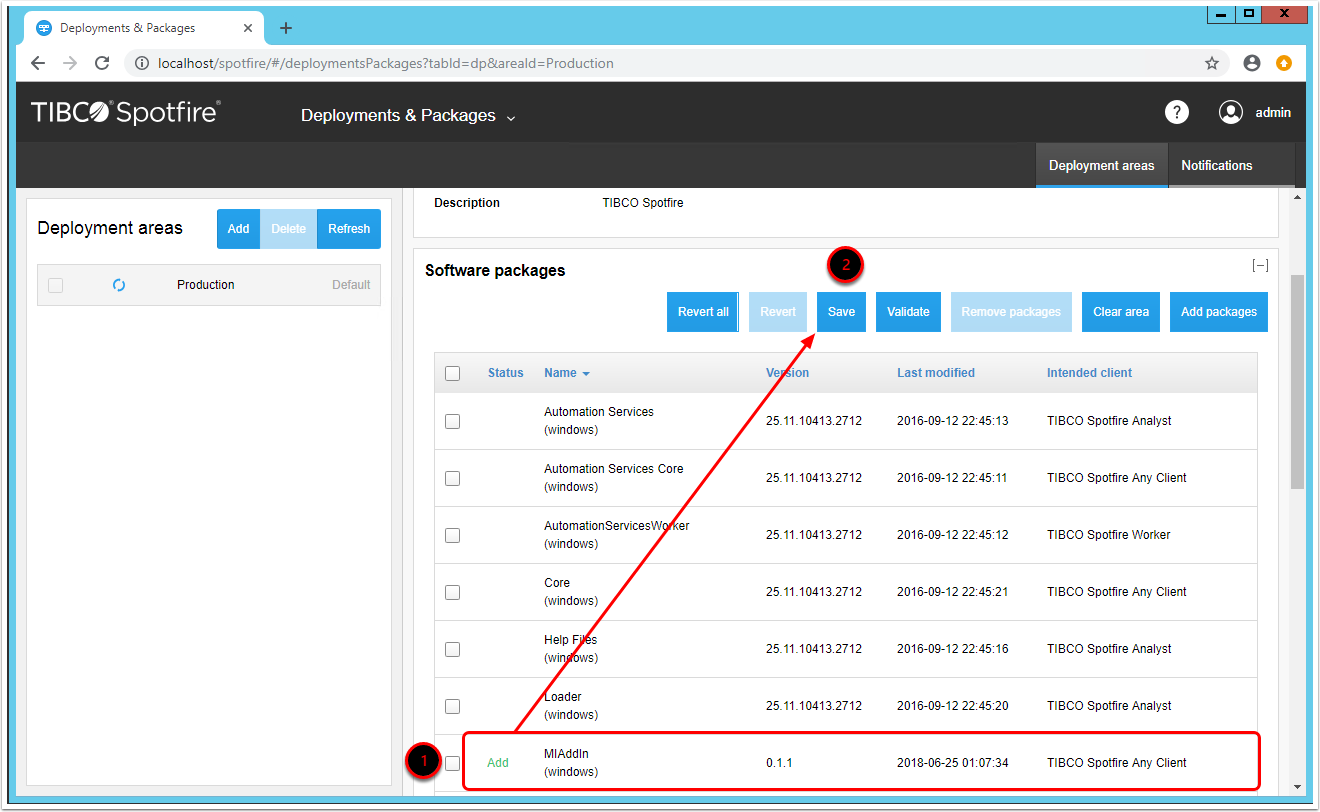
- The .spk extension file will be uploaded as an MIAddIn package with the "Add" status
- [Save] and validate the new distribution
5. Update Automation Services
After adding the MIAddIn extension package, you need to update Automation Services to the new deployment.
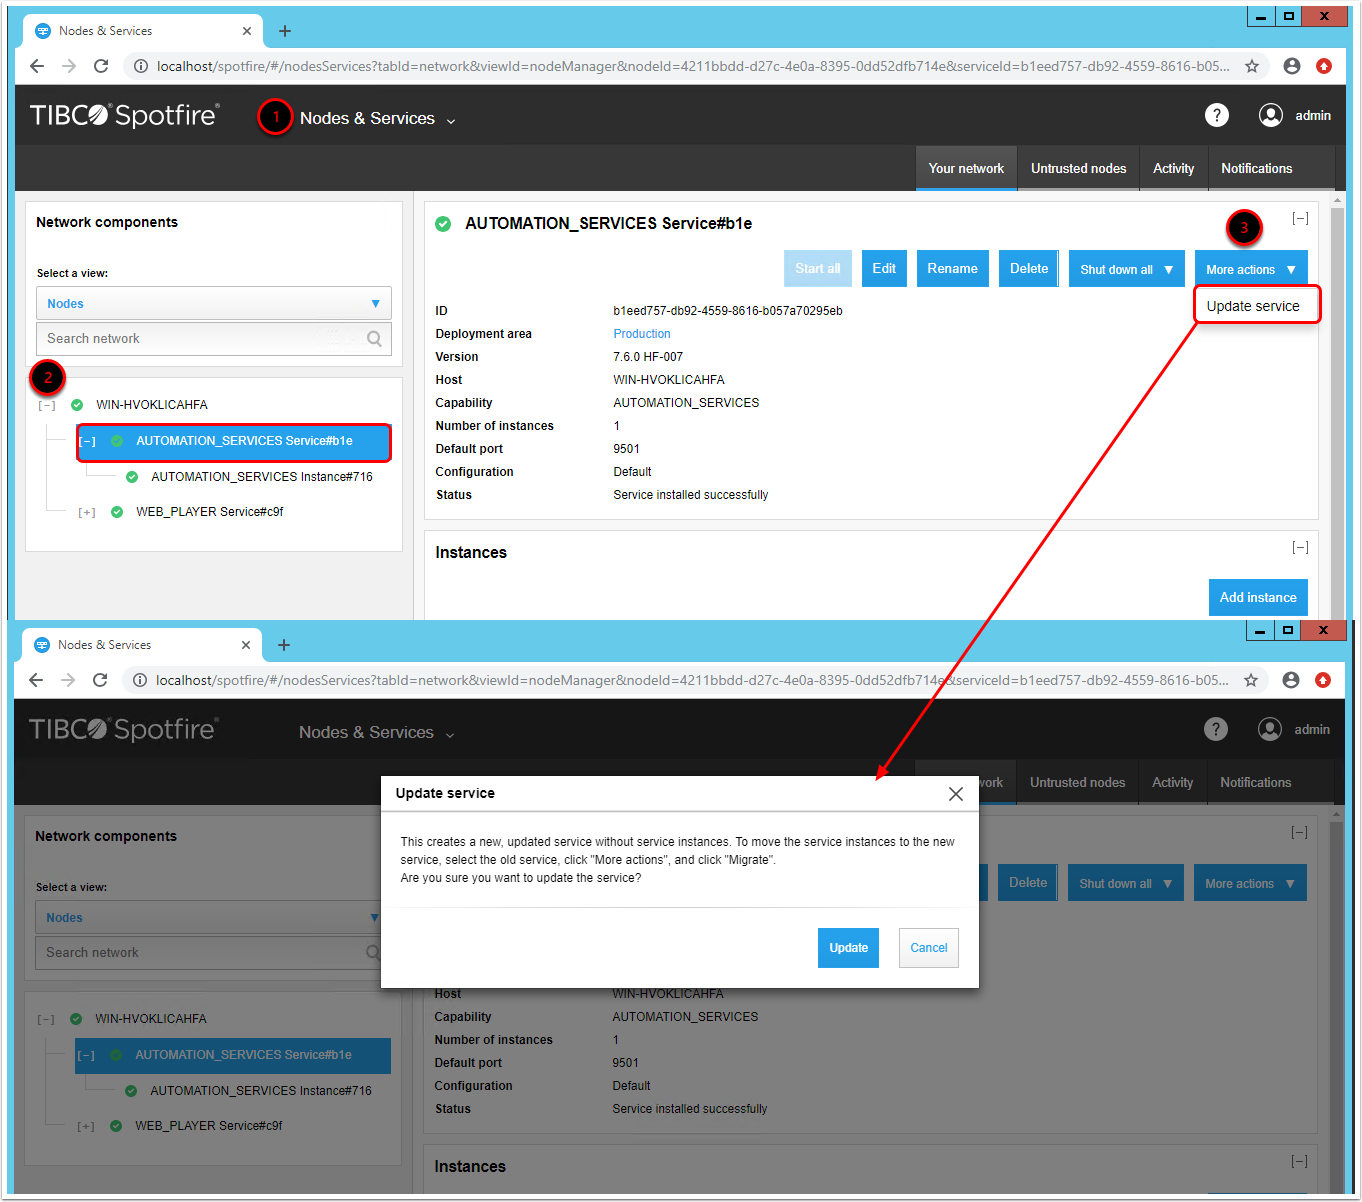
- From the navigation menu drop-down, select Nodes & Services
- Click the tree view symbol [+] to open the hierarchical structure of Network components and select the required Automation Service
- Go to More actions > Update Service
- Updating the Service will get the latest modules from the deployment area and create a new Service
6. Migrate Instances to the New Service
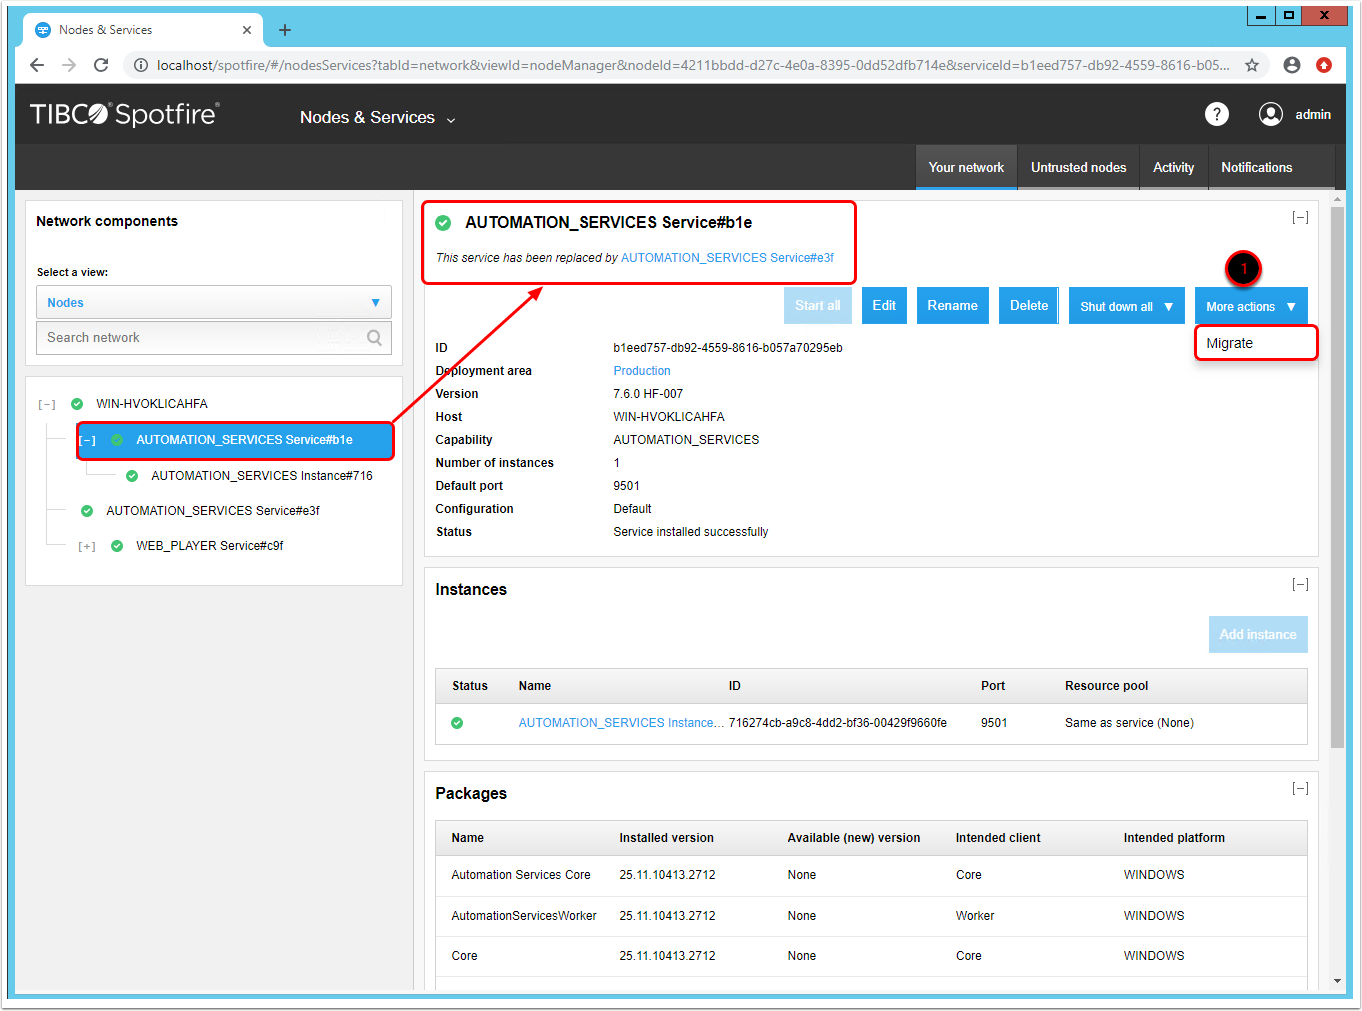
After the new Service has been created, you need to migrate Instances from the old to the new Automation Service.
- Go to More actions > click Migrate
7. Restart Your Instances
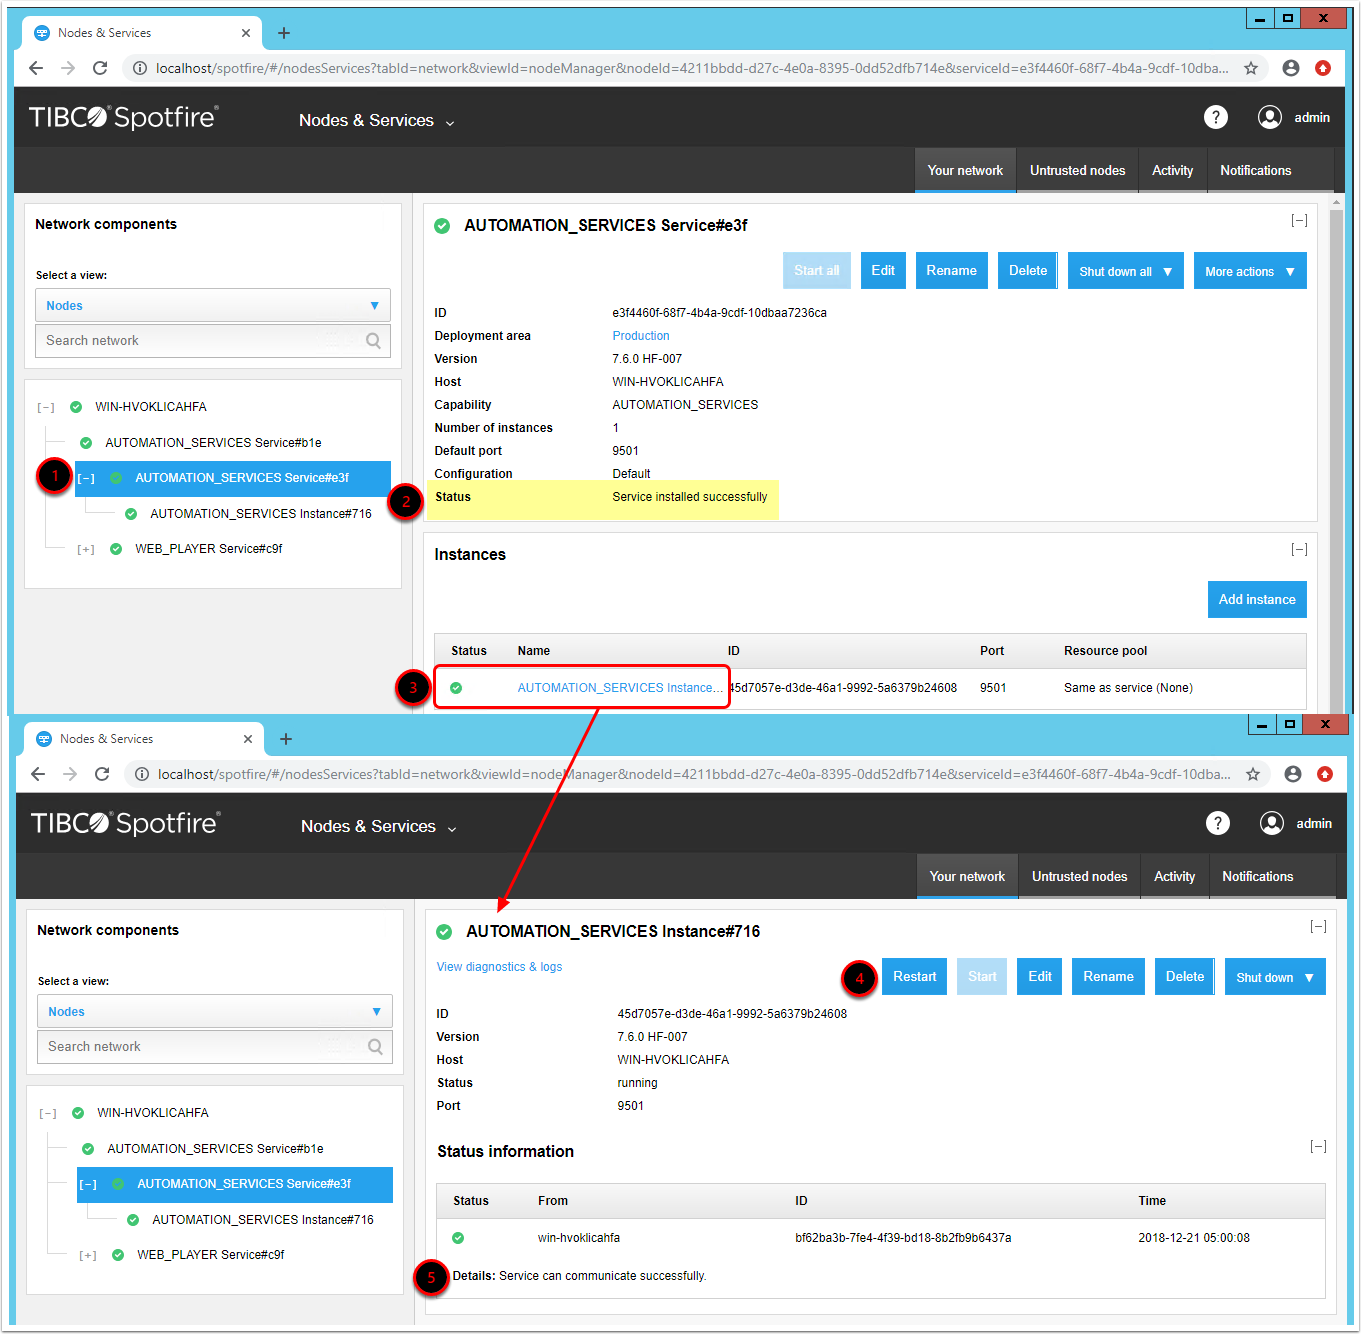
- Access the newly created Automation Service
- Verify that the Service has been installed successfully
- Click the name of the Instance to access its configuration page
- [Restart] the Instance
- Make sure that Service can communicate successfully
If the new Automation Service runs successfully, you can optionally delete the old Service.
8. Configure RDC Hostname Parameter
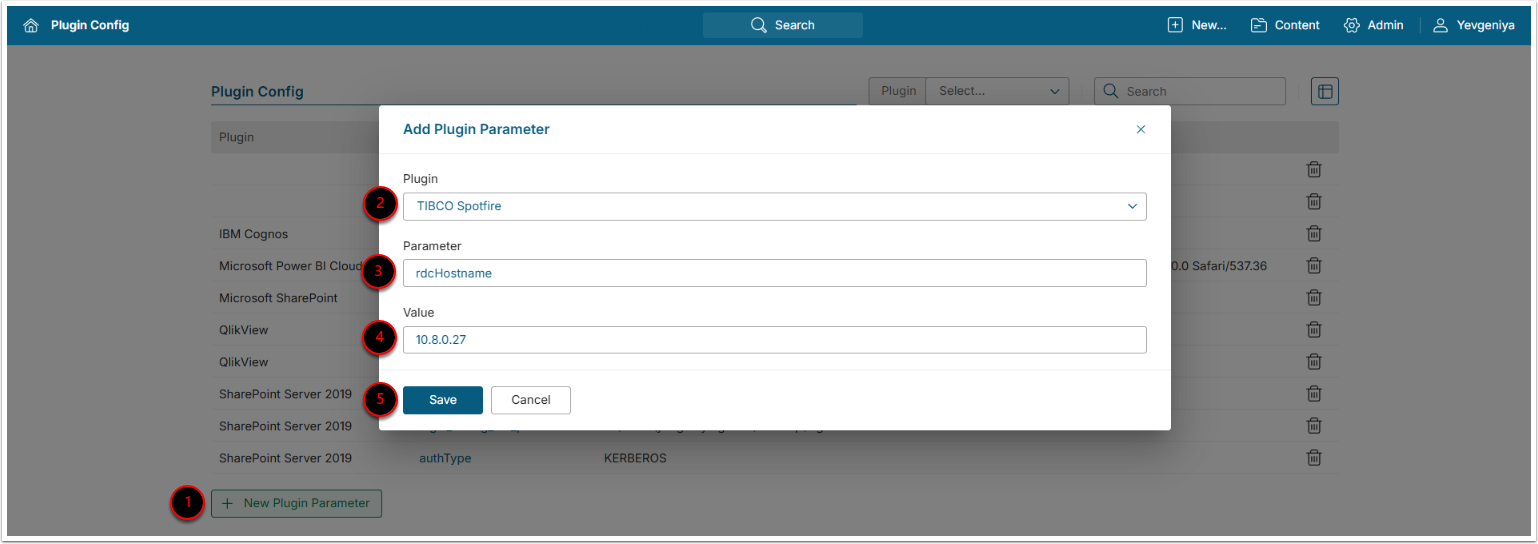
- From Plugin Config Page, [+New Plugin Parameter]
- Choose "TIBCO Spotfire"
- Set Parameter to "rdcHostname"
- Add Value
- [Save]
After that, run your RDP and Test Connection from the Metic Insights UI (as available in the Tibco Spotfire connection profile).
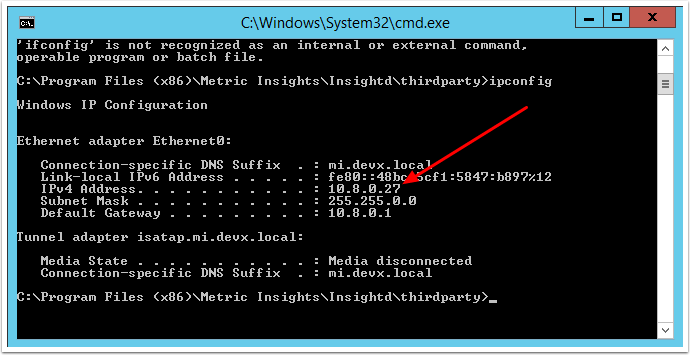
8.1. How to Obtain IP-address (for spotfire.config)
To get the ip-address of the machine with the installed RDC, enter ipconfig in the Windows Command Prompt.
If there are several ip-addresses listed, use the first.