This article describes how to use the Splunk plugin in order to create a connection profile with Metric Insights.
General instructions on setting up data sources based on plugins can be found in Create a New Plugin Data Source.
1. Access Admin > Collection & Storage > Data Sources
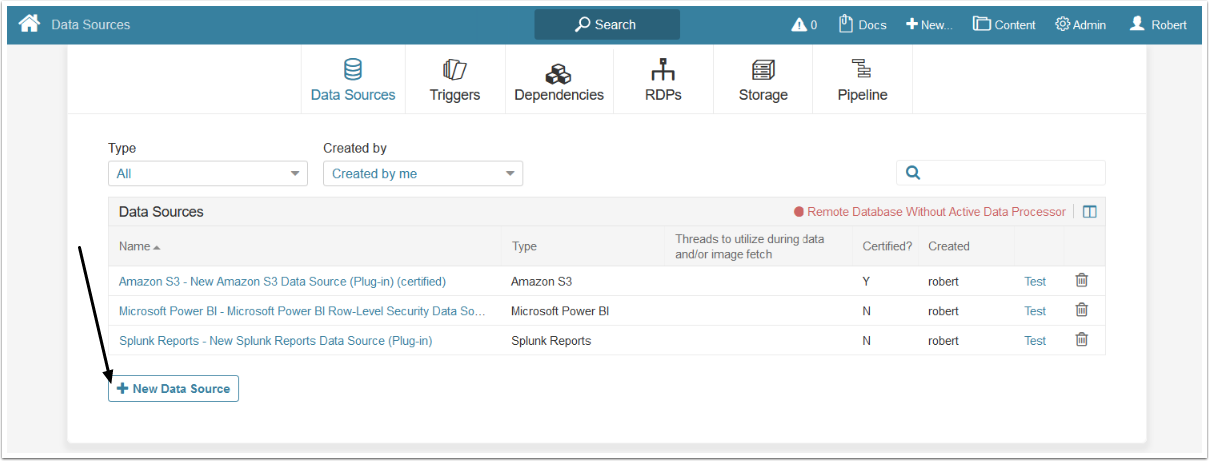
The list of data sources available in the system opens.
At the bottom of the screen, click [+ New Data Source].
2. Select Data Source Type
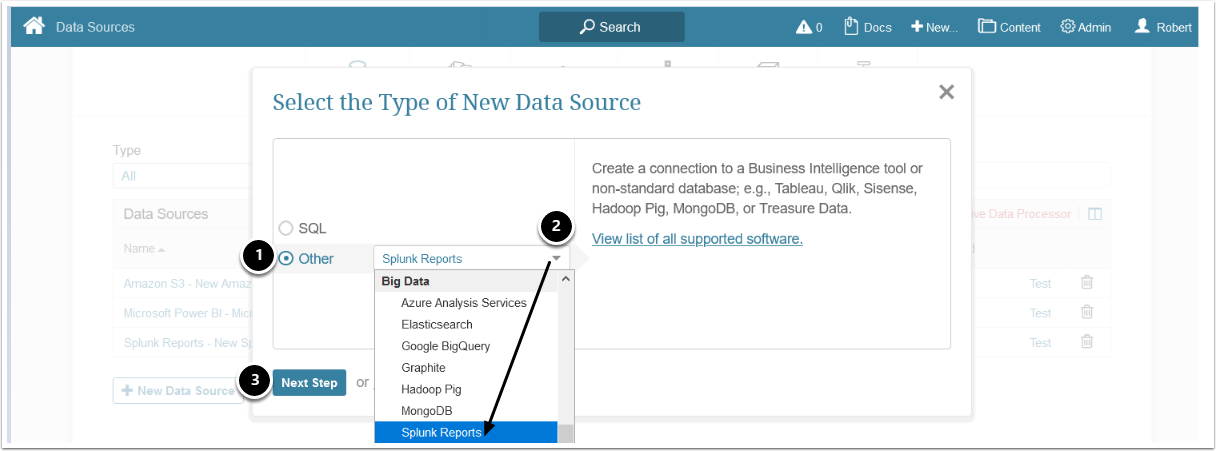
- Select Other
- Choose Splunk Reports from the drop-down list
- [Next Step]
3. Provide the Required Parameters
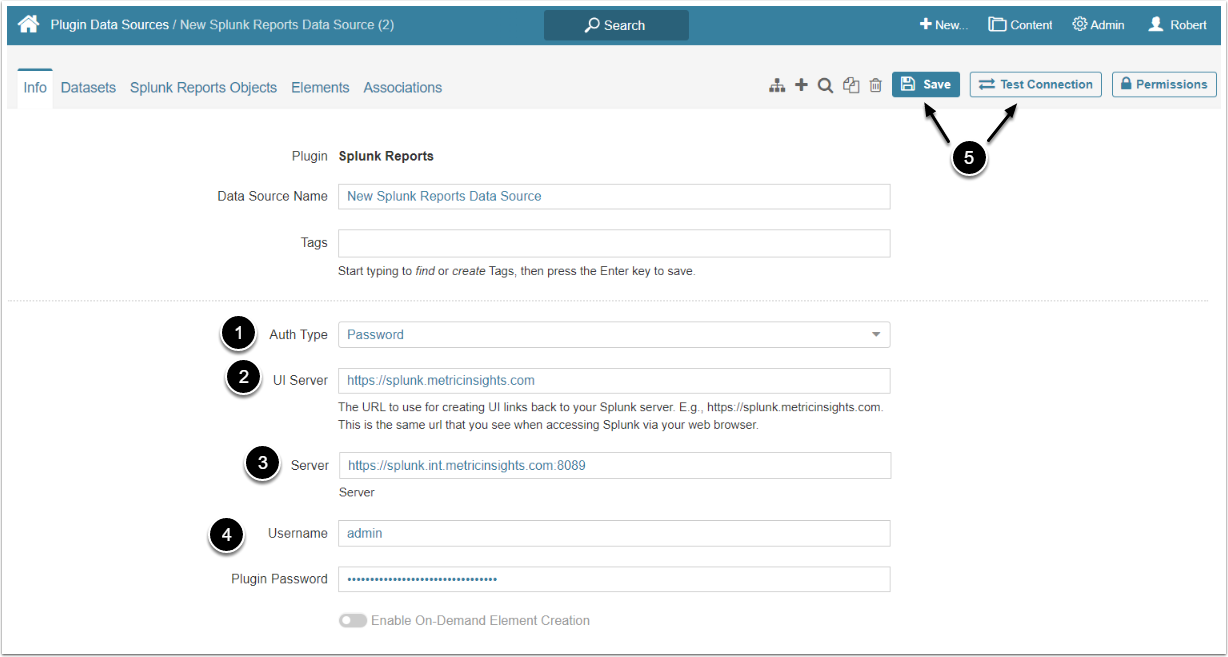
-
Auth Type: Select the authentication type
- For "Password", use the Splunk account credentials
- For "Identity Profile", select the existing Identity Profile in the Identity Profile field
- UI Server: Provide the UI server address to build URLs for the External Reports (the same URL that you see while accessing Splunk via a web browser; e.g., https://splunk.metricinsights.com)
- Server: Provide the server address that is used to send requests (the address may differ from the default address pattern from the example, if that is the case, contact your System Administrator for details)
- Username/Password: Provide your credentials used for Splunk authorization
- [Test Connection] and [Save]
4. Optional Parameters
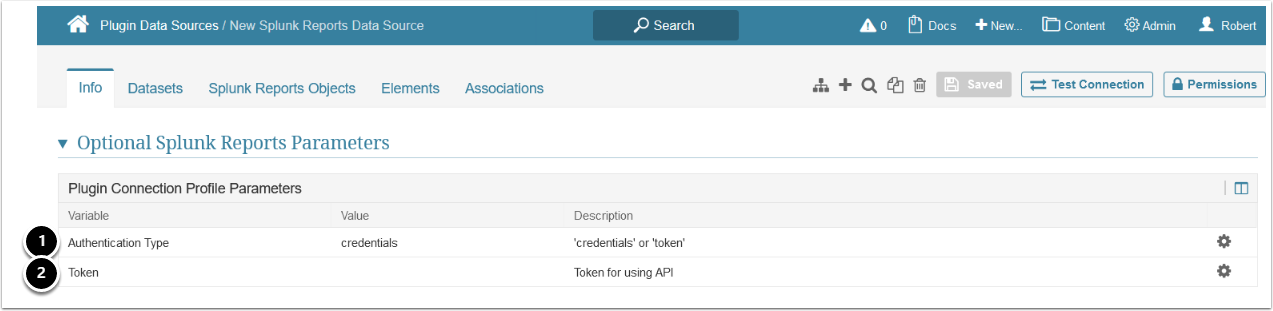
- Authentication Type accepts 2 values:
- "credentials" - the default value that uses your Splunk username and password for authentication
- "token" - uses token for authentication rather than username and password, if Authentication Type is set to this value, the Token parameter must be provided.
- Token: if Authentication Type is set to "token", a valid value for this parameter must be provided, otherwise, this parameter is not required
5. Advanced Configuration
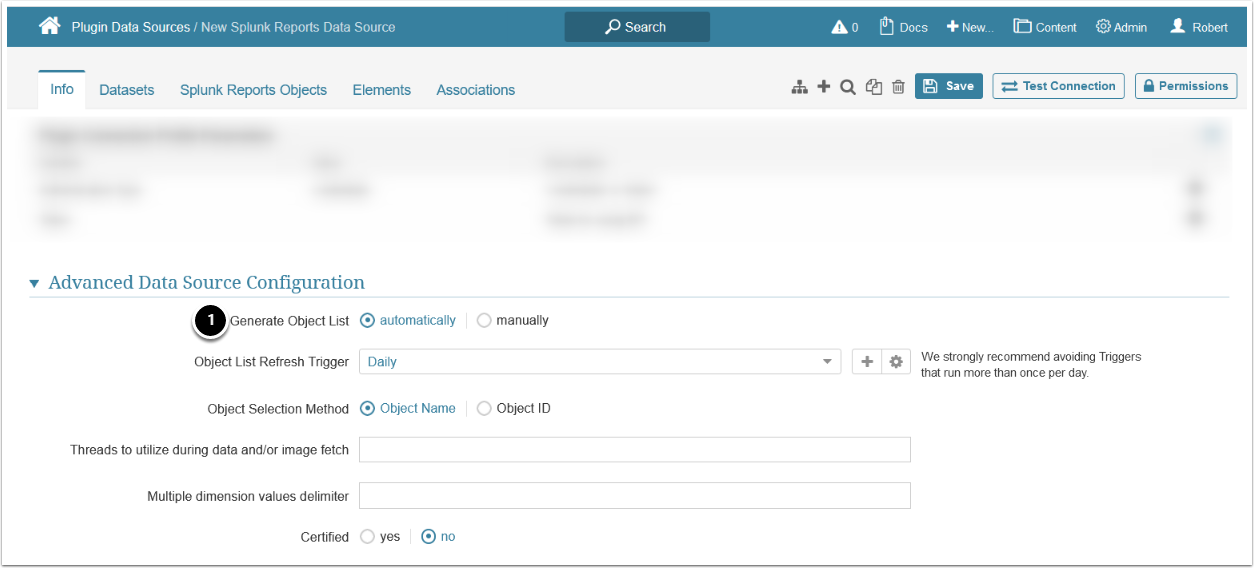
-
Generate Object List
- automatically: Choose an Object List Refresh Trigger to collect Objects from Splunk automatically
- manually: Objects can be added manually from the Splunk Report Objects tab
6. View Data Source Elements
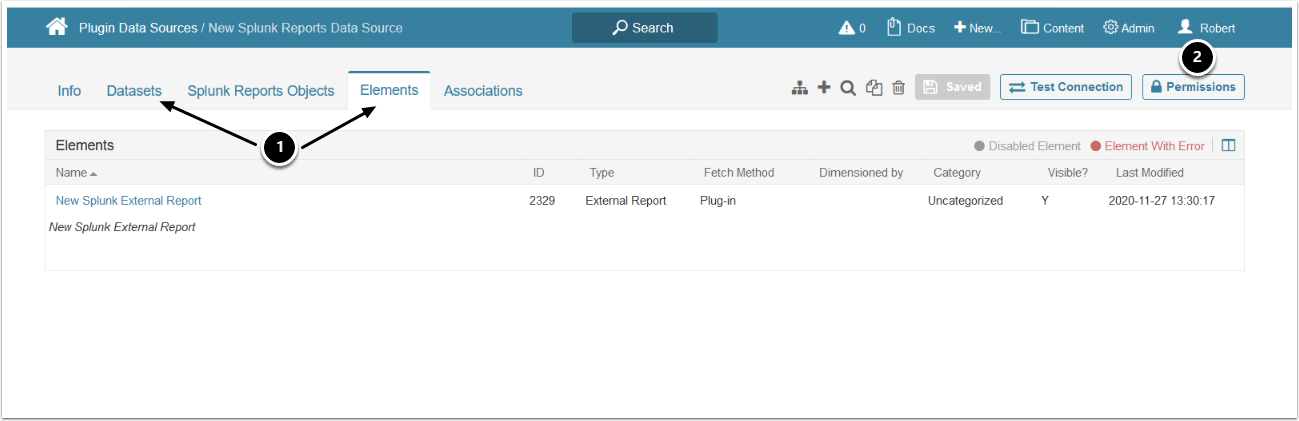
- You can create Datasets and view elements and Datasets directly from the respective tabs
- Click Permissions to assign them to Groups or Power Users