This article describes how to connect to the IBM Cognos server.
PREREQUISITES:
- Port 9300 must be open to be able to access the Cognos server from the Metric Insights server.
SERVICE ACCOUNT REQUIREMENTS:
- User account should be at least a member of Analytics Viewer.
1. Create New Data Source
Access Admin > Collection & Storage > Data Sources
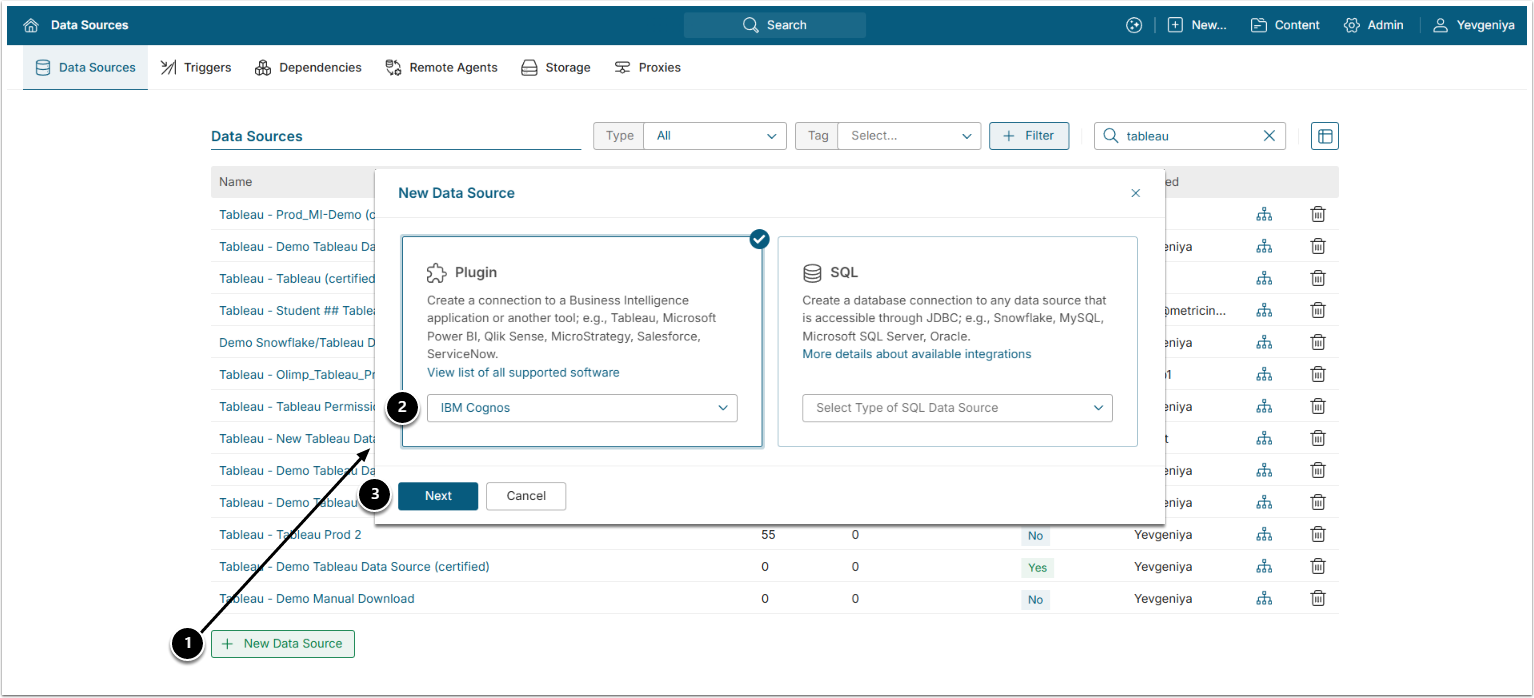
- [+ New Data Source]
- Plugin: Choose "IBM Cognos" form the Plugin drop-down.
- [Next]
2. Provide the Required Parameters
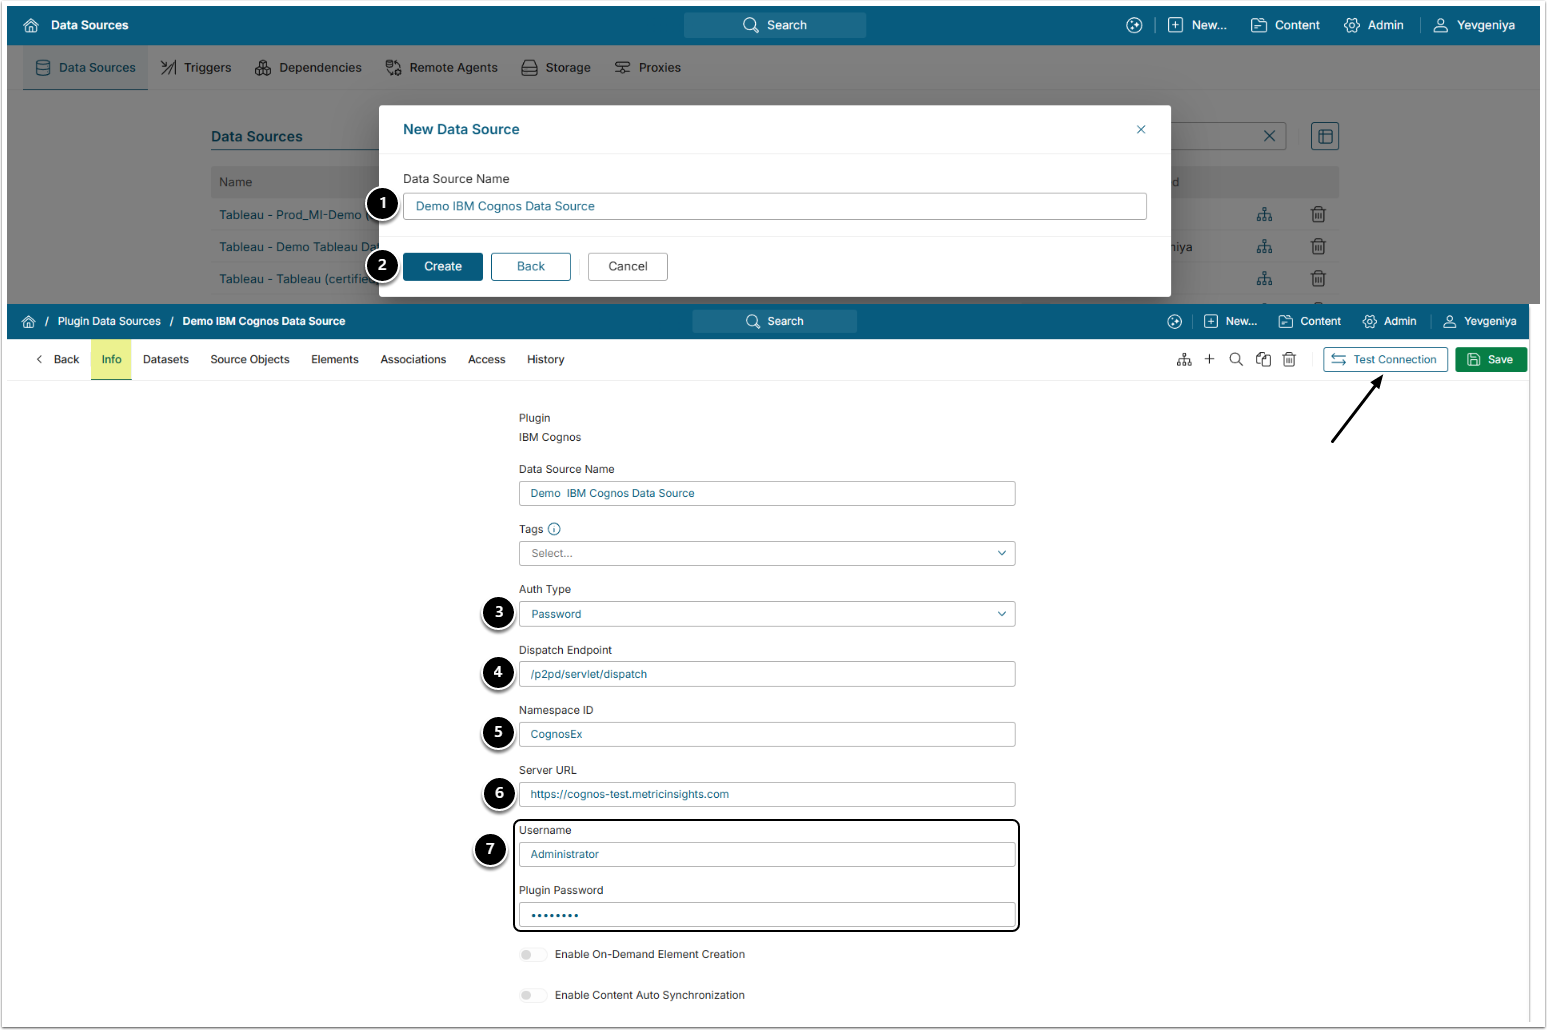
- Data Source Name:provide a descriptive phrase.
- [Create]
- Auth Type:select the required auth type:
- Password: use the IBM Cognos credentials as described in this section;
- Identity Profile: select the existing Identity Profile in the Identity Profile field that will appear instead of Username and Plugin Password.
- Dispatch Endpoint: provide the endpoint URL for the Cognos server login page.
- Namespace ID: specify Cognos Namespace ID.
- NOTE: Use Namespace ID (not Namespace Name), according to Cognos API requirements; otherwise, the connection will fail. Refer to the next section to locate the Namespace ID value.
- Server:define the server protocol (http/https) and hostname.
- Username and Plugin Password: input the credentials that are used for accessing to the Cognos account.
Optionally, toggle on:
Finding Namespace ID in IBM Cognos
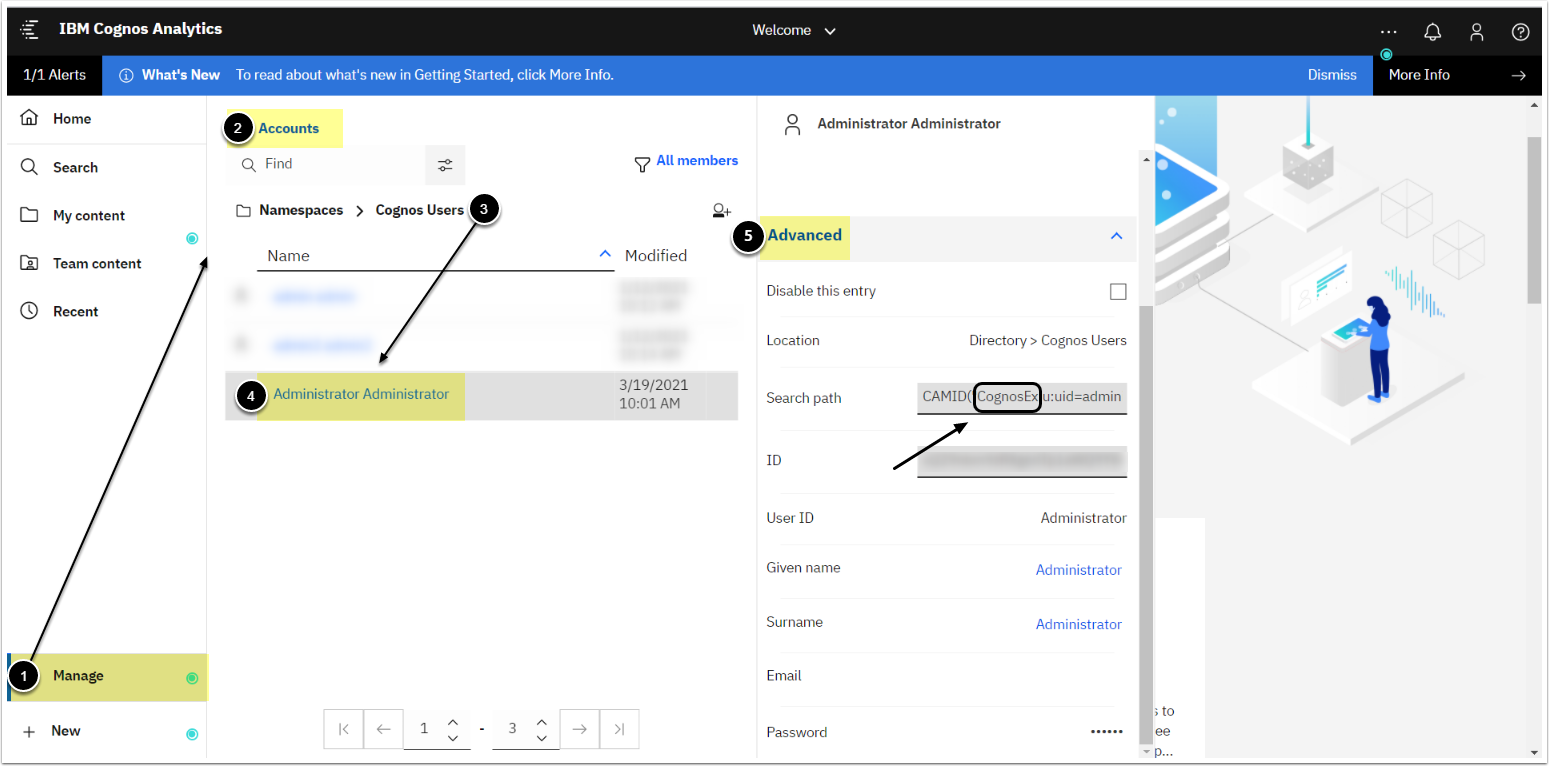
Access the Cognos server
- Go to Manage >People.
- Access Accounts.
- Select Cognos Users.
- Click your account name.
- Proceed to the Advanced tab.
3. Configure Optional Parameters

| Description | |
|---|---|
| 1 | Specify a full name of a Folder or Package that will be used for filtering IBM Cognos Objects. |
| 2 | List object types to use in report listing.
|
4. Proceed with Advanced Configuration
Advanced Configuration settings can be set to default values unless Data Source requires more precise tuning. For more details on how to proceed, refer to Advanced Data Source Configuration.
[Test Connection] in the upper right corner.