This article describes how to connect to Snowflake plugin in order to load data into Datasets and Reports in Metric Insights.
1. Create a New Data Source
Access Admin > Collection & Storage > Data Sources
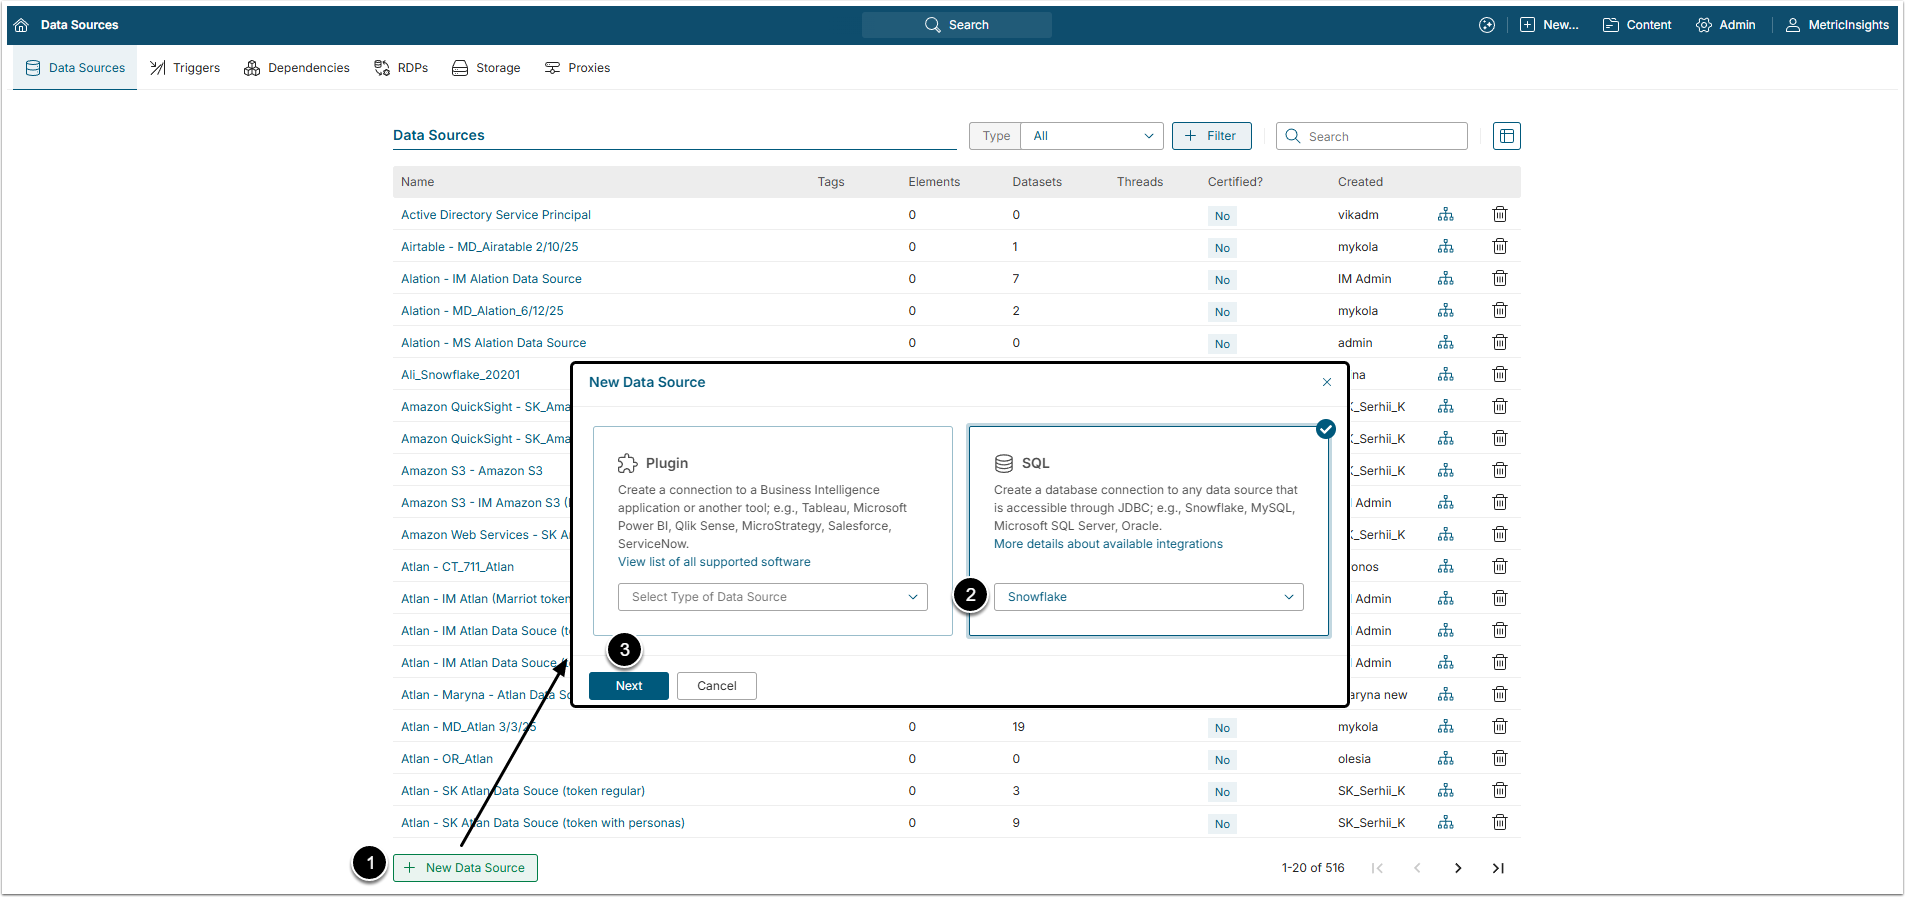
- [+ New Data Source]
- Select "Snowflake" in the SQL section.
- [Next]
2. Complete Data Source Creation

- Name: Give the Data Source a descriptive name.
-
Auth Type: Select the authorization type:
- Password: Use the credentials to provide access to the database.
- Identity Profile: Select the existing Identity Profile in the Identity Profile field.
-
Private Key: See instructions for configuring Private Keys in this article;
-
NOTE: To comply with modern security standards, when creating your encrypted private key with openssl pkcs8, use the flag for -v2. This will allow you to use the v2.0 PKCS#8 (PKCS#5) algorithms such as des3. When generating an encrypted private key:
openssl genrsa 2048 | openssl pkcs8 -topk8 -v2 des3 -inform PEM -out rsa_key.p8 - Refer to the latest Snowflake documentation.
-
NOTE: To comply with modern security standards, when creating your encrypted private key with openssl pkcs8, use the flag for -v2. This will allow you to use the v2.0 PKCS#8 (PKCS#5) algorithms such as des3. When generating an encrypted private key:
- OAuth: To use this Authentication type, the Administrator has to configure OAuth first.
- To obtain Data Source Username and Data Source Password generate an Access token in the User Settings page.
- Host name, Database name and Port fields will disappear after entering the JDBC string.
- JDBC driver: "Snowflake" is chosen in this field by default.
- JDBC string: Insert the JDBC URL from the page of created SQL Warehouse in the Snowflake account.
- [Create]
3. Check the Connection

[Test Connection] to check if the system connects to the database successfully.