This article details how to configure filtering in Domo External Reports.
PREREQUISITES:
1.1. For Dashboards
Access the Dashboard
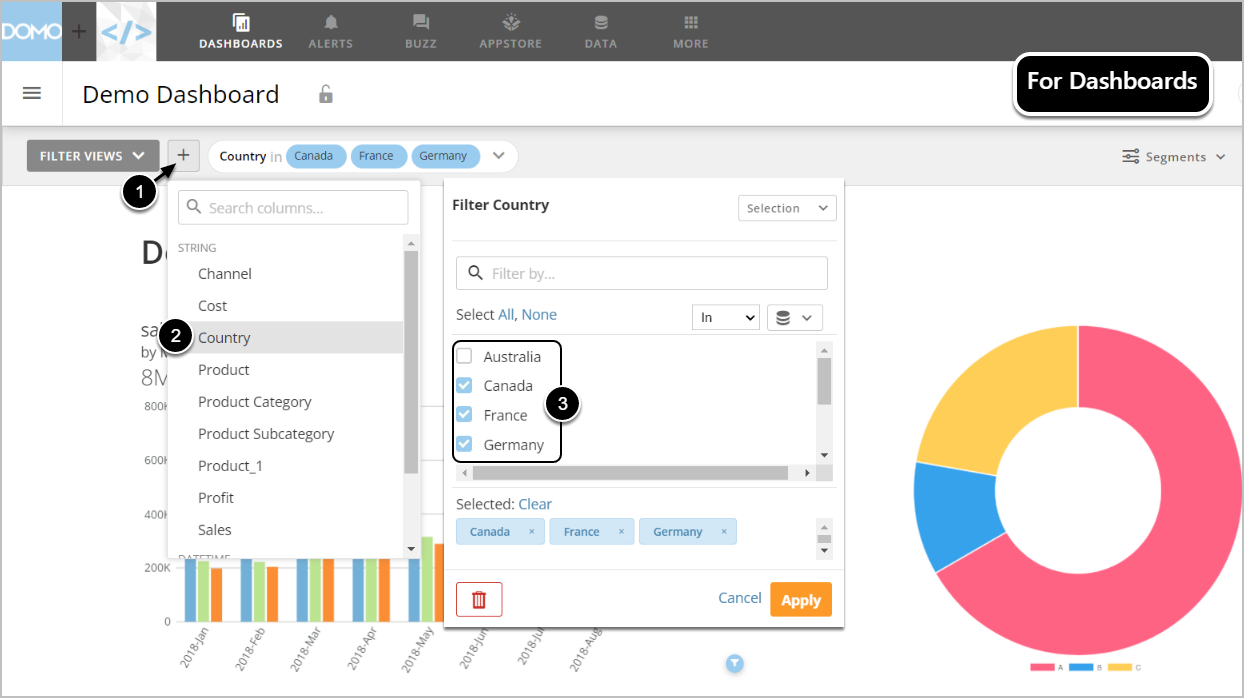
- Click the plus icon next to [FILTER VIEWS].
- Choose the desired Filter.
- Find the Values in the following popup.
1.2. For Cards
Access the Card
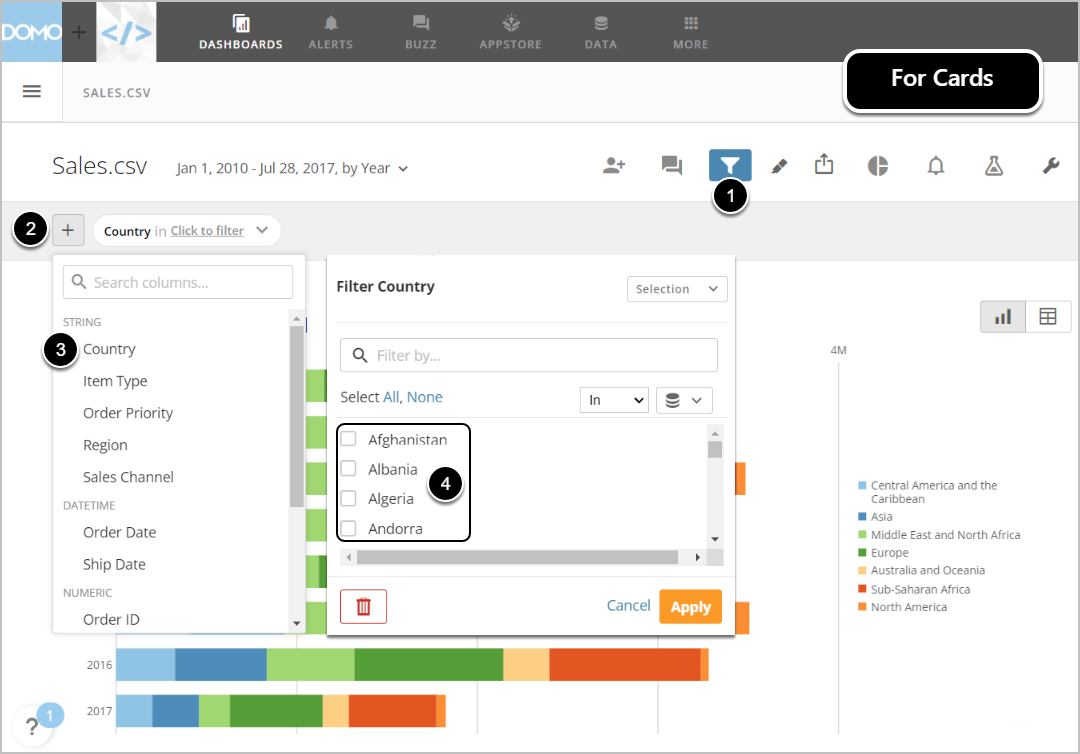
- Click the funnel icon.
- Click the plus icon.
- Choose the desired Filter.
- Find the Values in the following popup.
2. Define a Source Object for Data Collection
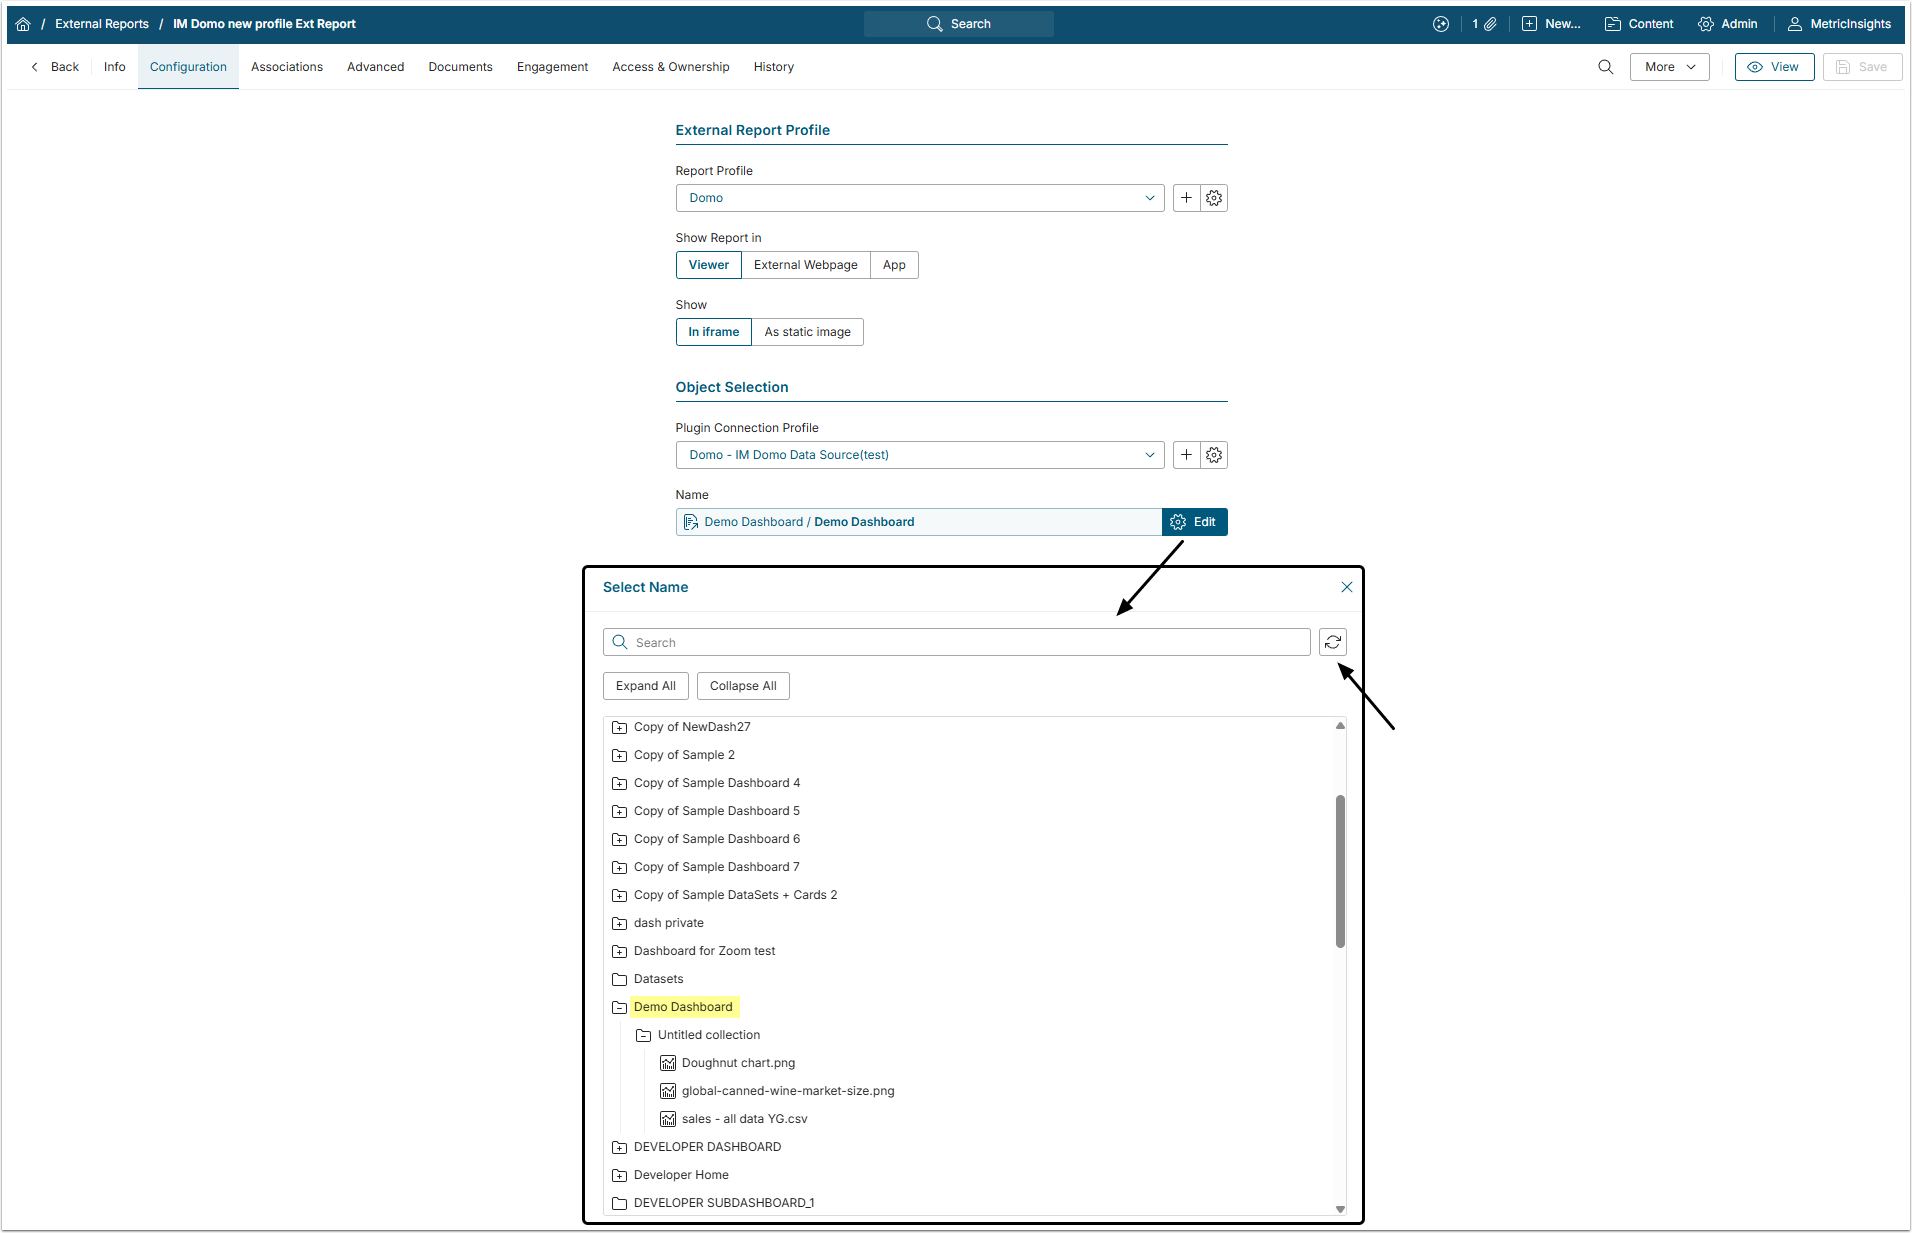
Start by creating an External Report. Once you get to the process of Data Collection, define the following:
- Choose Data Source that connects Domo and Metric Insights.
- For more information, see Establish Connectivity to Domo
- Choose Card/Dataset from the pop-up list of available Domo objects that can be a source of data.
- Each item in the list is represented as the path (hierarchy) to the respective object in Domo.
- If the required item is not displayed, click the Refresh icon at the upper right corner of the pop-up.
3. Managing Filters
Once filters are added for the first time, they are going to be automatically added to all new respective Elements with the same Data Source/Report.
NOTE:
- External filters are tied to Domo objects, not Metric Insights' Elements. This allows Filters to be reused for multiple Elements (without creating new Filters every time an Element is created in Metric Insights).
- If there are more External Filters or Filter Values that you would like to use for the current Element, you can always set the redundant ones to "ignore".
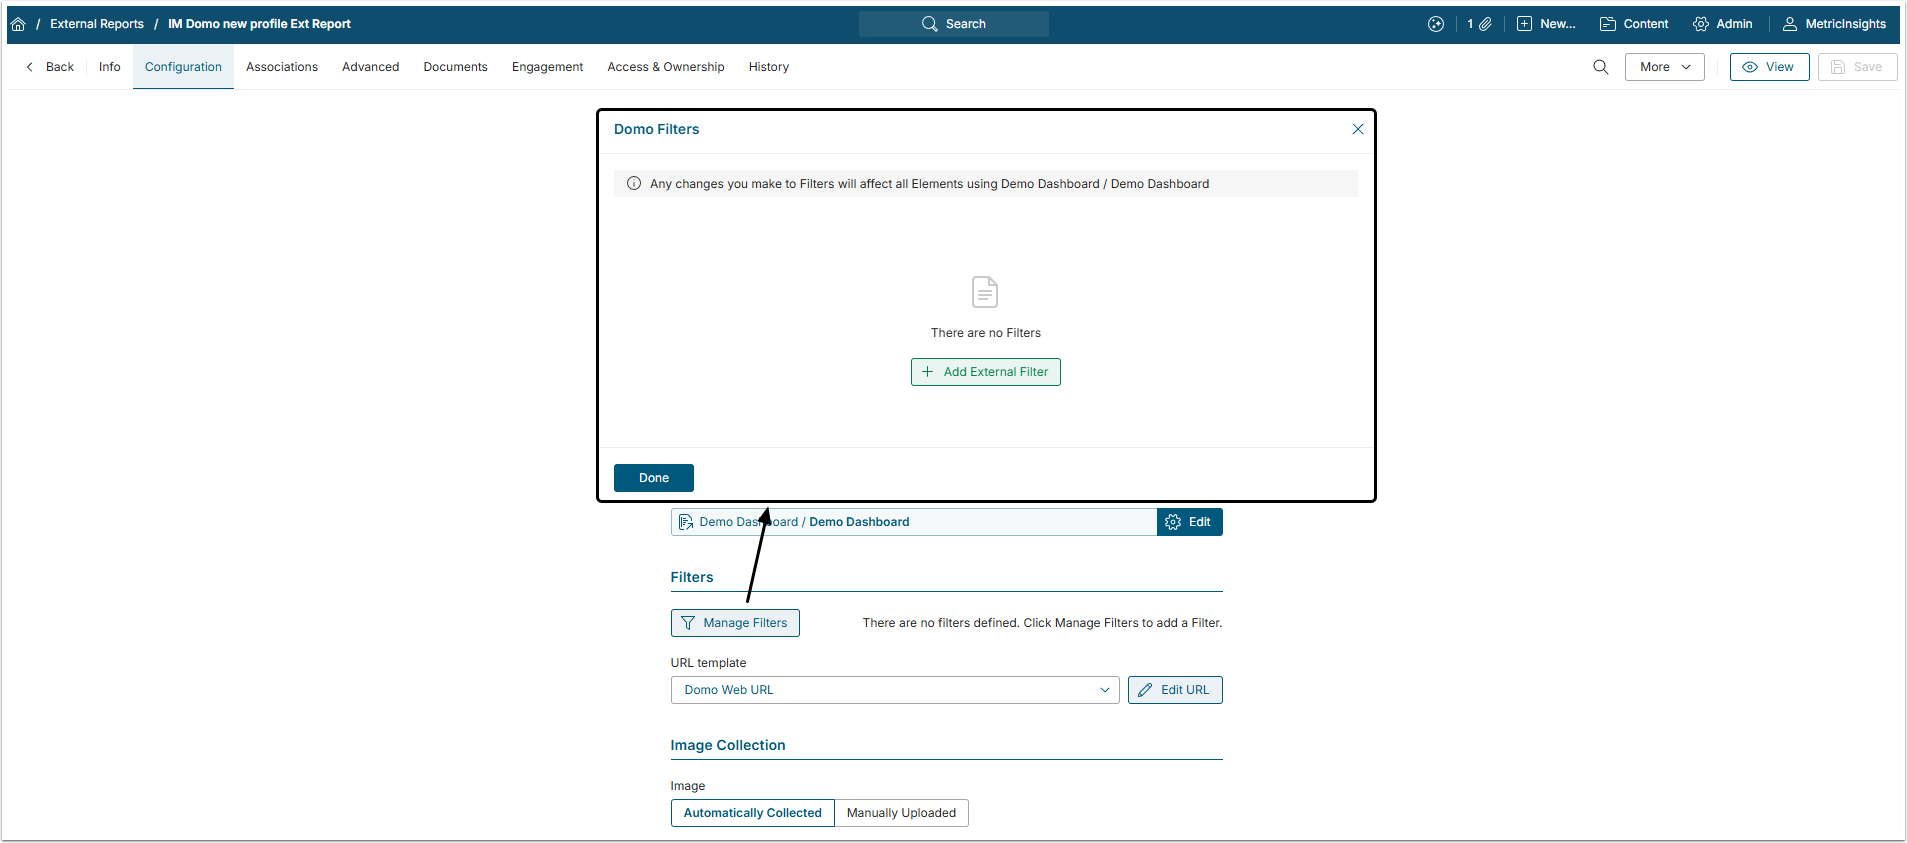
When creating an Element from Domo, after you define the Card/Dashboard that should serve as a Data Source, you may pre-filter information that is going to be fetched.
Click [Manage Filters] and than [+Add External Filter] to choose one of the four options for adding filters. Sections below provide information on how to do this.
4. Adding External Filters
NOTE:
- Examples given below are taken from the Domo Dashboard shown at the top of the page.
- Domo Filter Name must exactly match filter names from a Domo Card/Dashboard. Filter names are case sensitive. Unless the match is exact, the Filter will not work.
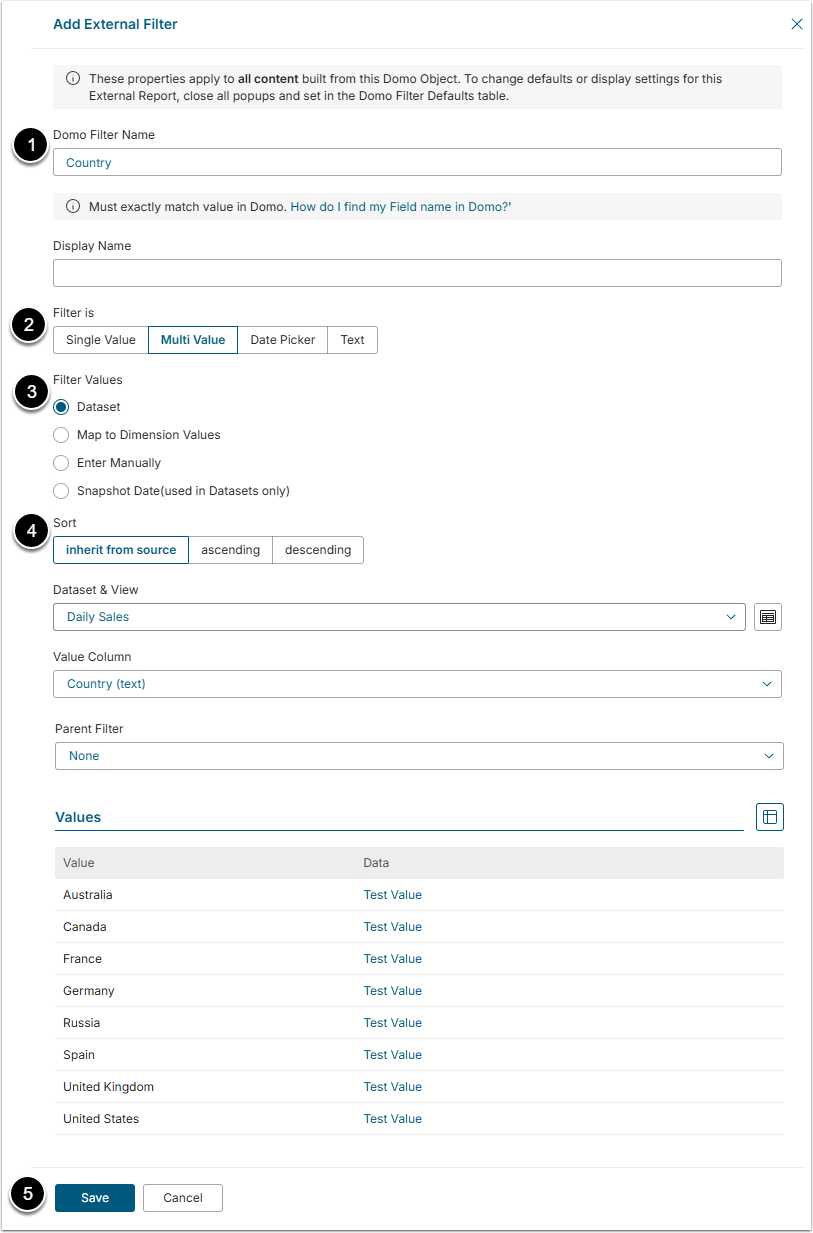
If you have already created Datasets from Domo in Metric Insights, you can choose one for pre-filtering:
- Domo Filter Name: Insert Domo Filter Name.
- Domo Filter Name must exactly match filter names from a Domo Card/Dashboard. Filter names are case sensitive. Unless the match is exact, the Filter will not work.
- Filter is: Specify the type of Filter.
- Filter Values: Select where the Filter Values will be taken from.
- Dataset: Filter values are taken from the Dataset. The User has to select the Dataser&View and specify the Value Column.
- Map to Dimentional Values: The User has to select a Dimension. All Dimension Values are going to be loaded to the Values list automatically.
- Enter Manually: The User has to add all the Values manually.
- Snapshot Date: The User has to select Date Format used in Domo account.
- Sort: Choose how the Values will be sorted.
- [Save]
NOTE: Datasets used here must have Values that exactly match the Filter Values in Domo (if the Values do not match, the Filter will not work).
5. Setting Defaults for Filters
Configuring defaults allows for defining Filter defaults for Users viewing this External Report. Defaults may be set the same for everyone or applied based on a User Map. Consequently, any number of Users will have the correct Filter Values when they open their External Report.
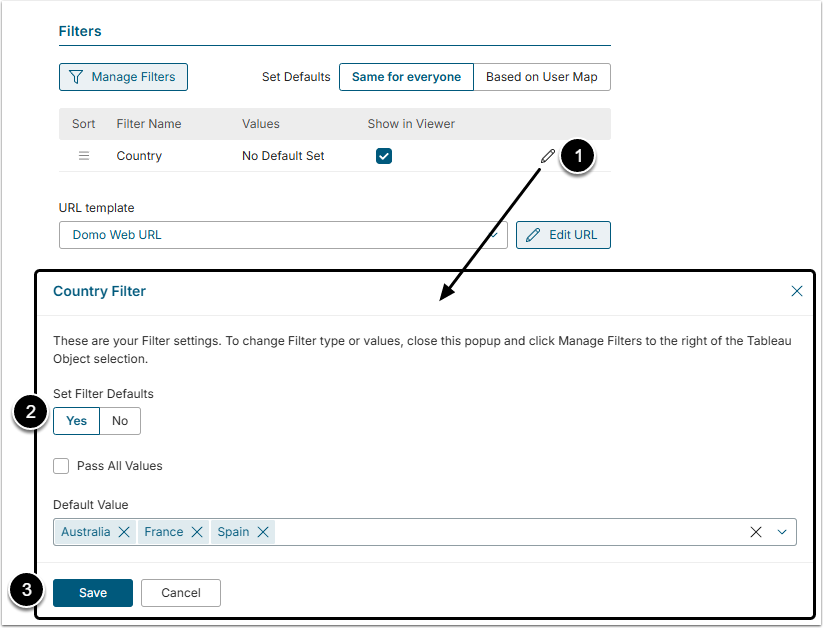
- Click the Pencil icon to assign the Defaults for Filters.
- Filter Defaults: Set this field to "Yes"
- You can choose to Pass All Values or select Default Value(s) from the drop-down.
- [Save]
Repeat to set the desired Defaults for other Filters, if needed.
Setting the Defaults via a User Map does not restrict Users from viewing non-default Values. It simply sets the Values displayed upon initial viewing. If a User is not in the User Map, the system will initially display the View with no default Values.
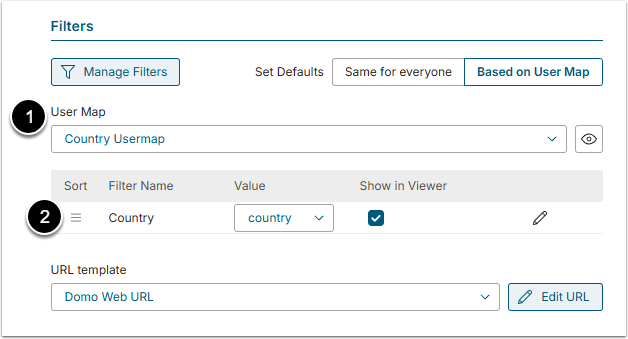
- Choose a User Map from the drop-down.
- Match the Filters to this User Map.
6. Deleting Filters
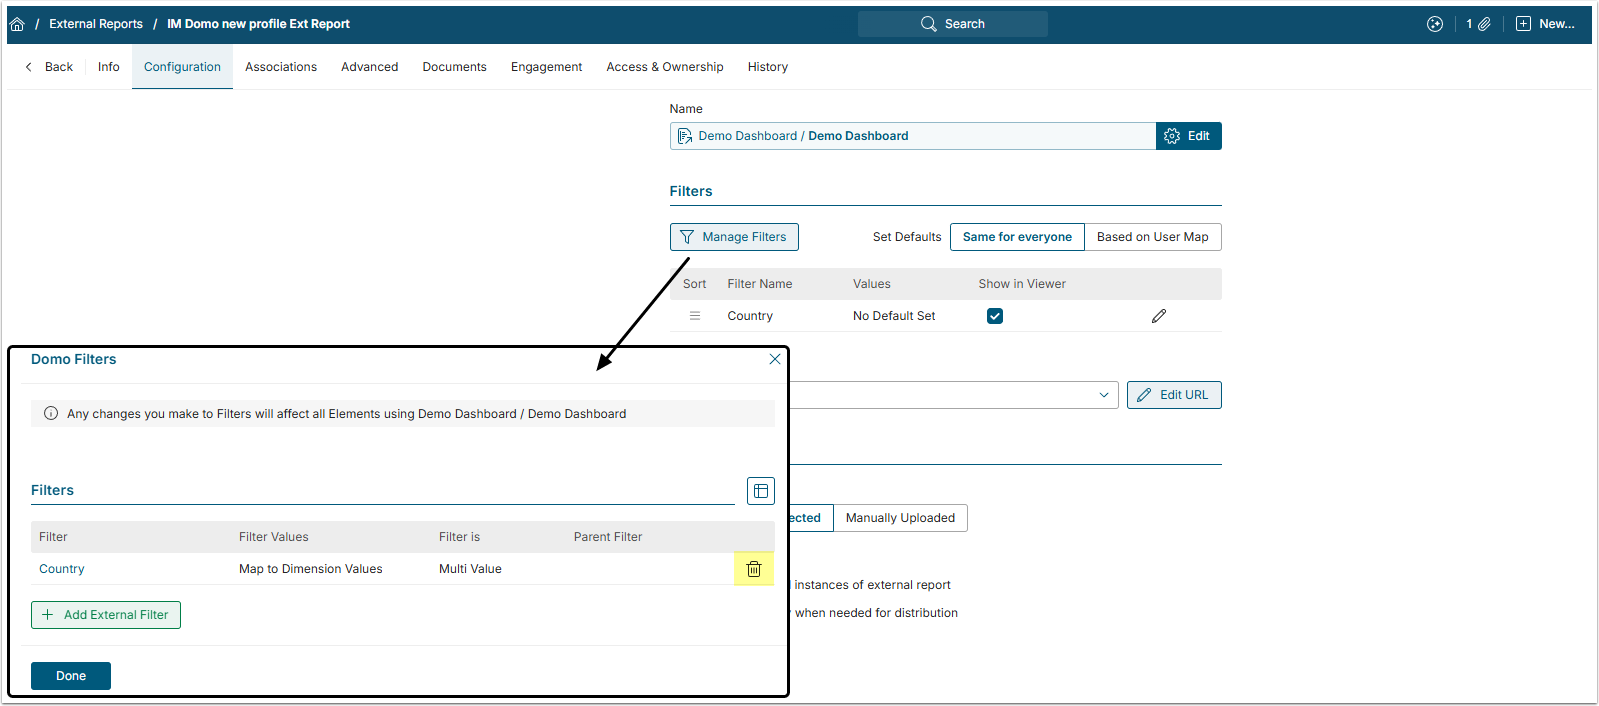
From Manage Filters, click the Trashcan icon next to the filter and confirm your consent.