This article details how to establish connectivity to Script Plugin that can run the following two types of scripts:
- Stored in the web container
- Stored as JavaScript Custom Scripts (at Admin > System > Custom Scripts)
PREREQUISITES:
- To use the scripts stored in the web container, create a config file listing the directories where the needed scripts are located
Constraining a List of Directories with Scripts
- Access the web container
- Place scripts to the directory that will be serve as a Script Plugin Data Source
- In
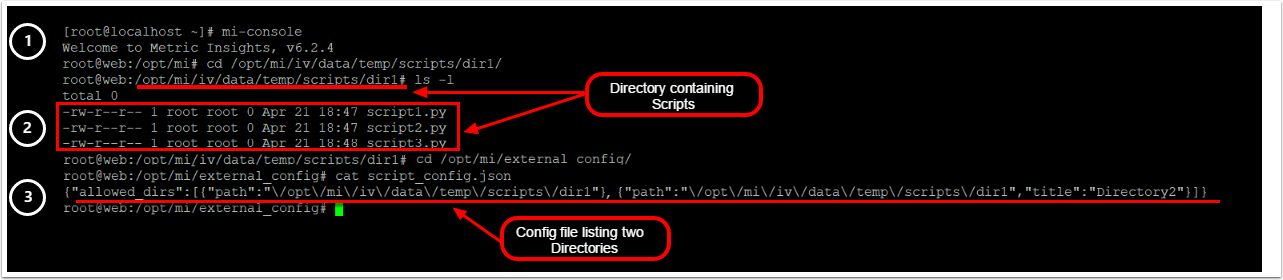
/opt/mi/external_config/directory, create ascript_config.jsonfile specifying the path to the directories that contain scripts. Use the following format:
{"allowed_dirs":
 [
  {"path":"<path to directory1>"},
  {"path":"<path to directory2>"},
  {"path": <path to directory3>"}
 ]
}Note: Important details to know about the script_config.json file:
- The slashes in the
pathparameter must be prefixed by backslashes. For instance, the contents of a config file listing a single/opt/mi/iv/data/temp/dir1directory will look like this:{"allowed_dirs":[{"path":"\/opt\/mi\/iv\/data\/temp\/dir1"}]} - Multiple directories can be listed within the config file
- An optional
titleparameter can be used to specify an alias that is used in the UI instead of the directory path. For example, in this config file we list two directories and declare the "Directory2" alias for the second one:{"allowed_dirs":[{"path":"\/opt\/mi\/iv\/data\/temp\/scripts\/dir1"}, {"path":"\/opt\/mi\/iv\/data\/temp\/scripts\/dir2","title":"Directory2"}]} - All directories listed in the config file are displayed in the Directory dropdown (see Provide the Required Script Plugin Parameters)
1. Create New Data Source
Access Admin > Collection & Storage > Data Sources
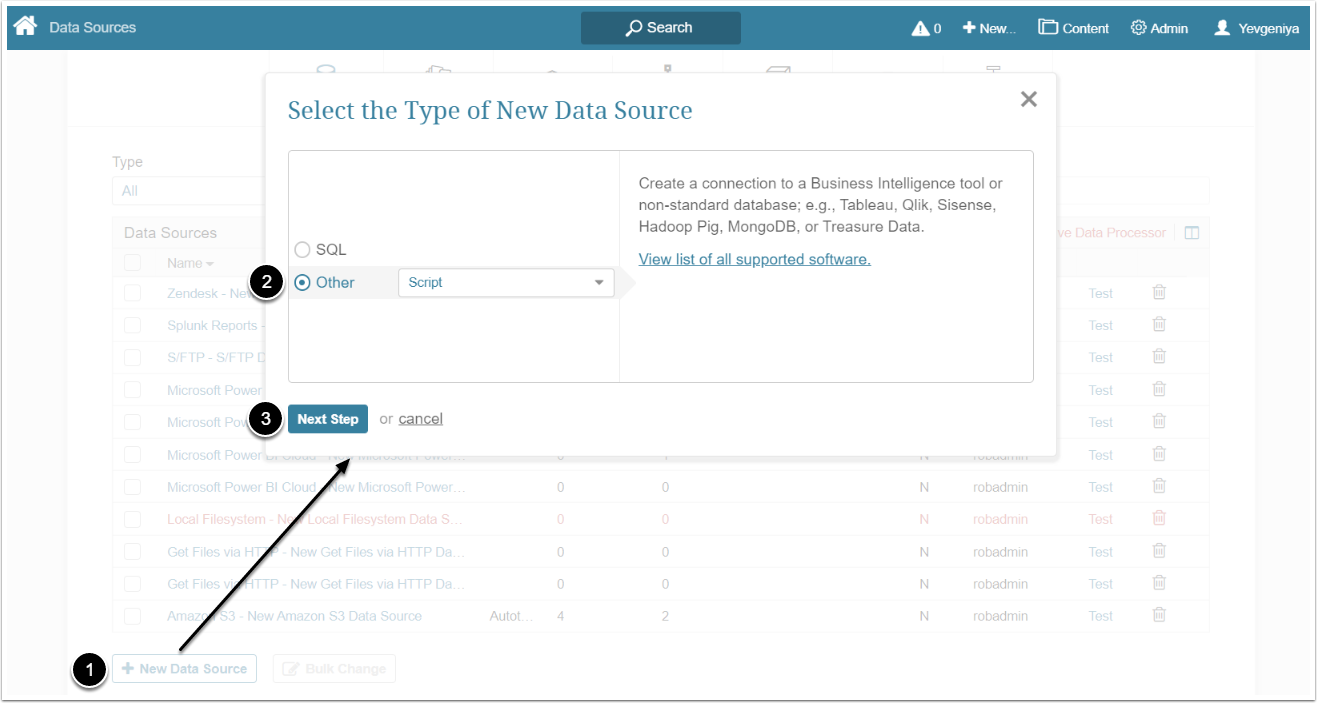
- [+ New Data Source]
- Choose "Script" from the Other drop-down list
- [Next Step]
2. Provide the Required Script Plugin Parameters
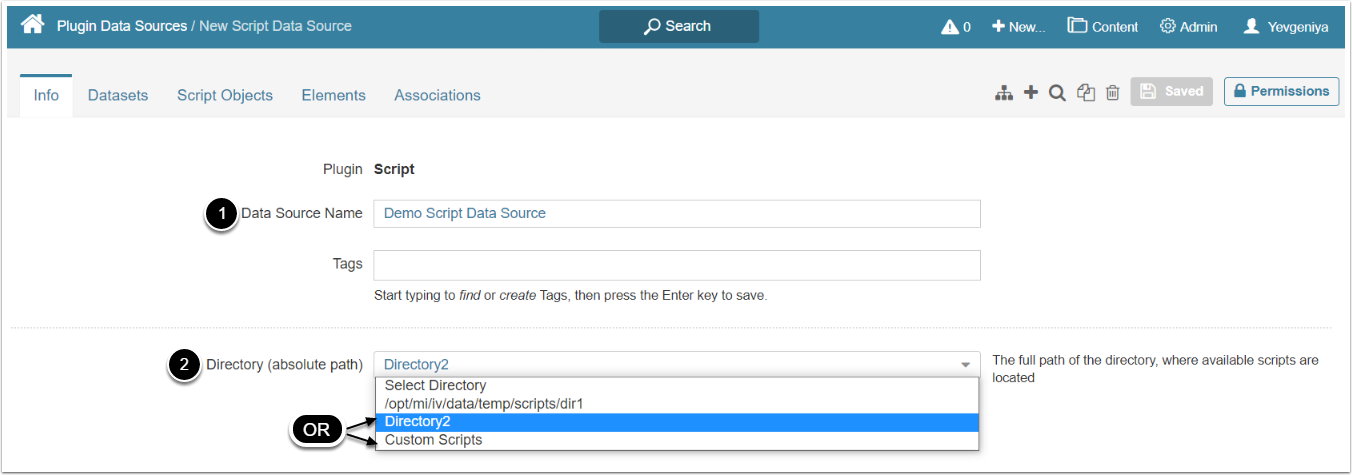
- Input a descriptive phrase in Data Source Name
- Choose a Directory in the web container where available scripts are located OR select Custom Scripts
Optionally, toggle on Enable On-Demand Element Creation.
To use the scripts fetched from the Script plugin, you must configure them to return data in either CSV or QueryResponse JSON blob format.
- See Configure Scripts for Dataset Creation for details
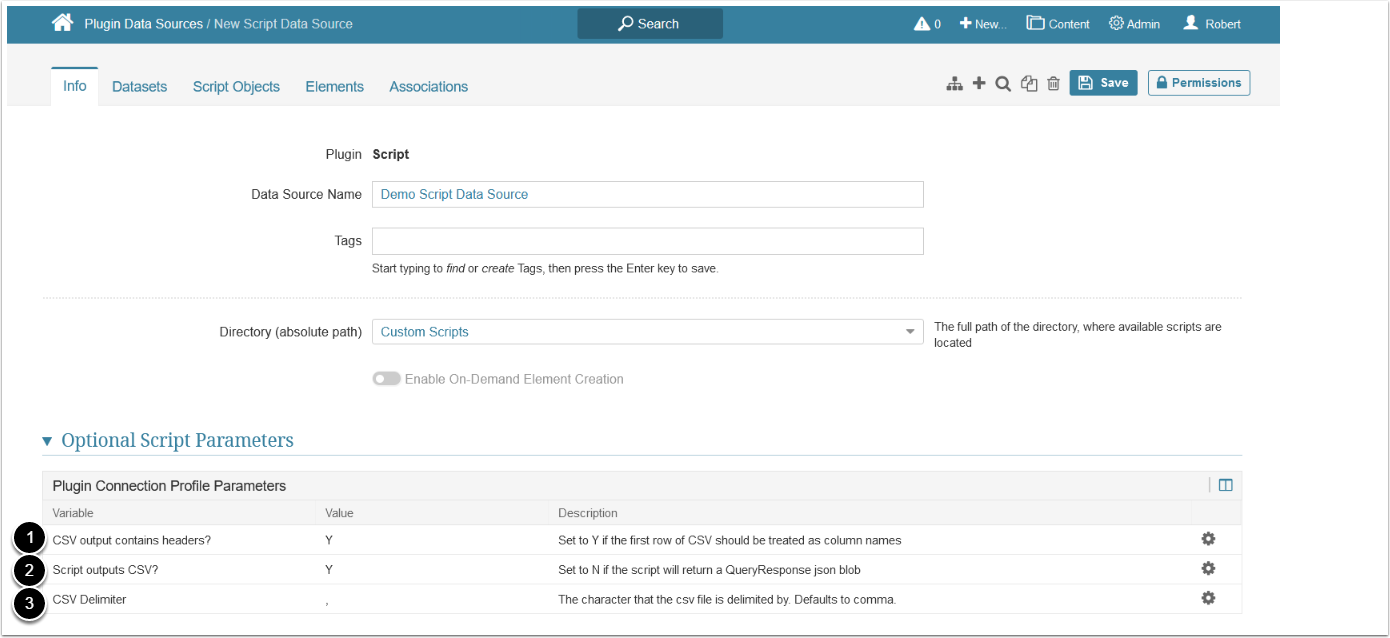
3. Configure Optional Script Parameters
| Description | |
|---|---|
| 1 | For CSV-formatted data, specify if the first row of CSV should be treated as column names |
| 2 | Specify whether or not the data is returned in CSV format. If set to N, leave #1 and #3 as is |
| 3 | For CSV-formatted data, specify the CSV delimiter character that is used in the script
|
4. Proceed with Advanced Configuration
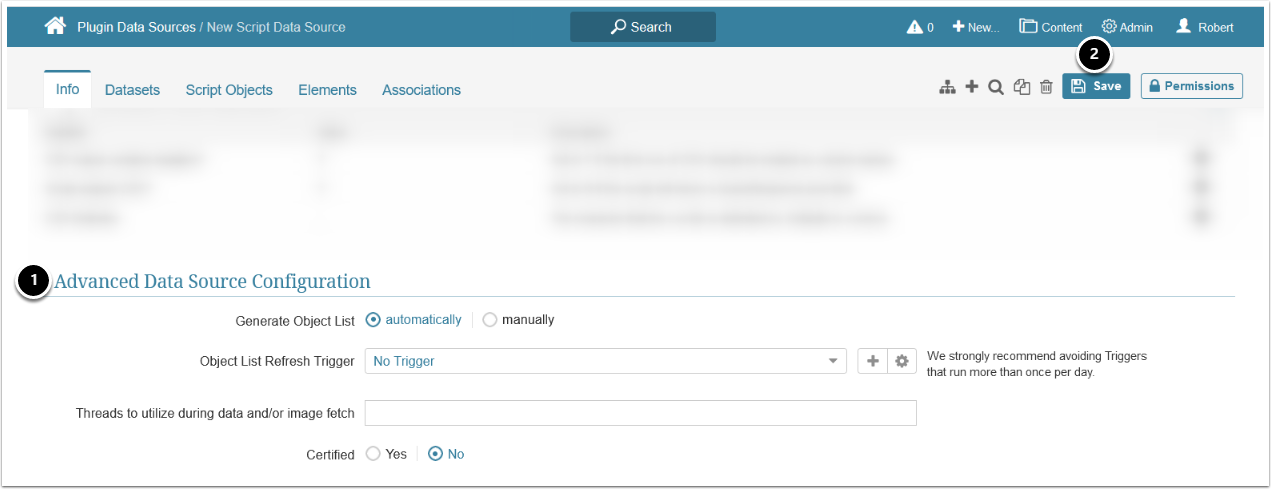
- Advanced Configuration settings can be set to default values unless Data Source requires more precise tuning
- For more details on how to proceed, refer to Advanced Data Source Configuration
- Once finished, click [Save] in the upper right corner
5. Fetch Script Data and Create New Datasets
Access the Script Objects tab
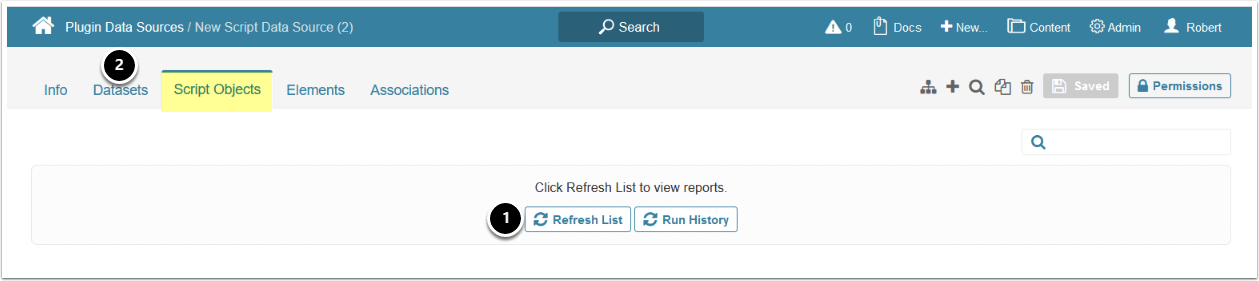
- Click [Refresh List] to get the list of available scripts
- If the Directory parameter is set to "Custom Scripts", all the Custom Scripts available in the system will be displayed
- You can create new and view the created Datasets from the Datasets tab
For details on creating Datasets, see Create a Dataset from Script Plugin.