Effective in v6.3.1, Custom Field Data Synchronization can be configured for MS SharePoint. This feature allows for mapping сustom-added columns and their values from SharePoint to Custom Fields in Metric Insights
Any changes made to the columns on the MS SharePoint side will be reflected in MI upon Data Sync.
This article details how to configure Custom Field Data Sync for Microsoft SharePoint.
PREREQUISITES:
1. Enable Custom Field Data Synchronization
Access Admin > Collection & Storage > MS SharePoint Data Source Name Link
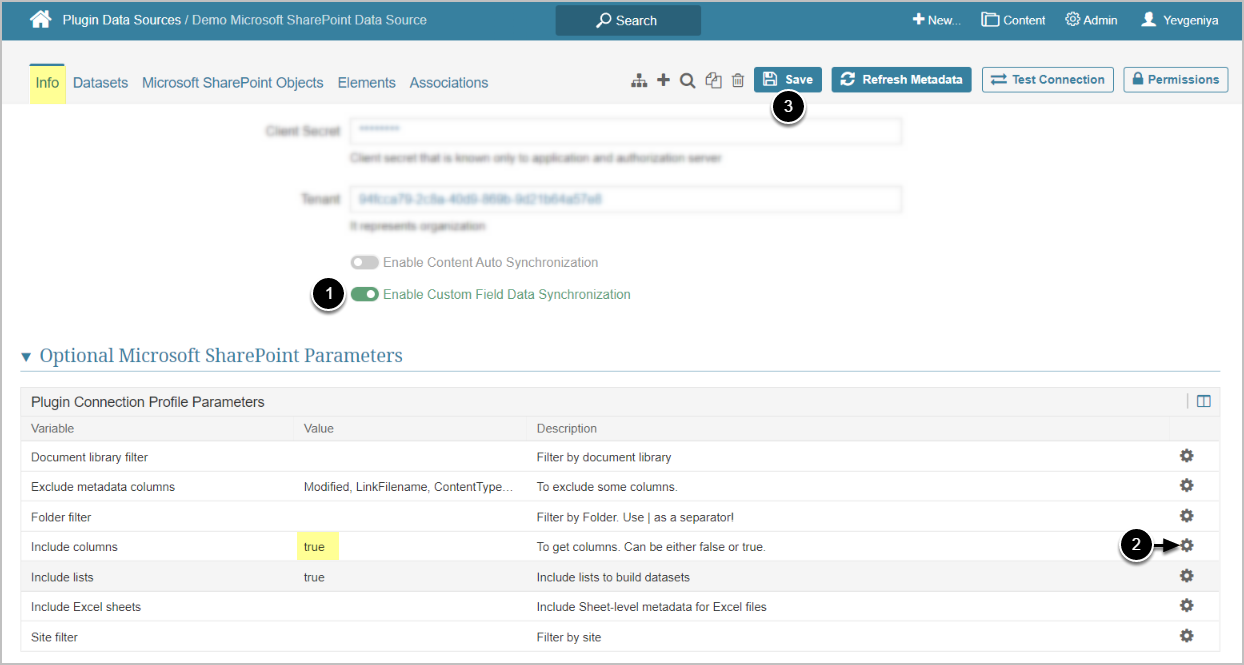
- [Enable Custom Field Data Synchronization]
- Enable the Include columns Optional Parameter by setting "true", "y", or "yes"
- [Save]
2. Locate Correct Custom Field Names and Values
With Custom Field Data Synchronization enabled, MI recognizes SharePoint columns as Custom Fields; however, their Names are not necessarily identical.
For example, the column "Classification" in SharePoint will be returned to the MI database as "Data classification".
To be able to sync data, use the names in the exact same way as they appear in the MI database, not in SharePoint UI. You can then give your Custom Fields descriptive display names. See more details in the Define Settings for the New Custom Field section.
To find the correct column names, follow the approach described in this section.
2.1. Locate Correct Custom Field Names
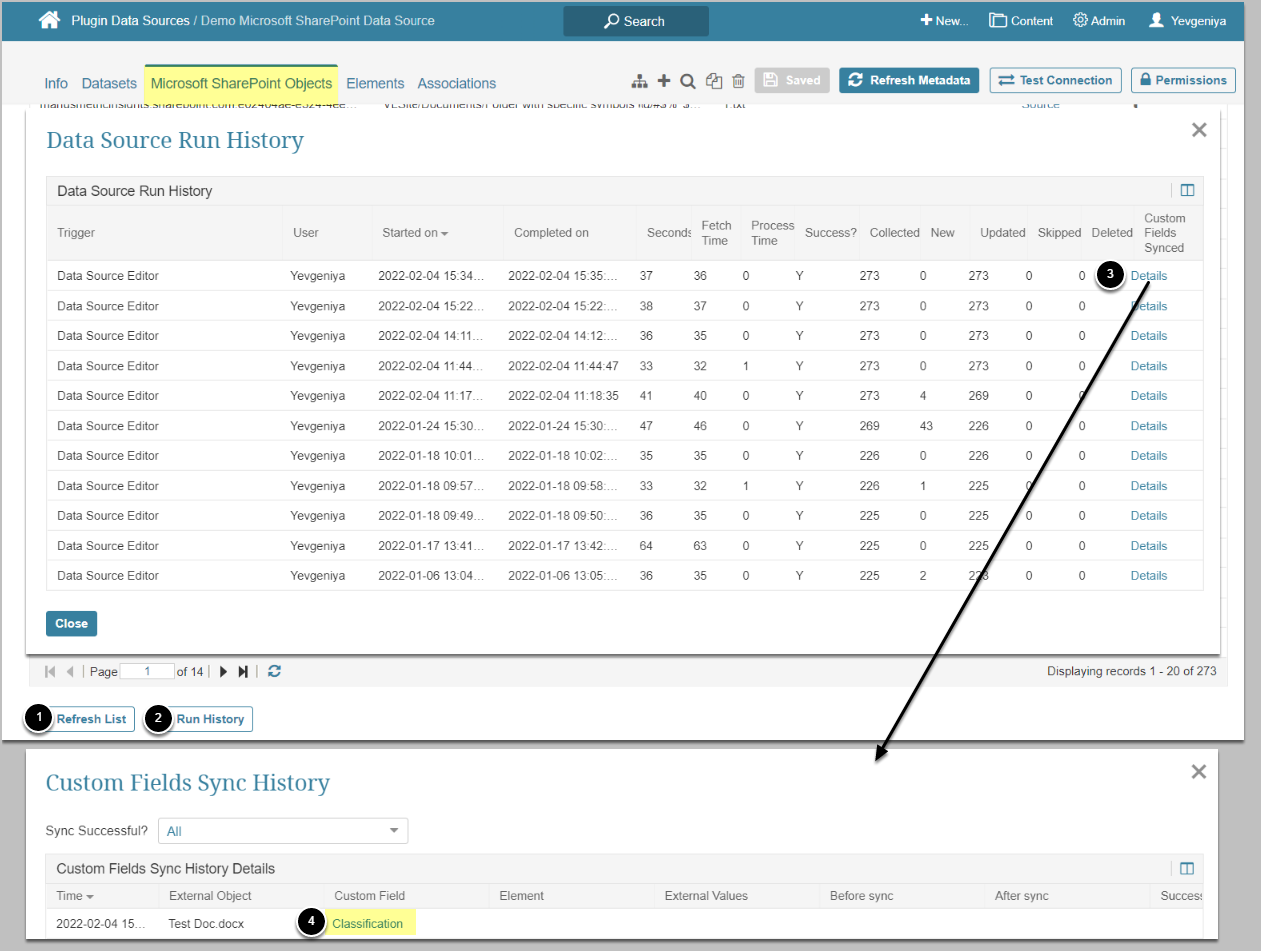
Access the Microsoft SharePoint Data Source Objects Tab
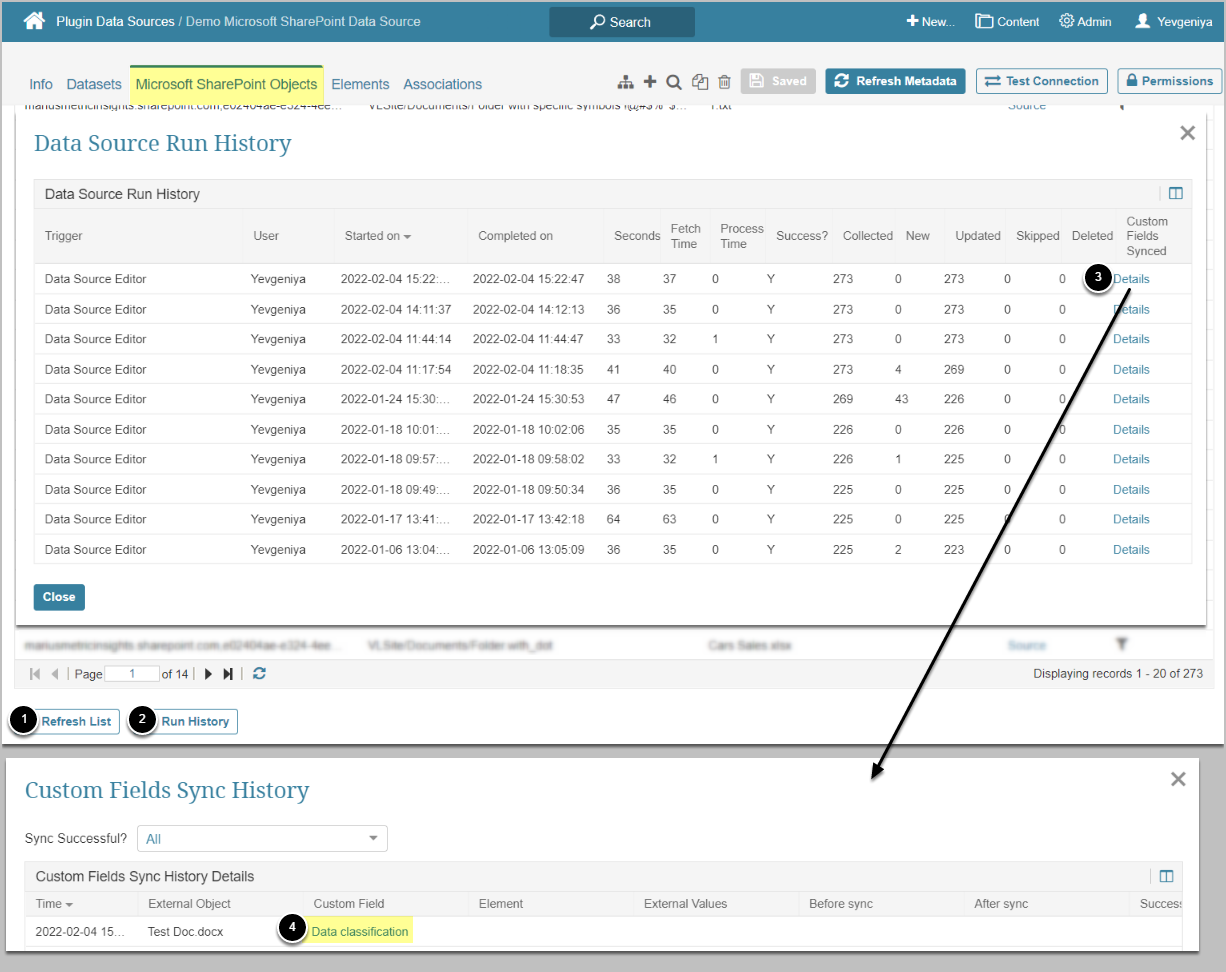
- [Refresh List]
- [Run History]
- Click [Details] to access the Custom Fields Sync History popup
- On the Custom Fields Sync History popup, find the correct name under the Custom Field column
- This name will be used for Custom Field creation
2.2. Locate Correct Custom Field Values
Access the SharePoint's Document Library from which you want to sync Custom Field data
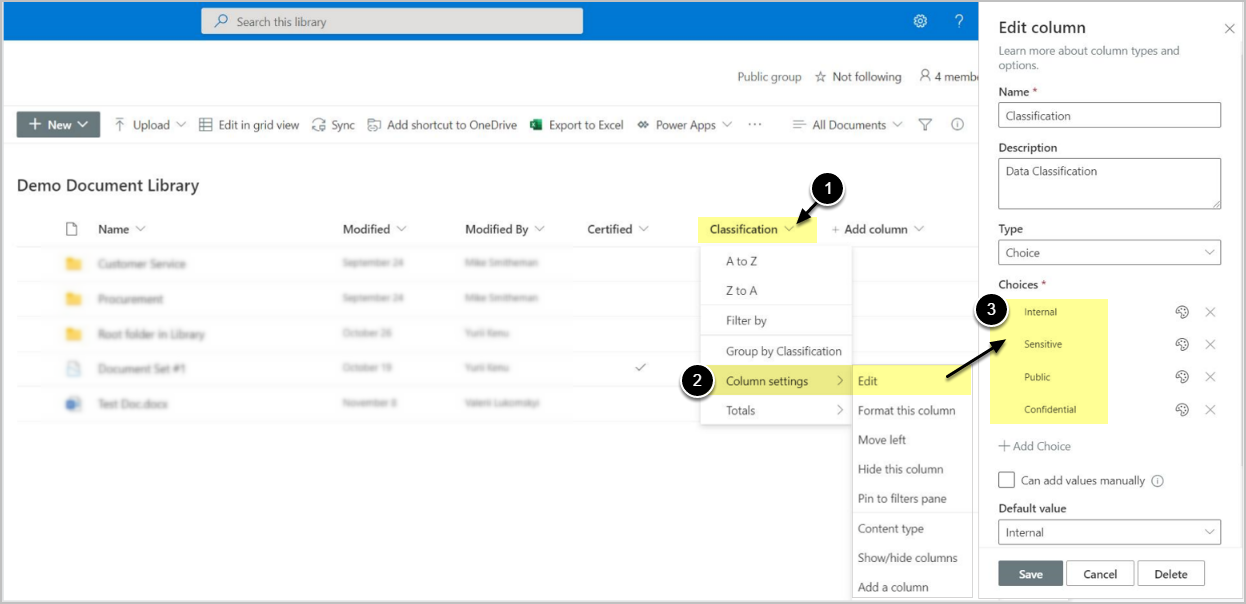
- Access the Column's drop-down
- Choose Column settings > Edit
- On the associated popup, find the available values under Choices
- These values will be used for Custom Field creation
- SSH the instance where the application is deployed
- Login as super user:
sudo -i - Once logged in, execute
docker ps - When the list of docker containers is returned, execute
docker exec -it <web container ID> bash - Once in the container, execute
mysql -A;to connect to a DB client - SharePoint Columns are stored in dashboard.external_report_reference, metadata column. Execute the following queries:
use dashboard;select name, metadata from external_report_reference where plugin_connection_profile_id = <SharePoint Data Source ID>;
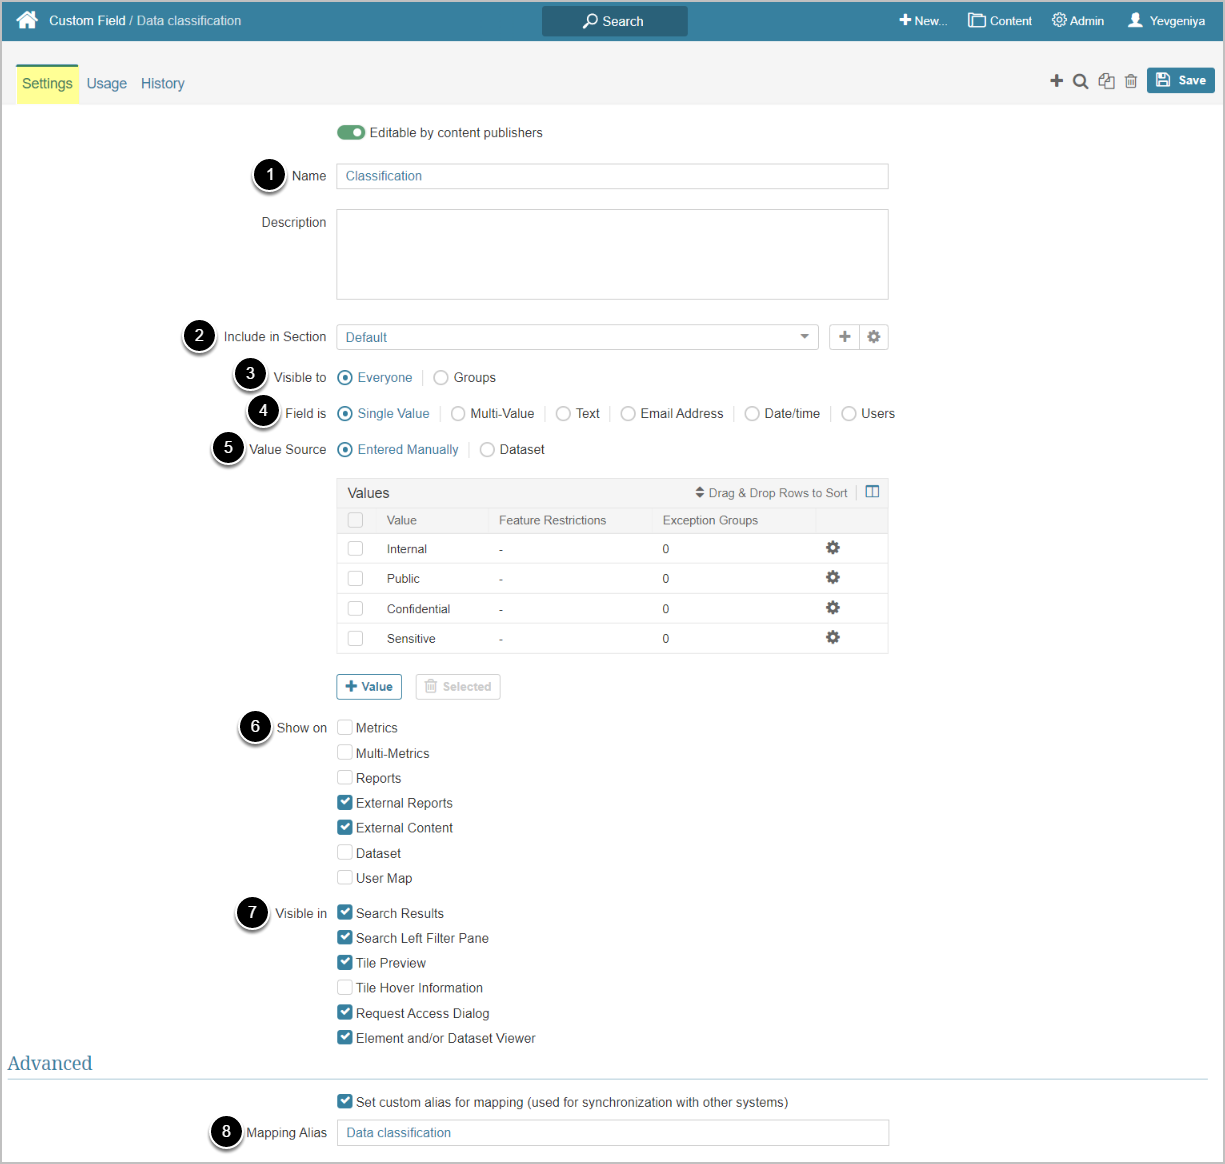
3. Define Settings for New Custom Field
Access Admin > Reference Objects > Custom Fields > [+ Custom Field]
See more details on Custom Field settings in Adding Custom Fields.
- Input a display Name for the Custom Field. This is how it will appear in Metric Insights UI. Ideally, it should correspond to the column name in SharePoint to achieve consistency.
- Choose a section for the Custom Field
- Define Visibility for the Custom Field
- Set the Field as a single value, multiple values, or free-form text
- Value Source for this field must be set to "Entered Manually"
- Click [+ Value] to enter Values from Section 2.3
- Define the Show on: option
- Specify where the Custom Field should appear
- Input the Custom Field name from Section 2.2 in Mapping Alias. This is the value against which the system will run a check to find corresponding values in SharePoint.
- NOTE: This setting is optional; however, we recommend using it to ensure that Custom Field names in MI are exactly the same as in MS SharePoint. If you are not using it, make sure to input Custom Field names from Section 2.2 in the Name field; otherwise, Custom Filed synchronization won't work.
- [Save]
4. Sync Data
Access the Microsoft SharePoint Data Source Objects Tab
- [Refresh List]
- [Run History]
- Access Details to verify the successful sync
- Common errors may include:
- Could not match custom field by name: there is no corresponding Custom Field on the MI side to match with one on SharePoint
- Empty set provided: there is no Custom Fields input in SharePoint
- Common errors may include:
5. Verify Result
Access an Element with Custom Fields
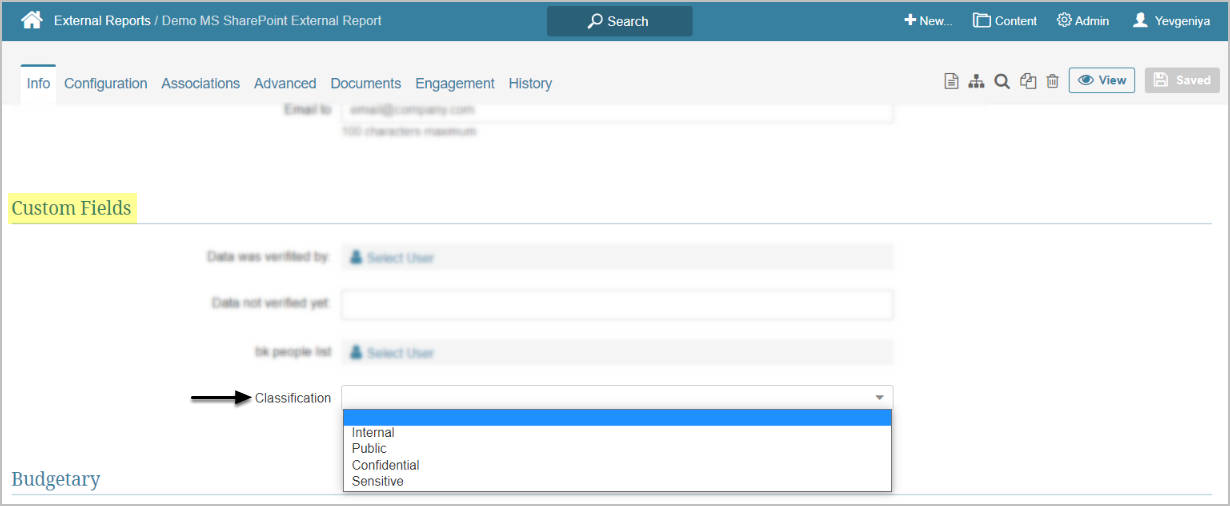
Custom Fields and their values will appear under the assigned Custom Field section on the Info tab.