This article details how to establish connectivity to Local Filesystem to use it as Data Source for creating Elements in Metric Insights.
General instructions on establishing data sources based on plugins can be found in Create a New Plugin Data Source.
1. Create New Data Source
Access Admin > Collection & Storage > Data Sources
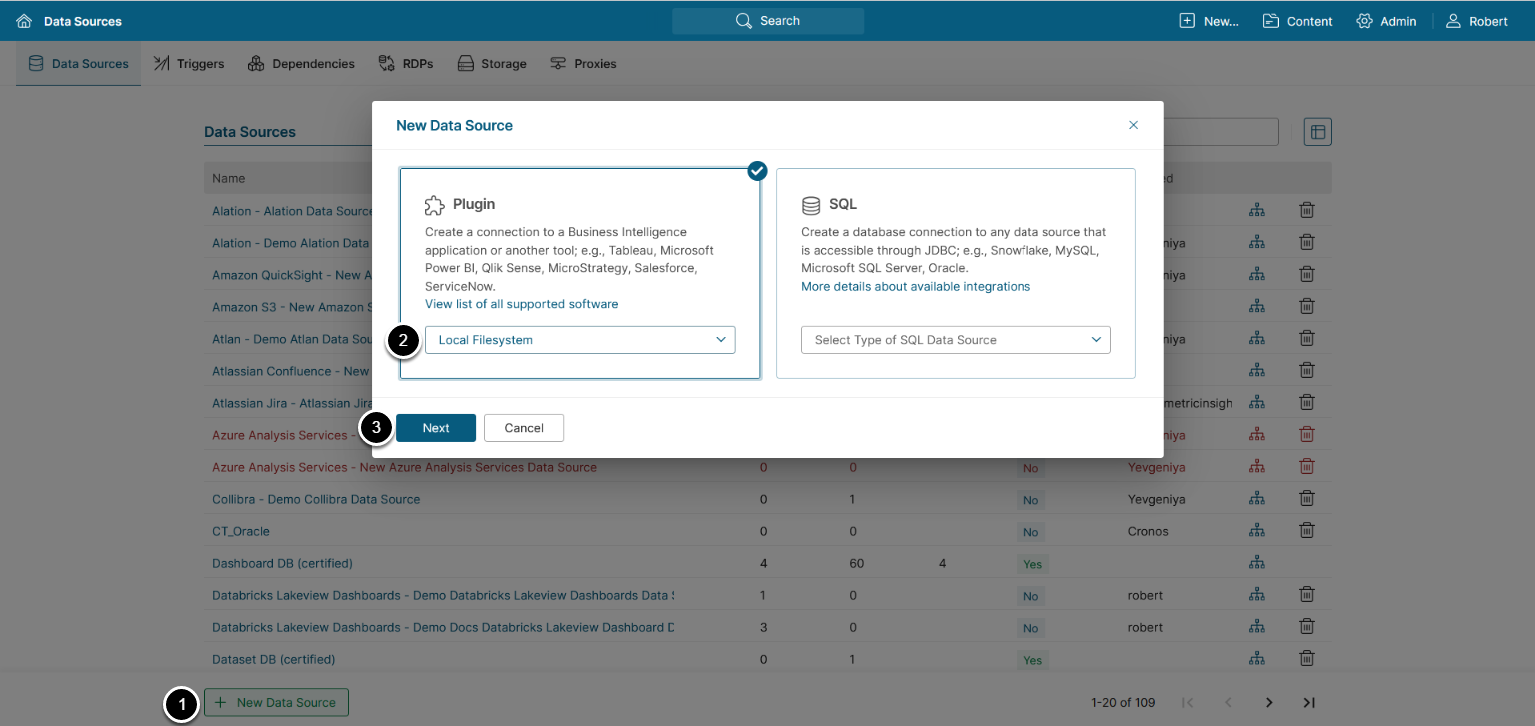
- [+New Data Source]
- Choose"Local Filesystem"fromPlugindrop-down list
- [Next]
2. Provide Required Parameters
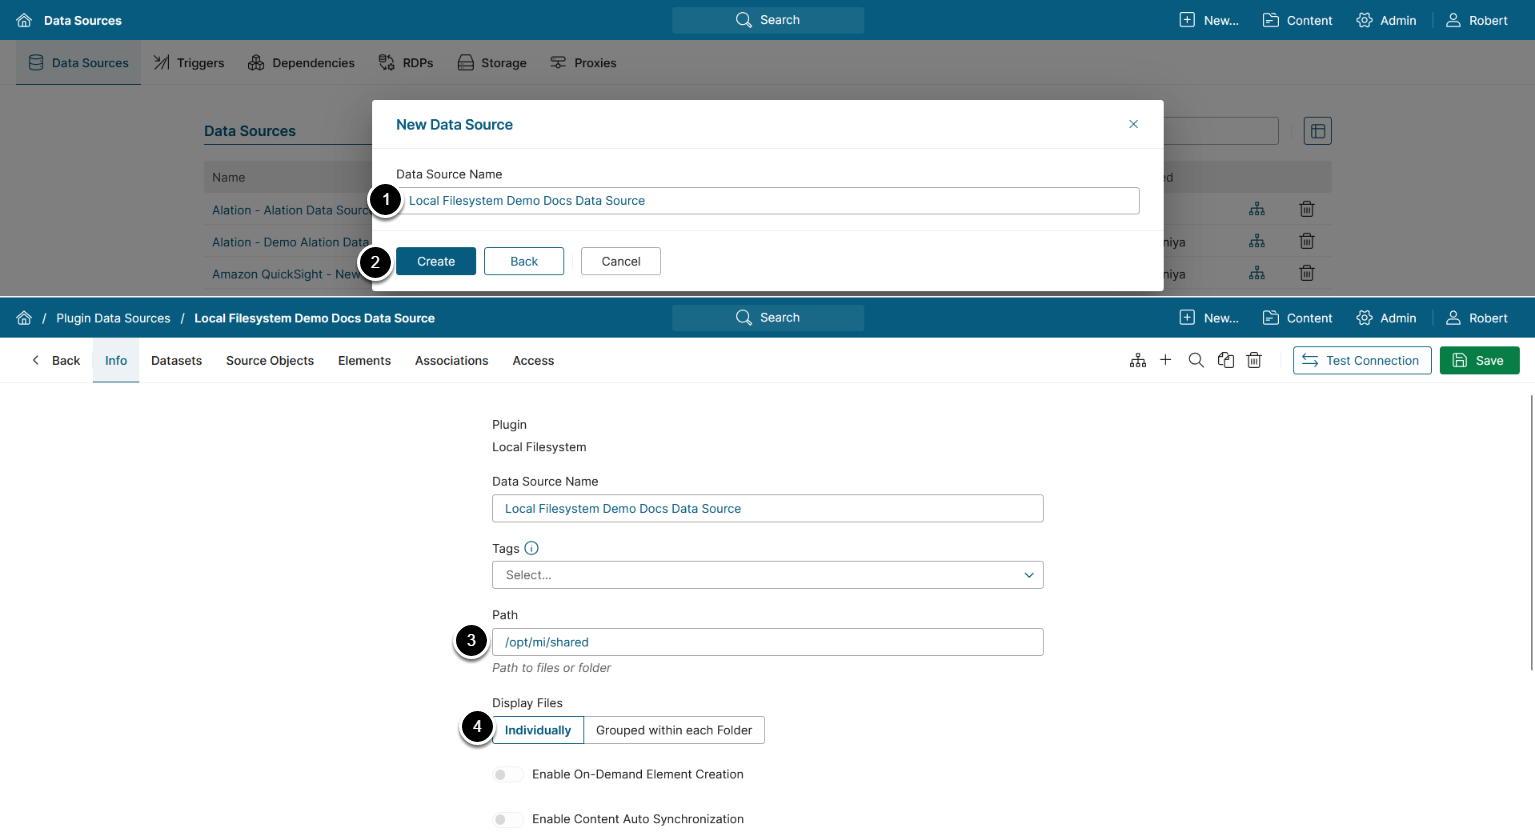
- Data Source Name: Enter a Data Source name
- [Create]
- Path: Provide the path to a folder. This folder can be located:
- On a Windows server. You should consider an RDP installation on this Windows machine. Plugin will have access to any folder under C:\Program Files (x86)\Metric Insights. Example of the path: C:\Program Files (x86)\Metric Insights\Data Processor\my_folder
NOTE: To fetch data from another folder, add this folder's path to the access_dirs config parameter. There are two different ways of doing this. Try the UI-based approach first:
- From the UI:
- Access
<MI hostname>.com/admin/plugin-config - [+ New Plugin Parameter]
- Provide Plugin Parameter Values:
- Plugin: Local Filesystem
- Parameter:
access_dirs - Value: Enter the path(s) to the folder(s) from which you want to fetch data
- [Save]
- Access
- From the
webcontainer:- Connect to the Linux server via SSH
- Access the
webcontainer:sudo mi-web - Access the
dashboarddatabase:mysql dashboard - Update the folders list:
update dp_config set access_dirs='<path(s) to the folder(s)>';
- On a Linux server where MI app is deployed:
- A default folder is /opt/mi/shared
- You can mount your Windows folder to Data Processor container directory /opt/mi/shared. Make sure the directory permissions are 755 and folder files permissions are 644. The owner of the directory under Data Processor container should be dataprocessor. If you choose to proceed with this option and face any difficulties, address your issues to support@metricinsights.com
- Display Files: Select how files will be displayed in the External Content Viewer and Editor
- Individually: Each file is displayed individually
- Grouped within Each Folder: Files are grouped by their containing folder. In the External Content Viewer, the most recent file is displayed by default, with a drop-down menu allowing to select other files from the folder
Optionally, toggle on Enable On-Demand Element Creation and Enable Content Auto Synchronization.
3. Optional Parameters
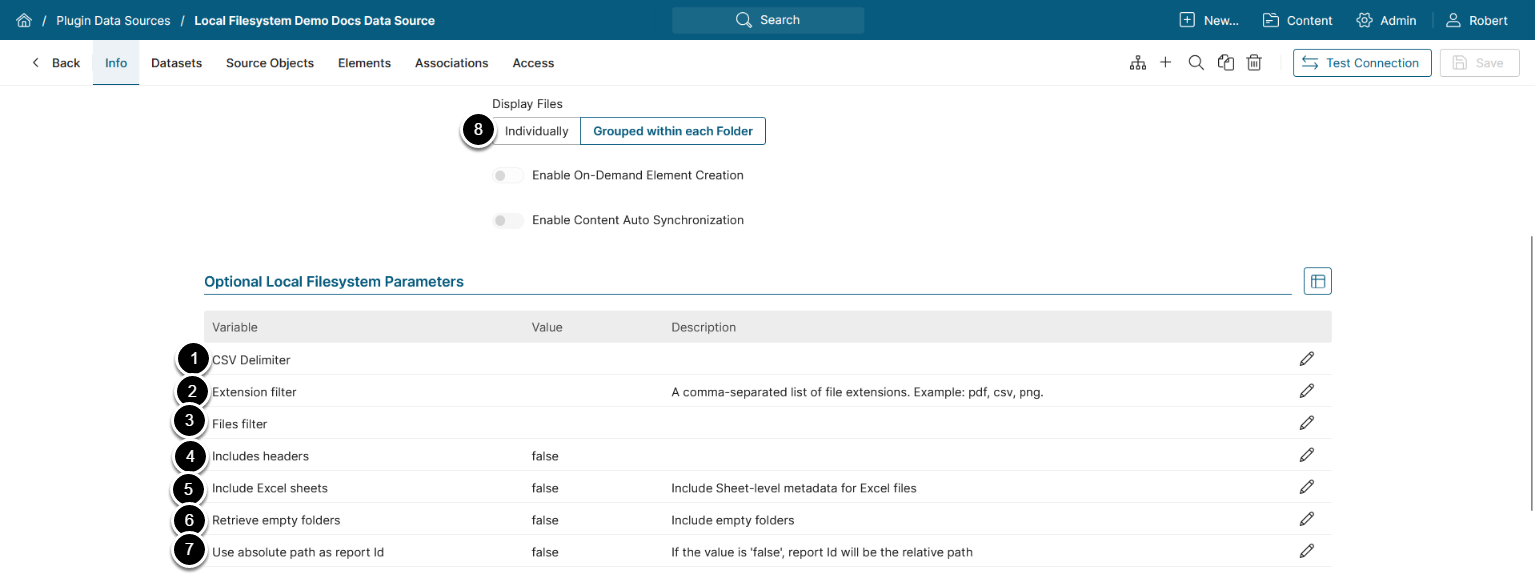
- CSV Delimiter: Choose the delimiter character used in your CSV files
- "," is the default value
- Extension filter: Provide a comma-separated list of file extensions to fetch only files with the specified file extensions
- Supported extension values for filtering:
json,avro,xml,proto,pdf,png,jpeg,txt,gz,csv,tar.gz,xlsx,xls,docx,doc,pptx,ppt,xlsb,xlsm
- Supported extension values for filtering:
- Files filter: Collect only files that match the defined filters
- "*" can be used as a wildcard
- Includes headers: Choose whether the first row of the CSV file should be treated as column headers ("true") or as a regular data row ("false")
- Accepts "true"/"false"
- "True" is the default value
- Include Excel sheets: Set to "true" to include both Excel files and their sheets as individual objects upon collection.
- NOTE:External Content won't be created for individual sheets upon Content Autosync, it is only available for Excel files.
- Retrieve empty folders: Set to "true" to retrieve empty folders
- Use absolute path as report Id: Select whether the Report ID displayed on the Source Objects tab should include the path from the Path parameter
- The default value is "true"
- Display Files: Select how files will be displayed in the External Content Viewer and Editor
- Individually: Each file is displayed individually
- Grouped within Each Folder: Files are grouped by their containing folder. In the External Content Viewer, the most recent file is displayed by default, with a drop-down menu allowing to select other files from the folder
4. Advanced Configuration
Advanced Configuration settings can be set to default values unless Data Source requires more precise tuning. For more details on how to proceed, refer to Advanced Data Source Configuration.
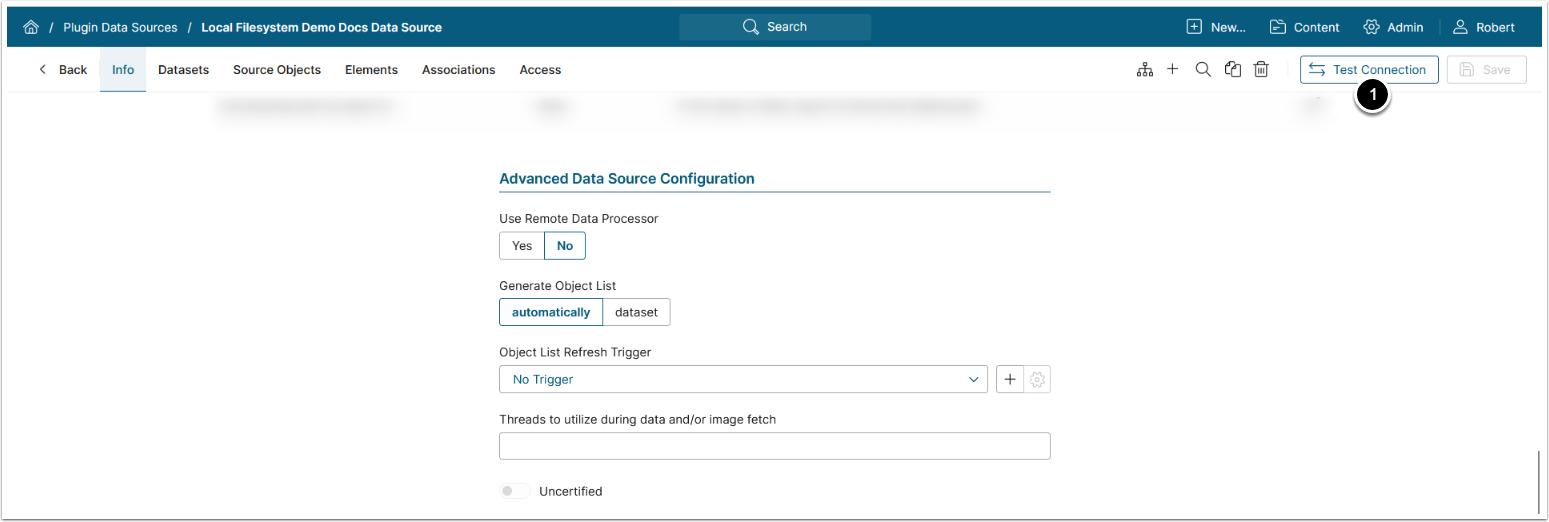
- [Test Connection] in the upper-right corner, this will also save your entries
5. Other Settings
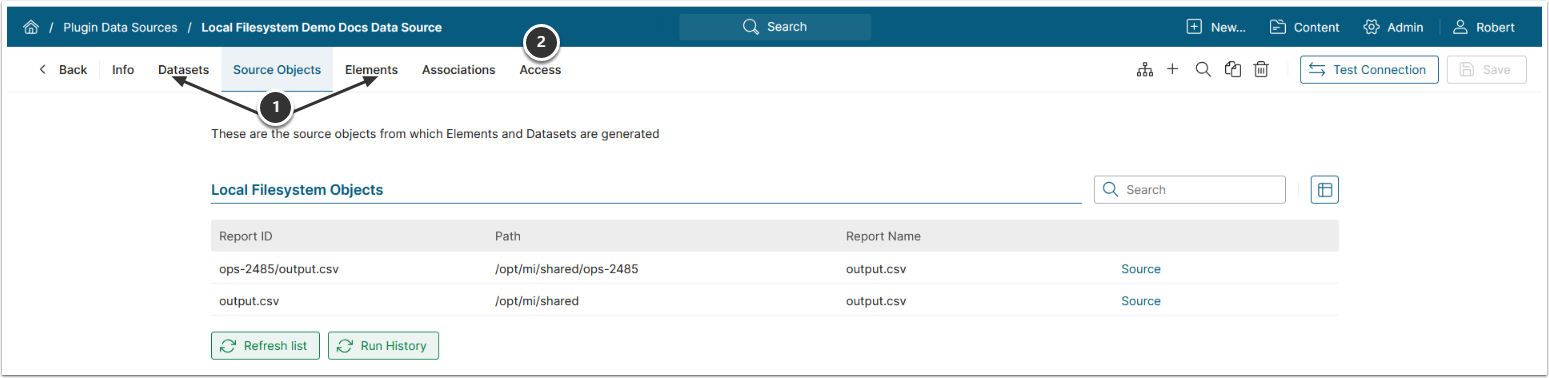
Access Source Objects
- You can create Datasets and view all the elements or Datasets using this Data Source from the respective tabs.
- Open the Access tab to assign Data Source access to Groups or Power Users.