In order to use the Salesforce SOQL plugin, you will need to log into the Salesforce browser interface and setup an OAuth connection. This article summarizes the key steps.
- Detailed instructions can be found in the Salesforce support area. Refer to Creating a Connected App for more information.
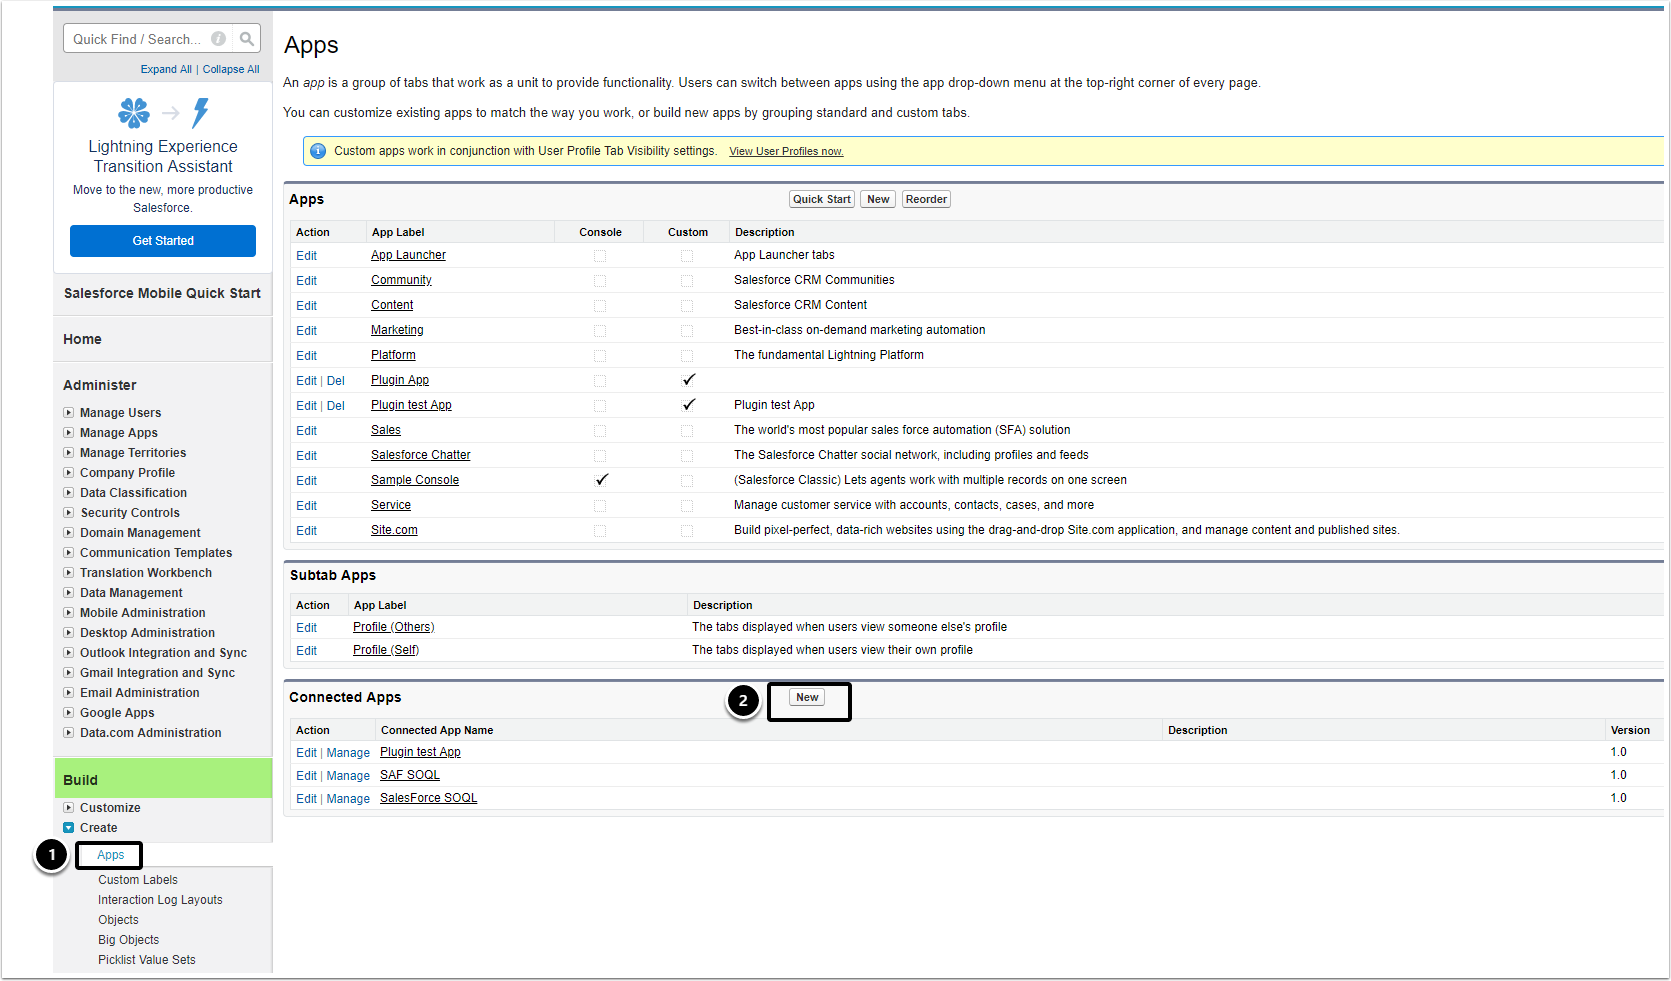
2. Go to Build > Apps > New
Use the Build Section in the Left Sidebar:
- Choose "Apps" in the Create sub-section
- Click the "New" button in the Connected Apps section
3. Define the Basics
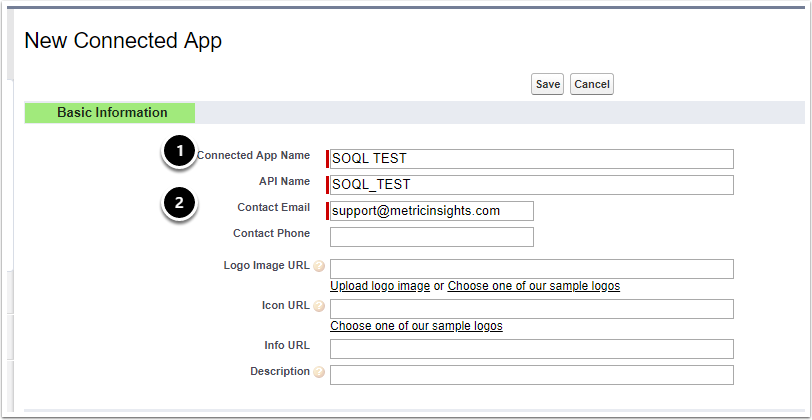
- Specify Connected App Name
- Enter the API name used when referring to your app from a program
- Enter the Contact Email for Salesforce to use when contacting you or your support team. This address isn’t given to Salesforce admins who install the app
For more information, refer to Create a Connected App
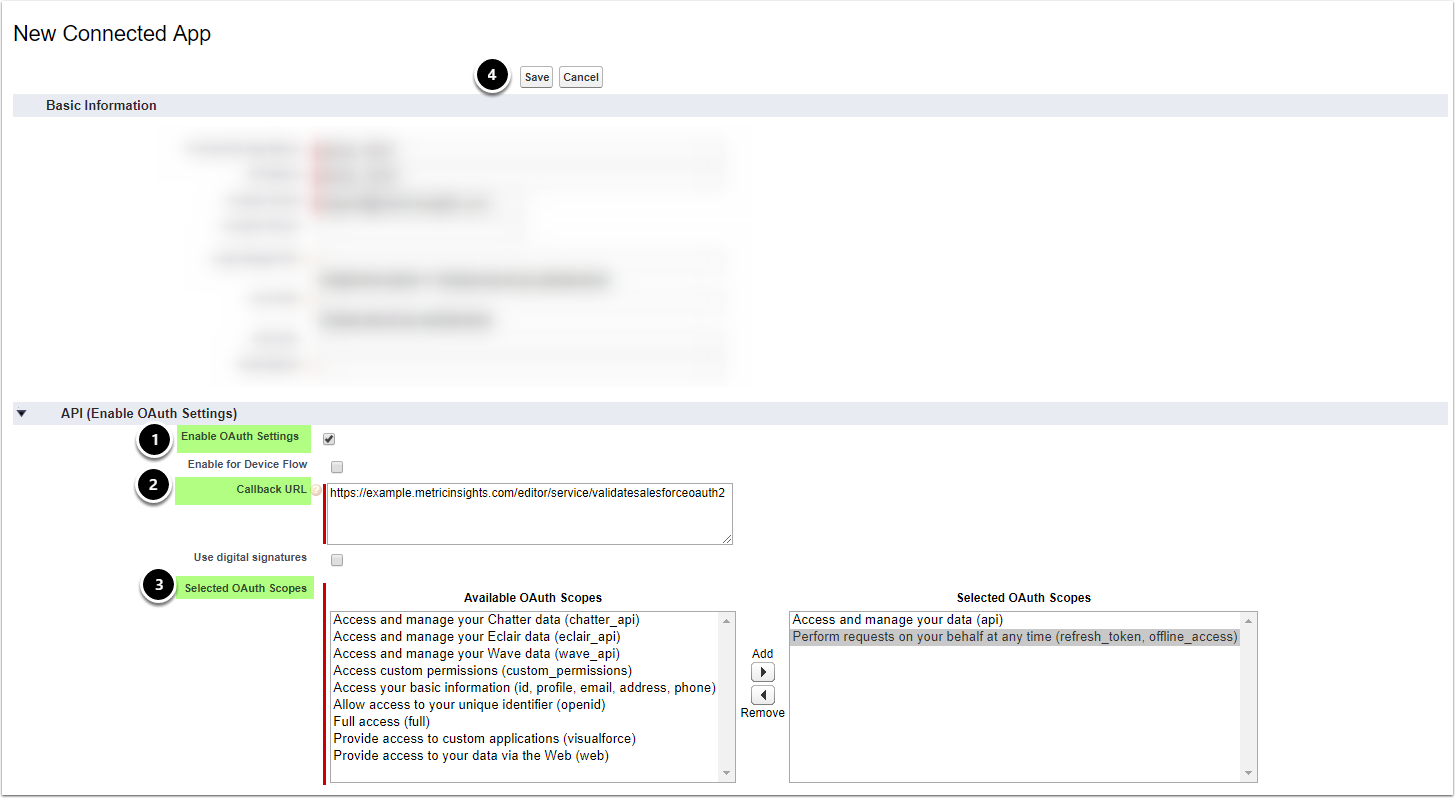
4. Enable OAuth Settings
- Choose "Enable OAuth Settings"
- Provide a Callback URL (endpoint) in this form where
example.metricinsights.comis the hostname for your Metric Insights server -
Selected OAuth Scopes should include:
- Access and manage your data (API)
- Perform requests on your behalf at any time (refresh_token, offline_access): this will enable Metric Insights to refresh Your Token
- Click [Save]
5. Connected Apps > Your New App
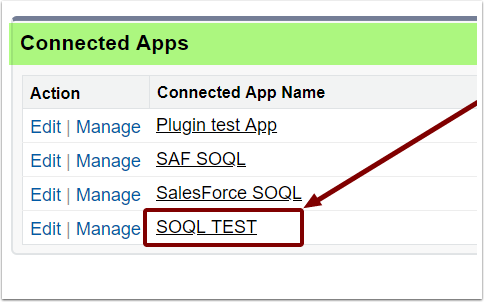
Click the Connected App Name to open its configuration page containing Consumer Key (ID) and Consumer Secret
6. Client ID and Client Secret
You should see your Consumer Key (ID) and your Consumer Secret in the middle of the page.
NOTE: These are client-specific.
For Legacy Plugin: You need to add your Salesforce Secret and Client ID to the Config variables. For details, see Step 7 below.
7. Configure Salesforce Variables in Metric Insights – for Legacy Plugin
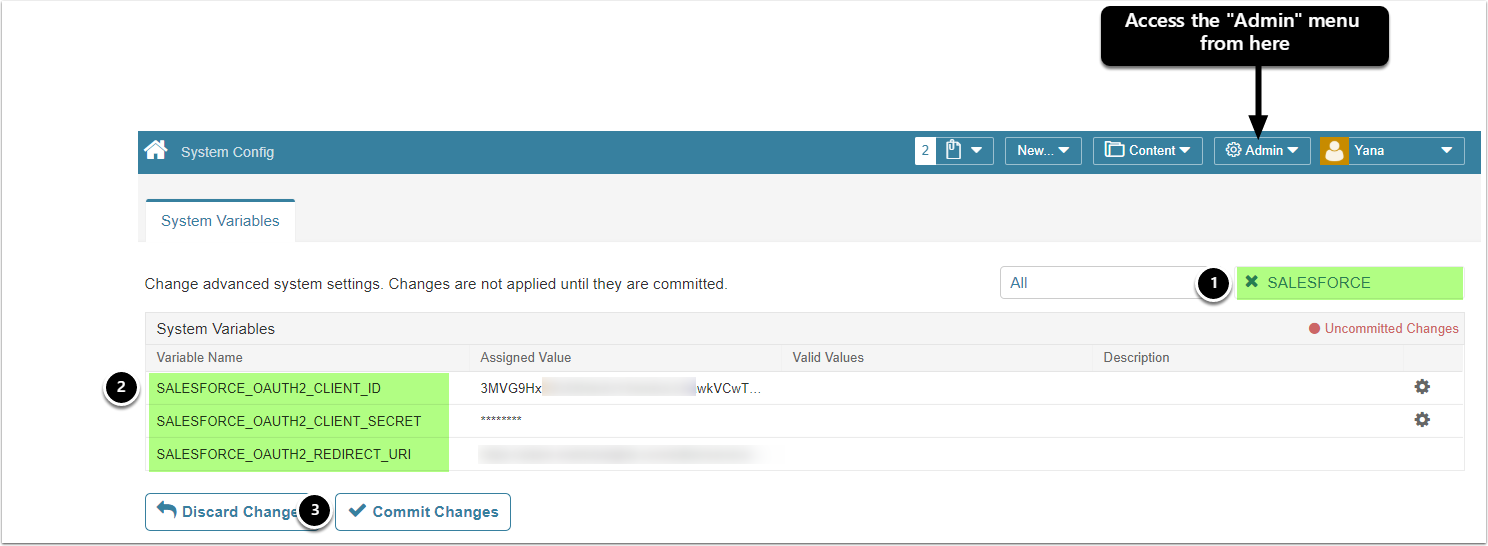
Access Config Variables via Admin > System > System Variables (For details, see Setting the Configuration Variables):
- Filter config settings for Salesforce
- Modify the variables to include "Salesforce Secret" and "Client ID"
- [Commit Changes]

