To integrate with Tibco Spotfire, particularly for fetching data, you must deploy Metric Insights' Remote Data Processor (RDP) to your server and install a custom MICustomTasks package (extension) on a Spotfire server.
PREREQUISITES:
- Configured Remote Data Processor profile in the Metric Insights UI
- Installed Insightd on your remote Tibco Spotfire Windows Server
NOTE: In this article, we are accessing TIBCO UI from the TIBCO server with the installed RDP via Remote Desktop Connection, but you can access TIBCO UI from any machine. In this case, the extension file has to be stored locally.
1. Connect to Spotfire Remote Desktop Client
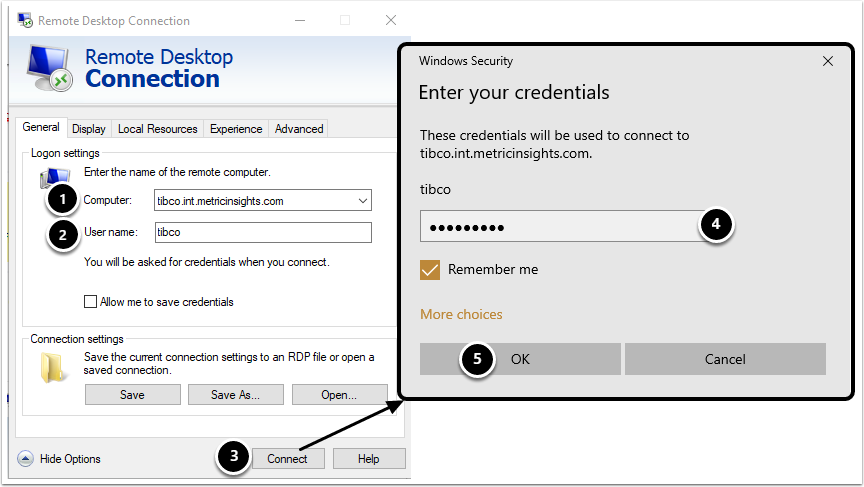
- Enter the hostname of the computer with the installed Remote Desktop client
- Specify the User name of the remote computer
- [Connect]
- Provide your Password credential
- [OK]
2. Access Spotfire Server
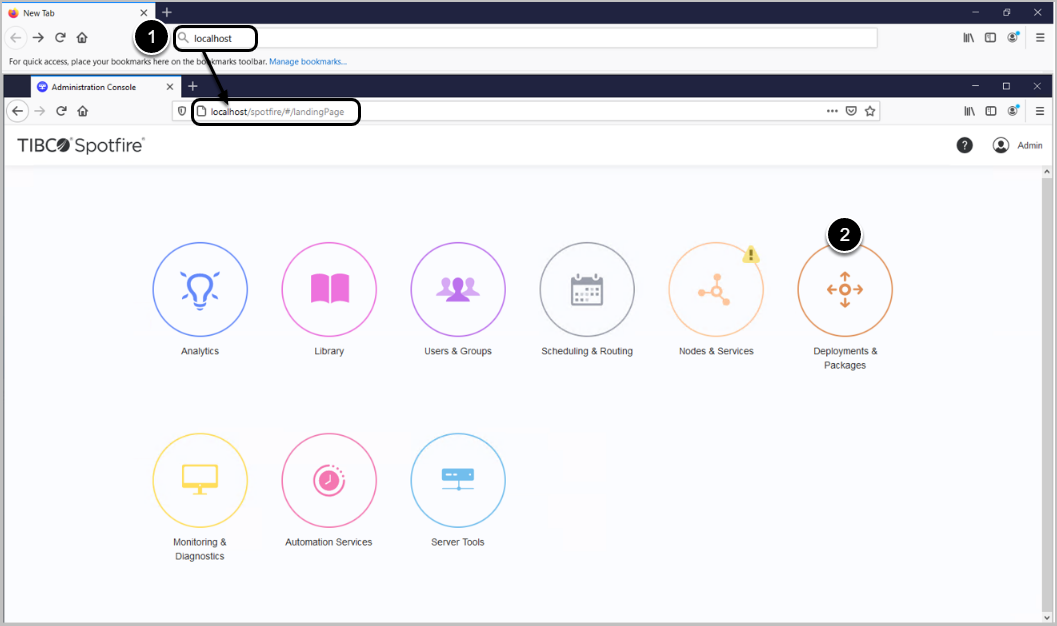
- Open your browser and type "localhost" in the address bar
- Press Enter to be redirected to the Spotfire Homepage
- Access Deployments & Packages
3. Add the Extension to Deployment Area
Spotfire extensions are functional units included in Spotfire add-ins. When added, they enable custom capabilities.
Extension artifacts are compiled and packaged into Spotfire packages, .spk files (containing the .dll's for the extension code and other resources as well as a module.xml file describing the metadata of the extension).
Deployment areas page will display available areas for deploying your extension.
When updating services with a new extension file, prior to adding the new package, you need to remove the existing one and update services.
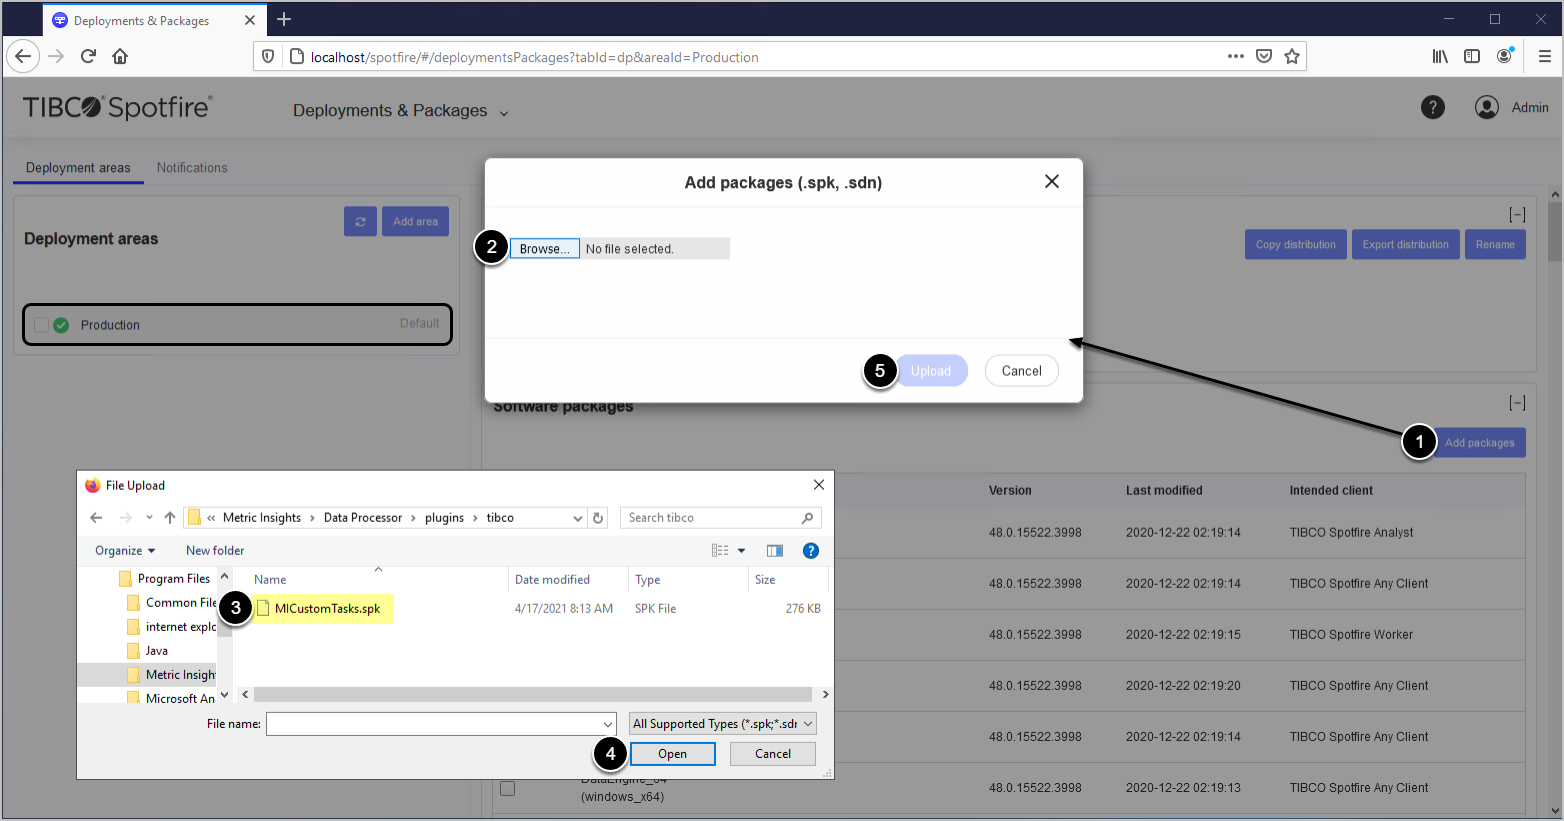
- [Add packages]
-
[Browse] to locate the MICustomTasks.spk file:
- C:\Program Files\Metric Insights\Data Processor\plugins\tibco
- Select the MICustomTasks.spk file
- [Open]
- [Upload]
4. Save the New Distribution
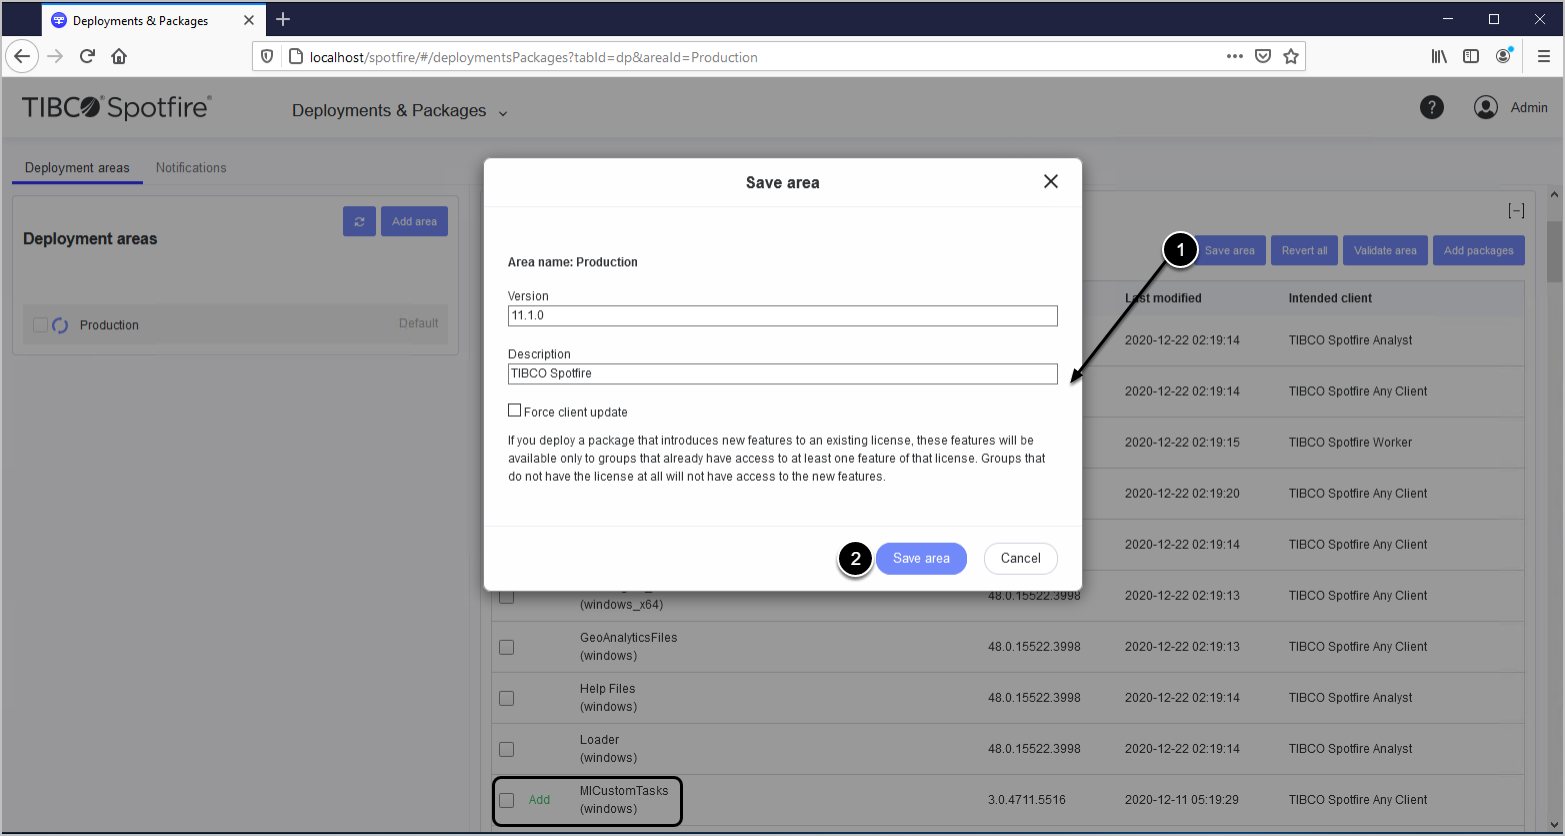
The .spk extension file is uploaded as an MICustomTasks package with the "Add" status
- [Save area] to save and validate the new distribution
- [Save area] to confirm your consent
5. Update Automation Services
After adding the MICustomTasks extension package, Automation Services must be updated to the new deployment.
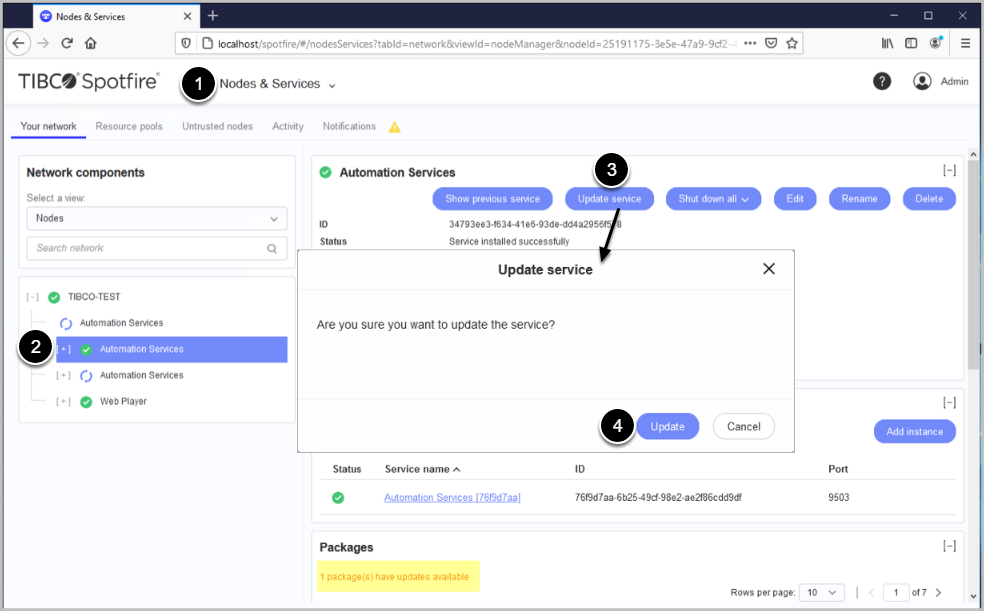
- From the navigation menu drop-down, choose Nodes & Services
- Click the tree view symbol [+] to open the hierarchical structure of Network components and select the required Automation Services
- [Update service]
-
[Update]
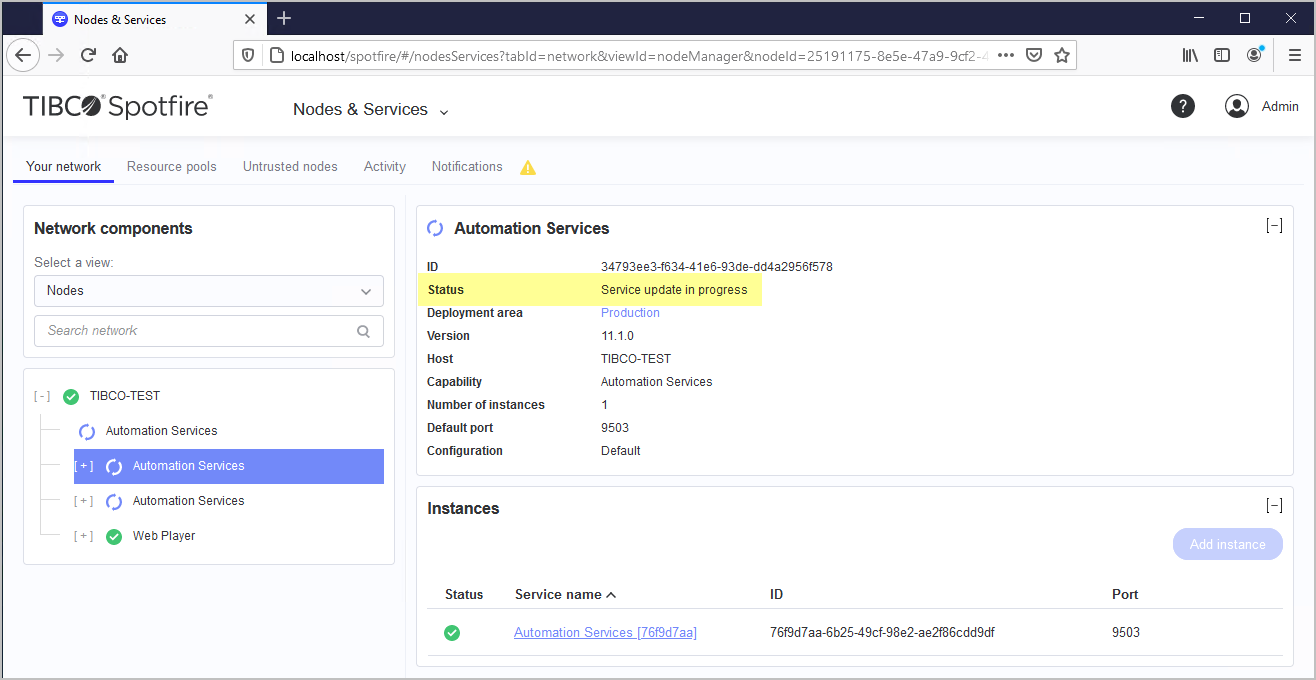
- Updating the service fetches the latest modules from the deployment area and creates new Automation Services
- Status reflects the update progress as shown on the screen image below
6. Verify Successful Installation
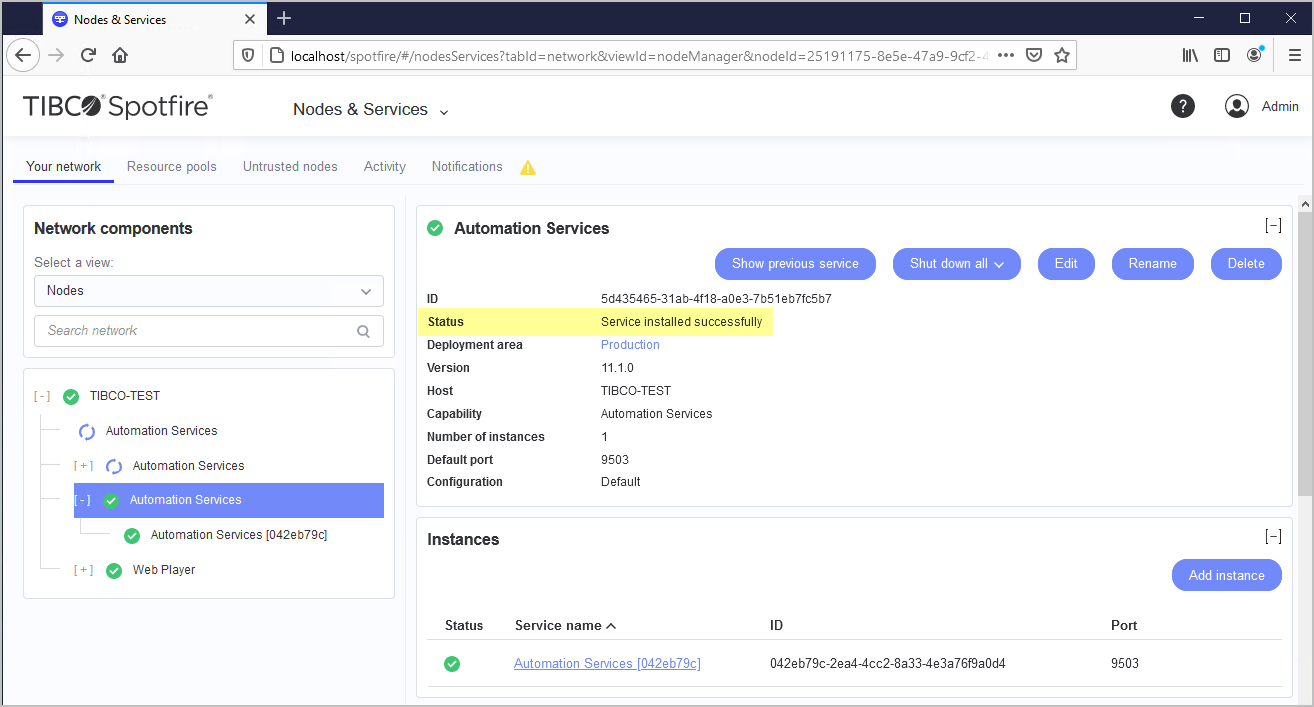
If the new Automation Service runs successfully, optionally, delete the old Service.