This article details how to create an External Report that displays data from the Domo server.
PREREQUISITES:
External Reports can be created from Cards, Dashboards, and Apps and can be viewed in Viewer, regardless of the "Show Report in" option selected. For this, embedding must be enabled on the Domo side for each individual Card/Dashboard/App.
NOTE: Pages cannot be embedded in Metric Insights. To embed a Page, convert it into a Dashboard on the Domo side first.
Convert Page into Dashboard
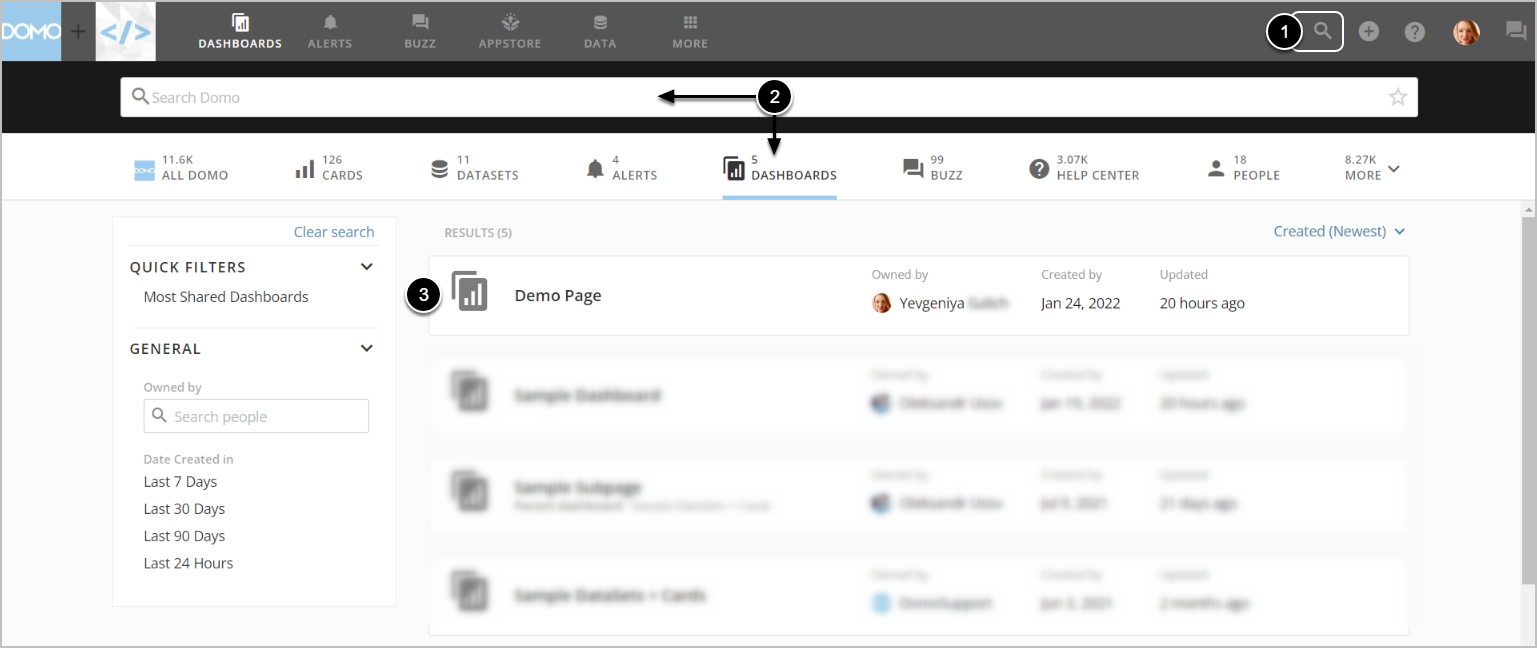
Access Domo Home
- Access Search
- Select DASHBOARDS or find the Dashboard in search
- Access the Page to be converted
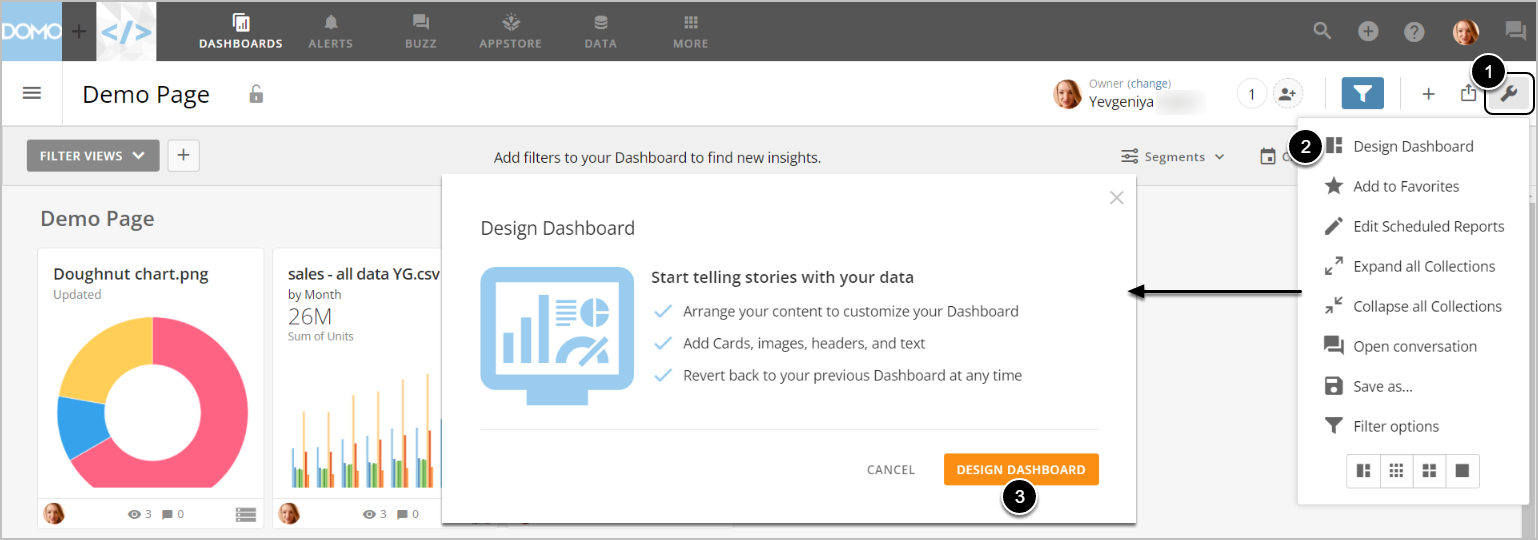
- Access the Edit menu
- Choose Design Dashboard
- [DESIGN DASHBOARD]
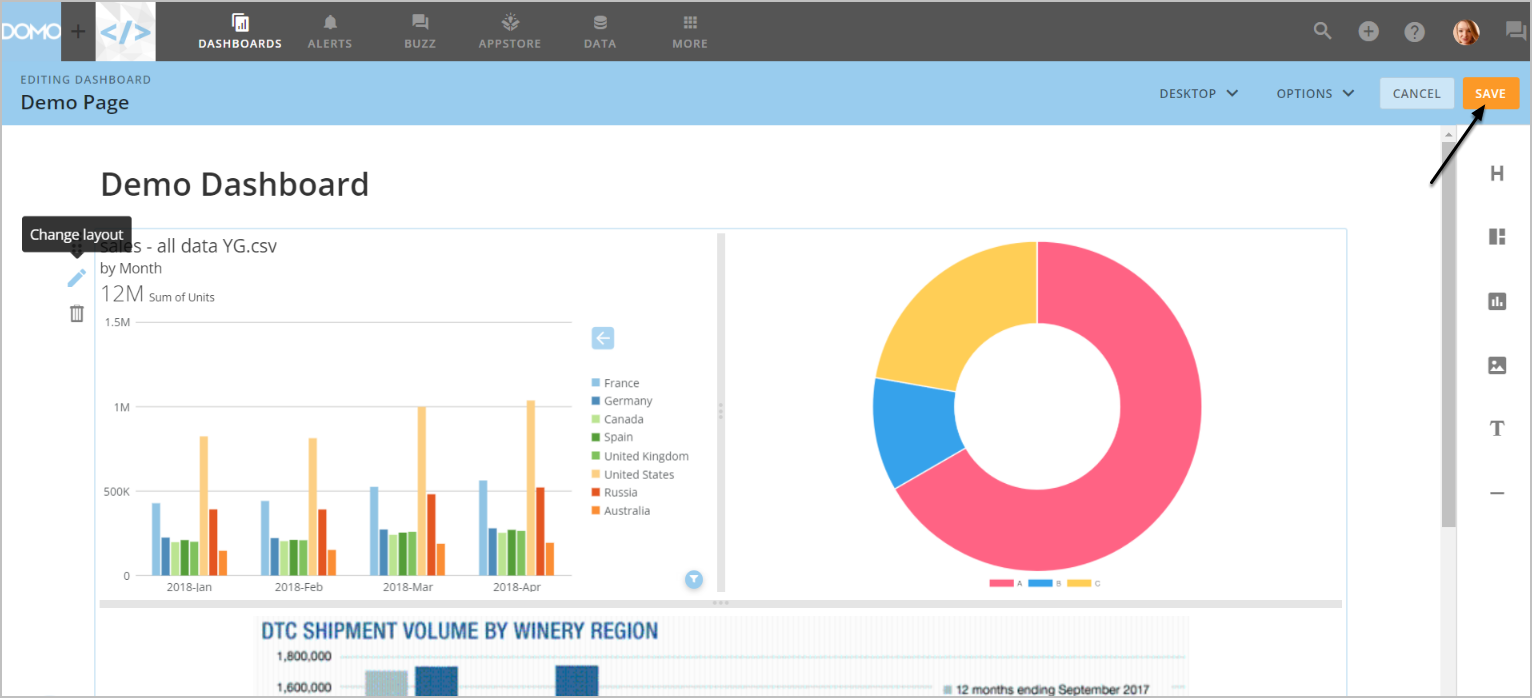
Apply changes, if needed, and [SAVE]
Enable Embedding for Domo Dashboards/Apps
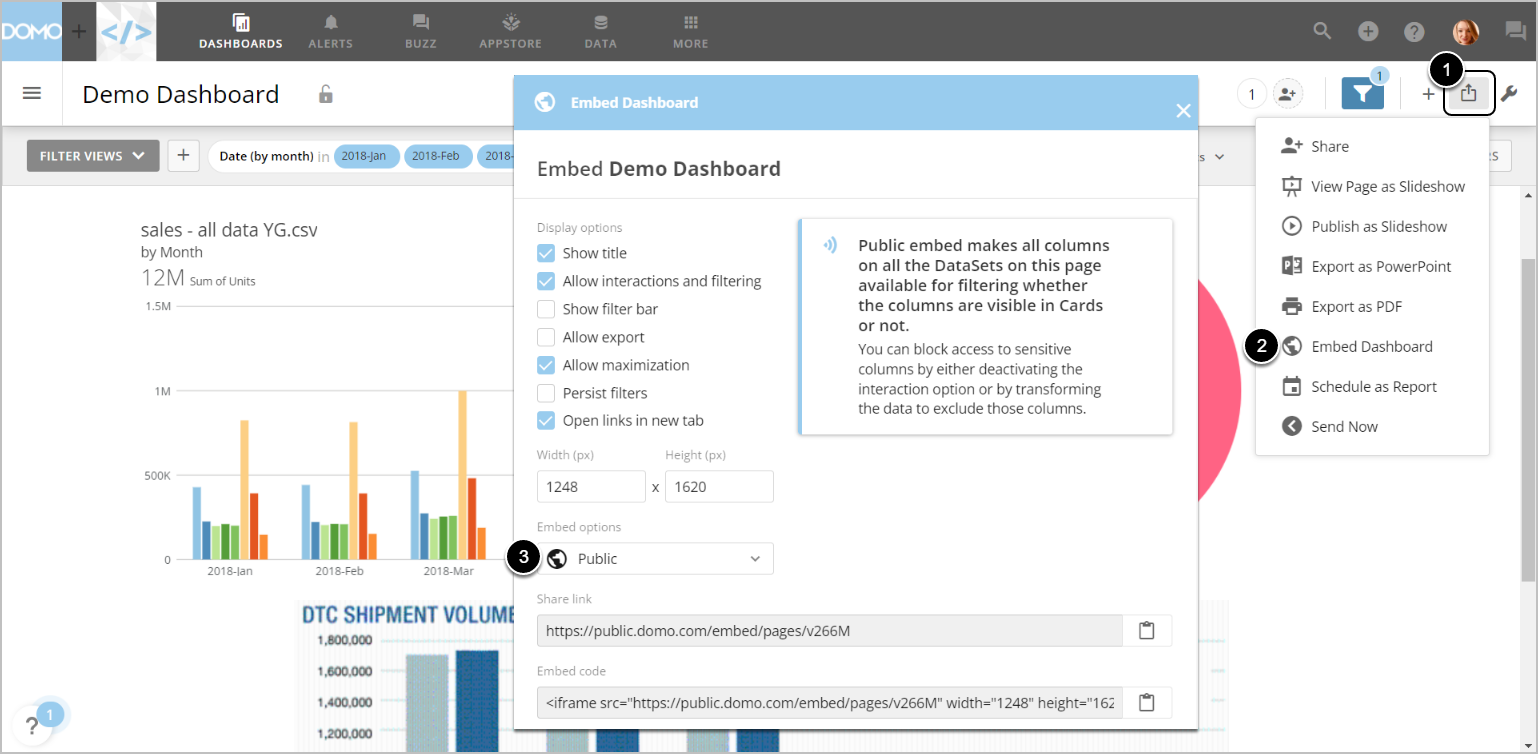
- Access Share
- Go to Embed Dashboard/App
- Set Embed options to "Private" or "Public"
- "Private" would require a user to enter the credentials to Domo
1. Create New External Report
Access New > External Report > Domo
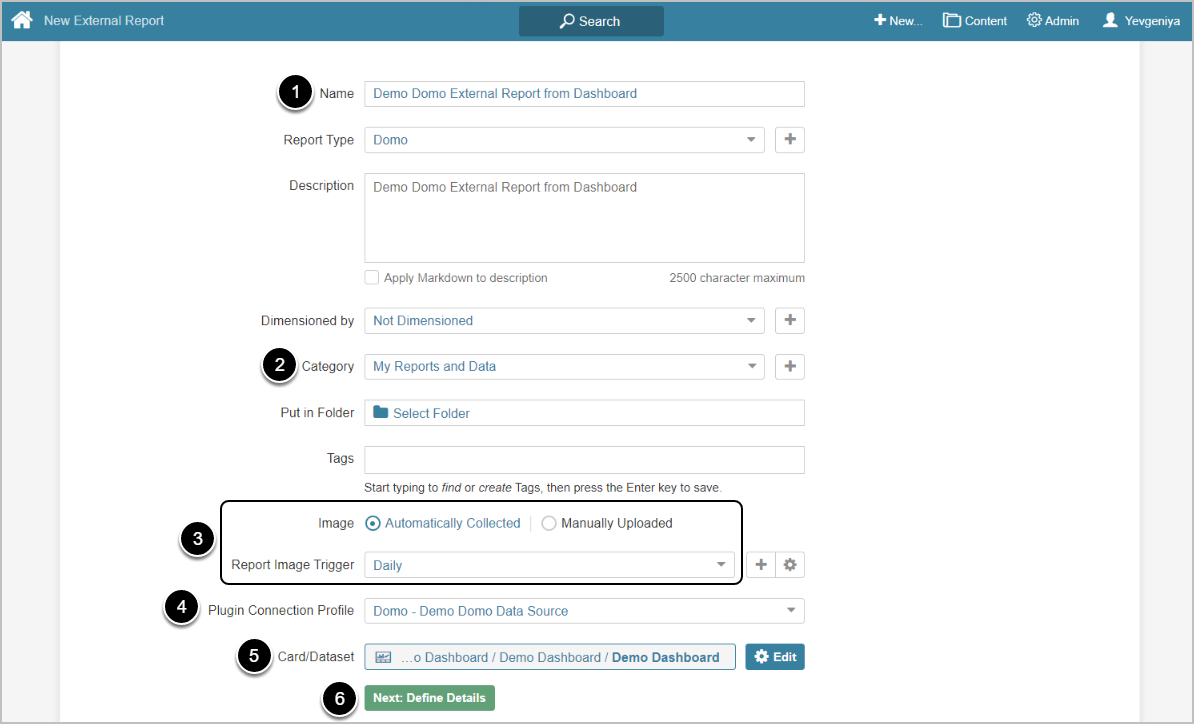
- Provide a descriptive phrase in Name
- Specify Category into which External Report will be placed
- Define whether content has to be updated manually or automatically
- For "Automatically Collected", specify a Report Image Trigger
- Choose Domo Plugin Connection Profile
- Select a Dashboard for External Report
- [Next: define details]
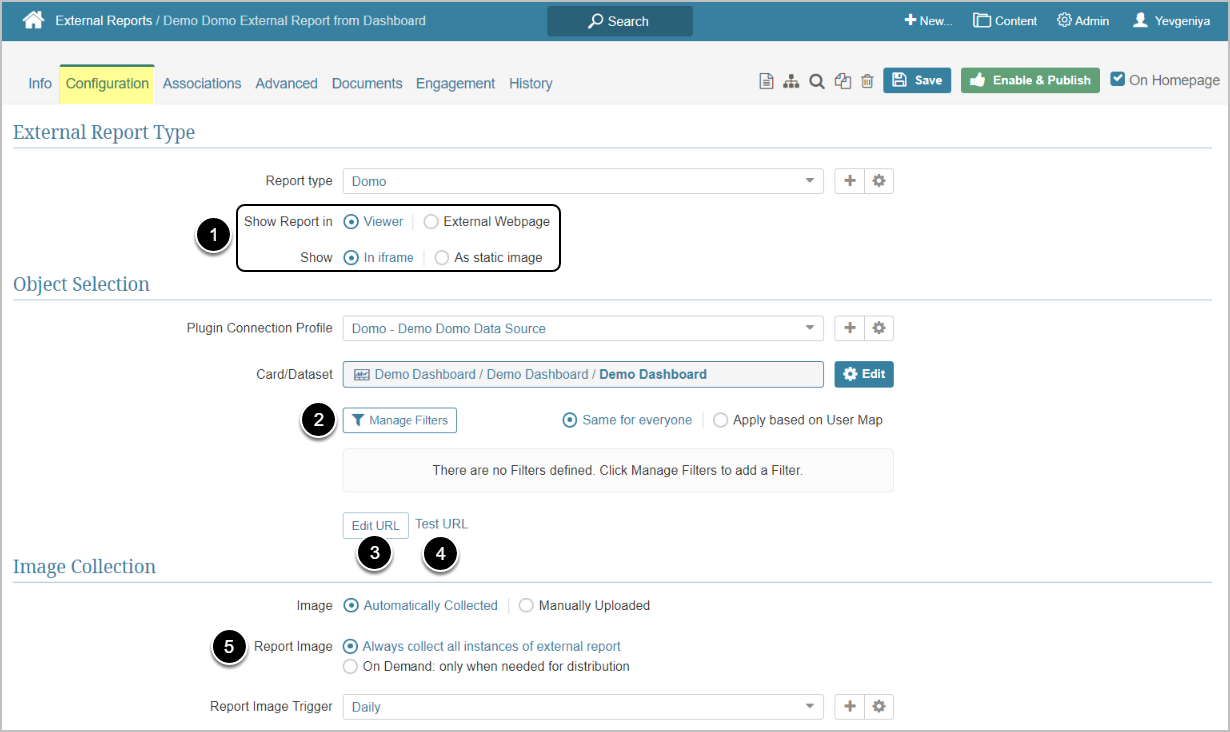
2. Specify Report Details
-
Show Report in defaults to "External Webpage".
- For "Viewer", select Show "In iframe" or "As static image" option
- NOTE: When opting to display the Report as a Static Image, make sure to Collect Image before going to Viewer.
- Optionally, configure filtering via [Manage Filters]
- Optionally, [Edit URL] to modify the URL by appending a question mark (?) followed by any filter or parameter settings
- Optionally, [Test URL] to test how the Report will be displayed on External Webpage or in Viewer, depending on the display option selected in the previous step
- Select Report Image option:
- "Always collect all instances of external report": collect all images and cache them on a schedule
- "On Demand: only when needed for distribution": individual images are only collected when they need to be included in an email
3. Collect Image and Publish
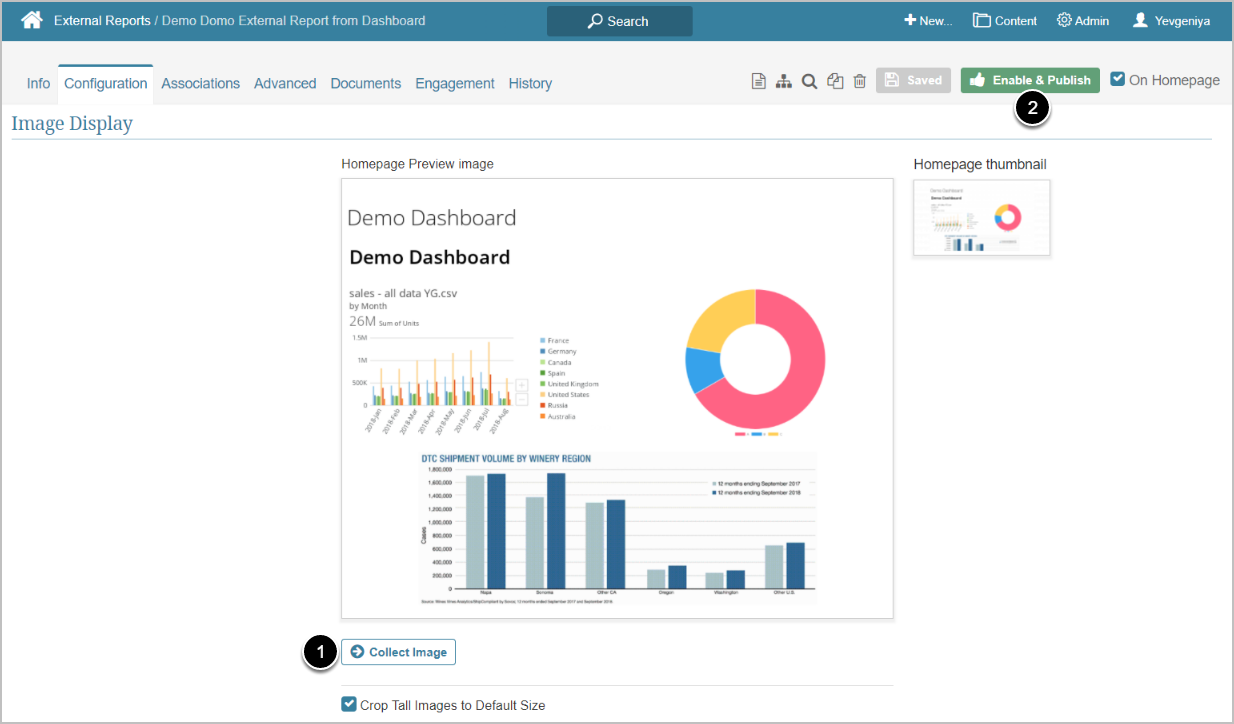
- [Collect Image]
- [Enable & Publish] to proceed to Viewer