This article describes the process of creating plugin Data Source to connect to MicroStrategy. This Data Source will allow data from existing MicroStrategy objects to be used in building Elements using Metric Insights tools.
PREREQUISITES:
- You must have network connectivity access from Metric Insights to your MicroStrategy Intelligence server (default port 34952).
1. Create New Data Source
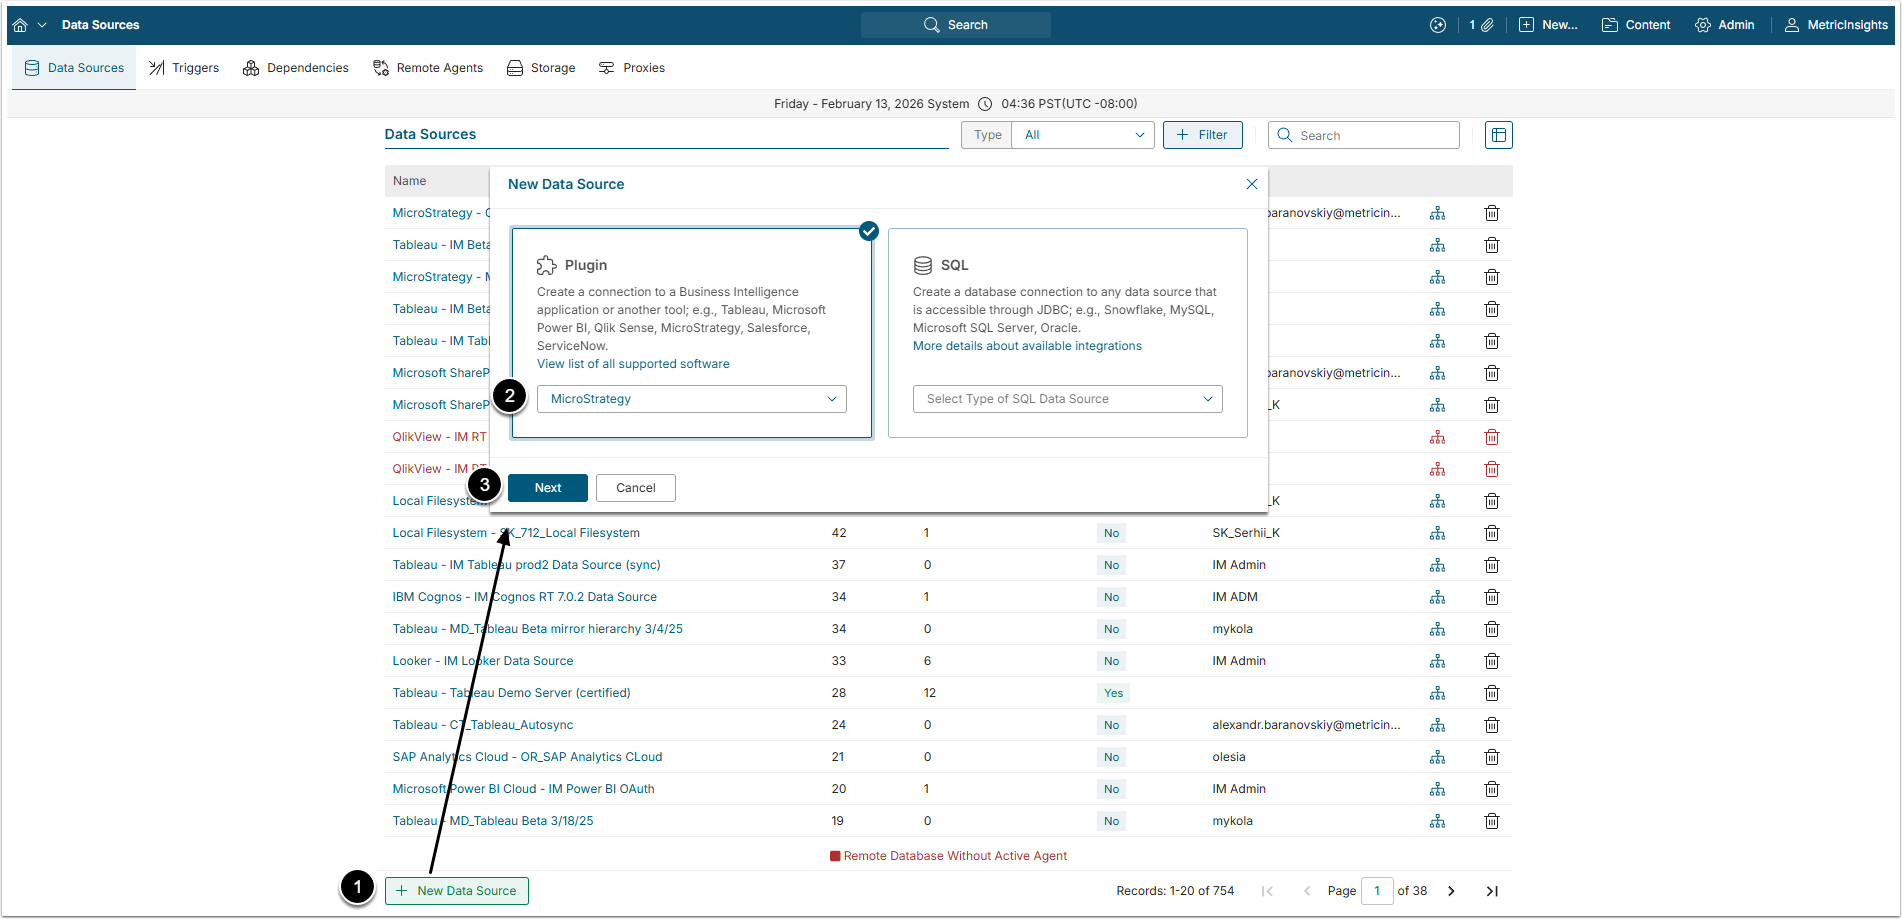
Access Admin > Collection & Storage > Data Sources
- [+ New Data Source]
- Plugin: Choose "MicroStrategy" from the drop-down list.
- [Next]
2. Provide Required MicroStrategy Parameters
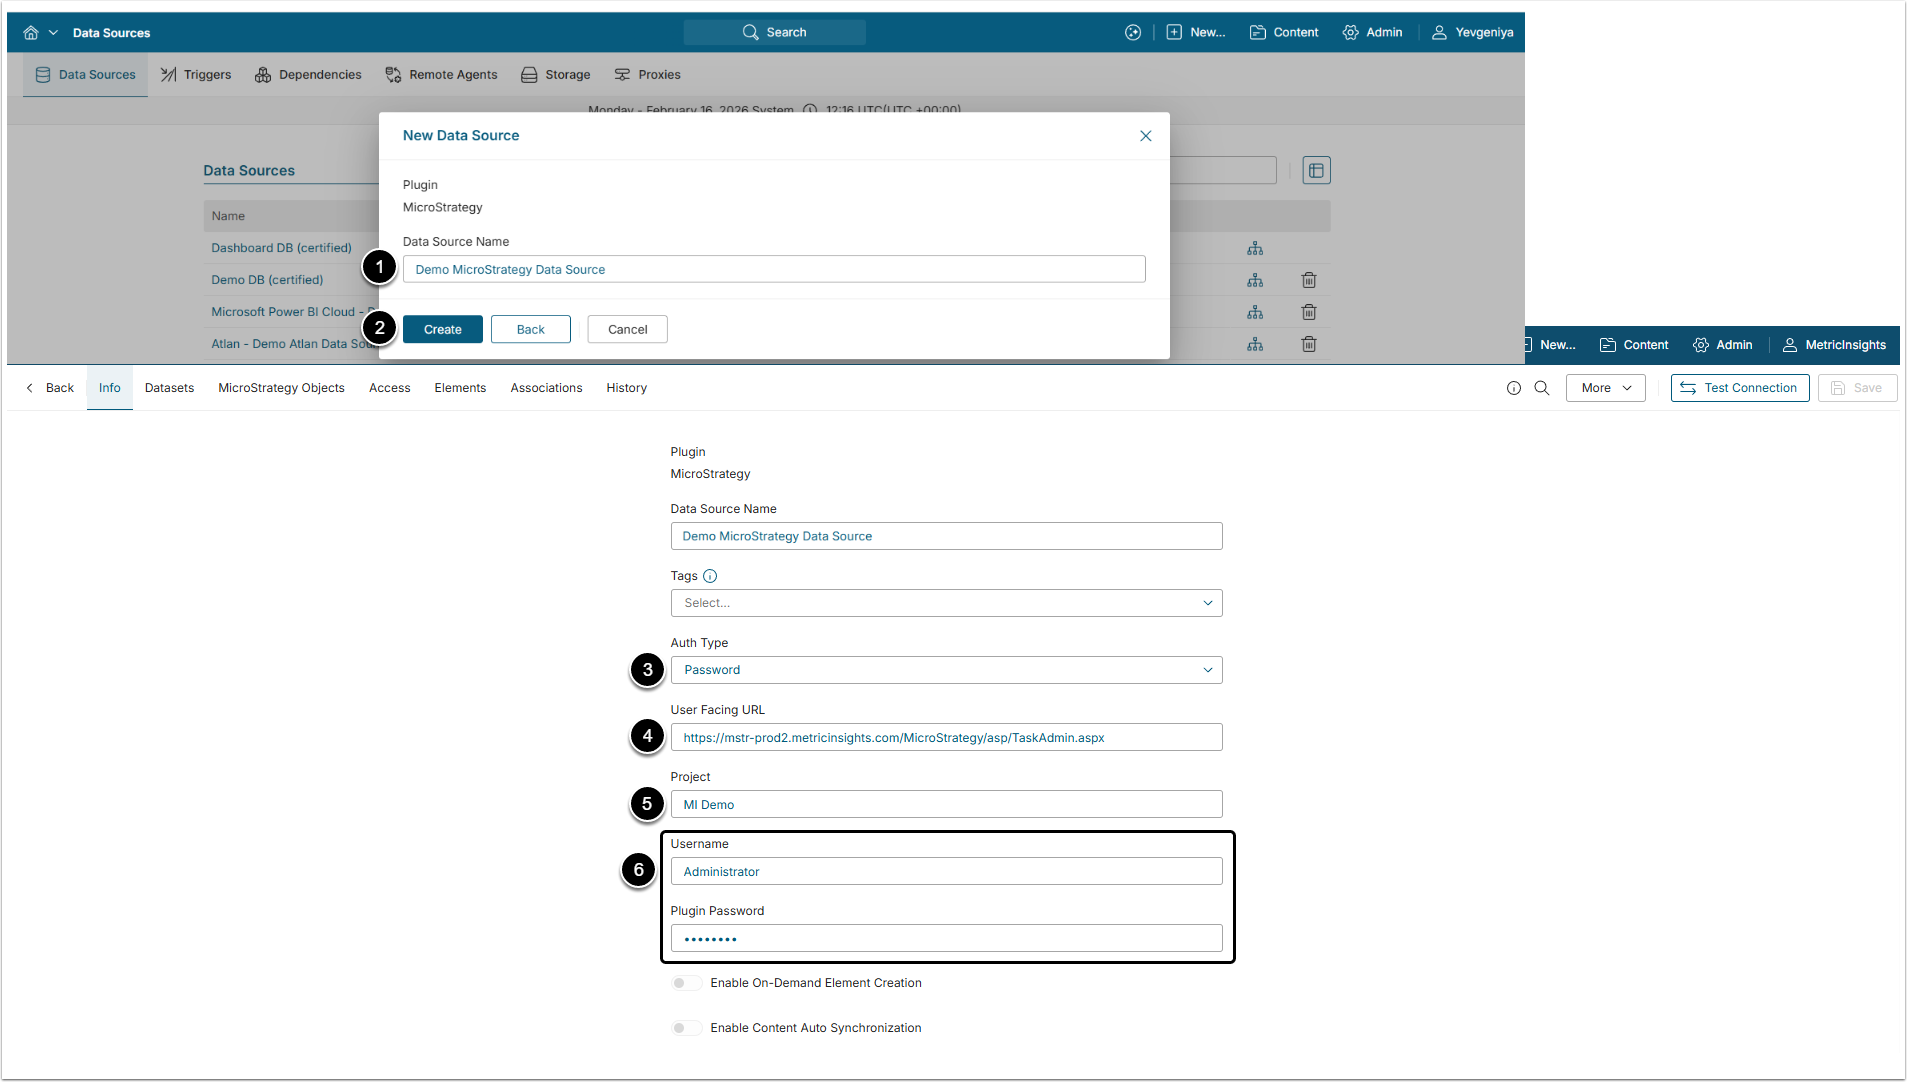
- Data Source Name: Give the Data Source a descriptive name.
- [Create]
- Auth Type: Select the required authentication type.
- Password: use the MicroStrategy account credentials.
- Identity Profile: select the existing Identity Profile.
- User Facing URL: Specify the URL that you use to access MicroStrategy.
- Project: Input the MicroStrategy Project name.
- Username/Plugin Password: Provide credentials that you use to access MicroStrategy.
- Optionally, enable On-Demand Element Creation.
- Optionally, enable Content Auto Synchronization.
NOTE: Special characters listed below are handled as an underscore “_” in Category names upon "Mirror folder hierarchy":
- Double quote "
- Single quote '
- Less than <
- Greater than >
- Caret ^
- Grave accent (backtick)`
3. Configure Optional Parameters
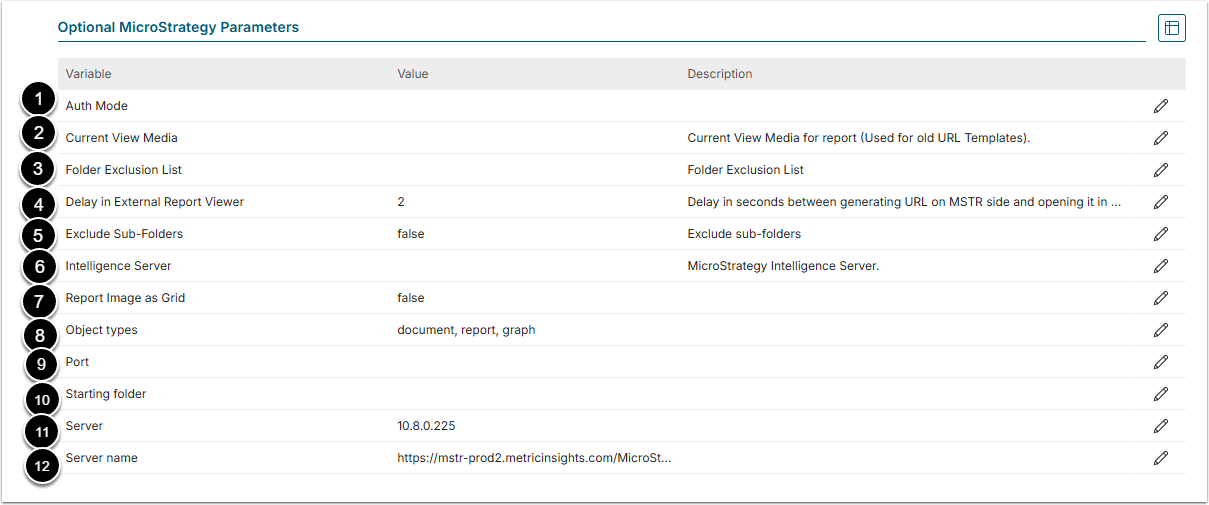
| Field Name | Description | |
|---|---|---|
| 1 | Auth Mode | Values: 1 = Standard (default), 16 = LDAP Authentication, 4 = Database Authentication, 8 = Guest, 2 = Windows Authentication, 64 = Trusted Authentication, 128 = Integrated Authentication. |
| 2 | Current View Media | Add Current View Media for report. It is used for old URL Templates. |
| 3 | Folder Exclusion List | List the folders that do not need to be pulled from MicroStrategy. In order to exclude a folder from Objects, provide the folder path (with a root folder and without Project name). Use comma as a delimiter. |
| 4 | Delay in External Report Viewer | A delay in seconds between generating URL on MicroStrategy side and opening it in viewer. |
| 5 | Exclude Sub-Folders | Specify if you want to exclude sub-folders (true/false). |
| 6 | Intelligence Server | Specify a host and port of the iServer.
|
| 7 | Report Image as Grid | MicroStrategy renders Reports as Grid or Chart. The default value is "Grid". |
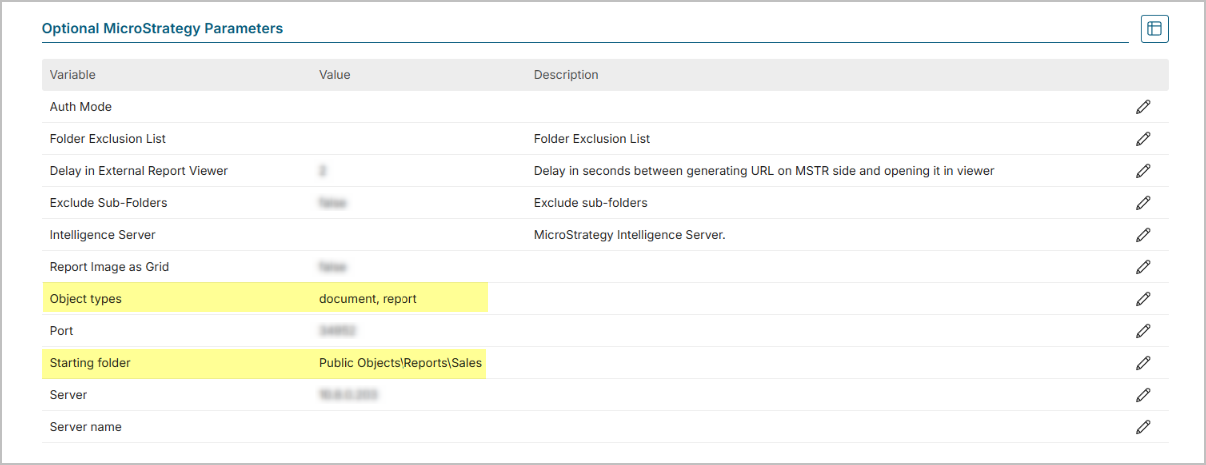
| 8 | Object types | The list of object types to use in report listing.
|
| 9 | Port | The port used for accessing the MicroStrategy Intelligence Server via the MicroStrategy Java Web API. The default port is 34952. If using a different port, then specify here.
|
| 10 | Starting folder | The starting (root) folder for your Project. All MicroStrategy documents and reports under this folder will be available.
|
| 11 | Server | If the Server field is blank, than it's taken from the User-facing URL field or Intelligence Server parameter. |
| 12 | Server name | A name of a server where the Project is located. Usually appears under the Project description. This is the Web API Server field. |
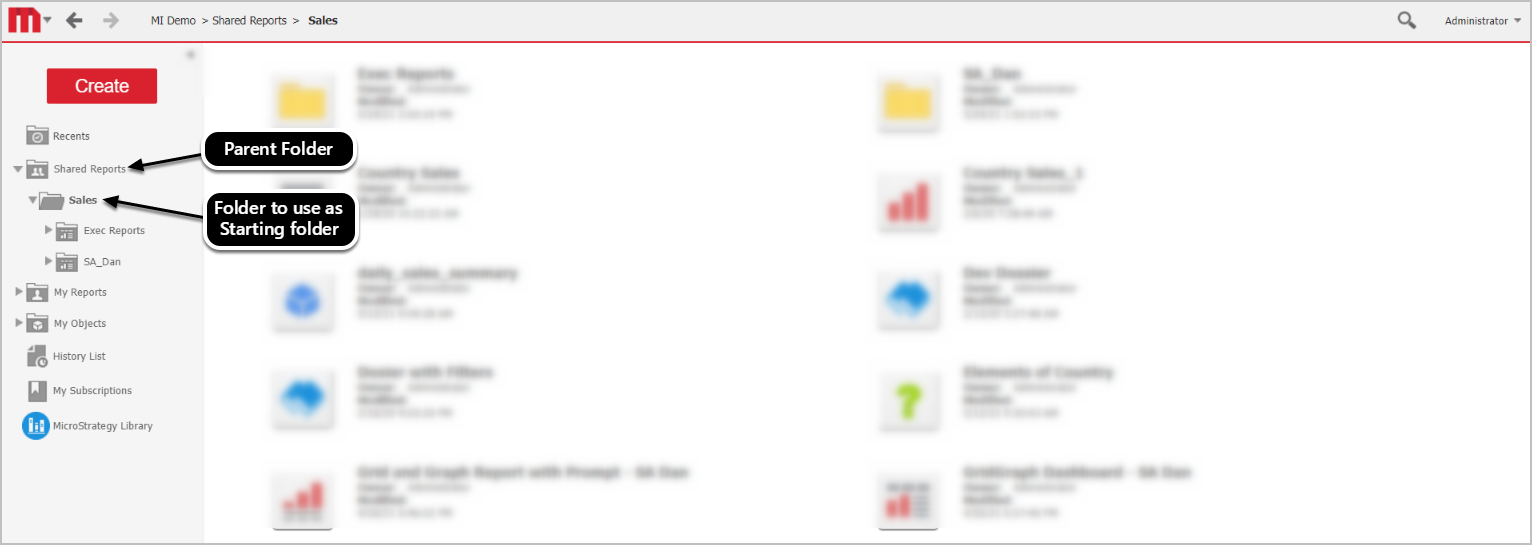
Working with the Starting folder filter requires specifying the full path to the folder in the MicroStrategy hierarchy of folders in a given Project using a backslash "\" as a delimiter.
NOTE:
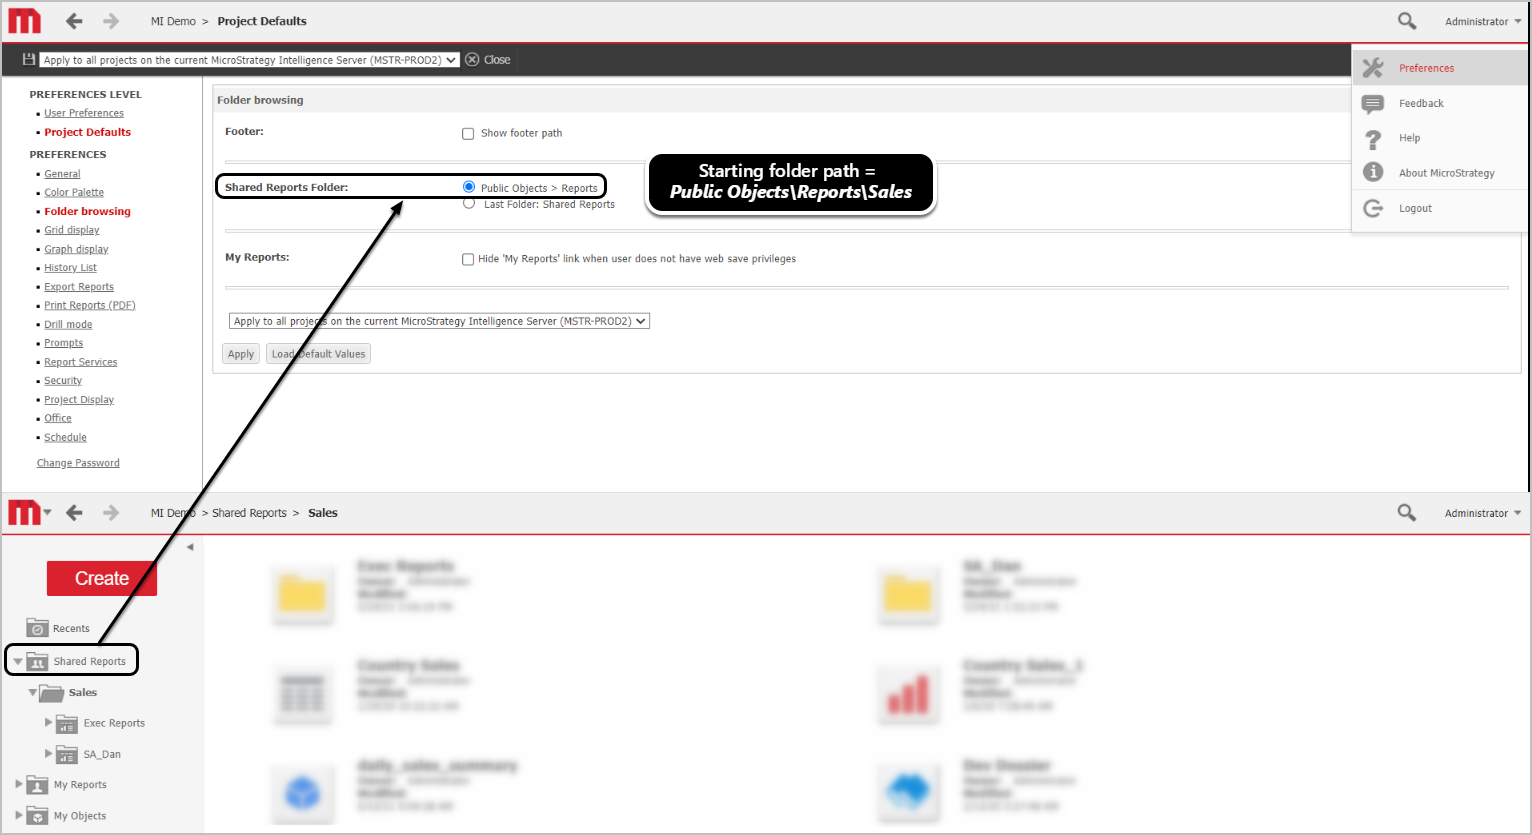
Folder Path in MicroStrategy UI does not correspond with folder path returned by MicroStrategy API to Metric Insights. Folder structure names to be used for filtering may differ from those you see in the MicroStrategy UI.
To find the correct path, access:
- User menu > Preferences > Project Defaults > Folder Browsing.
See the example below.
In this example, Shared Folder will be returned as Public Objects\Reports and the value for the Starting folder would be Public Objects\Reports\Sales.
NOTE:
- All objects that correspond to the object types set under Object types in MI Optional Plugin Parameters will be fetched into MI.
- If the folder includes sub-folders, all objects from these sub-folders will be pulled in.
- If more than one Project is specified in the Project parameter and multiple folders with the same name exist in these Projects, MI will pull content from all folder and their sub-folders, unless set otherwise in Exclude Sub-Folders parameter.
4. Proceed with Advanced Configuration
Advanced Configuration settings can be set to default values unless Data Source requires more precise tuning. For more details on how to proceed, refer to Advanced Data Source Configuration.
Click [Test Connection] button in the upper right corner.
