The User can configure Bursts to send Microsoft SharePoint External Content as an attachment instead of just previewing it.
After the initial Burst is sent, files are stored in cache. Each subsequent time the system will send the exact same files from cache, unless cache is cleared. Cache clearing guarantees that users will receive the most recent files. See the configurations steps below.
In addition, it is possible to create a Burst in a way so that the system sends only the files that have been updated since the last email. Note that this option works only for automated (scheduled) Bursting.
1. Enable Sending Attachments
Access the Editor of the External Content that needs to be sent as attachment
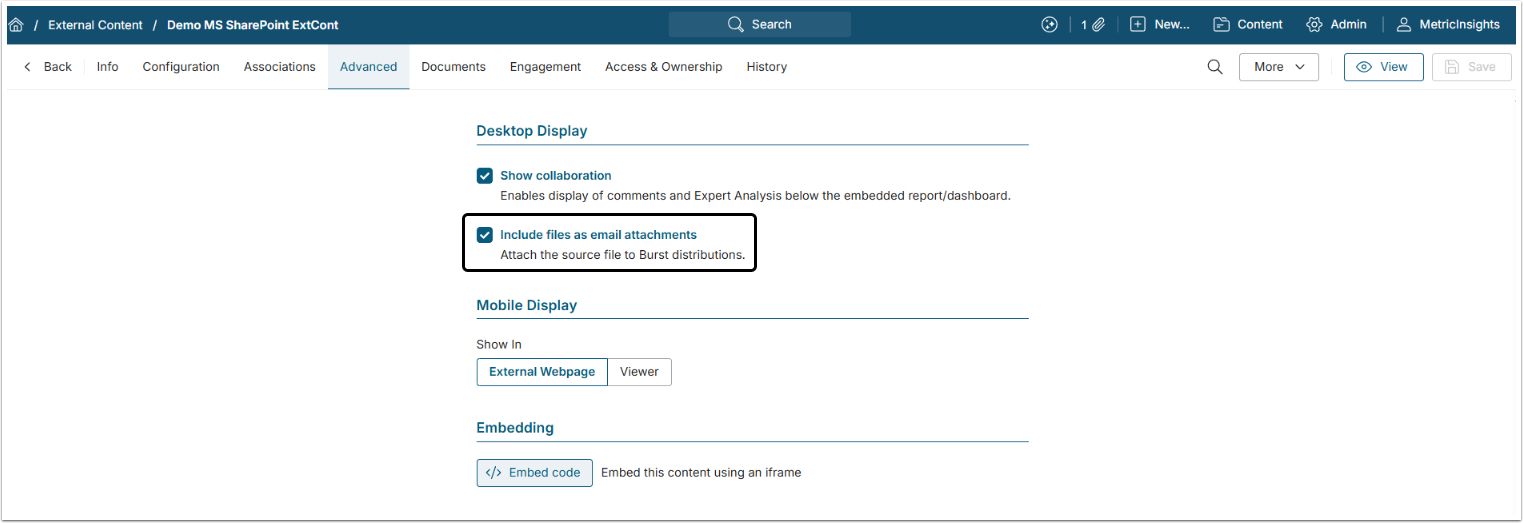
Open the Advanced tab and make sure that the Include files as email attachments is activated.
NOTE: Include files as email attachments is activated by default unless configured otherwise by the ATTACH_EXTERNAL_CONTENT_FILES_DEFAULT System Variable.
NOTE: The DIGEST_MAX_ATTACHMENTS_SIZE System Variable controls the total attachment size. Ensure that the assigned value does not restrict receiving oversized attachments. The default is 10 MB in bytes.
2. Configure Data Collection Trigger for Cache Clearing
Open the Configuration tab
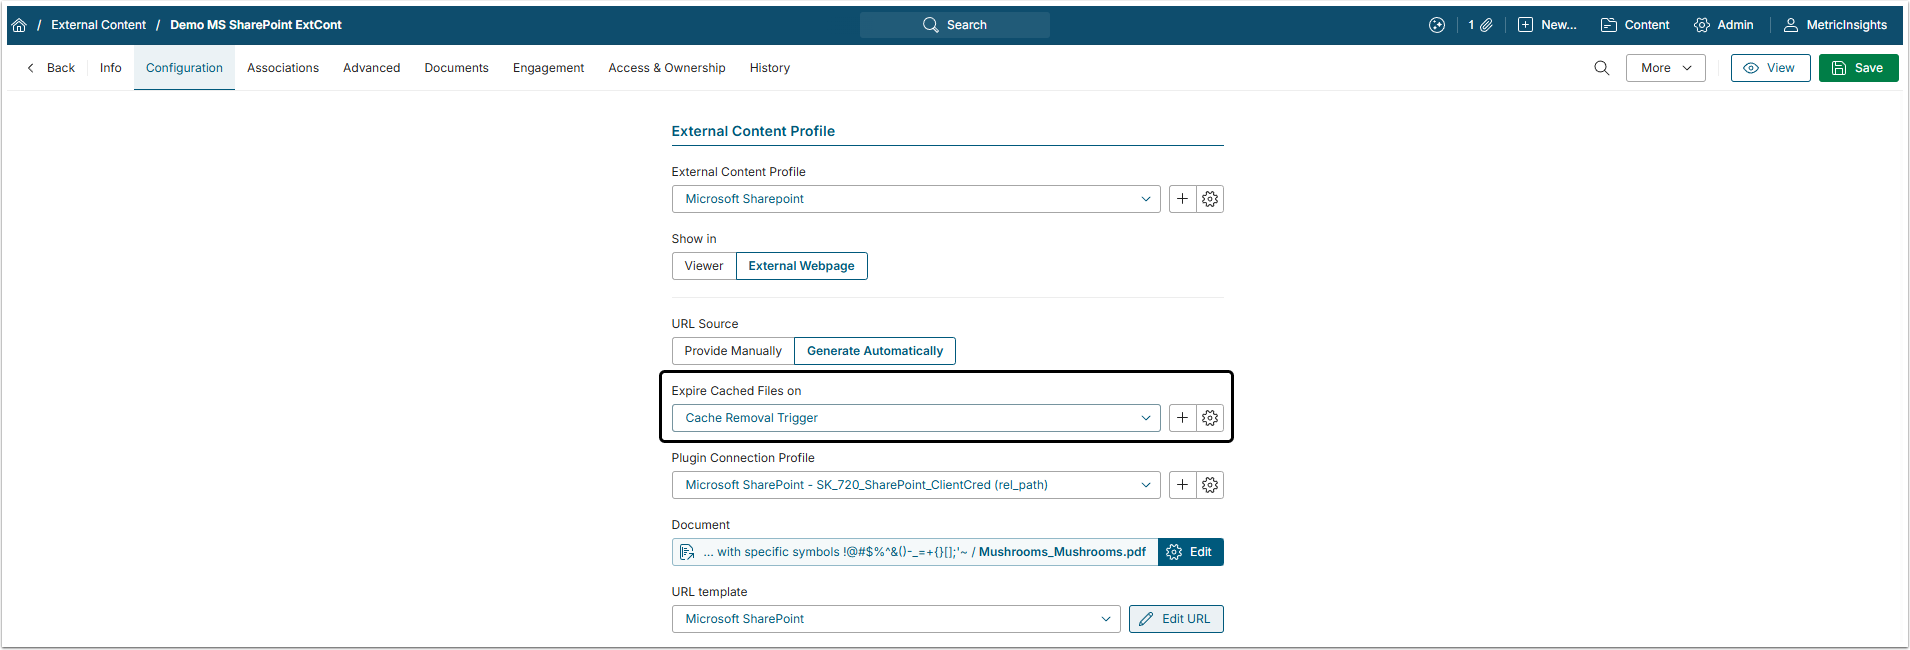
In the Expire Cashed Files on field select an existing Trigger or create a new one by clicking the plus icon.
Cache clearing must be configured for each individual External Content created from MS SharePoint that will be used for Bursting.
It is recommended that the Trigger be set to run before the Burst is sent to ensure that the system sends the most recent data. For example, if the Burst is scheduled for Mondays at 10 AM, the Trigger should run at least at 9:55 AM.
3. Configure a Burst
After finishing previous Steps, create a Burst , adding the Microsoft SharePoint External Content to it.
Optionally, you can configure a Burst to sends only the files that have been updated since the last email.
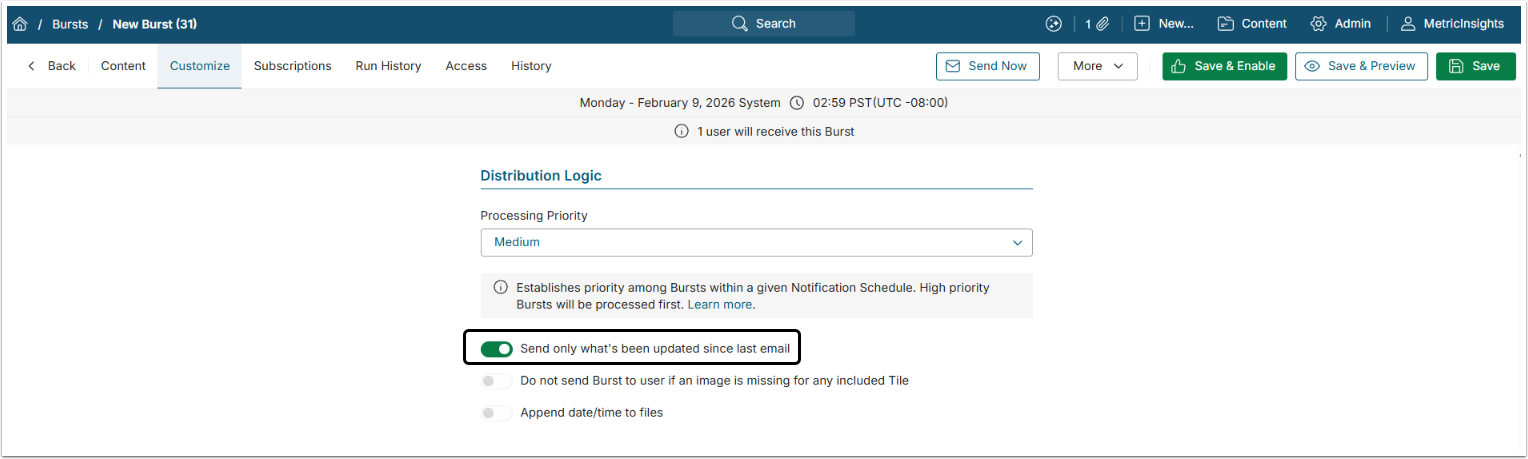
- On the Customize tab of Burst Editor, enable Send only what's been updated since last email.
- [Save & Enable]
NOTE:
- After a file has been modified on the SharePoint side, Objects must be recollected in MI to include the updated file in a Burst.
- The "Send only what's been updated since last email" option works only if a Burst is sent on schedule by the system. Clicking [Send Now] will send all content that is included in the Burst.