This article describes how to connect to Zendesk in order to load data into Datasets and Reports in Metric Insights.
PREREQUISITES:
- For OAuth, it is required to create an OAuth client. See more details in the following section.
- For OAuth with manual token, it is required to generate a token.
The OAuth Authorization Type requires creating an OAuth client via your organization's Zendesk account under:
Admin > Channels > API > OAuth Clients Tab > Add OAuth client, where:
* Unique identifier = Client ID,
* Secret = Client Secret.
Redirect URLs should be set to https://<hostname>/editor/service/validate-zendesc-oauth2
1. Create New Data Source
Access Admin > Collection & Storage > Data Sources
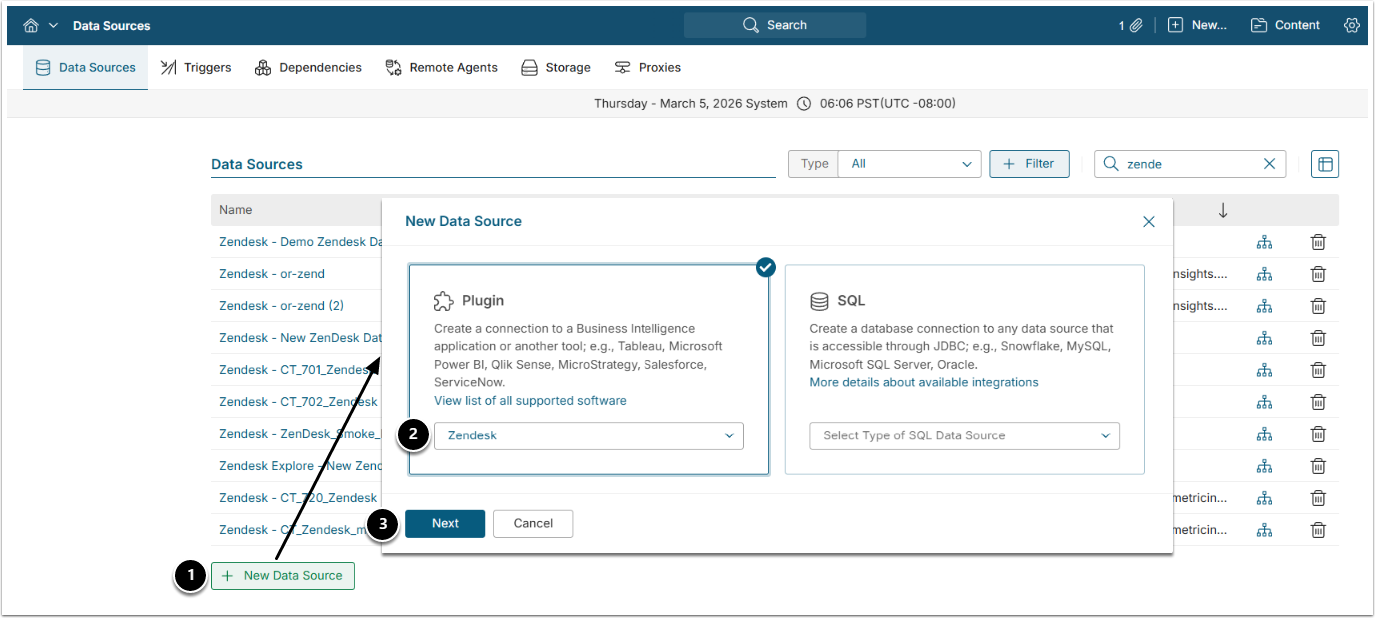
- [+ New Data Source]
- Choose "Zendesk" from the Plugin drop-down list.
- [Next]
2. Provide the Required Parameters
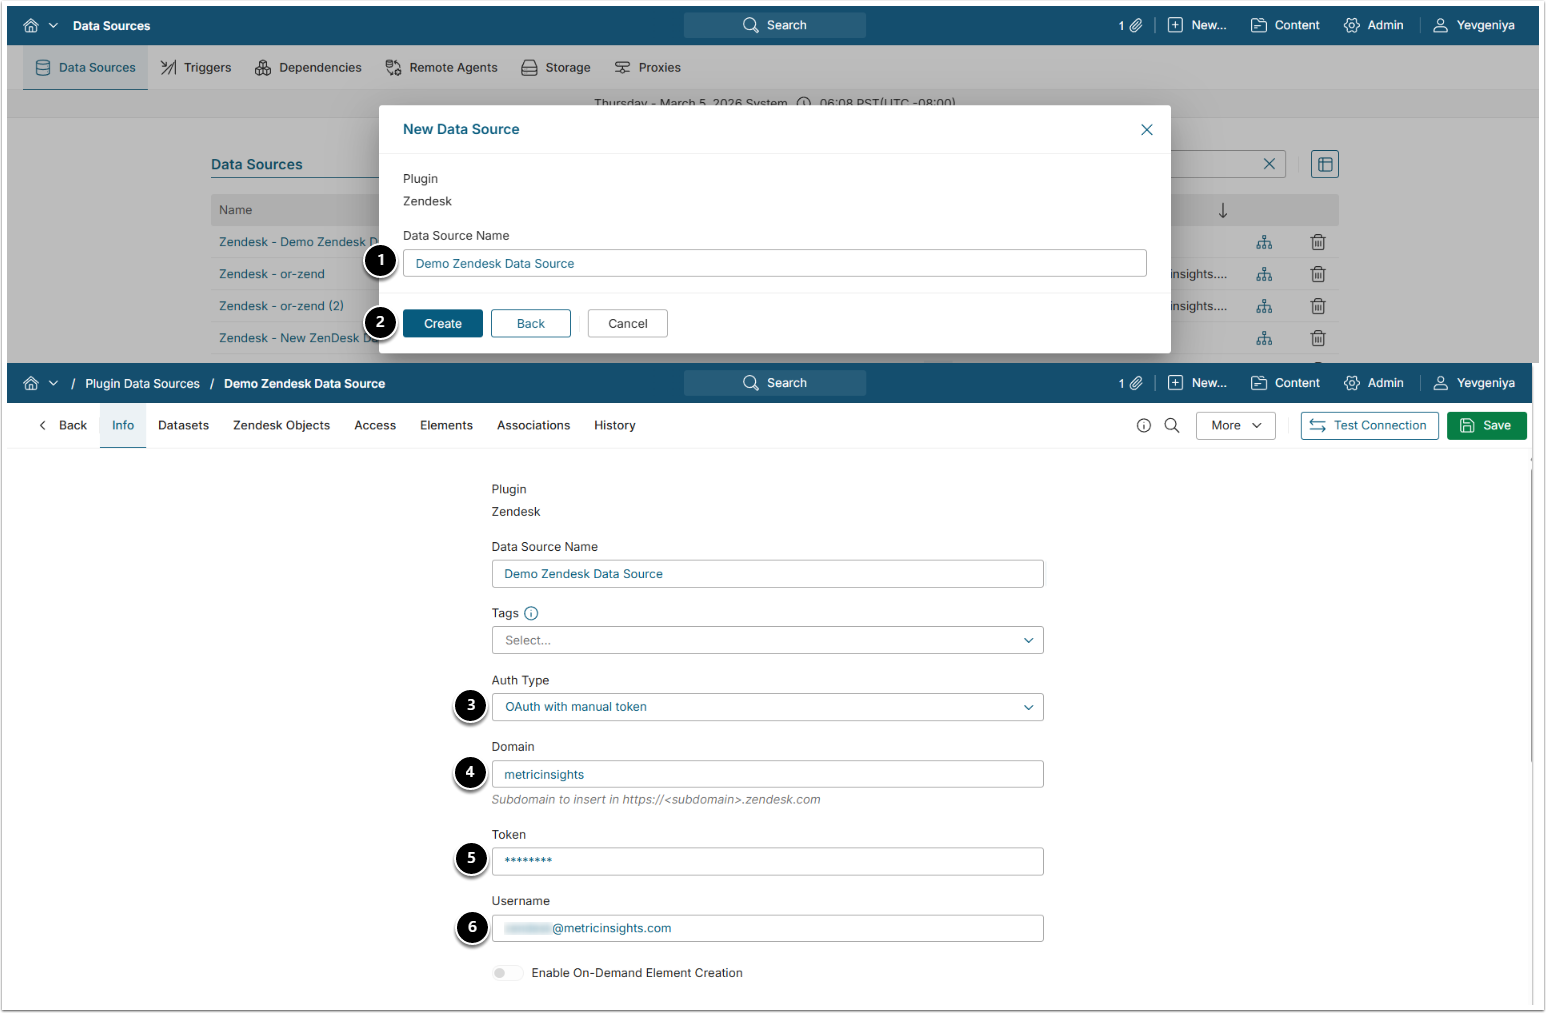
- Data Source Name: Enter a descriptive phrase.
- [Create]
- Auth Type: Select the required type:
- NOTE: Regardless of the Auth type, you must have access to view Zendesk tickets; otherwise, no objects will be collected.
- OAuth with manual token: fill in the fields as shown above. You must have a pre-generated OAuth token.
- OAuth: use OAuth client credentials. You will need Client Secret/Client ID to generate token.
- Domain: Specify your Zendesk domain.
- Token: Provide a pre-generated Zendesk token.
- Username: Specify the Zendesk username you use to log in.
- Optionally, toggle on Enable On-Demand Element Creation
3. Configure Optional Zendesk Parameters
You can edit any values in the Plugin Connection Profile Parameters grid by clicking the gear icon in the corresponding row:

| Description | |
|---|---|
| 1 | Allows filtering archived tickets by the updated_at field. The parameter accepts values in the "yyyy-MM-dd HH:mm:ss" format and returns data updated after the time specified. |
4. Proceed with Advanced Configuration
Advanced Configuration settings can be set to default values unless Data Source requires more precise tuning. For more details on how to proceed, refer to Advanced Data Source Configuration.
[Test Connection] in the upper right corner.