This article details how to create a Dataset populated with data sourced from Splunk.
For general instructions on building a Dataset, see Create a Dataset from any Data Source.
PREREQUISITE:
1. Access New > Dataset > Create New
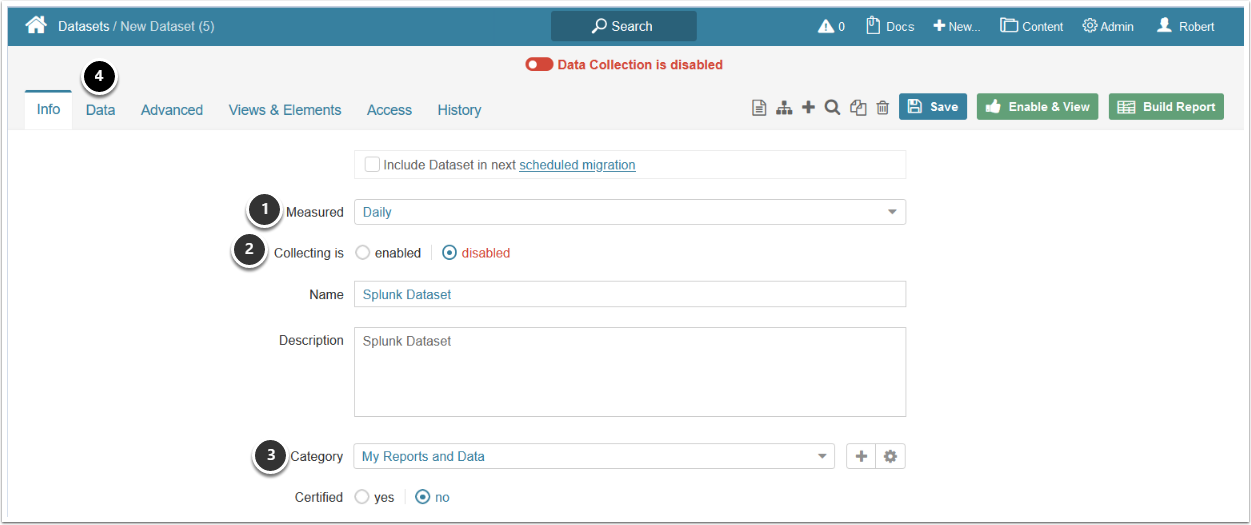
- Measured: select the measurement interval that applies to your element
- Collecting: is disabled by default and is enabled once you enable the Dataset
- Category: specify the Category where your Dataset will be placed
- Move to the Data tab
2. Define the Settings for Data Collection
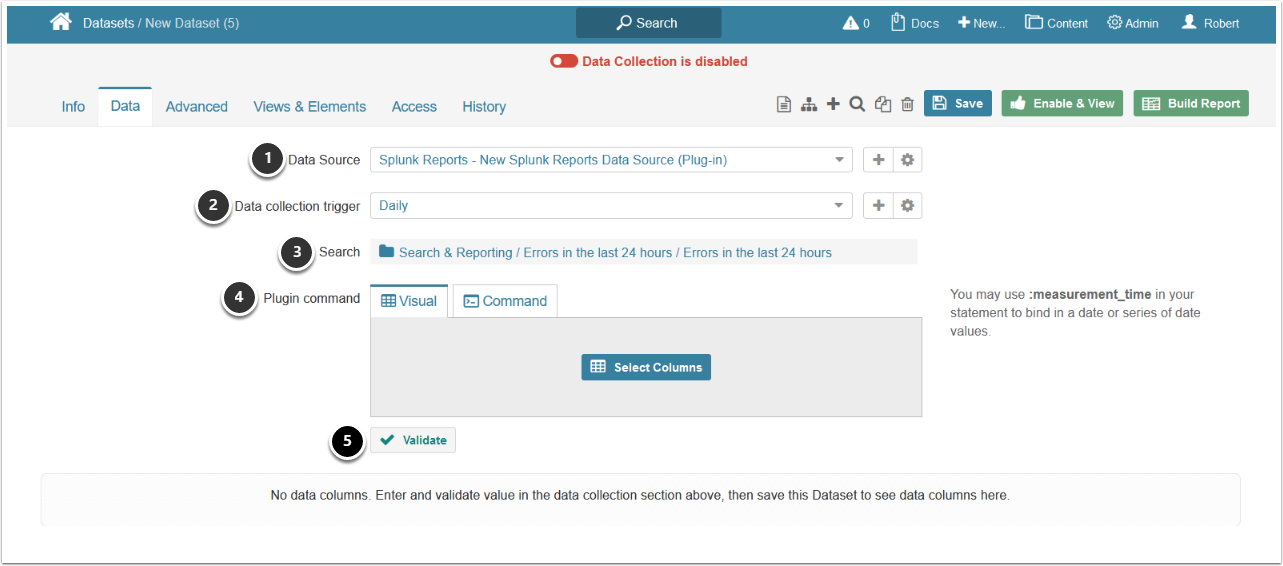
- Data Source: select the connection profile you have created for Splunk
- Data collection trigger: specify the Trigger to fetch data for the Dataset
- Search: select a Splunk object to serve as a basis of your Dataset
- Plugin command: [Select Columns] from the Visual tab, or enter an MIQL plugin command directly from the Command tab
- Validate your query
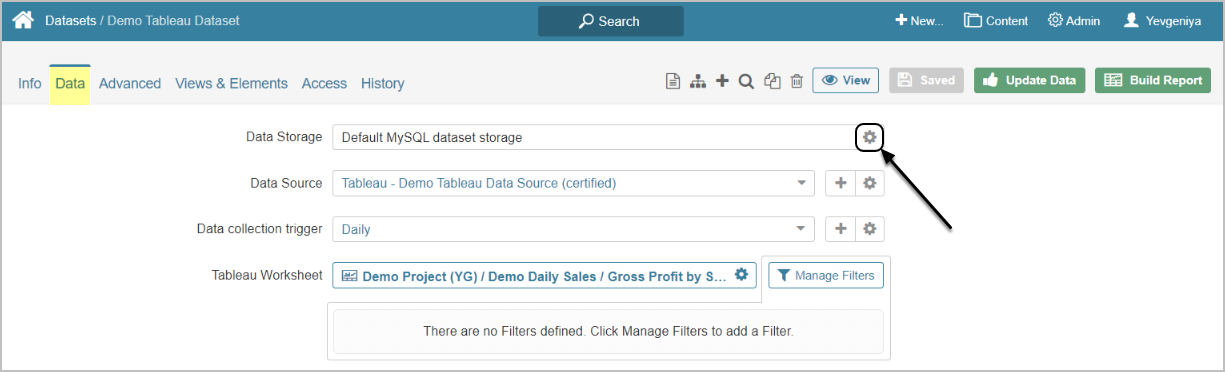
[6.3.1] Datasets can be moved between the available Data Storage locations. The screen below shows Tableau, but the functionality is essentially the same for all Plugins.
Click the Edit icon next to the Data Storage on Data tab and follow the prompts to complete the operation.
3. Enable & View Dataset
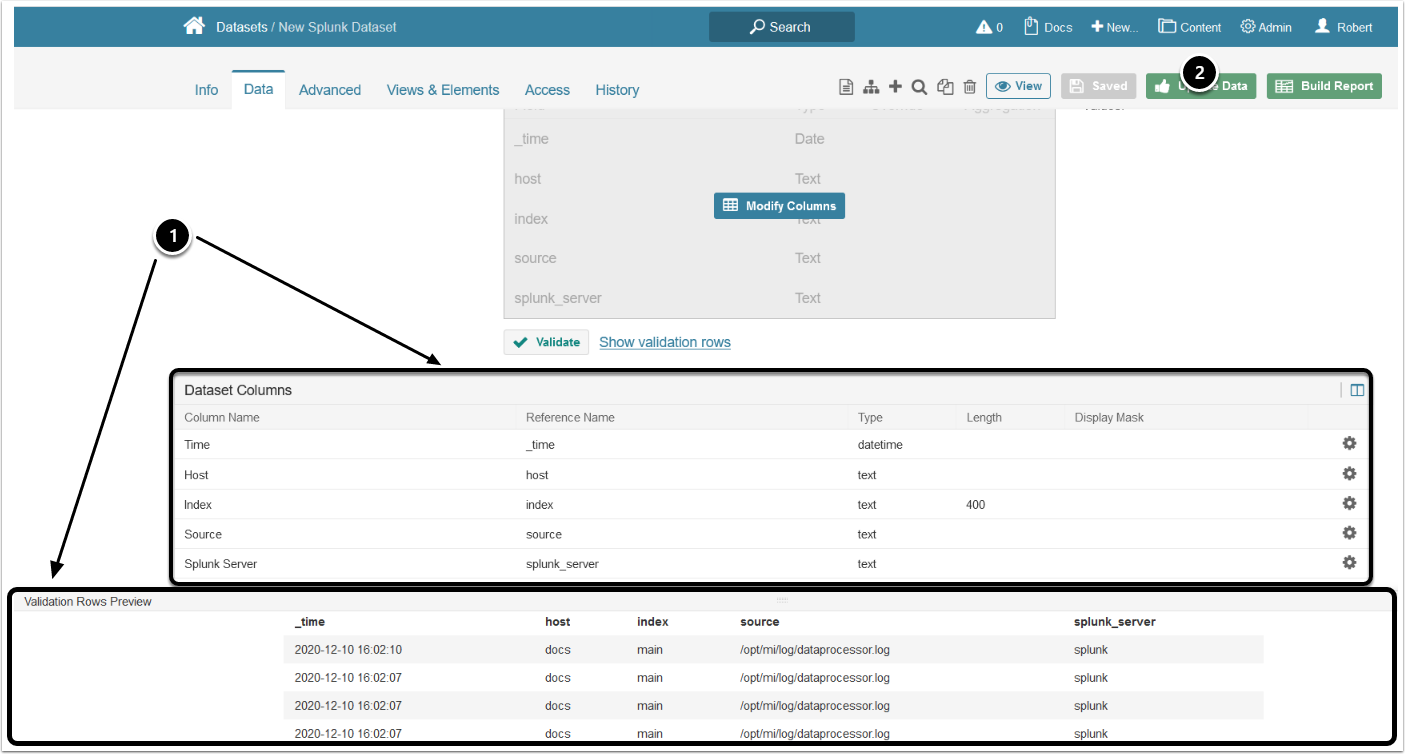
- If the command is validated successfully, the Dataset columns and Validation Rows Preview will be shown below
- At the upper right corner of the screen, click [Enable & View] to enable the Dataset to display the complete set of fetched records
4. Dataset Viewer
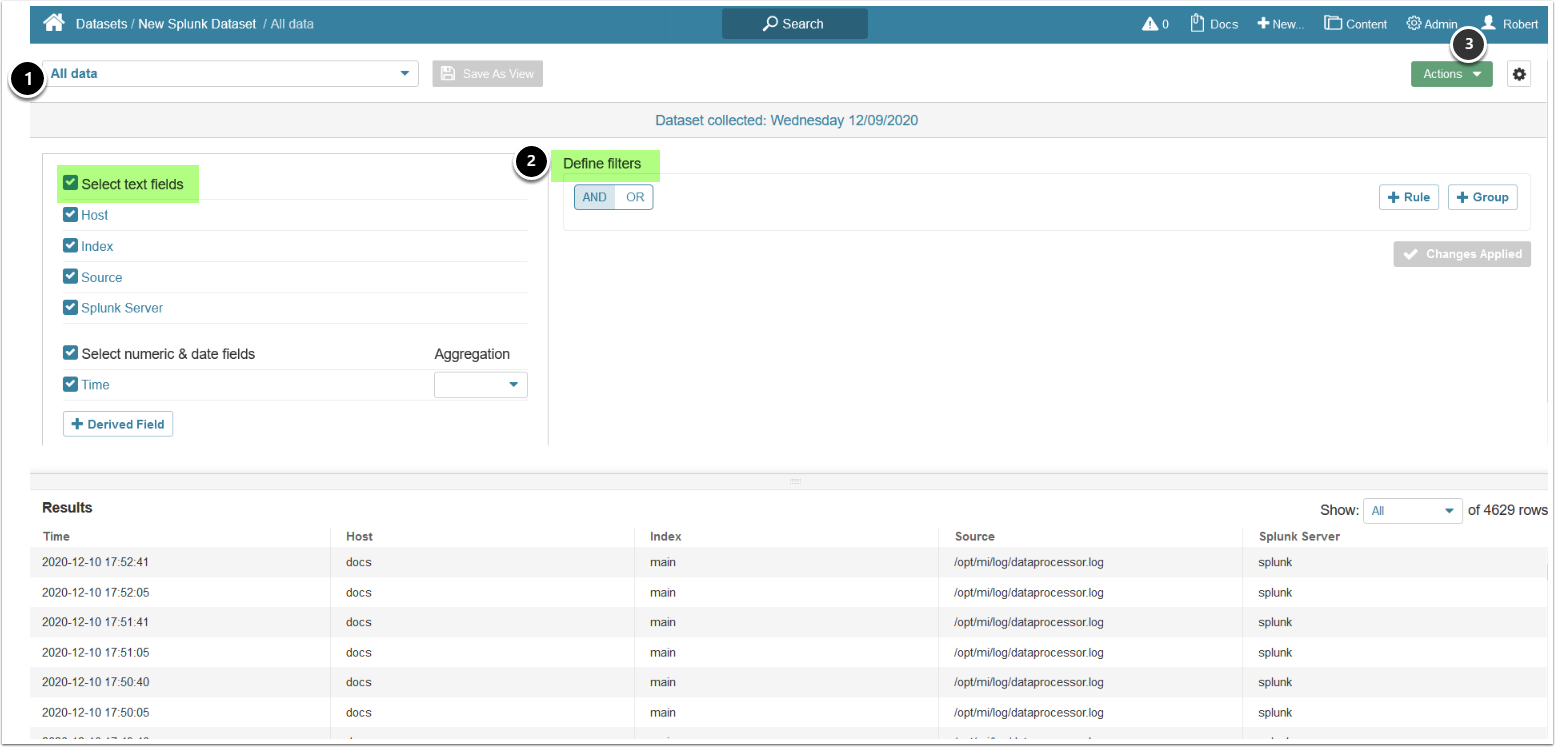
Dataset Viewer is displayed upon Enabling:
- Default View is All data. Any changes made will not affect the All data View, but may be saved as a New View
- For more information on using Filters, refer to Create a Dataset View
- Access Actions > Build Metrics to build Metrics directly from the Dataset Viewer.
- For detailed information on creating a Metric, see Create Metrics from a Dataset View