This article details how to establish connectivity to Looker Plugin.
PREREQUISITES:
- For OAuth 2, generated Client ID and Client Secret. See details below.
Finding Client ID and Client Secret
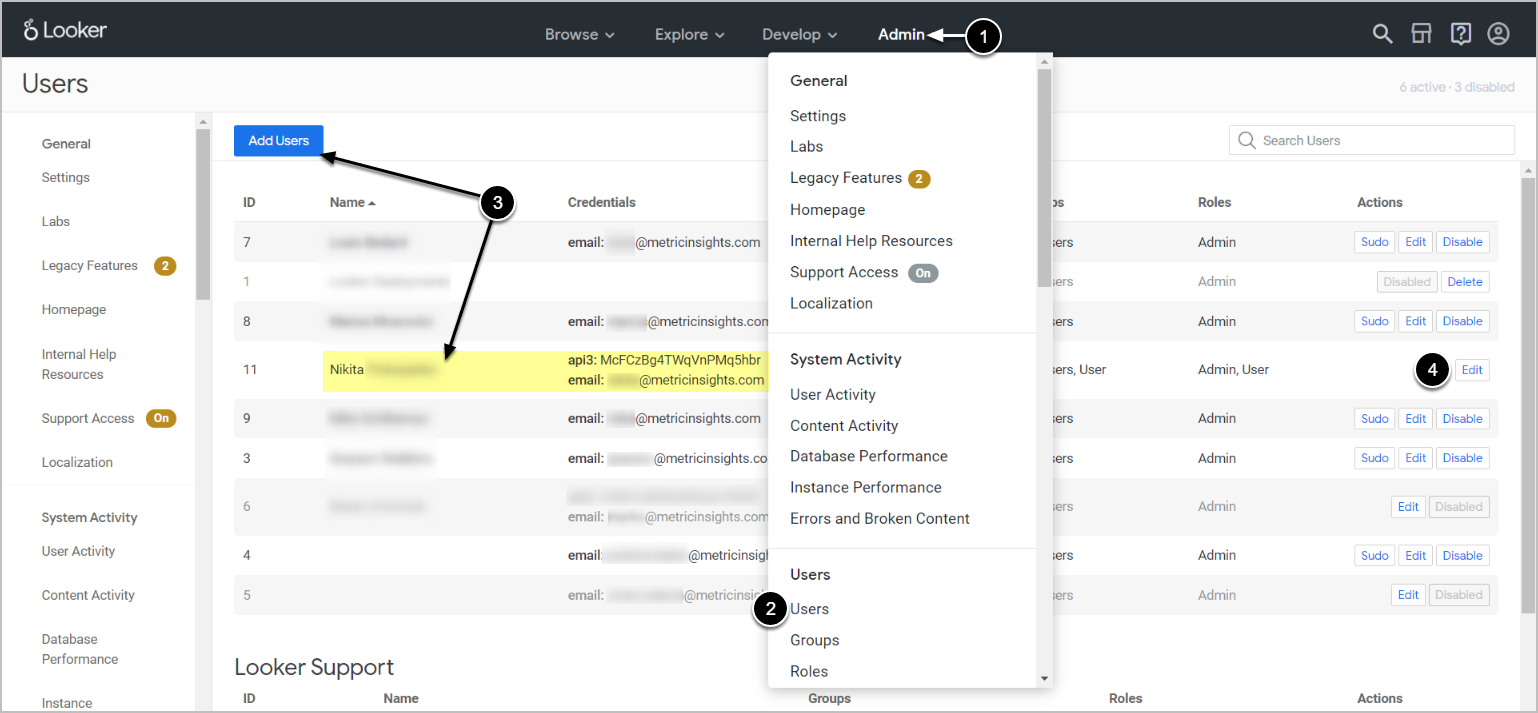
- From the Looker homepage, access the Admin drop-down.
- Go to Users.
- From the Users page, find the user and click Edit from the Actions column.
- To create a new user, click [Add Users]. For more information on Users and Roles, refer to this article.
-
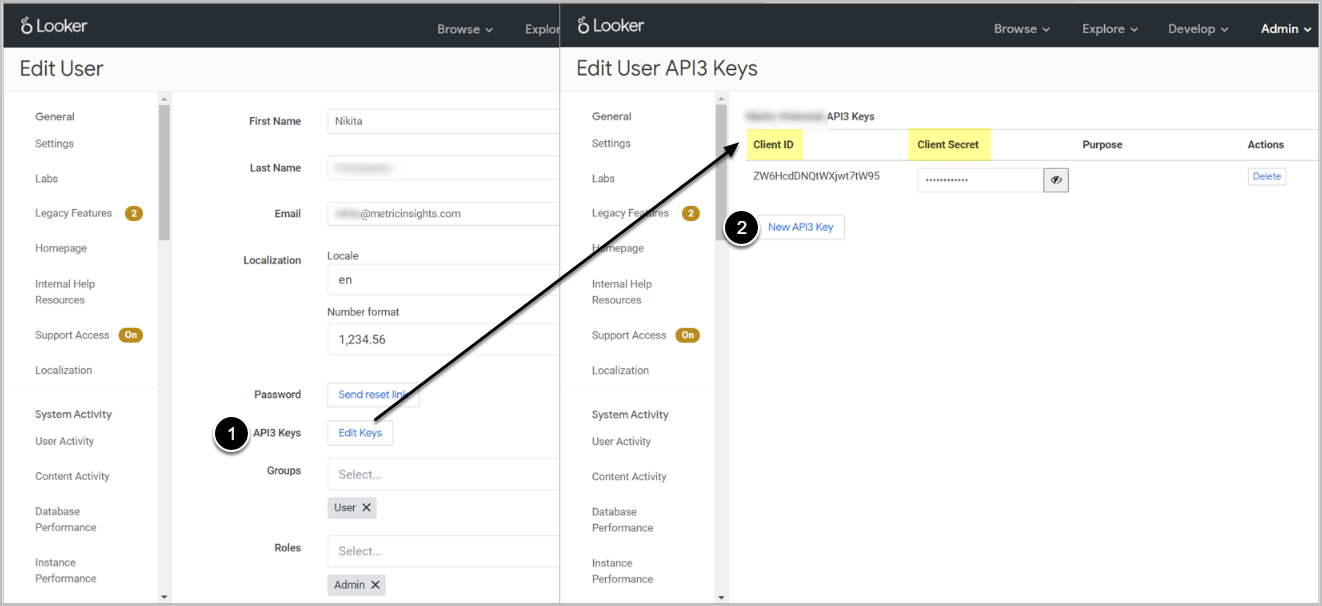
[Edit Keys]
- Client ID and Client Secret will be displayed on the Edit User API3 Keys page.
- To create new keys, click [New API3 Key].
1. Create New Data Source
Access Admin > Collection & Storage > Data Sources
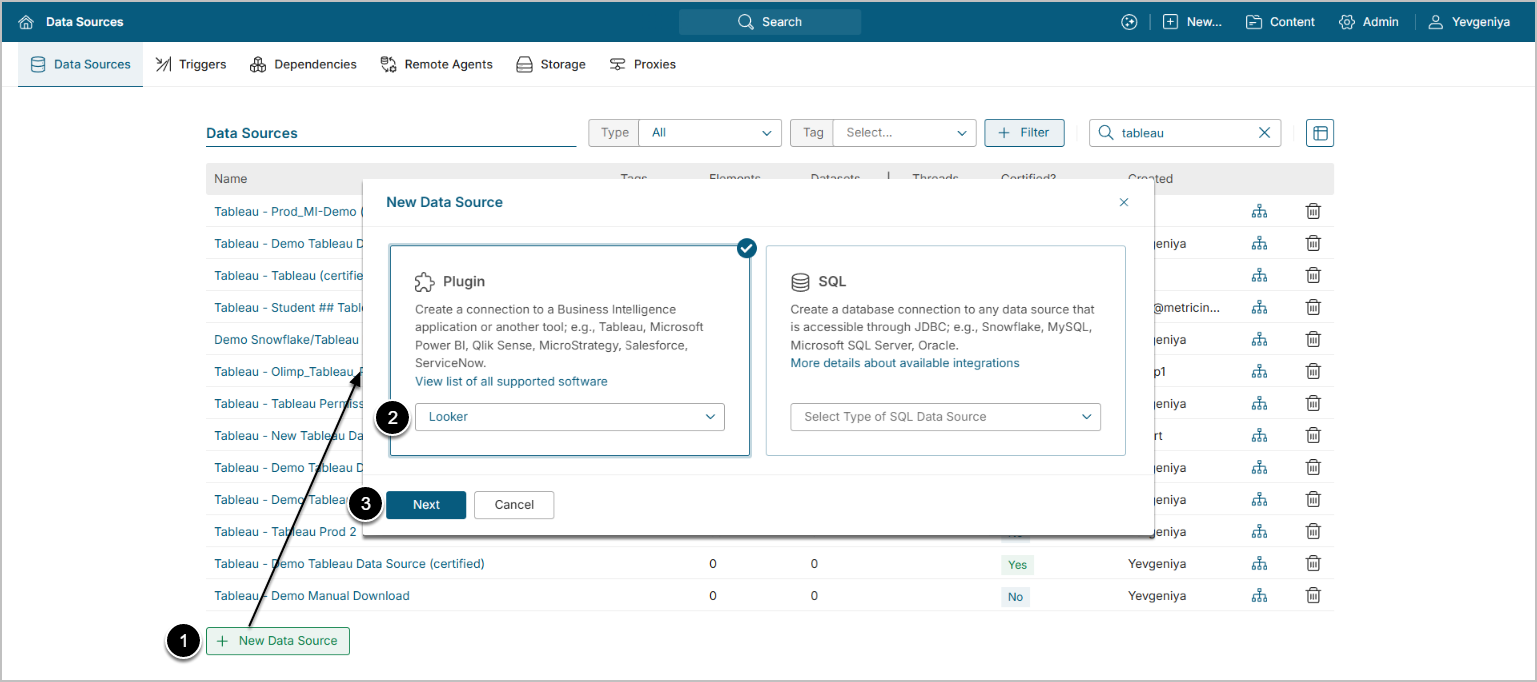
- [+ New Data Source]
- Choose "Looker" from the Plugin drop-down list.
- [Next]
2. Provide Required Parameters
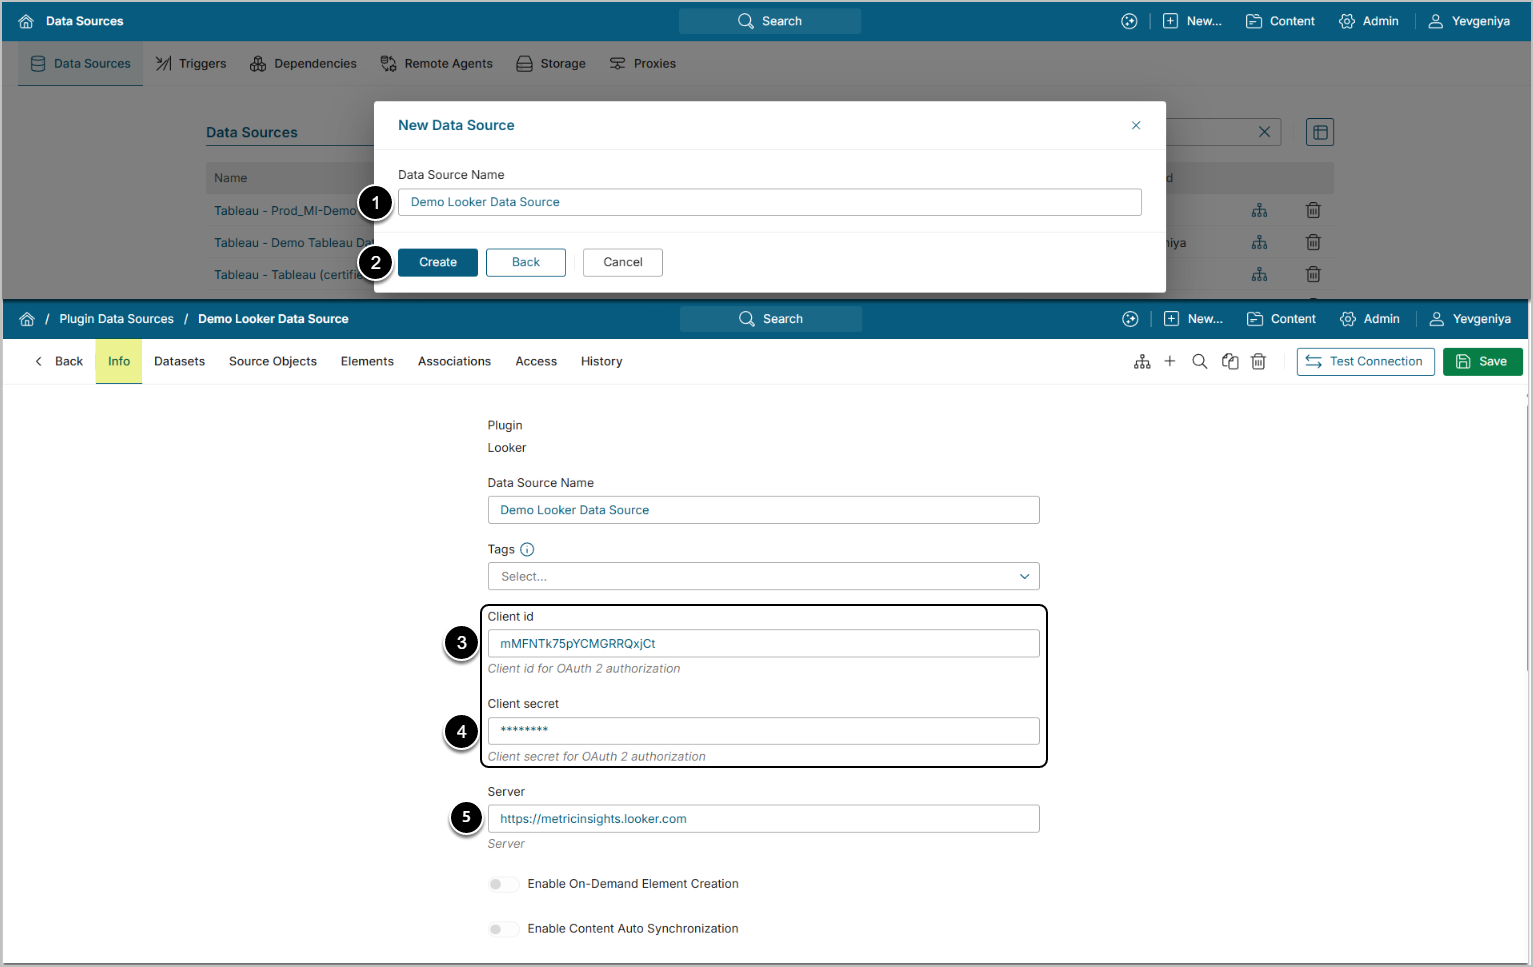
- Data Source Name: enter a descriptive phrase.
- Client id/secret: provide the values from Looker. Refer to this section for instructions.
- Server: specify the Looker server (your Looker account URL).
Optionally, toggle on:
3. Configure Optional Parameters

| Parameter | Description |
|---|---|
Exclude personal folders |
Specify if you want to collect or exclude personal folders from the object list. |
Folder filter |
Provide a comma-separated list of folders to fetch objects from. |
Object type filter |
Provide a comma-separated list of object types. Leave blank to collect all supported types.
|
4. Proceed with Advanced Configuration
Advanced Configuration settings can be set to default values unless Data Source requires more precise tuning. For more details on how to proceed, refer to Advanced Data Source Configuration.
Use the [Test Connection] button, in the upper right corner to verify connectivity.