This article describes how to use the S/FTP in order to create a connection profile with Metric Insights.
General instructions on setting up data sources based on plugins can be found in Create a New Plugin Data Source.
1. Create New Data Source
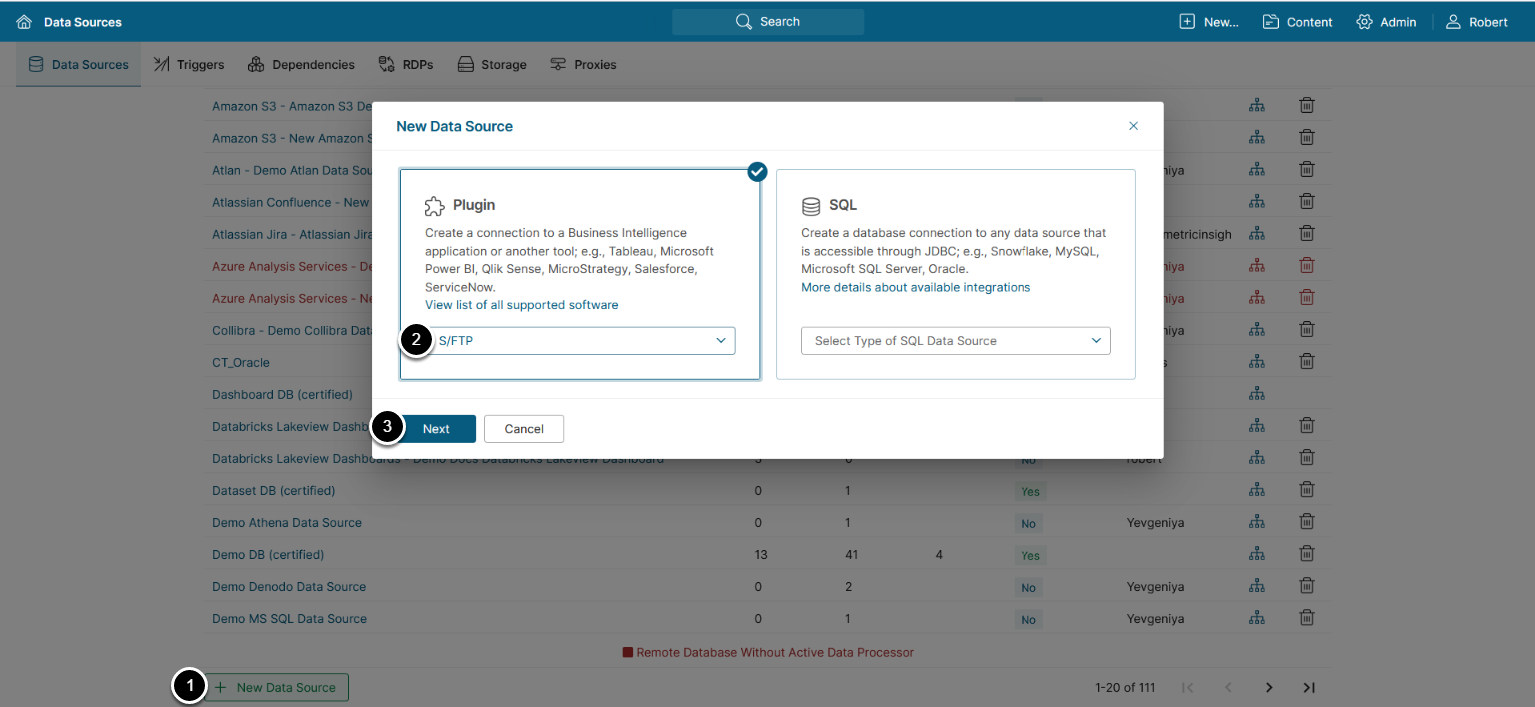
Access Admin > Collection & Storage > Data Sources
- [+New Data Source]
- Choose "S/FTP" from Plugin drop-down list
- [Next]
2. Provide Required Parameters
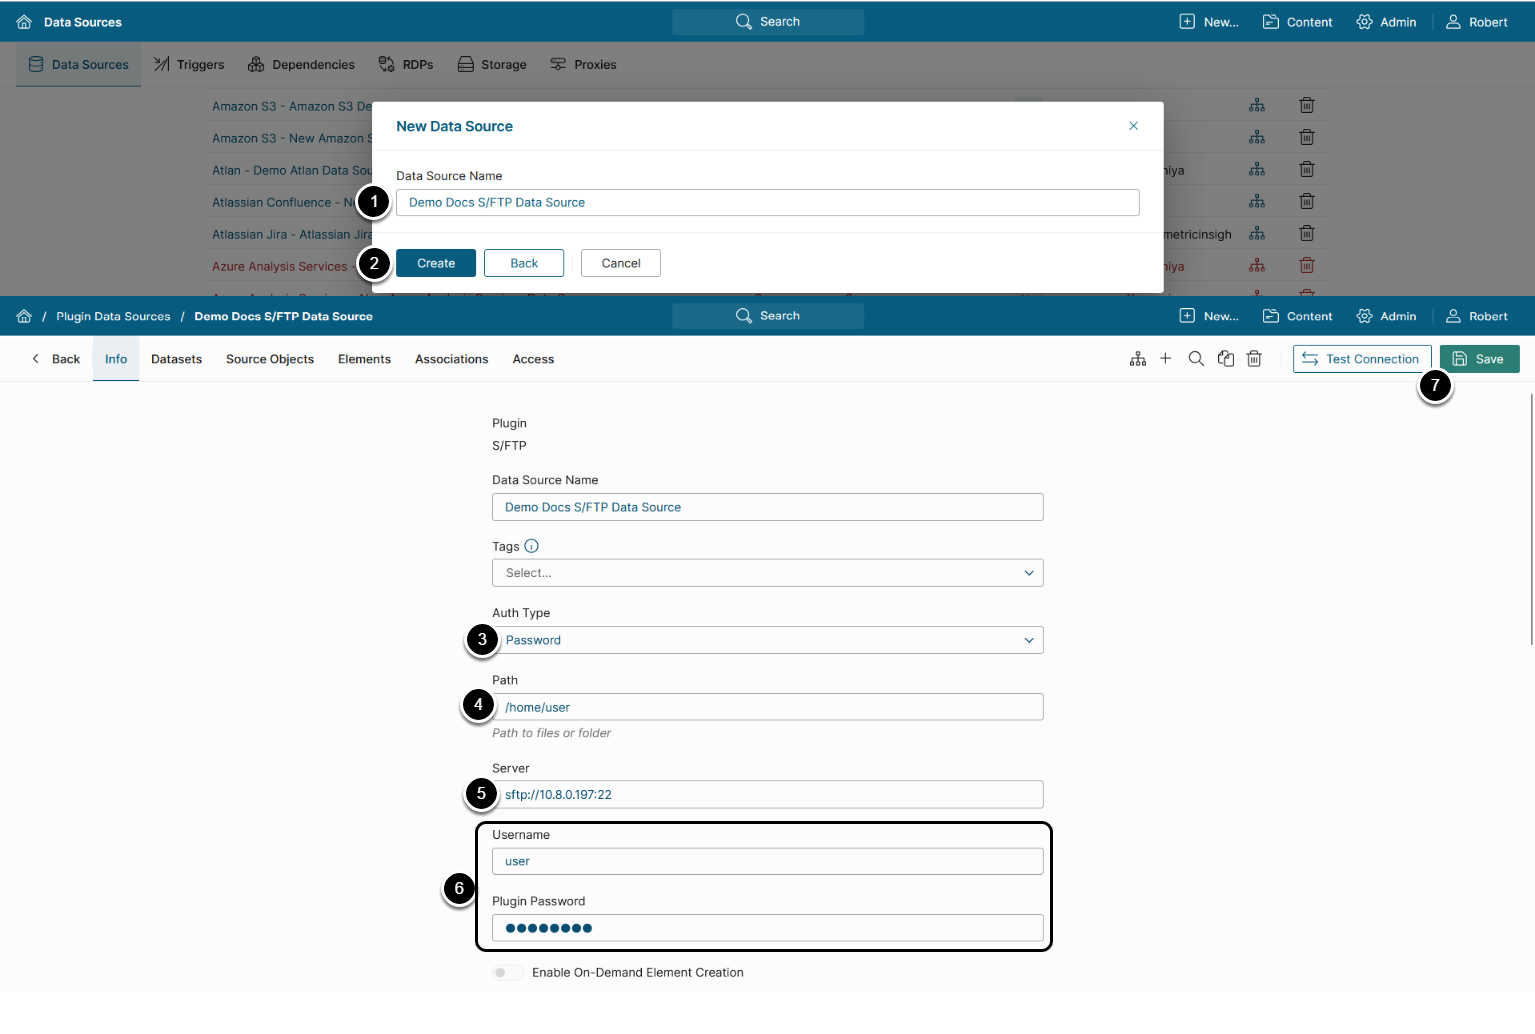
- Data Source Name: Enter a Data Source name
- [Create]
-
Auth Type: Select the authentication type
- For "Password", use the S/FTP account credentials
- For "Identity Profile", select the existing Identity Profile in the Identity Profile field
- Server: Provide a link to the S/FTP server and port (22 for SFTP, 21 for FTP)
-
Path: Optionally, provide path to the exact files/folders on the server.
- If this field is left empty, all files and folders from the server will be accessed
- Username / Password : Provide credentials used for authentication on the server
- [Test Connection] and [Save]
3. Provide Optional Parameters
-
CSV Delimiter: Choose the delimiter character used in your CSV files
- "," is the default value
-
Extension filter: Provide a comma-separated list of file extensions to fetch only files with the specified file extensions
- Supported extension values for filtering:
json,avro,xml,proto,pdf,png,jpeg,txt,gz,csv,tar.gz,xlsx,xls,docx,doc,pptx,ppt,xlsb,xlsm
- Supported extension values for filtering:
-
Files filter: collect only files that match the defined filters.
- "*" can be used as a wildcard
-
Includes headers: Choose whether the first row of the CSV file should be treated as column headers ("true") or as a regular data row ("false")
- Accepts "true"/"false"
- "True" is the default value
- Certificate / Passphrase: Enter certificate file and passphrase, in case the server requires certificate-based authentication
4. Provide Advanced Settings
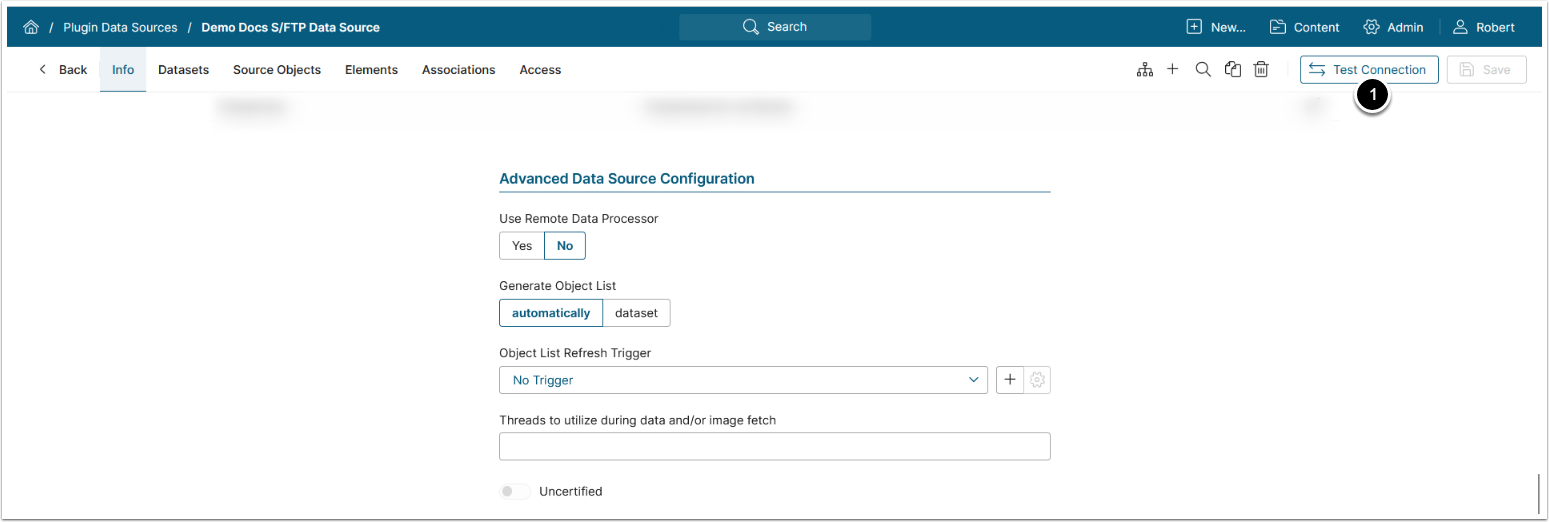
Advanced Configuration settings can be set to default values unless Data Source requires more precise tuning. For more details on how to proceed, refer to Advanced Data Source Configuration.
- [Test Connection] in the upper-right corner, this will also save your entries


