This article describes how to connect to Tibco Spotfire in order to load data into Datasets and create External Reports in Metric Insights.
PREREQUISITES:
1. Create New TIBCO Data Source
Access Admin > Collection & Storage > Data Sources

- [+ New Data Source]
- Plugin: Choose "TIBCO Spotfire" from the drop-down list.
- [Next]
2. Specify Required Tibco Spotfire Parameters
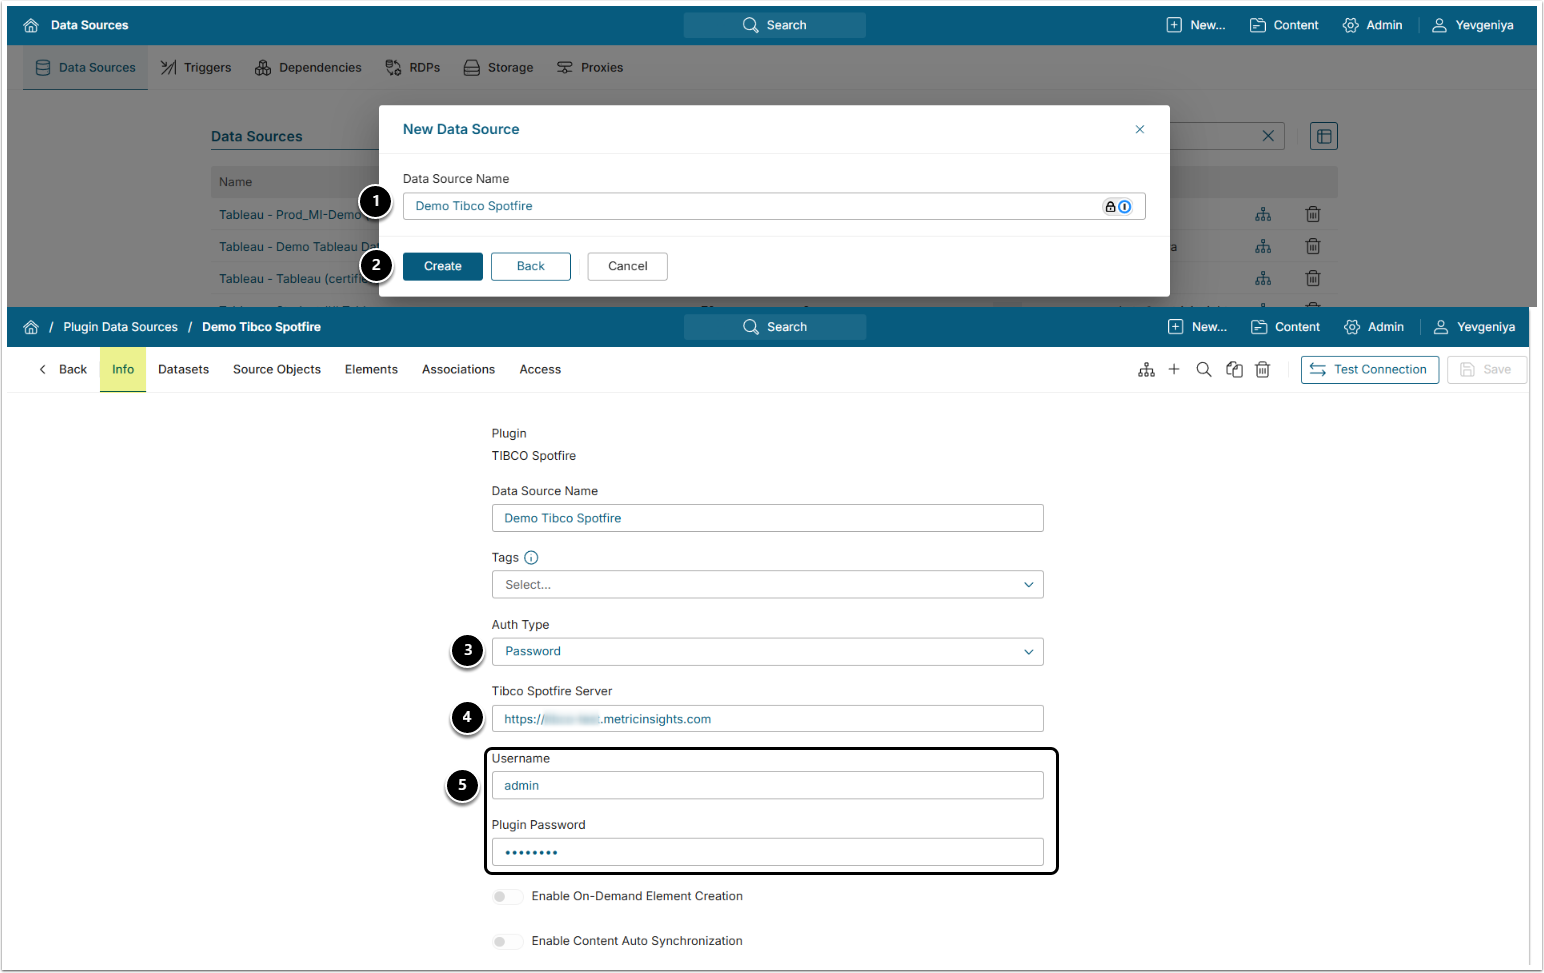
- Data Source Name: Input a descriptive phrase.
- [Create]
-
Auth Type: Select:
- Password: Use the Tibco account credentials as shown on the screen.
- Identity Profile: Select the existing Identity Profile in the Identity Profile field.
- [7.1.0] OAuth: Provide Client ID and Secret, next [Get token].
- [Not available starting in 7.1.1] Kerberos: Specify Path to Kerberos configuration file under the corresponding Optional Parameter. Leave Username and Password blank.
- Tibco Spotfire Server: Input the value.
- Username and Plugin Password: Provide credentials.
Optionally, toggle on:
To enable Kerberos Auth for TIBCO Spotfire, refer to this article.
3. Specify Optional Tibco Spotfire Parameters
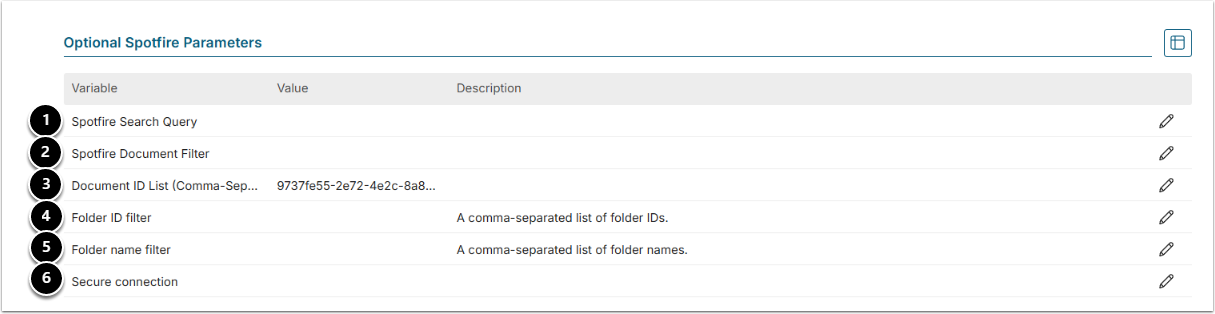
| Parameter | Description | |
| 1 | Tibco Spotfire Search Query | Use a search command to narrow down the list of Spotfire Objects brought into Metric Insights |
| 2 | Spotfire Document Filter | Limit the number of collected Spotfire Objects by name.
|
| 3 | Document ID List (Comma-Separated) | Specify IDs to fetch only selected Documents. See instructions on how to find IDs below.
|
| 4 | Folder ID filter | Specify Folder IDs to fetch only selected Folders.
|
| Folder name filter | Specify Folder names to fetch only selected Folders.
|
|
| 5 | Secure connection | Specify if the connection between the Plugin and TIBCO Spotfire extension has to be secure.
|
| 6 | Path to Kerberos configuration file |
N/A starting in 7.1.1 Specify the path to where krb5.conf file is located.
|
3.1. How to Obtain Document IDs in Tibco Spotfire?
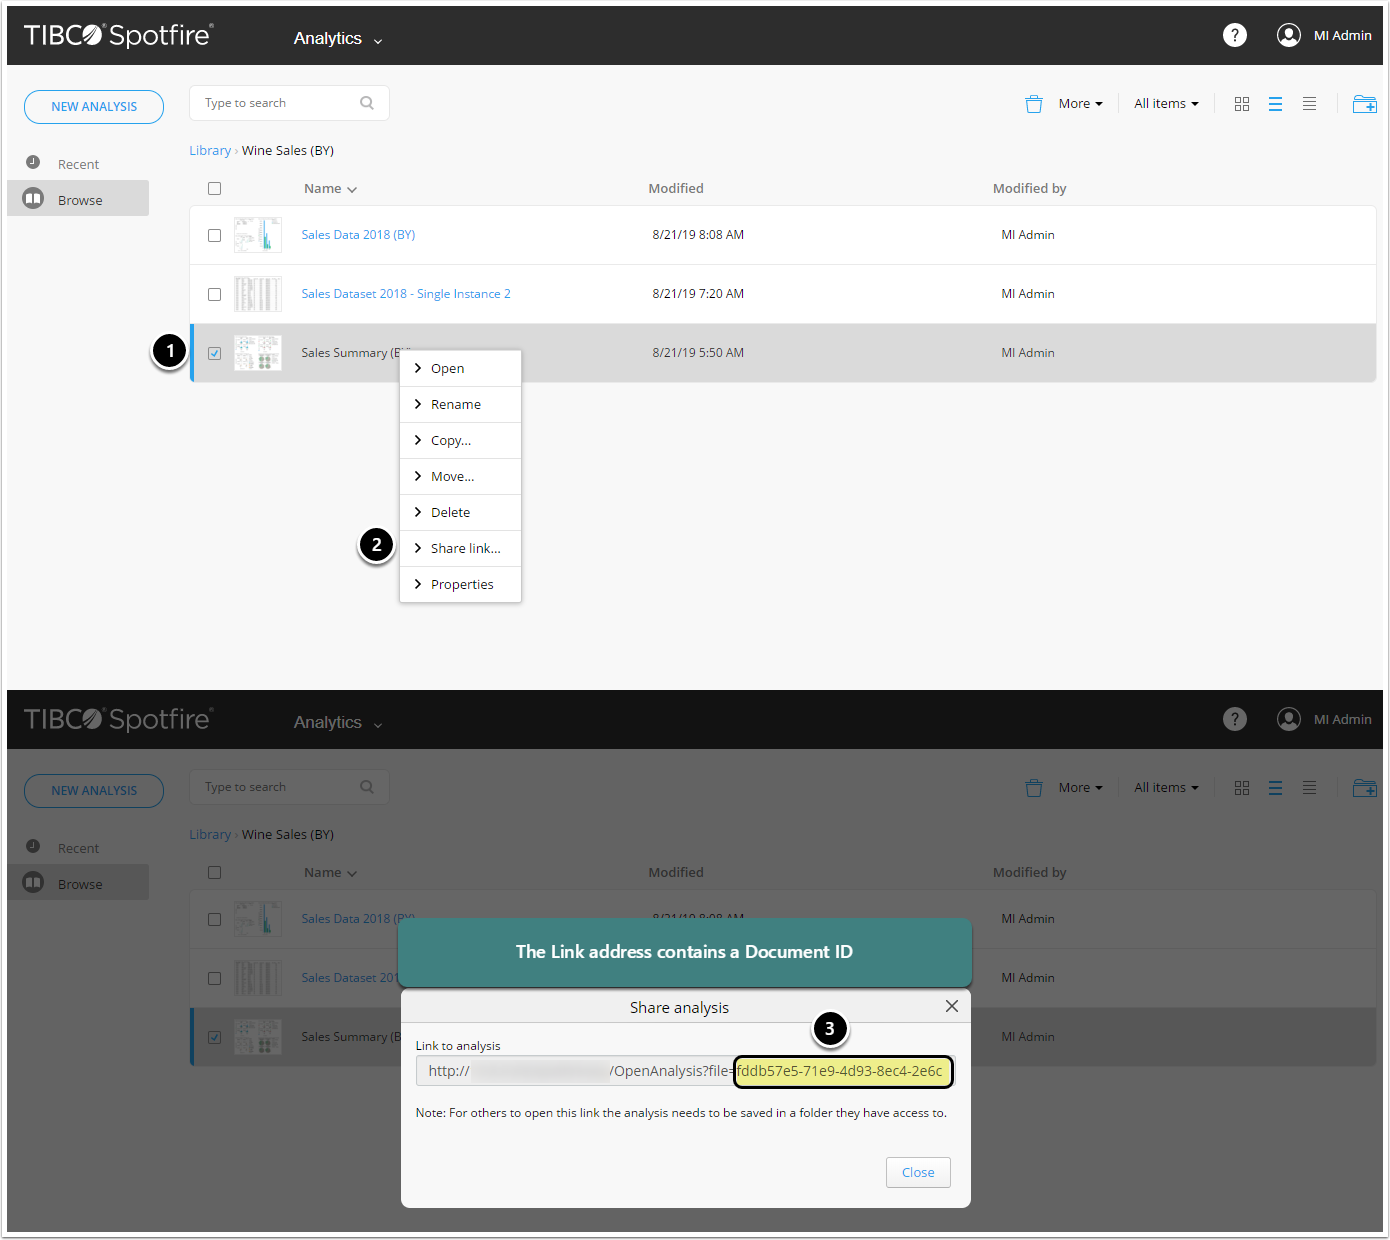
Global Unique Identifiers (GUIDs) are used to filter Tibco Spotfire objects and can be obtained from the UI.
- Right-click a Document.
- Select Share Link.
- The value after file= represents Document ID.
4. Proceed with Advanced Configuration
Advanced Configuration settings can be set to default values unless Data Source requires more precise tuning. For more details on how to proceed, refer to Advanced Data Source Configuration.
Once finished, click [Test Connection] in the upper right corner.