This article describes how to establish connectivity to Grafana to use it as a Data Source for External Reports.
NOTE: See Grafana Plugin Capabilities for details on Grafana Plugin functionality.
Table of contents:
1. Add New Data Source
Access Admin > Collection & Storage > Data Sources
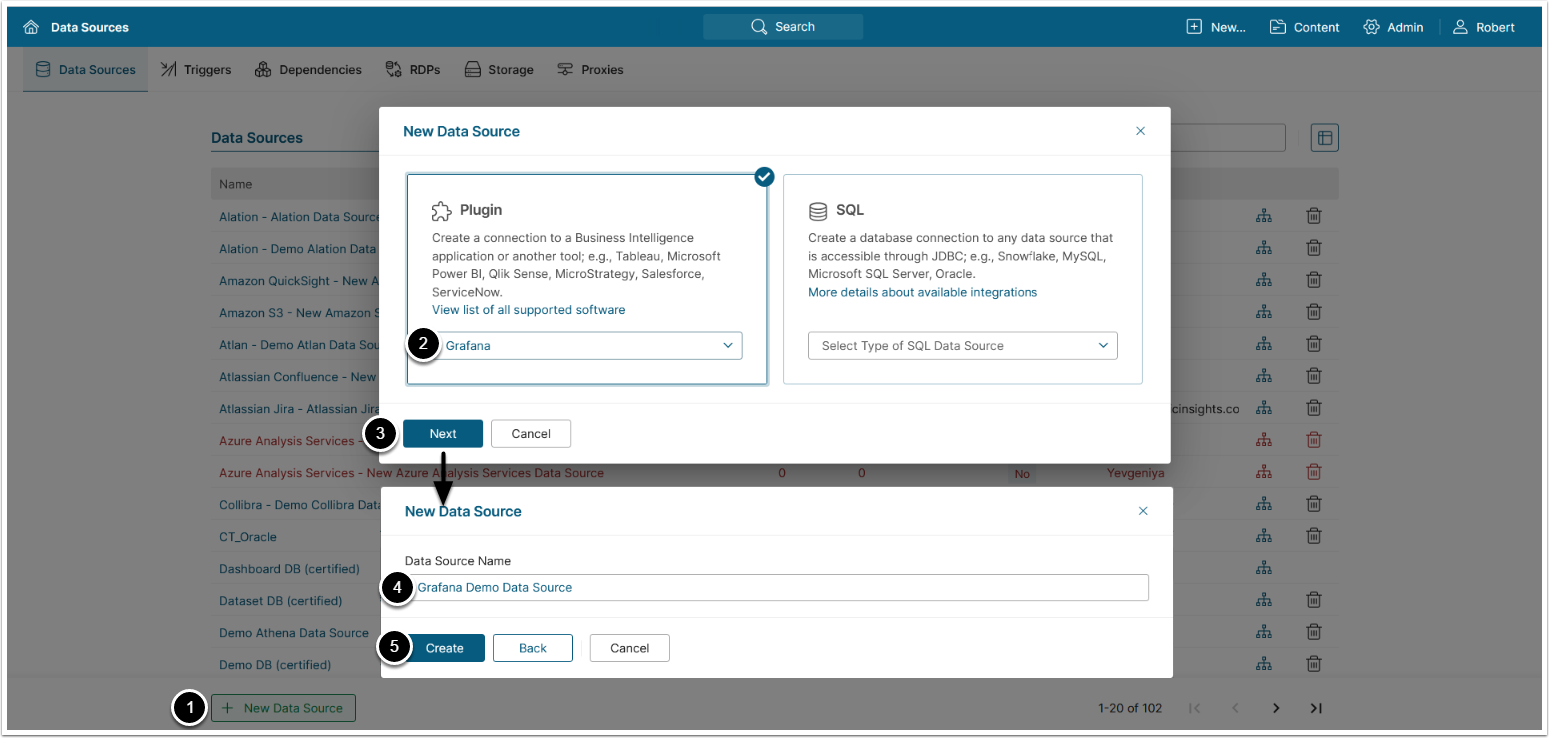
- [+New Data Source]
- Choose"Grafana"from Plugin drop-down list.
- [Next]
- Enter a descriptive Data Source Name.
- [Create]
2. Provide Required Parameters
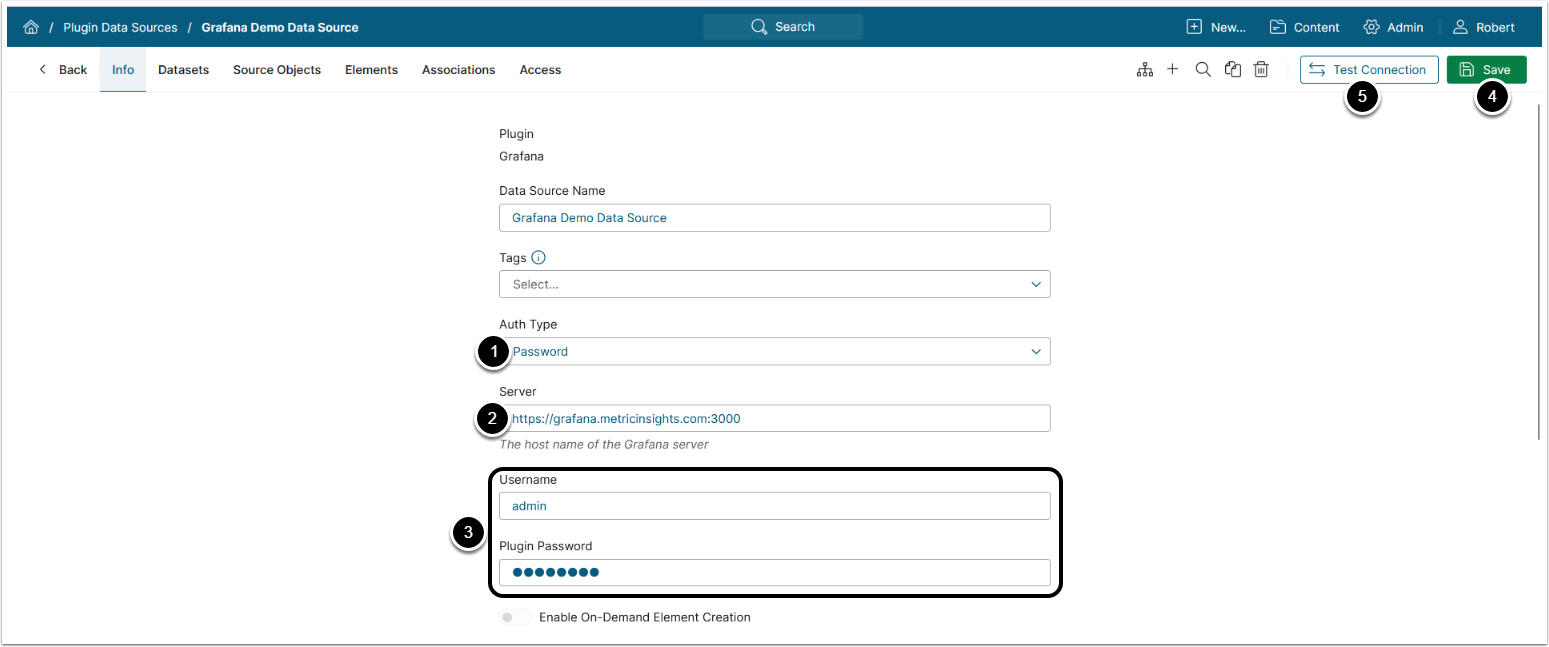
- Choose Auth Type
- For Identity Profile, refer to Overview of Identity Profiles.
- For Password, provide user credentials as described below.
- Enter the host name of Grafana Server.
- Provide Grafana Username and Password.
- [Save]
- [Test Connection]
Optionally, toggle onEnable On-Demand Element Creation.
3. Proceed with Advanced Data Source Configuration
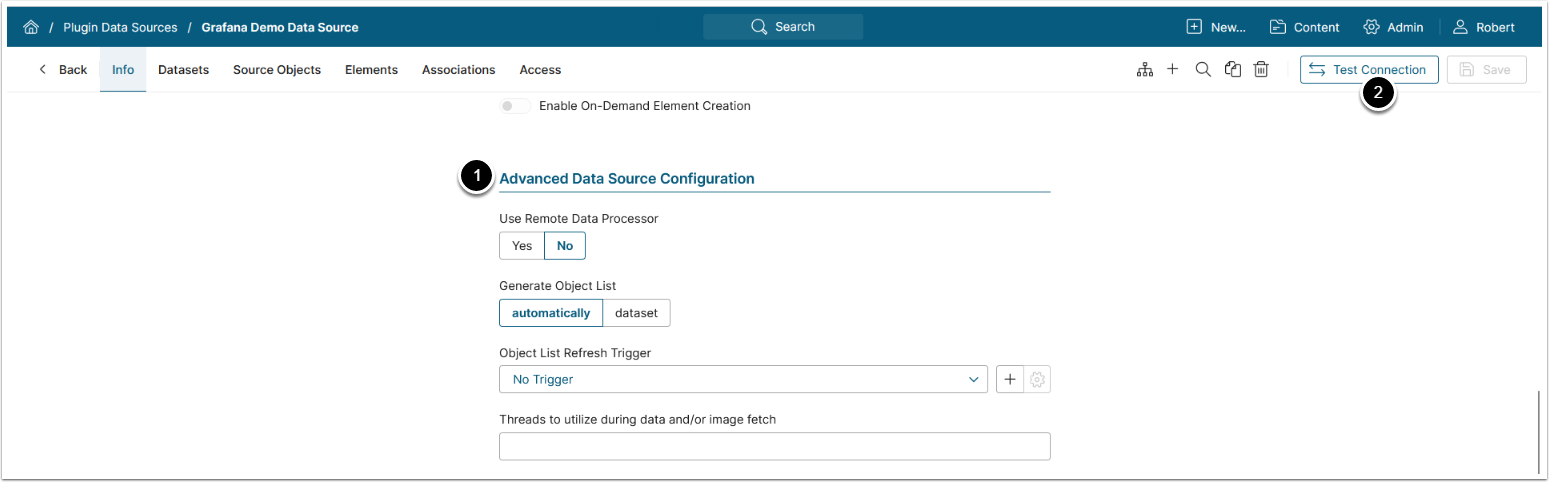
- Advanced Configuration settings can be set to default values unless Data Source requires more precise tuning.
- See Advanced Data Source Configuration for details.
- [Test Connection], this will also save your entries.
4. Refresh Object List
Access Source Objects tab
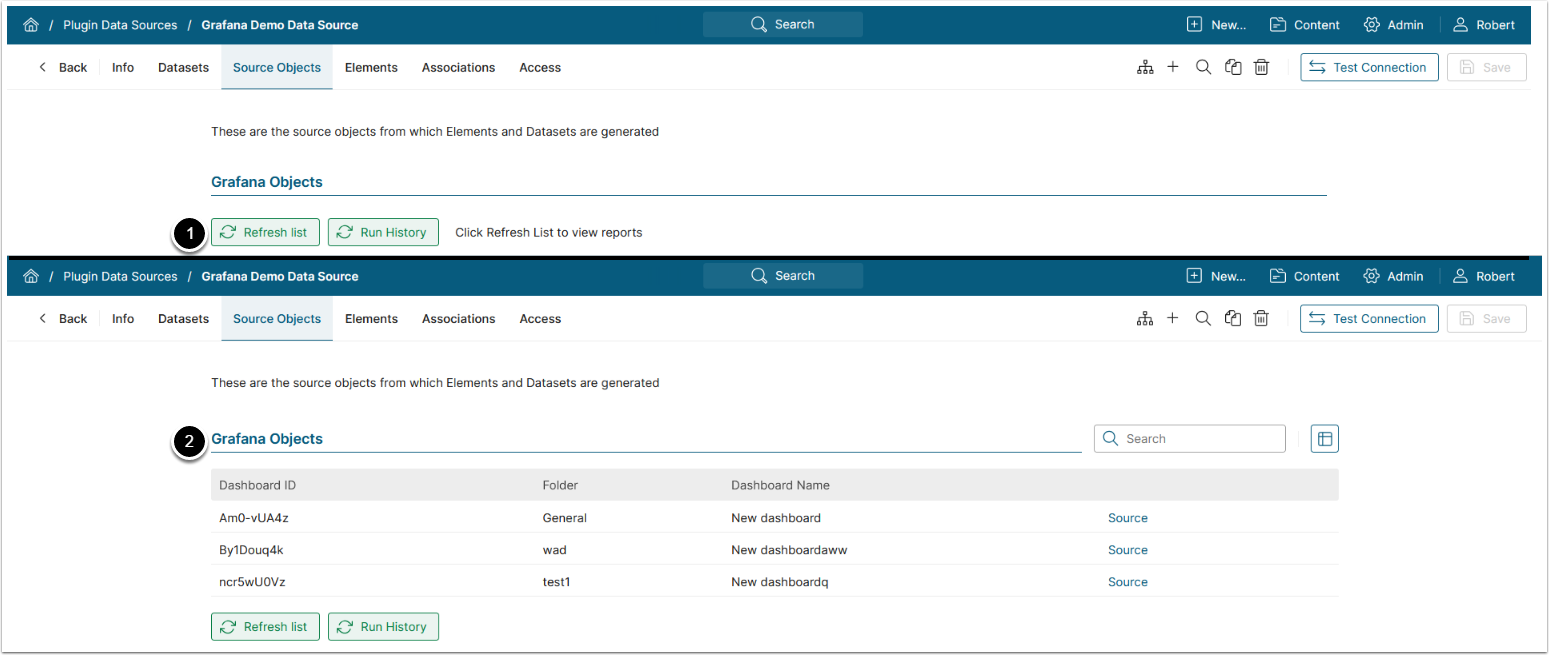
- [Refresh list]
- Grafana Objects grid displays the synchronized objects.