Metric Insights Data Storage allows it server to connect to existing enterprise database infrastructure. This article describes how to initialize Data Storage with Microsoft SQL Server. The process of connecting MySQL is essentially the same.
PREREQUISITES:
- Microsoft SQL Server must be installed and configured for use.
- SQL Server User initializing the Data Storage must have relevant database permissions.
Grant Database Permissions to a Microsoft SQL User
Data Storage initialization can be performed by any SQL Server User having the corresponding Permissions to manipulate a database (including DDL commands):
- CREATE
- ALTER
- DROP
- RENAME
- INSERT
- UPDATE
- DELETE
- SELECT
We recommend creating a separate SQL Server User (service account) to work with the assigned Data Storage. See details below.
USE master
CREATE LOGIN <username> WITH PASSWORD = '<password>';
CREATE DATABASE <storage name>;
USE <storage name>;
CREATE USER <username>;
CREATE ROLE <storage role>;
EXEC sp_addrolemember '<storage role>', '<username>'
GRANT CREATE,ALTER,DROP,RENAME,INSERT,UPDATE,DELETE,SELECT ON DATABASE::<storage name> TO <storage role>;1. Open Data Storage List
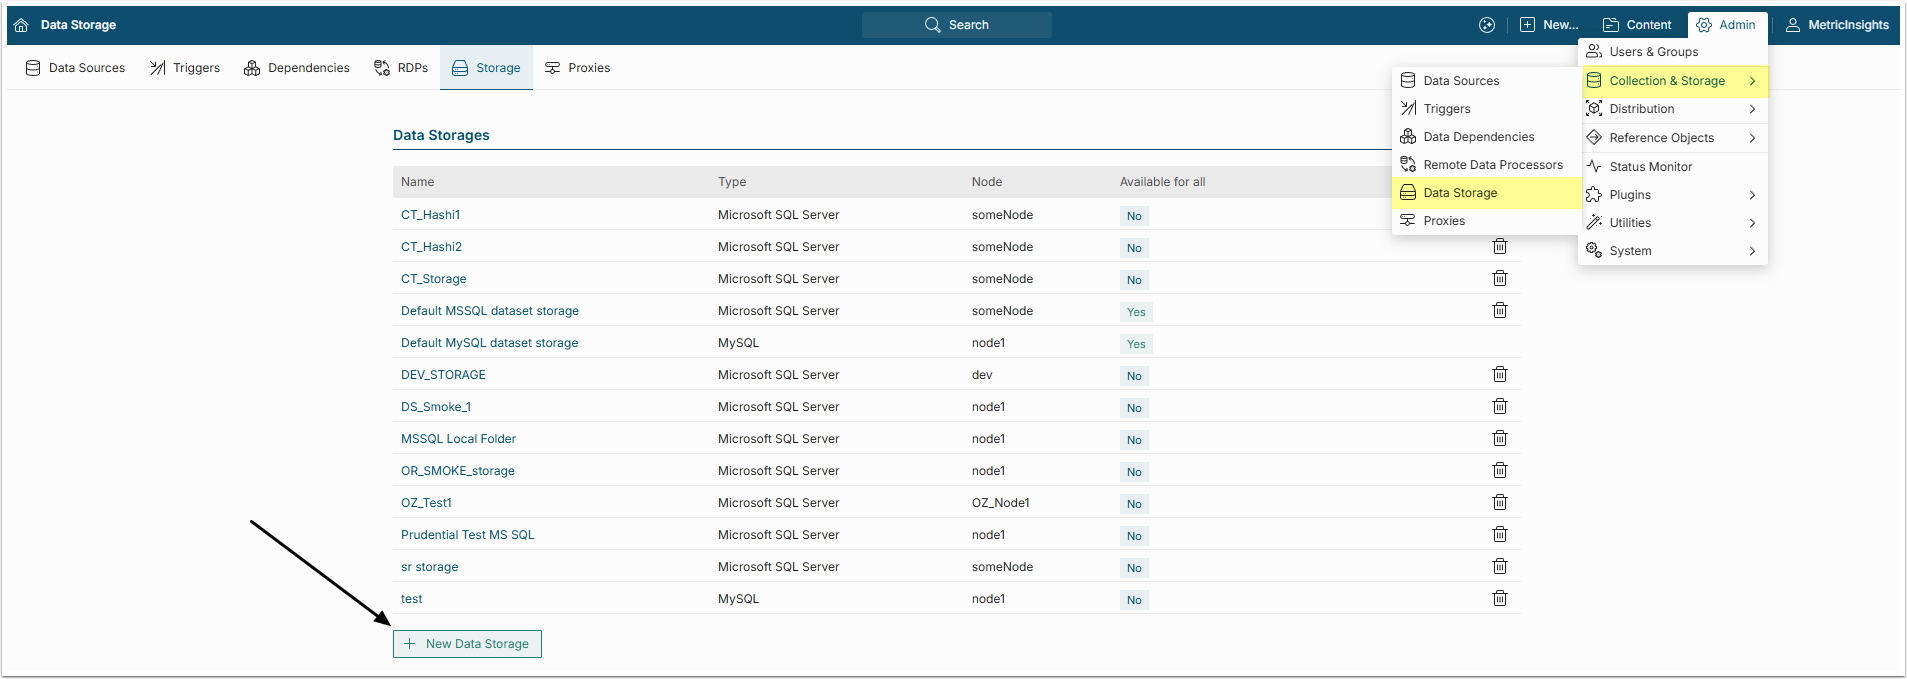
Access Admin > Collection & Storage > Data Storage
Below the grid, select [+ New Data Storage].
2. Create a New Data Storage

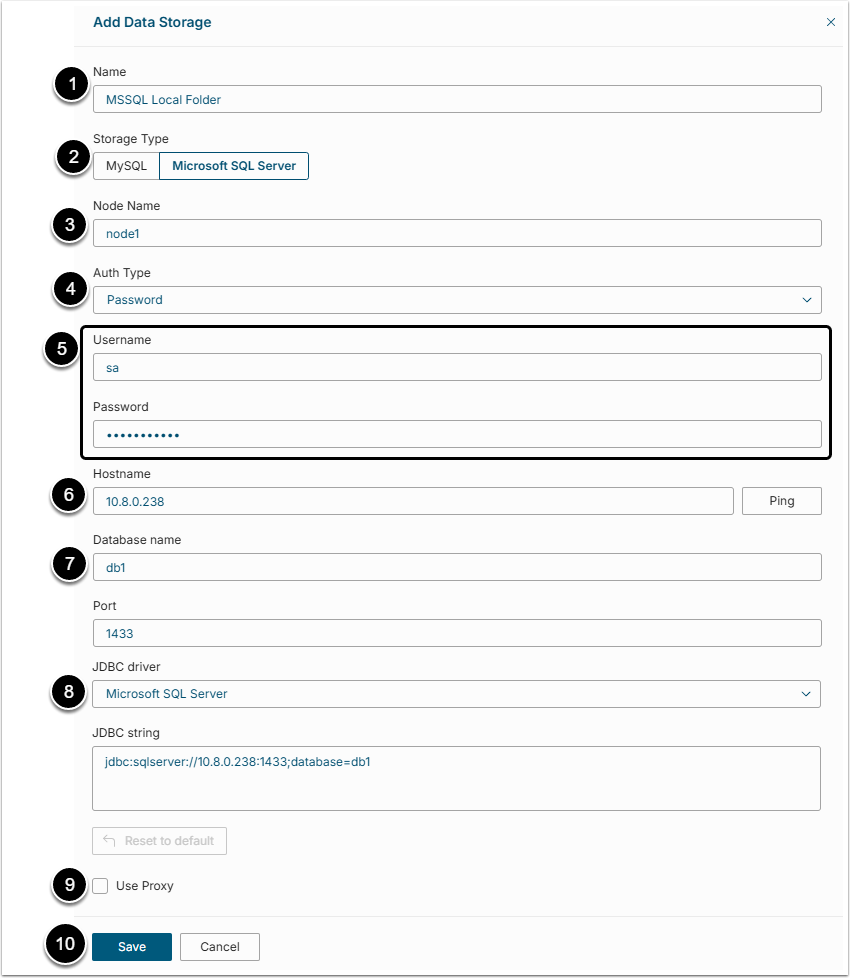
- Name: Enter a name for your Data Storage.
- Storage Type: Specify your Dataset Storage type. In this case it is a "Microsoft SQL Server" database.
- Node Name: leave as "node1".
- Auth Type: Select either the authentication process should be performed via password and username or via the identity profile.
- Username/Password: Provide the credentials for accessing MSSQL Server database.
- Hostname: Provide a hostname or IP of the database host.
- Database name: Enter the name for MS SQL Server Database where MI Datasets will be stored.
-
JDBC driver: Choose the JDBC driver, that will be used to interact with the database.
- After the JDBC driver has been selected, the Port and the JDBC string will be provided automatically.
-
Use Proxy: Define either you want to use a proxy to connect to the Data Storage or not.
- See Create a Proxy for details on configuring Proxy objects.
- [Save]
3. Provide Data Storage Parameters
-
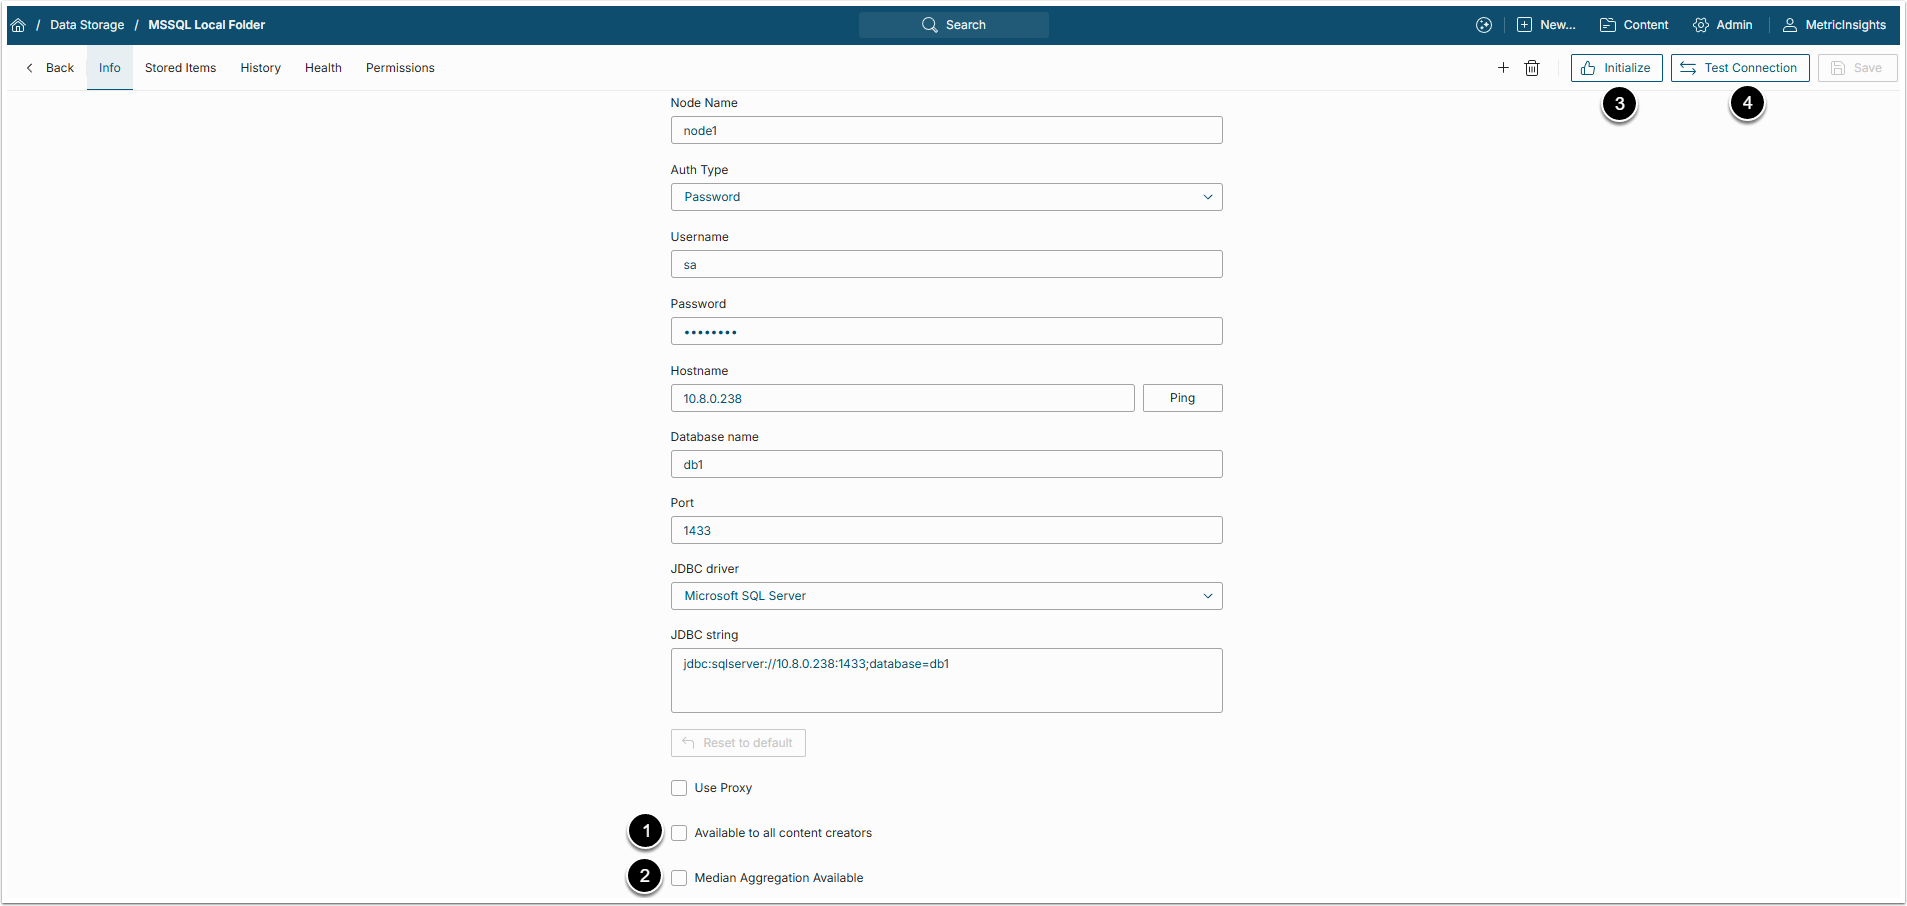
Available to all content creators: Enable this parameter to allow all Power Users to use this Data Storage.
- Refer to the Data Storages Available to All article for details.
-
Median Aggregation Available: Enable this parameter to be able to use median aggregation for Datasets and Metrics.
- Refer to Enable Median Aggregation for Datasets and Metrics for further details.
- [Initialize] the database to be able to save Datasets to it.
- [Test Connection] to verify that the Data Storage profile can communicate with the database.
NOTE:
- After Data Storage Initialization, configuration process is complete and cannot be reverted.
- If you need to change the Database name, re-enter Password and save changes before re-initializing the Data Storage.

